Building a Windows Phone 7 Application
It’s a lazy Saturday afternoon, and was the perfect time for me to do something that I have been meaning to get to for a while now. That is, to develop a Windows Phone 7 application. No, I don’t have a brilliant application idea in mind (I will get to that another day), but this was more to just get my hands wet in developing a simple application. As I was developing it, the thought occurred, that it might not be a bad idea to blog about it – it my help some other soul to learn about and get excited about building Windows 7 phone applications, or perhaps it might be useful for me to cover other topics in the future in my blogs. So here it is – a step by step tutorial of developing my first Windows Phone application!
Get Visual Studio 2010, and download Silverlight for Windows Phone
I am assuming you already have a developer edition Visual Studio 2010 (you can get more details about the product here). You also need to download the Silverlight for Windows Phone package – Silverlight being the application development platform for Windows Phone 7. You can get it here. From there you also need to download the Windows Phone 7 developer toolkit, that plugs into Visual Studio.
I am now set to create the first Windows phone application.
I will start with building a simple Stopwatch application. This type of application is already readily available in many forms in the Windows Marketplace – but as I said, the goal for this post is to just get started with a simple application. I will call this application a Chronometer – maybe I will add more functionality later.
Creating a new project, leveraging the template
Creating the shell of the application is real easy – simple create a new project in Visual Studio and choose to create a Windows Phone Application – that’s all! Check out some screen shots below.
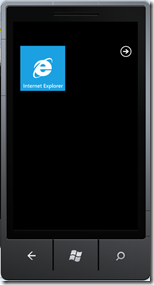
You can just build and run the application. The application comes up in the simulator, and is pretty functional already – see the screens below! The one of the left gives you a default view of the application we are building – it has a default title for the application, and a default name for the starting page of the application. The simulator also includes fully functional buttons that you’d have on the phone. Clicking on the "windows” button shows you the start screen of the phone, complete with a tile for internet explorer (and that tile/app is fully functional too). Clicking on the navigation button next to the IE tile, you see the third screen which shows the applications already on the phone – and here you see that our chronometer application has also shown up (we should change the tile of the application here – it has simply picked up the title of the solution we have created in Visual Studio. Finally, you can click on the search button on the phone, and it brings up the Bing search application – once again, fully functional including the current day’s Bing picture and fully functional voice search capability. I love the Windows Phone 7 simulator in Visual Studio – it not only makes building your application really easy, but allows you to get a feel for it in an actual environment by giving a pretty functional feel of the Windows Phone 7 device!
Few easy modifications to begin with – change the application name and titles
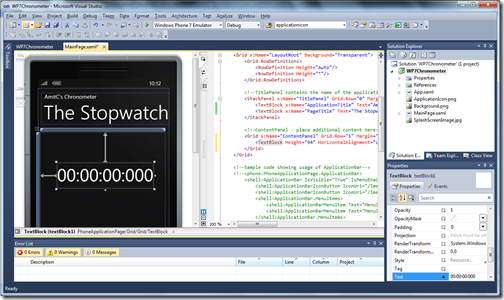
Getting back to Visual Studio, you can see the XAML representation for the UI and the actual view displayed in the designer mode. You can simply click on the controls, check out their properties on the bottom-right of the screen, and change the texts. For example, I have changed the title of the application and the title of the main page below. I will build a stopwatch application for the main page.
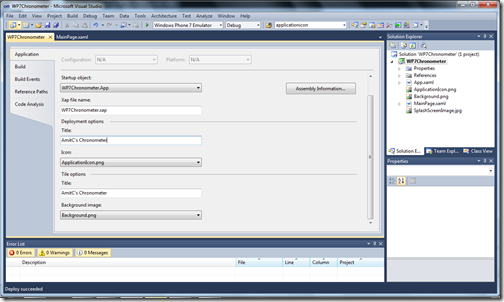
Let us also change the name of the application that shows up in the list of applications on the phone. Click on the name of the solution in the solutions explorer, and bring up the properties page. Click on the applications tab in the properties and change both the title in the “deployment” as well as the “Tile” options property sets – see below.
Simply build and run the application again, and you can see all of the changes have been effected. Including the tilt of the application in the tile view (I simply double clicked on the application in the list on the left screen and pinned it to the start page).
It is worth reflecting on how easy Visual Studio makes developing Windows Phone applications too! With just a few very simple steps we have created the structure of the application.
Creating the Stopwatch display
Let’s now get to the core of our application. I will first add the main display for the Stopwatch page. I intend to be in the format of “DD:HH:MM:SS:mmm” displaying days, hours, minutes, and milliseconds.
Back in Visual Studio, bring down the toolbox of controls that you can choose from (via View.Toolbox menu) – see below. You have a rich set of controls to choose from.
I am choosing the “Textbox” control for the main display – it allows me to display a rich text on the page. You simply double click the control from the Toolbox to get it on to the application page. Next, simply change the properties (I have changed the display text to be 00:00:00:000 by default, and have changed the font size to 64), resize the control to the desired size, and drag and position it to the location you want.
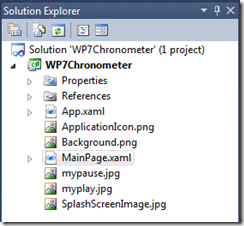
The application display now looks as shown below. I now would like to add a start/pause button to finalize my first page for my simple Stopwatch application. For this, I simply create two icons – for play (or start) and pause – and create two JPG files for them. I used Windows Paint to create these two icons – each being a 60x60 in pixel size. I then add those two files to my solution via “Project.Add Existing Item…” menu
Next, I add a button from the Toolbox to the application screen, position it and size it appropriately. At this point this is a simple button, and the page and the backing XAML looks as follows.
However, instead of the Button being a simple Text button, I want the button to use an image – say the “play” image that I have created above. To do this, I simply add the “Image” tag to the Button definition directly in the XAML file shown above. The reworked XAML looks as follows – notice the <Image /> tag in the XML inserted in the definition of the <Button /> tag, and also that the play icon now shows up in the Button – we have transformed it into a an image based button.
With this, we have really completed our application layout! Now we need to add a bit of code for the Stopwatch logic.
Adding the code for the Stopwatch
As you can imagine, all of the action will be initiated by the clicking of the play button. To create an event handler for the button, simply double click on the button in the display view for the XAML for the main page. It creates the following code in the backing code file.
Now we will simply add the code in the event handler framework that has been created by Visual Studio.
My focus here is not to write the most efficient code, but will rather focus on simplicity.
Adding class references
We will be using few special class from the System name space – namely Media for updating the image of the button, Threading to get a timer going, and Diagnostics to use the Stopwatch object built into .NET. I start of by adding these references in the MainPage.xaml.cs file
A few member variables
I next introduce a few member variables. These will store the day/hour/minute/second/millisecond values that I will display; the state of the stopwatch (started or paused) , a Stopwatch object, and a Timer object ;
It also created two BitmapImage objects for the start and pause images that the button will display.
The start/pause click logic
Now, we move onto the code which executes when the play button is clicked. Note, this button is going to toggle between “start” and “pause” modes.
When in the stopped state (the initial state), it toggles the state, sets the image in the button to the pause button, creates a new Timer object, and also starts the stopwatch timer in code.
The Timer object is created with a callback method (updateDisplay) which we will discuss shortly. It also sets up the callback to be called with a reference to our TimerDisplay TextBlock so that we can update it. The penultimate parameter of 0 starts the timer straightway, and the last parameter of 100 sets it up to call the callback function at intervals of 100 milliseconds.
The logic is similar and simple when the stopped state is false – it changes the image of the button to play, disposes the timer, and stops the stopwatch. Note that in our application, the stopwatch can be resumed from the point of pausing by clicking play again.
The code is shown below.
The Timer callback
Finally, we are ready to plug in the last piece of code – the callback function – which will update the applications display.
The code is shown below.
We simply calculate the elapsed time from Stopwatch object, convert it into the appropriate formatted display string for the application
The application is ready!
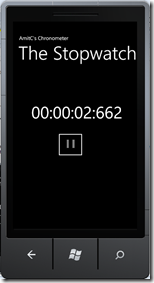
With that, our app is ready! Simply build and run the application, to check it out on the Simulator. I show four screens below – the application listed in the list of applications, the starting screen, once the start button is clicked, and once the pause button is clicked
What’s next?
That was fun – and not bad, for a Saturday afternoon’s worth of coding. Visual Studio really does make building Windows 7 Phone applications quite easy.
So, what’s next?
There are many different ways I could extend this work – I could add more functionality to the stopwatch, or perhaps I could add another page to the application and add another functionality to the chronometer (may be a count down timer?). A demonstration of an application with two pages would be a good learning! And then of course there is the task of actually deploying the application to the app store, Perhaps I could also go into testing of phone applications. So, there are lots of ways I could take this – will wait for another lazy afternoon.
Cheers!
Comments
- Anonymous
July 11, 2011
I am getting this erro: 'Stopwatch' is 'namespace' but is used like 'type'I followed exact same thing here but still getting this erro! - Anonymous
July 15, 2011
Please change your Application namespace to MyStopwatch - this should solve the issue - Anonymous
August 21, 2011
I will first add the main display for the Stopwatch page. I intend to be in the format of “DD:HH:MM:SS:mmm” displaying days, hours, minutes, and milliseconds. - Anonymous
September 27, 2011
Error 1 The name 'timerdisplay' does not exist in the current context c:userssakthidocumentsvisual studio 2010ProjectsWindowsPhoneApplication9WindowsPhoneApplication9MainPage.xaml.cs 45 73 WindowsPhoneApplication9 - Anonymous
August 26, 2012
The comment has been removed - Anonymous
September 17, 2012
There's a Logical problem in the app!The 1st second loads earlier than usualand 1 minute ticks on 30th second - Anonymous
September 17, 2012
Looks like i found the Logical error:The 1st Second is fired on 500 ms time and then it goes normally.Similarly, The 1st Minute is fired on 30th sec. and the rest incrementation is done after a minute's intervalsSo the very 1st instance is being executed in 1/2 of the time and rest is carried normally - Anonymous
September 18, 2012
and Here's the Cure of Logical error: Actually what we are using is the '/' for performing a Floating point division that returns a Double result. are then assigning it to an long round the value instead of truncate, So 500/1000 becomes 1I recommend you to use ' ' for performing the integer divisionlike ss = ms 1000; and same with othersor else there's another wayyou can just use Stopwatch.elapsed and can use a Timespan with itlike here's the example in vb that can be used within the updateDisplay method Dim e As New TimeSpan e = stopwatch.Elapsed MicroSeconds.Text = e.Milliseconds.ToString("00") Seconds.Text = e.Seconds.ToString("00") Minutes.Text = e.Minutes.ToString("00") Hours.Text = e.Hours.ToString("00")


