Set up Azure Pipelines for deploying Field Service and other Dataverse solutions
A core component of healthy application lifecycle management (ALM) practices for Field Service is a well-functioning CI/CD pipeline. CI/CD pipelines automate and standardize the process of moving changes from a lower environment to a higher environment, reducing time, effort, and issues of regular deployments. With a code repository as a foundation of the pipeline process, differentials and version history are easily trackable removing ambiguity of what changed from one deployment to the next.
A Dataverse pipeline includes components designed to export a solution, unpack and commit its XML and files to a repository, repack the solution, and import it into a target environment. You can easily create such pipelines using Azure Pipelines. By the end of this guide, you will have two Azure Pipelines: one handling export processes and the other managing import processes.
Prerequisites
Set up a GitHub account and repository.
Prepare source and target Dataverse environments.
Create application users with the system administrator role in both source and target Dataverse environments created from application registrations. Use the Power Platform Build Tools to create these users quickly.
Prepare the GitHub repository
Your GitHub repository holds your pipeline YAML definitions and exported/unpacked CRM solutions. It's a simple Dataverse deployment pipeline setup that you can extend and modify as needed. The outcome of this step is a GitHub repository with a Pipelines folder that contains both template YAML files.
To prepare your GitHub repository
Navigate to your main branch in the GitHub UI.
More experienced GitHub users can use whatever CLI/tooling they would prefer to get the noted outcome.
Select Add file in the upper right corner, and then choose the Create new file action.
In your GitHub file editor, write
Pipelines/D365_DevOps_Export_from_Source.yaml.This creates a subdirectory and the name of your pipeline YAML to export from a source environment.
In the body of the new YAML file, paste the YAML from the same file in the FastTrack GitHub repository.
Select Commit changes in the upper right, and then select Commit changes in the dialog window that appears.
The GitHub UI takes you to the Pipelines folder after this.
Select Add file in the upper right, and then select Create new file. In the Name your file box, type
D365_DevOps_Push_to_Target.yaml.In the body of the new file, paste the YAML from the same file in the FastTrack GitHub repository.
Commit your changes again like before.
Your GitHub repository is now ready for setting up the pipeline.
Create a Personal Access Token (PAT) in GitHub
To allow the Azure DevOps script to commit files to GitHub, we must grant it access to do so. You must create a Personal Access Token (PAT) and provide that to Azure DevOps through a secret variable.
Follow the steps at https://docs.github.com/en/authentication/keeping-your-account-and-data-secure/managing-your-personal-access-tokens to create the PAT. Make sure you copy the token to a temporary location like a text file for use later, but don't forget to purge that file securely when pipeline setup is completed. Alternatively, store the token in a secure password manager—you can't retrieve that token from GitHub again after the initial setup.
Azure DevOps parallel jobs and agents
When you set up your Azure DevOps organization, one aspect you must consider is the process workers, or agents, that run your pipeline jobs. There are two options for the agents that run jobs, also known as parallel jobs:
Use a Microsoft-hosted agent to run jobs, which is a cloud-allocated agent.
Host your own agent on your own infrastructure, be that a physical or virtual server, or local machine.
You need at least one agent, be it Microsoft-hosted or self-hosted, to run your pipelines. For more information on how to set up your own self-hosted agent on a Windows-based OS, go to Self-hosted Windows agents.
Finally, you can use a Microsoft-hosted agent instead of a self-hosted agent. The free tier of Azure DevOps for both public and private projects provide free Microsoft-hosted agents. Learn more at Configure and pay for parallel jobs. You can also purchase more agents.
Make sure you have either a Microsoft-hosted or self-hosted agent set up before you continue.
Set up a pipeline to export and unpack a Dataverse solution
Once you have an Azure DevOps organization and a GitHub repository, the next step is to set up the pipeline that exports a given source solution and unpacks it in the GitHub repository.
Note
While this guide assumes use of a GitHub repository, Azure Pipelines also support other types of repositories.
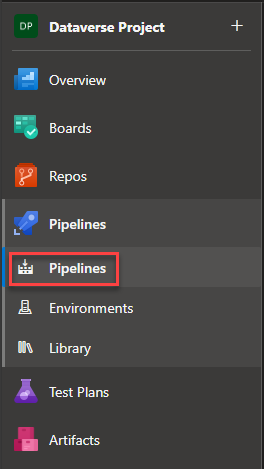
In your project, navigate to Pipelines in the left-hand navigation panel, and then choose Create Pipeline.
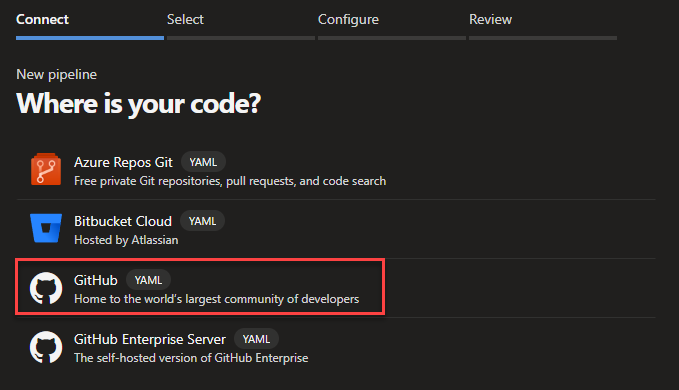
Choose GitHub as your repository during the first step of the pipeline setup. You're then redirected to the GitHub sign-in page.
Sign in using the GitHub account with access to your newly created repository.
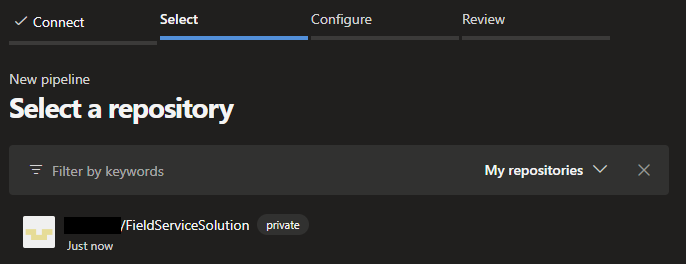
After authenticating with your GitHub account, you're redirected back to the Azure DevOps pipeline setup page for the next step. Here, you must select the repository for the pipeline to use. Select the repository you created during the prerequisites of this guide.
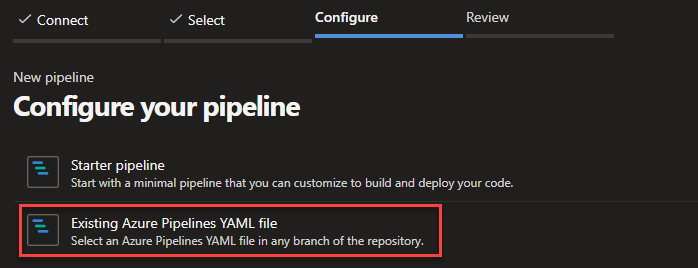
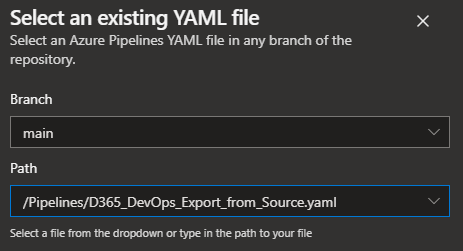
In the Configure your pipeline screen, choose the Existing Azure Pipelines YAML file option. Leave the branch as main and select the dropdown for Path. Select the /Pipelines/D365_DevOps_Export_from_Source.yaml file, then select Continue. The YAML is loaded on the screen.
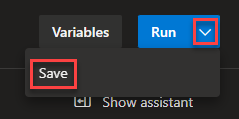
Save your source pipeline. Select the dropdown (downward facing arrow) in the blue Run button in the upper right corner, and then select Save. This creates your new source pipeline.
Navigate to the Pipelines page using the left-hand navigation, and you see your newly created pipeline.
The default name is typically the name of your GitHub repository. We recommend that you give your pipelines more precise names. Select the vertical ellipses on the far right side of the pipeline and select Rename/move. In the Name field, name this pipeline Export from Source Environment, and then select Save.
Set up a pipeline to package and import a Dataverse solution
Next, you create the import to target environment pipeline. To do this, navigate back to your pipelines via the left-hand navigation link, select New pipeline in the upper right corner, and repeat the same process as was done for the export from source pipeline, this time choosing the /Pipelines/D365_DevOps_Push_to_Target.yaml file. When complete, you should have two pipelines in your Azure DevOps organization. Using the same process as the export pipeline, name your new import pipeline Import to Target Environment.
Set up service connections in Azure DevOps to access Dataverse
To use the pipelines you imported, make sure they have appropriate access to our source and target Dataverse environments. As a best practice, avoid hardcoding credentials in assets like YAML files. Instead, use Azure DevOps service connections to manage credentials securely.
In your Azure DevOps project, select Project settings, and then Service connections.
You should already see one connection there for your GitHub repository.
Select the New service connection button in the upper right corner. Then search for and select the Power Platform option, then select Next.
Fill in the fields as described in the following table.
Field Description Server URL Specifies your source Dataverse URL, such as https://<orgname>.crm.dynamics.com.Tenant Id Specifies the ID of your Microsoft Entra ID tenant. Application Id Specifies your client ID from your source application user. Service connection name Use the value Dataverse source environment. Enter a checkmark in the Grant access permission to all pipelines field. Then save the service connection.
Repeat this process for your target environment, naming the service connection Dataverse target environment.
At the end of this process, the list of service connections includes two entries, Dataverse source environment and Dataverse target environment.
Create environments in Azure DevOps
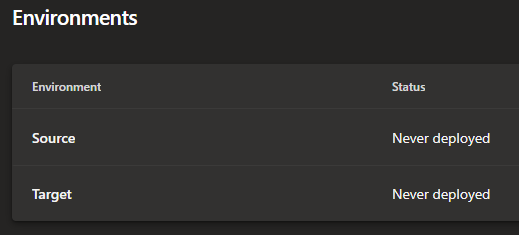
To properly use our job's YAML structure, we must create environments in Azure DevOps for our source and target environments. Furthermore, we can get better historical metrics on pipeline executions by using environment values to segment pipeline runs, and it allows for securing a given pipeline to a given environment. In your Azure DevOps project, select on Environments on the left side, and then select the New environment button at the top right corner. Name this environment Source, leave the Resource selector at None, and select Create at the bottom. In the environment page that appears, select the vertical ellipses in the upper right corner, and choose Security. In the Pipeline permissions section, select the + sign, and then select the Export from Source Environment pipeline. Repeat this for your target environment, naming it Target, and associating the Import to Target Environment pipeline.
Update your pipelines to reference your desired Dataverse solution
In each pipeline, there are references to the solution unique name that must be updated to the solution of your choice. While you can have multiple solutions managed in one pipeline, this guide focuses on a one solution to one pipeline set of processes for ease of demonstration. We recommend the simpler pipeline for simplicity for those newer to Dataverse ALM.
In both your source and target pipelines, use the Edit screen to find and replace the YourSolutionUniqueName designations with the unique name of your desired solution. Make sure you save and commit your pipeline changes using the upper right Validate and save button.
Update your pipelines to reference your Azure DevOps agent and GitHub user
Previously, you set up either a Microsoft-hosted or a self-hosted Azure DevOps agent. You must make sure that the setup is reflected in both of your pipelines. Near the top of your pipeline YAML, there's a pool attribute with name and vmImage attributes below it. The following code snippet illustrates the setting.
pool:
  name: Azure Pipelines
  vmImage: windows-latest
If you're using Microsoft-hosted agents on Windows, leave the name and vmImage attributes as they are. If you're using a self-hosted agent, ensure the name is set to the name of that agent, and change the vmImage value accordingly if you're not running on Windows.
Additionally, while it isn't required, for continuity you should update the youruser@domain.com and youruser values in the final stage of the export pipeline to your own GitHub user email and username so commits are recorded with those values accordingly.
Finally, make sure you update the YourGitHubOrgName and YourGitHubRepoName values to your GitHub organization and repository values. This can be found by going to your GitHub repository and looking at the browser URL after github.com, the first segment after the slash being your organization and the second segment after the next slash being your repository. These must be set so the script can properly commit changes to your repository. The following code snippet illustrates the setting.
Settings
task: PowerShe11@2
displayName: Commit Change to GitHub-Repo
inputs:
targetType: 'inline'
script: |
Add-Content."$HOME\.git-credentials"."https://$(GitHubPAT):x-oauth-basic@github.com"
git.config -- global-user.email "youruser@domain.com"
git config -- global user.name "youruser"
git.config -- global --- add-url."git@github.com:".insteadOf "https://github.com/"
git checkout -B-main
git-add --- all
git commit -- m-"code commit"
git.push https://$(GitHubPAT)@github.com/YourGitHubOrgName/YourGitHubRepoName.git
Grant your pipelines access to GitHub via the Personal Access Token (PAT)
You set up a PAT in GitHub and noted the token value for later. Now, you must create secret variables in Azure DevOps to hold this token, so that the pipelines can read and write to the GitHub repository when they're running.
For both pipelines, navigate to the Edit page where the pipeline YAML is shown, and in the upper right corner, select the vertical ellipses and select Triggers. On the following page, select the Variables tab. Select the + Add button, and name it GitHubPAT. Set the value to the token you saved from earlier. Make sure you select the lock icon to secure the variable and make it secret. Select the down arrow next to the Save & queue button and select Save, saving the variable to the pipeline configuration.
Run your export pipeline
Once done with the above steps, you're now ready to run your export pipeline. Running your export pipeline does several things in order, which you can see reflected in your pipeline YAML. The pipeline takes the following steps:
Installs the PAC CLI so that you can invoke PAC commands.
Publishes all customizations in the source environment.
Updates the source solution version to the current build number.
Note
You might want to alter this, and some strategies of doing that are noted in the build tools task.
Exports an unmanaged version of the solution.
Exports a managed version of the solution.
Unpacks the managed solution—this allows you to easy see differences in solution XML and structure within GitHub.
Commits all changes to the GitHub repository's main branch.
To run your export pipeline, open it and select Run pipeline in the upper right, then select Run. You can select on the currently running job to watch it execute and note behaviors.
Run your import pipeline
Once you run the export pipeline, you're now ready to run your import pipeline. Running your import pipeline does several things in order, which you can see reflected in your pipeline YAML. The pipeline takes the following steps:
Installs the PAC CLI so that PAC commands can be invoked.
Publishes all customizations in the source environment.
Packages both unmanaged and managed versions of the solution.
Imports the managed solution to the target environment.
Because the solution is managed, a publish step isn't needed here. But if you're importing an unmanaged solution, you should add a step to publish all at the end to make sure changes are live.
To run your import pipeline, open it and select Run pipeline in the upper right corner, then select Run. You can select on the currently running job to watch it execute and note behaviors. In the Power Apps Maker portal, confirm that your managed solution was imported successfully.
Use GitHub to analyze solution XML changes
One major advantage of unpacking your solution into a GitHub repository before promoting it to another environment is that you can use the inherent change differential tracking mechanisms of GitHub to know exactly what is different between your current solution deployment and your previous one. For example, below you can see the differential generated by adding one other column to the Account table, with the previous version on the left and the new version on the right side. In this way, you can have complete visibility to any changes deployed to your target environment in a more granular way than simply relying on the Power Apps Maker portal solution viewer.
Conclusion
You now have a fully working pipeline for moving a solution from a source environment to a target environment. There are many advanced features in Azure DevOps that can be used beyond what we described here. Learn more in the Azure Pipelines documentation.
