Schema comparison overview
Applies to:
SQL Server
Azure SQL Database
Azure SQL Managed Instance
SQL database in Microsoft Fabric
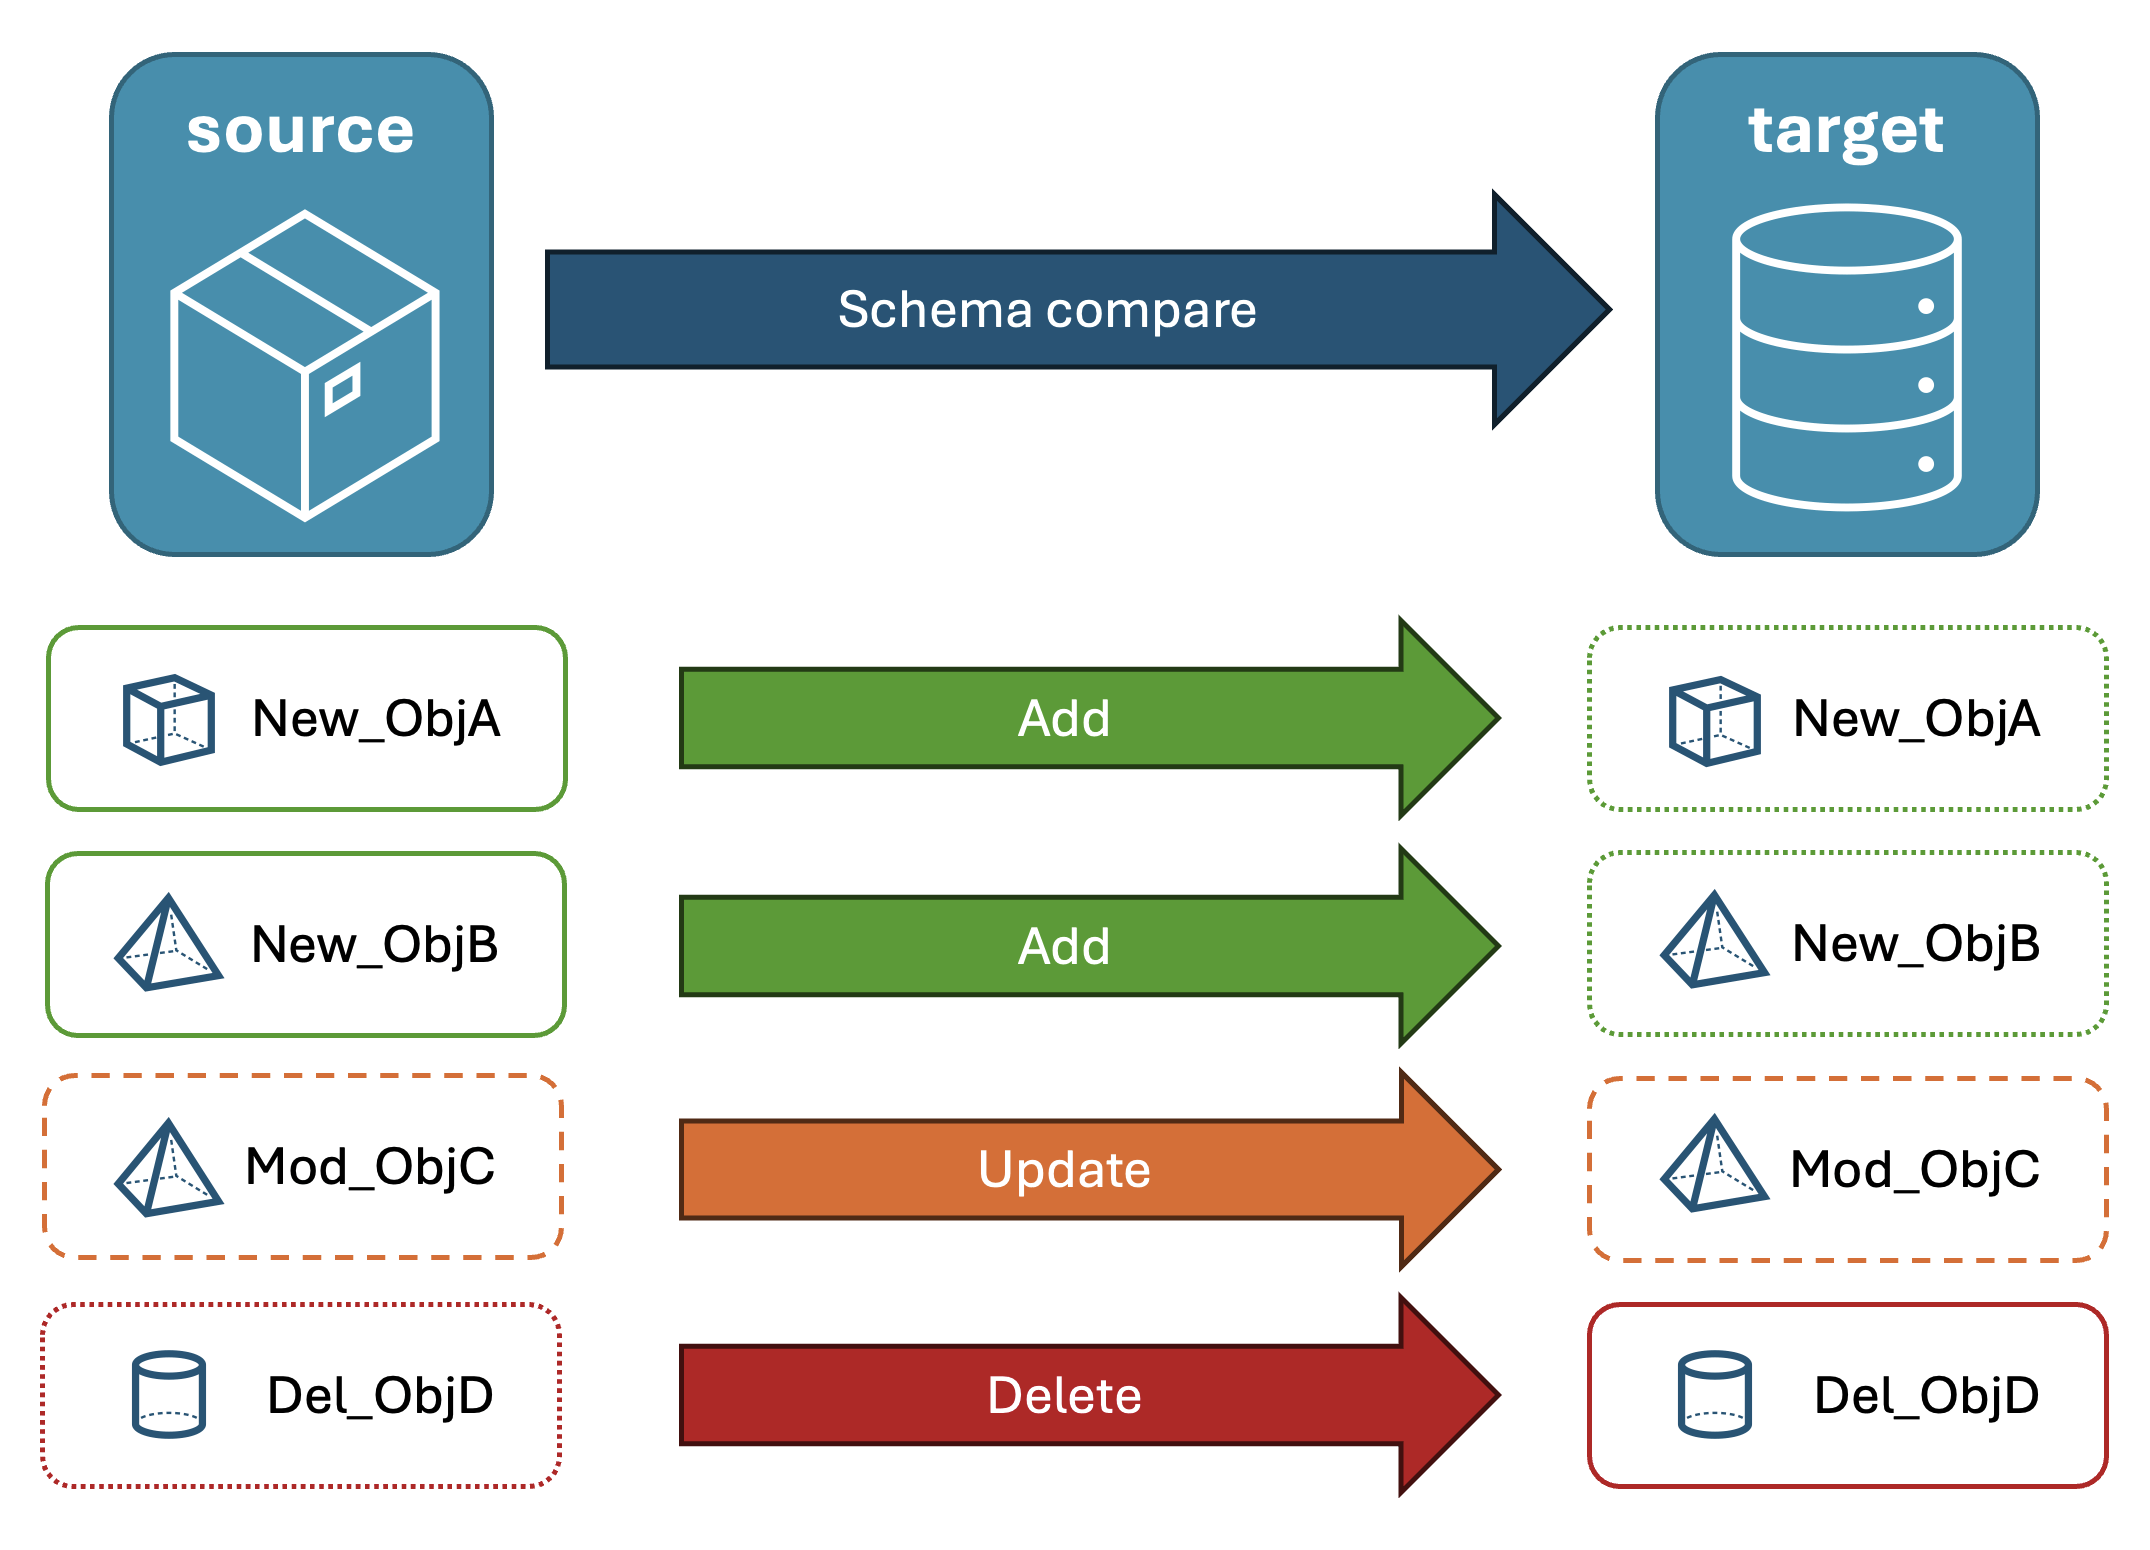
The schema comparison tooling enables you to compare two database definitions, where the source and target of the comparison can be any combination of connected database, SQL database project or .dacpac file. Once the comparison is complete, the results of the comparison appear as a set of actions that make the target the same as the source in a similar manner as a source control diff. From a schema compare interface you can update the target directly (if the target is a project or a database) or generate an update script that has the same effect.
Schema compare provides the following features:
- Compare schemas between two dacpac files, databases, or SQL projects.
- View results as a set of actions to take against the target for it to match the source.
- Selectively exclude actions listed in results.
- Set options that control the scope of the comparison.
- Apply changes directly to the target or generate a script for applying the changes at a later time.
- Save the comparison.
Functionality
The differences between source and target appear in a grid for easy review. Comparison can be made in either direction between a database model derived from any of the following:
- connected database
- SQL database project
.dacpacfile
In schema compare you can drill into and review each difference in the results grid or in script form where details of the changes are available at a per-line level. You can also selectively exclude specific differences before updating the target. The schema compare tooling is available in Visual Studio, Azure Data Studio, and the command line.
Schema comparison options
The options for schema comparison are drawn from the deployment options available from the DacFx .NET library. These options include:
- ignore whitespace
- ignore partition schemes
- ignore column order
- drop indexes not in source
- block on possible data loss
The object types that are included in the comparison can also be configured. These objects include tables, stored procedures, indexes, permissions, user-defined types, and more.
Schema compare files
The comparison definition for schema compare can be saved as an .scmp file, known as a schema compare file. This file stores information about the schema comparison in XML and includes:
- source and target connection information
- comparison options
- excluded object types
An .scmp file can be opened in Visual Studio or Azure Data Studio to easily run the same comparison again later or to share the comparison with others.
Launch and use schema compare
On the Tools menu in Visual Studio, select SQL Server, and then select New Schema Comparison.
Alternatively, right-click the TradeDev project in Solution Explorer, and select Schema Compare.
The Schema Compare window opens, and Visual Studio automatically assigns it a name such as
SqlSchemaCompare1.Two dropdown list menus with a green arrow in between them appear just below the Schema Compare window toolbar. These menus allow you to select database definitions for your comparison source and target.
In the Select Source dropdown list, choose Select Source and the Select Source Schema dialog opens.
If you opened the Schema Compare window by right-clicking the project name, the source schema is already populated and you can proceed to step 4.
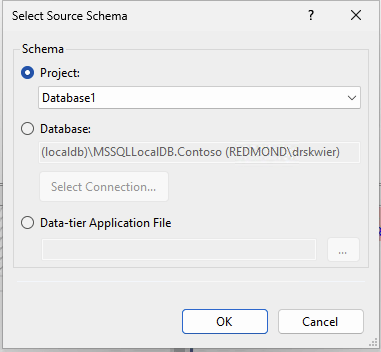
Complete the selections for a schema comparison source by choosing a Project, Database connection, or .dacpac file. The source is database definition that you want to use as the basis for changes to the target.
From the Select Target dropdown list in the Schema Compare Window , choose Select Target, and the Select Target Schema dialog opens. Complete the selections for a schema comparison target by choosing a Project, Database connection, or .dacpac file. The target is database definition that you want to evaluate and potentially apply changes to.
You can also select the Options button in the Schema Compare Window toolbar to specify which objects are compared, what types of differences are ignored, and other settings.
Select the Compare button in the Schema Compare Window toolbar to start the comparison process.
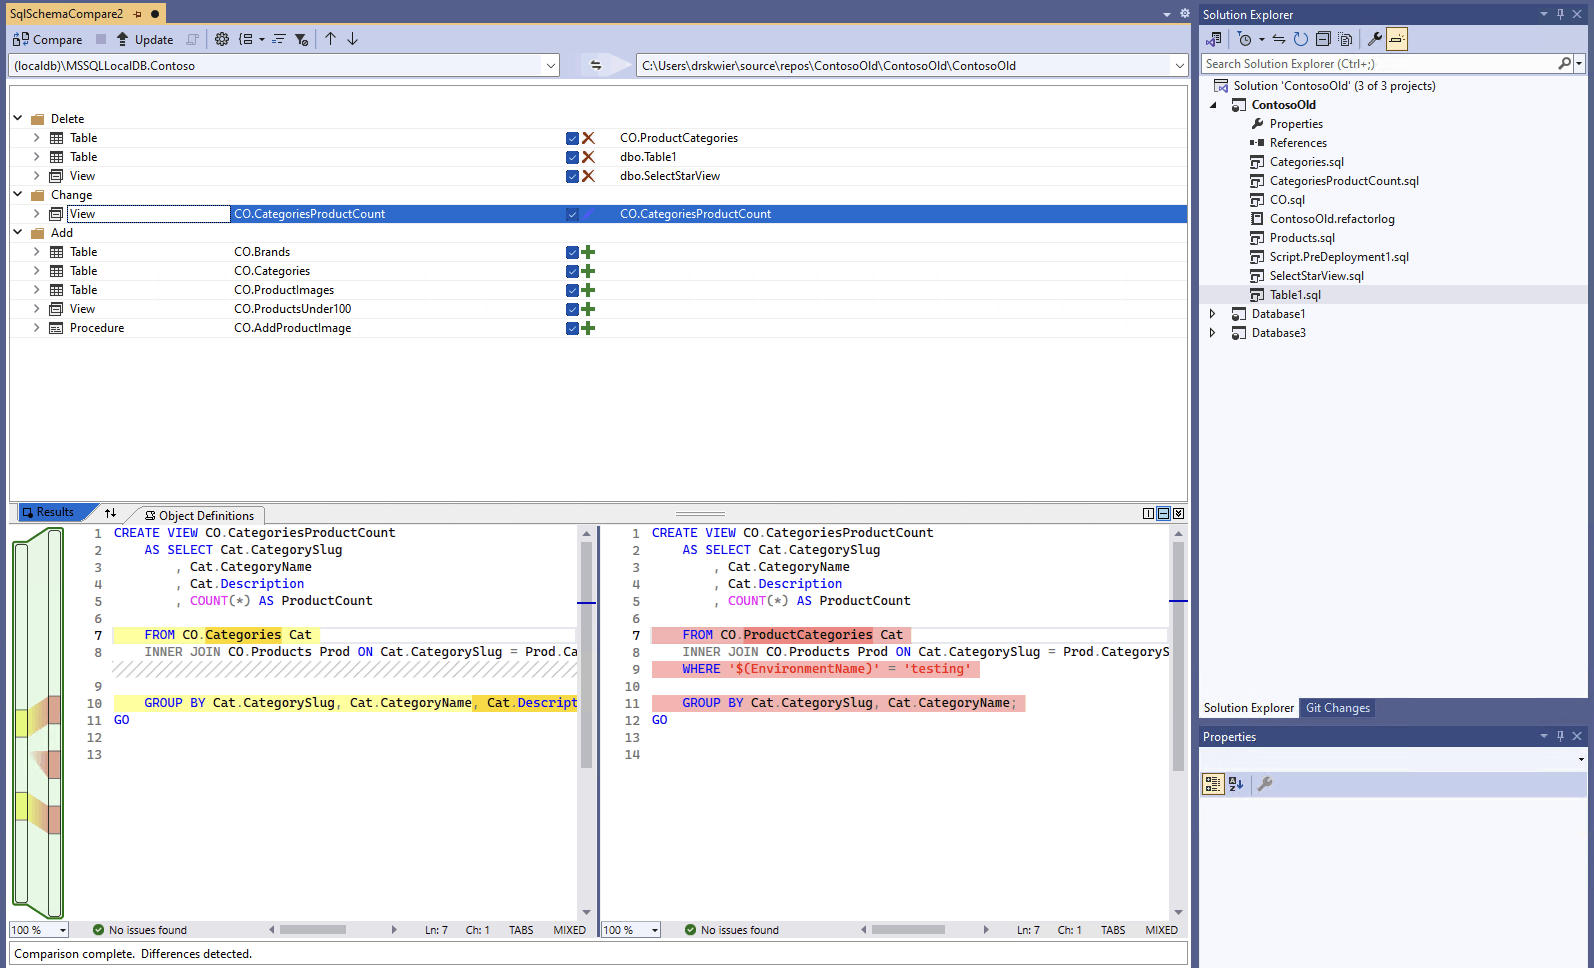
When the comparison is complete, the structural differences between the project and the database appear in the Results pane in the upper part of the window. By default, the comparison results group all the differences are grouped by action (such as Delete, Change, or Add). The Results pane displays a row for each database object that differs between the database definitions. Each row identifies the object in the source or target schema (or both) and the action that would be taken on the target schema to make the target object the same as the source object. If an object was refactored and either renamed or moved to a new schema, the source and target names are different, and the source name appears in bold font to highlight the difference.
By default the results list hides objects that are the same in both schemas or that aren't supported for update (for example, built-in objects). You can select the appropriate filter buttons in the tool bar to show these objects.
To change the grouping preference, select the Group Results dropdown list in the toolbar. Select Type to group the results by object type (for example, by tables, views, or stored procedures).
By default all differences are included in the scope of the Update Target action. You can exclude differences that you don't want to synchronize. To do so, uncheck the Action column in the center of each row. Alternatively, right-click a row in the Schema pane, and select Exclude. The row is immediately grayed out. When schema compare is used to update the target database, this row isn't considered for any pending changes.
You can also right-click on a group row and select Exclude All or Include All, which is equivalent to unchecking or checking all differences in that group. When you group results by schema this is a useful way to include or exclude all changes to a specific schema.
If the row being excluded has any dependent objects (for example, a Table row that is referenced by a View row), the excluded row is disabled but its checkbox isn't cleared. Once all rows that depend on it are unchecked, the disabled row is unchecked. In addition, if a row is refactored (renamed or moved to another schema), then the checkbox is disabled for that row and any of its dependent child rows.
If you refresh the comparison, those differences that you have chosen to skip are ignored.
To update the schema of the target, you have two options. You can update the target directly from the Schema Compare window if the target is a database or project, or you can generate an update script if the target is a database or a database file. A generated script appears in the Transact-SQL Editor, from which you can inspect the script execute it against a database.
Graphical schema comparison isn't yet available in the SDK-style SQL projects preview in Visual Studio. Use Azure Data Studio to compare schemas.
Note
Schema compare isn't available in Visual Studio Code. Use Azure Data Studio or Visual Studio to compare schemas.
In Azure Data Studio in the command palette (
ctrl/cmd+shift+P), search for and select Schema Compare.Alternatively, right-click a database project in the Database Projects view or a database in Object Explorer, and select Schema Compare.
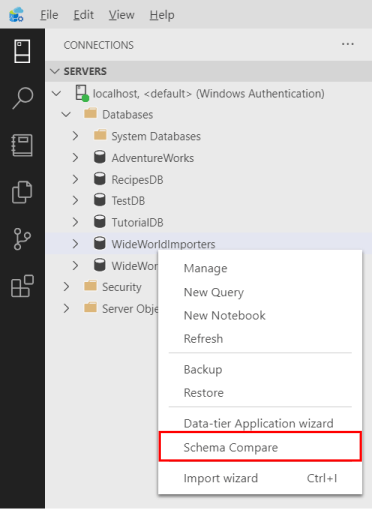
The Schema Compare window opens, and a source or target might be preset based on the launch point.
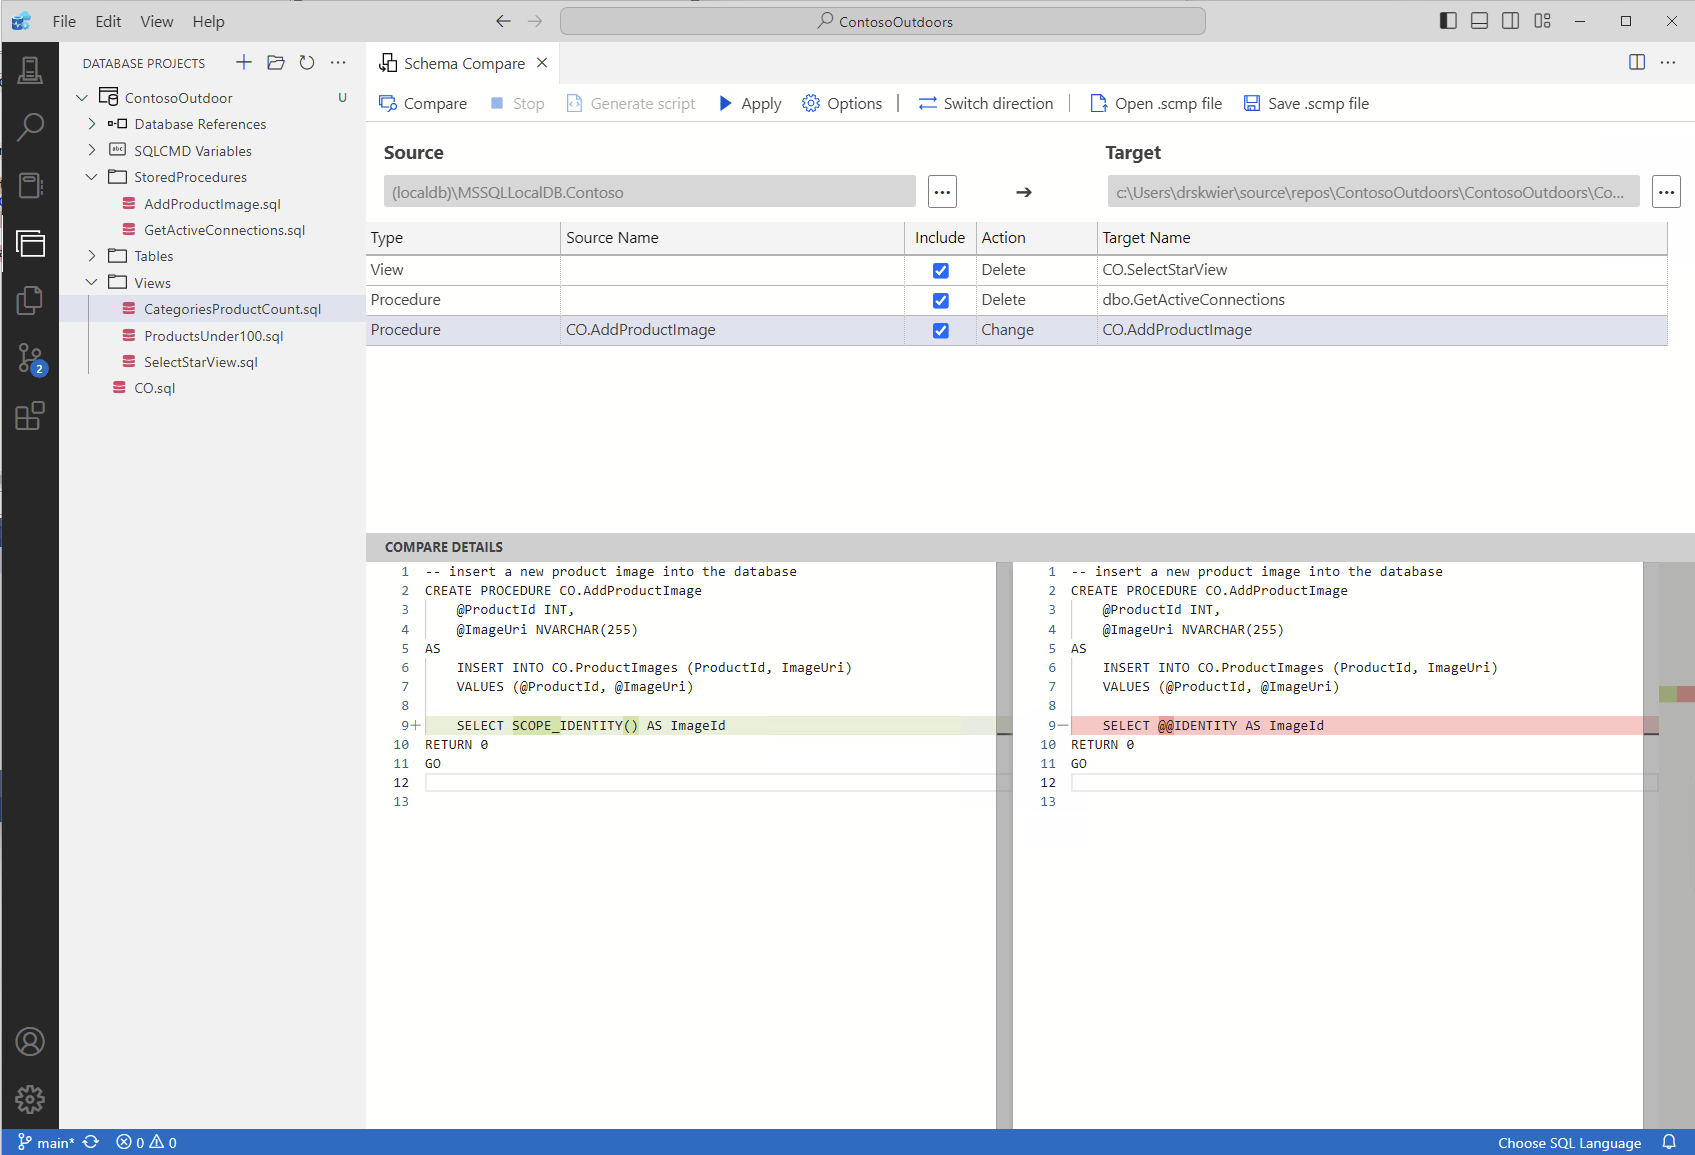
Two ellipsis buttons with an arrow in between them appear just below the Schema Compare window toolbar. These menus allow you to select database definitions for your comparison source and target.
Selecting the ellipsis button for the source or target opens a dialog where either or both can be updated. Complete the selections for a schema comparison source by choosing a Project, Database connection, or .dacpac file. The source is database definition that you want to use as the basis for changes to the target. The target is database definition that you want to evaluate and potentially apply changes to.
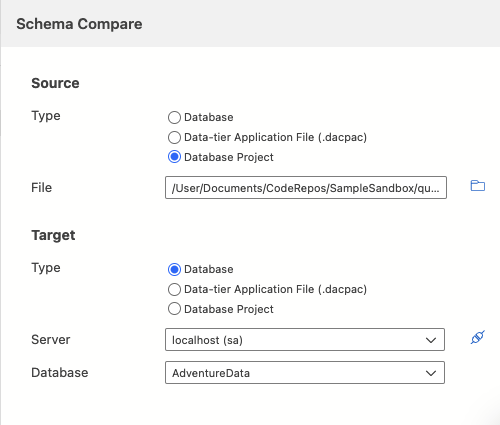
Once the selections are completed, select OK to close the dialog and return to the Schema Compare window.
You can also select the Options button in the Schema Compare Window toolbar to specify which objects are compared, what types of differences are ignored, and other settings.
Select the Compare button in the Schema Compare Window toolbar to start the comparison process.
When the comparison is complete, the structural differences between the project and the database appear in the Results pane in the upper part of the window. By default, the comparison results group all the differences are grouped by action (such as Delete, Change, or Add). The Results pane displays a row for each database object that differs between the database definitions. Each row identifies the object in the source or target schema (or both) and the action that will be taken on the target schema to make the target object the same as the source object. If an object has been refactored and either renamed or moved to a new schema, the source and target names are different, and the source name appears in bold font to highlight the difference.
By default all differences are included in the scope of the Update Target action. You can exclude differences that you don't want to synchronize. To do so, uncheck the Action column in the center of each row. Alternatively, right-click a row in the Schema pane, and select Exclude. The row is immediately grayed out. When schema compare is used to update the target database, this row isn't considered for any pending changes.
You can also right-click on a group row and select Exclude All or Include All, which is equivalent to unchecking or checking all differences in that group. When you group results by schema this is a useful way to include or exclude all changes to a specific schema.
If the row being excluded has any dependent objects (for example, a Table row that is referenced by a View row), the excluded row is disabled but its checkbox isn't cleared. Once all rows that depend on it are unchecked, the disabled row will be unchecked. In addition, if a row is refactored (renamed or moved to another schema), then the checkbox is disabled for that row and any of its dependent child rows.
If you refresh the comparison, those differences that you have chosen to skip will be ignored.
To update the schema of the target, you have two options. You can update the target directly from the Schema Compare window with the Apply button if the target is a database or project, or you can generate an update script if the target is a database with the Generate script button. A generated script appears in the Transact-SQL Editor, from which you can inspect the script execute it against a database.
Schema compare requires a graphical tool such as Visual Studio or Azure Data Studio.
