Step-by-Step: Capture a linux VM Image from a running VM
Hello folks,
I was talking with a customer last week and the conversation turned towards using an existing VM as a template from which he could deploy other VMs. and we are not talking about creating a custom Linux VM image and uploading it to Azure.
So, in this post we’ll look at how we capture that image to be used. Next week we’ll use the template to deploy it in a new Resource Group.
Step 1: Prep the VM
in order to capture an image. We first need to prep it. In the Windows world we would SYSPREP it. in this case we will use the Azure Command-Line Interface (CLI) to capture and generalize the Linux VM.
I created a VM in Azure, attached a new data disk to it and in this case installed and Apache Web server on it. to simulate a workload we want to use in our template.
Once I'm done configuring the machine the way i want it, then I’m ready to capture the it.
1- Connect to it using your SSH client. I use Putty.
2- In the SSH window, type the following command.
sudo waagent –deprovision+user
This command will clean the system and make it ready for reprovisioning. it does that by performing the following tasks:
- Removes SSH host keys
- Clears nameserver configuration in /etc/resolvconf
- Removes the root user's password from /etc/shadow
- Removes cached DHCP client leases
- Resets host name to localhost.localdomain
- Deletes the last provisioned user account and it’s data
Step 2: Capture the VM
From another computer with Azure CLI installed, login to your Azure subscription and ensure you’re in the Azure Resource Manager mode by running the following:
azure config mode arm
The VM can only be imaged when it’s in a Stopped state. so stop it by using the following command:
azure vm deallocate -g rg-client-east1 -n prvmsnap
In this case “rg-client-east1” in the resource group where the VM is located, and ‘'”prvmsnap” is the VM name.
Generalize the VM with the following command:
azure vm generalize -g rg-client-east1 -n prvmsnap
Now that the VM is deallocated and generalized, we’ll capture the image and generate a local file template. You’ll be using that template to deploy new VMs. We’ll do this with the following command:
azure vm capture rg-client-east1 prvmsnap Template -t \home\template.json
This command creates a generalized OS image, using the VHD prefix you specified in the command for the VM disks (in my case “template” is the disk prefix).
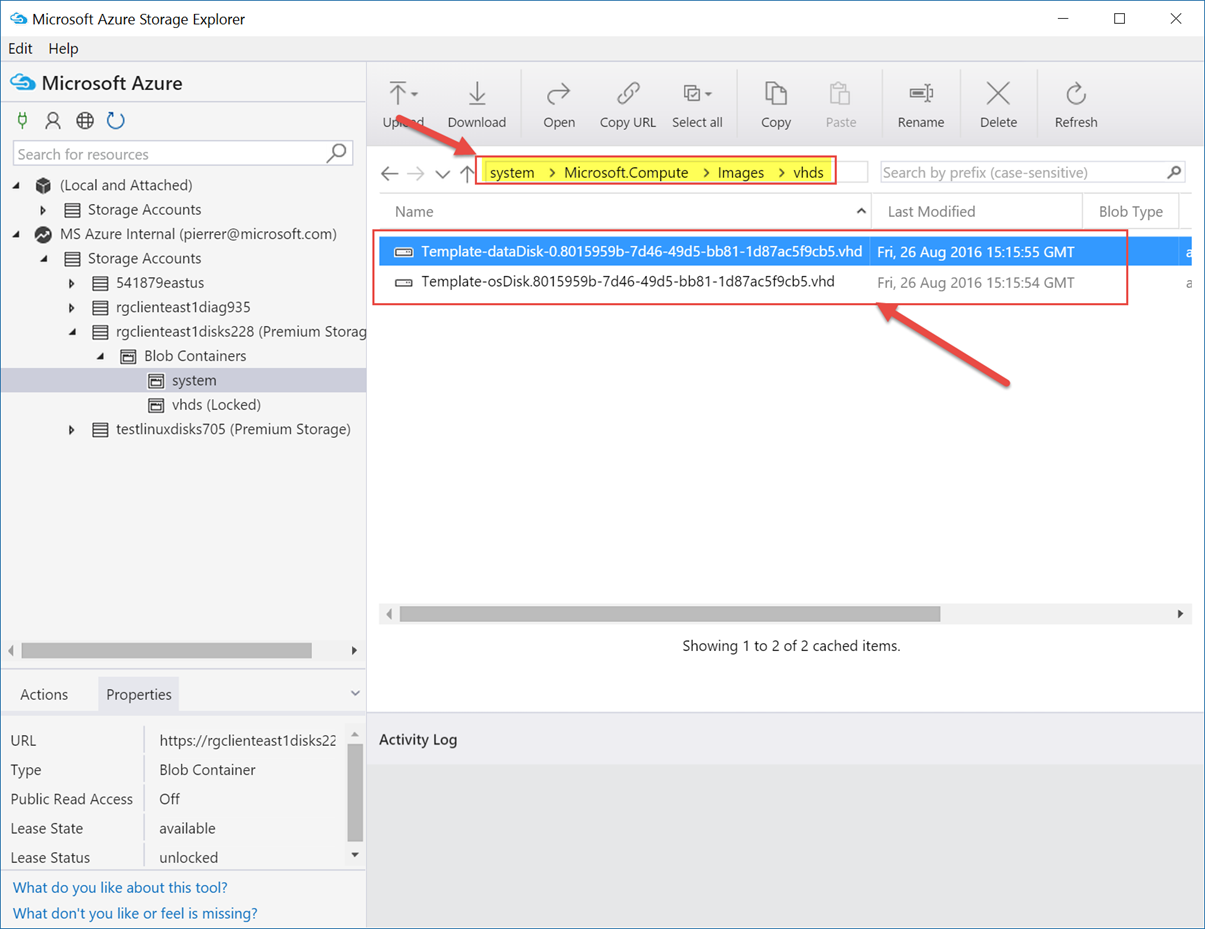
The image VHD files get created by default in the same storage account that the original VM just in a new container. For my machine the image was created here:
The -t option creates a local JSON file you can use to create a new VM from the image.
You can then use it as an Azure Resource Manager template to create other virtual machines. This template specifies the OS disk and data disks attached to the virtual machine. Please Note that It does not include the virtual network resources. You'll need to set those up separately/manually before you create another virtual machine that uses the template.
I hope this helps. Stay tuned, next week we’ll deploy that template as new VMs.
Cheers!
Pierre Roman
@pierreroman

![clip_image004[4] clip_image004[4]](https://msdntnarchive.z22.web.core.windows.net/media/2016/08/clip_image0044_thumb.jpg)
![clip_image006[4] clip_image006[4]](https://msdntnarchive.z22.web.core.windows.net/media/2016/08/clip_image0064_thumb.jpg)

