Generating your tile/icon image assets for Windows 10 UWP using Photoshop Actions
UPDATE: The Windows design team has made this template and the export actions into an official Windows 10 design resource. You can now find this at the Windows 10 design resources page under the Tools section as well as here in this post.
---
We all know that Windows 10 UWP now supports many different screen sizes and resolutions, from phones to laptops to big screen TVs. With all the different scale resolutions now supported, there is quite the massive amount of assets that your dev team or designers need to produce. Your Windows UWP application, to make this less of a burden, only requires a small handful of those images assets be present in your app package. This is great as it allows you to get your app shipped quickly but it comes at the expense of a lot of screens potentially not showing the most optimal assets for that screen. Kind of a problem. These assets represent your brand and your application and why would you want anything less than the sharpest images shown to your users? Creating all the required and recommended image assets for your Windows 10 UWP projects is a very time consuming and mundane process. And not to mention the ramp up time needed to understand (and to remember) all the W10 guidelines for tile and icon assets put forth by the Windows team on how to ensure your app logo looks great on all screens. To help alleviate us all from this monotonous work, I decided to leverage Photoshop to streamline as much of this work as possible.
What I’ve done is taken the tile and icon assets guidelines documentation and used ALL that information to create a set of 7 Photoshop template files. These 7 files represent all the assets needed for your application’s tiles, app icons, splash screen, badge logo, and store logos. Along with these template files, there is a set of 7 Photoshop Actions (they are like macros) which pair up with each of the Photoshop PSD template files. What each of these Photoshop Actions do is take its corresponding template file exports that template multiple times to the proper sizes and with the proper file names needed for your UWP project. These 7 templates/actions essentially output 68 of the required and recommended images assets for all the scale sizes (100, 125, 150, 200, 400) and package images needed to ensure your application looks great on any screen!
To get up and running with this, follow these instructions below:
Download and unzip the ZIP file attached to this blog post (contains the 7 Photoshop templates and an ATN file that contains that Photoshop Action definitions).
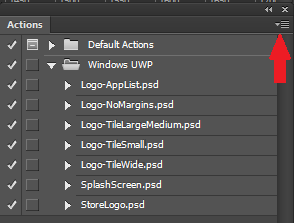
Import the actions file (Windows UWP v1.2 for Windows.atn OR Windows UWP v1.2 for Mac.atn) in to your Photoshop instance through the Actions pane’s settings menu.
Have your designer edit each of the Photoshop PSD template files. Each template file contains rulers representing all the boundaries which they should ideally adhere to (set forth by the W10 guidelines for tile and icon assets document). In pretty much all cases, it’s recommended that you keep your logo confined to the middle 4 boxes. However, if your logo is horizontally oriented, you can leverage the 2 square areas to the left and right of the center 4. Or if your logo is vertically oriented, you can leverage the 2 square areas above and below the center 4. Not both directions. And ideally leave your logo layer as a vector based layer so that as your asset is being re-sized and exported there is no loss of quality from the re-seize. Note that these boxes created by the guide rulers are based on the tile and icons margin guidelines set by the W10 design team.
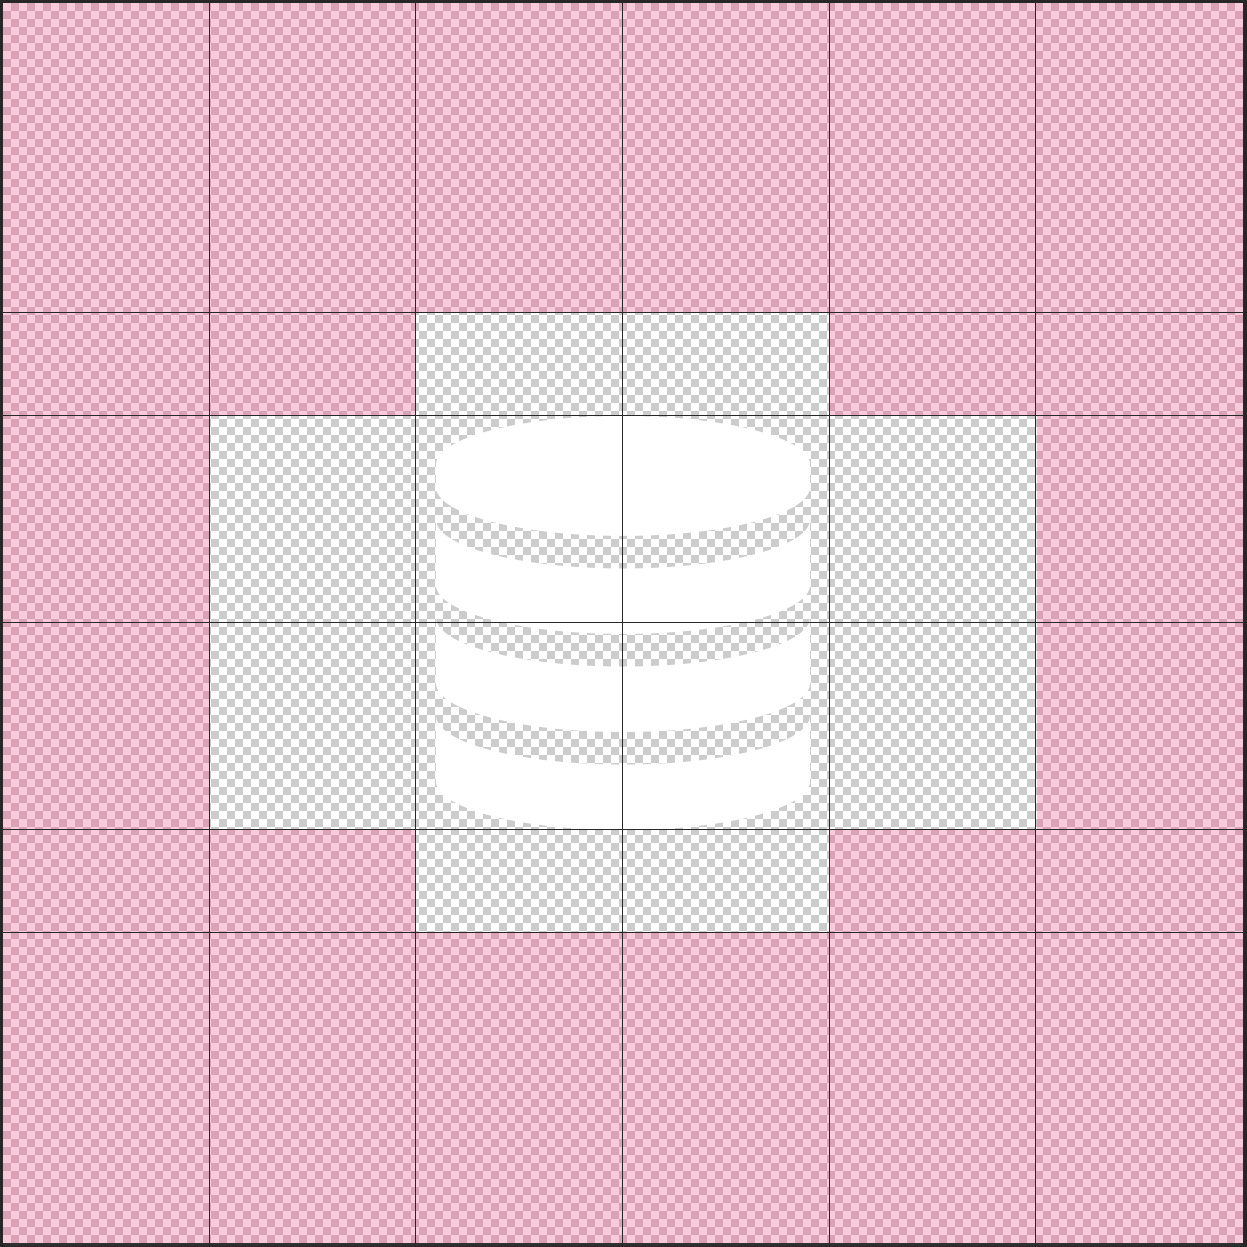
Sticking to these boundaries will ensure your logo looks great everywhere within Windows. Unless you intend to have full bleed branding on your assets, which in that case you can ignore the rulers. Though I do recommend you carefully read the guidelines documentation for guidance on margins of your full bleed logos.If you're using Photoshop on Windows, create a folder on your C: root drive called Images (i.e. C:\Images\). This is the folder that the Photoshop Actions will output to. If you're using Photoshop for Mac, files will be outputted to the /var/tmp/ folder. That folder isn't visible in Finder (the file explorer) as it's hidden by default. So to navigate to it, you'll want to use Cmd+Shift+G and manually type the path.
NOTE: I know this isn't ideal, but when creating Photoshop Actions, for both Windows and PC, the Action recorder captures the full path to any folder you choose. So if I chose Desktop, for example, it'd include the logged in user's name into the path which would prevent the action from running on other machines since that user (and it's full path to that person's Desktop) would exist or be accessible. Hence why I had to use C:\images or /var/tmp/ as they can both be accessible by all users on any computer.
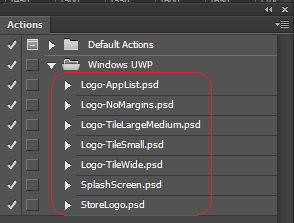
For each Photoshop template file, run the corresponding Photoshop Action (i.e. Run the Logo-TileLargeMedium.psd action on the Logo-TileLargeMedium.psd template file).
Copy the image files from the output folder to your Assets folder within your W10 application project.
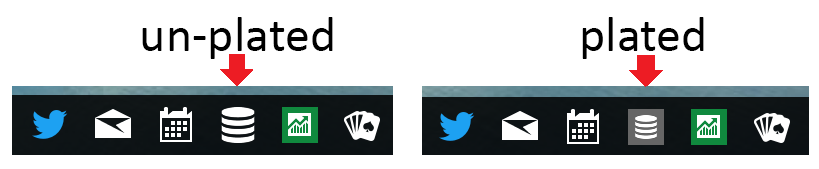
Decide if you want un-plated or plated images for your logo on the taskbar and task switcher and start menu jump list. If you want un-plated, simply include all the asset images named "Square44x44Logo.targetsize-##_altform-unplated.png" in your solution and ensure your tile background color is set to transparent. If you want them to be plated, then include the "Square44x44Logo.targetsize-##.png" image files and specify a hex value for tile color in the app manifest which dictates the background color for the tiles and icons. No need to include both sets.
Ensure each file you want is included in your Visual Studio project and set as Content so that it can be deployed with the application.
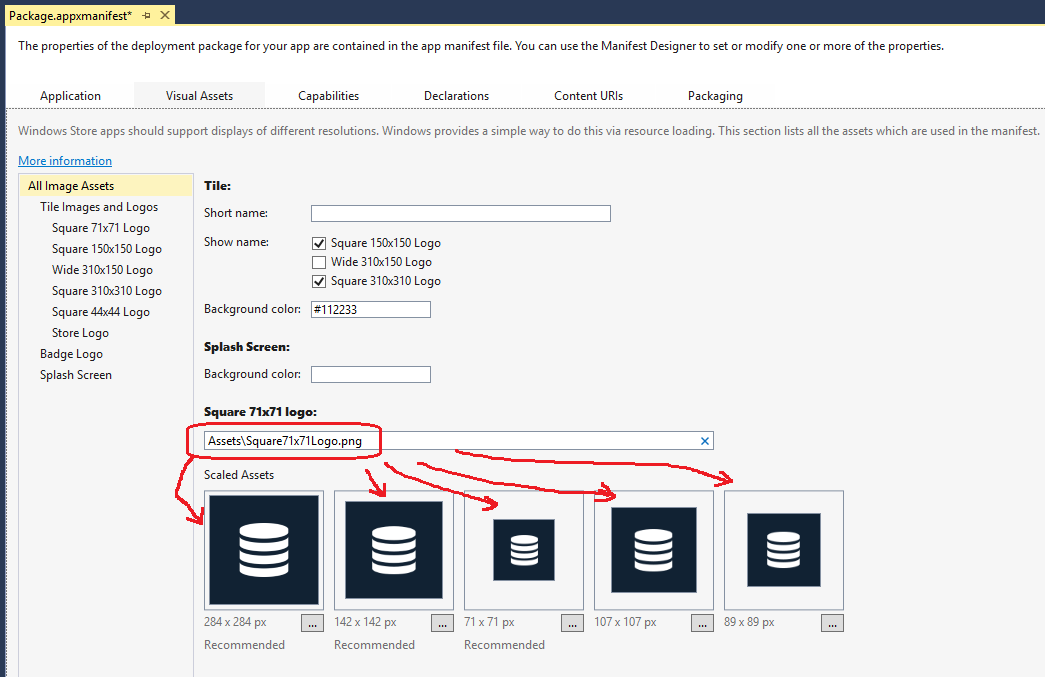
Update the Visual Assets tab in the application manifest to point to the appropriate image assets set. If you type in the name of the file without the “.scale-###.” part of the file name, it’ll automatically figure out each scaled image available in the project and show up in the manifest designer. For example, instead of selecting each image one by one for each scale size, just type in Square71x71Logo.png and it'll populate the 100, 125, 150, 200, and 400 scale images. See image:
I use this for my own applications to and it now takes me minutes to produce all the assets I need instead of hours. Hopefully this helps you out as well. If you have any questions or suggestions, please do reach out via the comments below! Windows UWP v1.2.zip
Comments
Anonymous
December 08, 2015
Would have been nice in the PS action to allow the user a location to save the files. The current action will not work on Macs. Unless that was intended ;)Anonymous
December 11, 2015
Will work on a Mac version in the near future....will post an update once it's done.Anonymous
December 17, 2015
I just tried to use this with CS5 and the problem is that every action ends up with only one image as a result. Images are not saved with different names, they just overwrite the main name so you get the resolution of the image set by the last steps of the actions. Is it just problem with the CS5 or what?Anonymous
December 21, 2015
I built this with Photoshop 2015. I will see if I can find someone with an older version of Photoshop [CS5/6] and try to test this. Also this is for Photoshop for Windows only right now. I will try to reproduce this for Photoshop for Mac in the near future.Anonymous
January 27, 2016
Hi Ante, I've created actions for Photoshop for Mac. Please download the ZIP file on this blog again. Also see step 4 so you know where the assets are exported to on your Mac.Anonymous
February 26, 2016
The actions crash Photoshop CS3 Extended. It does generate one image with the name of the PSD file, not sure if it's supposed to generate more than one image with a different name that the PSD file.Anonymous
March 02, 2016
Photoshop CS3 is from 2007 --- that's pretty old. I built this for the latest version of Photoshop CC 2015 and have not tested it with earlier versions. Sorry.Anonymous
March 29, 2016
Why not supporting vector files (ex: svg or XAML) so that one file would suffice?We are launching our UWP app in 2 months time and were surprised we had to resort to bitmap for this. Any technical reason?- Anonymous
June 28, 2016
The comment has been removed
- Anonymous
Anonymous
April 14, 2016
Is this template up to date?I tested it on a windows 10 universal app (Vs2015).Some imagens are broken. An error appears saying they have an incorrect size.Are all assets sizes correctly created?- Anonymous
June 28, 2016
Yes, this is tested on UWP for Windows 10 and Visual Studio 2015. NAPCAT, can you double check that you used the appropriate action with the PSD file? I.e. you used the action with the same name as the PSD file you were trying to export? That is probably your issue.
- Anonymous
Anonymous
June 04, 2016
I got inspired by this and did a (extremely) similar solution for Inkscape. It’s available on GitHub:https://github.com/pekspro/Icons-and-tiles-generatorAnonymous
June 09, 2016
Works great with Photoshop CS6 on Windows 10. Thank you very much :)- Anonymous
June 28, 2016
Fantastic! Glad this helped you!
- Anonymous
Anonymous
June 20, 2016
Thank you for these! When I run them on Mac Photoshop CC 2015.1.2 I get "folder not found". Perhaps it's because this machine has an admin? Is there way to edit the destination folder?- Anonymous
June 20, 2016
To be clear, when I "Command K" and try to navigate to /var/tmp/folder, it says "folder not found".- Anonymous
June 20, 2016
(I also created a folder in /var/tmp/folder called "folder" with no success)
- Anonymous
- Anonymous
Anonymous
June 28, 2016
UPDATE: The Windows design team has made this template and the export actions into an official Windows 10 design resource. You can now find this at the Windows 10 design resources page under the Tools section as well as here in this post.