Update Microsoft Defender Antivirus on Azure Stack Hub
Microsoft Defender Antivirus is an antimalware solution that provides security and virus protection. Every Azure Stack Hub infrastructure component (Hyper-V hosts and virtual machines) is protected with Microsoft Defender Antivirus. For up-to-date protection, you need periodic updates to Microsoft Defender Antivirus definitions, engine, and platform. How updates are applied depends on your configuration.
Connected scenario
The Azure Stack Hub update resource provider downloads antimalware definitions and engine updates multiple times per day. Each Azure Stack Hub infrastructure component gets the update from the update resource provider and applies the update automatically.
For those Azure Stack Hub deployments that are connected to the public Internet, apply the monthly Azure Stack Hub update. The monthly Azure Stack Hub update includes Microsoft Defender Antivirus platform updates for the month.
Disconnected scenario
For those Azure Stack Hub deployments that are not connected to the public Internet (such as air-gapped datacenters) customers have the ability to apply the antimalware definitions and engine updates as they are published.
To apply the updates to your Azure Stack Hub solution, you first have to download them from the Microsoft site (links below) and subsequently, import them into a storage blob container under your updateadminaccount. A scheduled task scans the blob container every 30 minutes and, if new Defender definitions and engine updates are found, it applies them to the Azure Stack Hub infrastructure.
For those disconnected deployments that don't have the ability to download Defender definitions and engine updates on a daily basis, the monthly Azure Stack Hub update includes Microsoft Defender Antivirus definitions, engine, and platform updates for the month.
Set up Microsoft Defender for manual updates
You can use two new cmdlets in the privileged endpoint to configure Microsoft Defender Antivirus manual update in Azure Stack Hub.
### cmdlet to configure the storage blob container for the Defender updates
Set-AzsDefenderManualUpdate [-Container <string>] [-Remove]
### cmdlet to retrieve the configuration of the Microsoft Defender Antivirus manual update settings
Get-AzsDefenderManualUpdate
The following procedure shows how to setup Microsoft Defender Antivirus manual update.
Connect to the privileged endpoint and run the following cmdlet to specify the name of the storage blob container where the Defender updates will be uploaded.
Note
The manual update process described below only works in disconnected environments where access to "go.microsoft.com" is not allowed. Trying to run the cmdlet Set-AzsDefenderManualUpdate in connected environments will result in an error.
### Configure the storage blob container for the Defender updates
Set-AzsDefenderManualUpdate -Container <yourContainerName>
Download the two Microsoft Defender Antivirus update packages and save them on a location that is reachable from your Azure Stack Hub administration portal.
- mpam-fe.exe from https://go.microsoft.com/fwlink/?LinkId=121721&arch=x64
- nis_full.exe from https://go.microsoft.com/fwlink/?LinkId=197094
Note
You'll have to download these two files every time you want to update the Defender signatures.
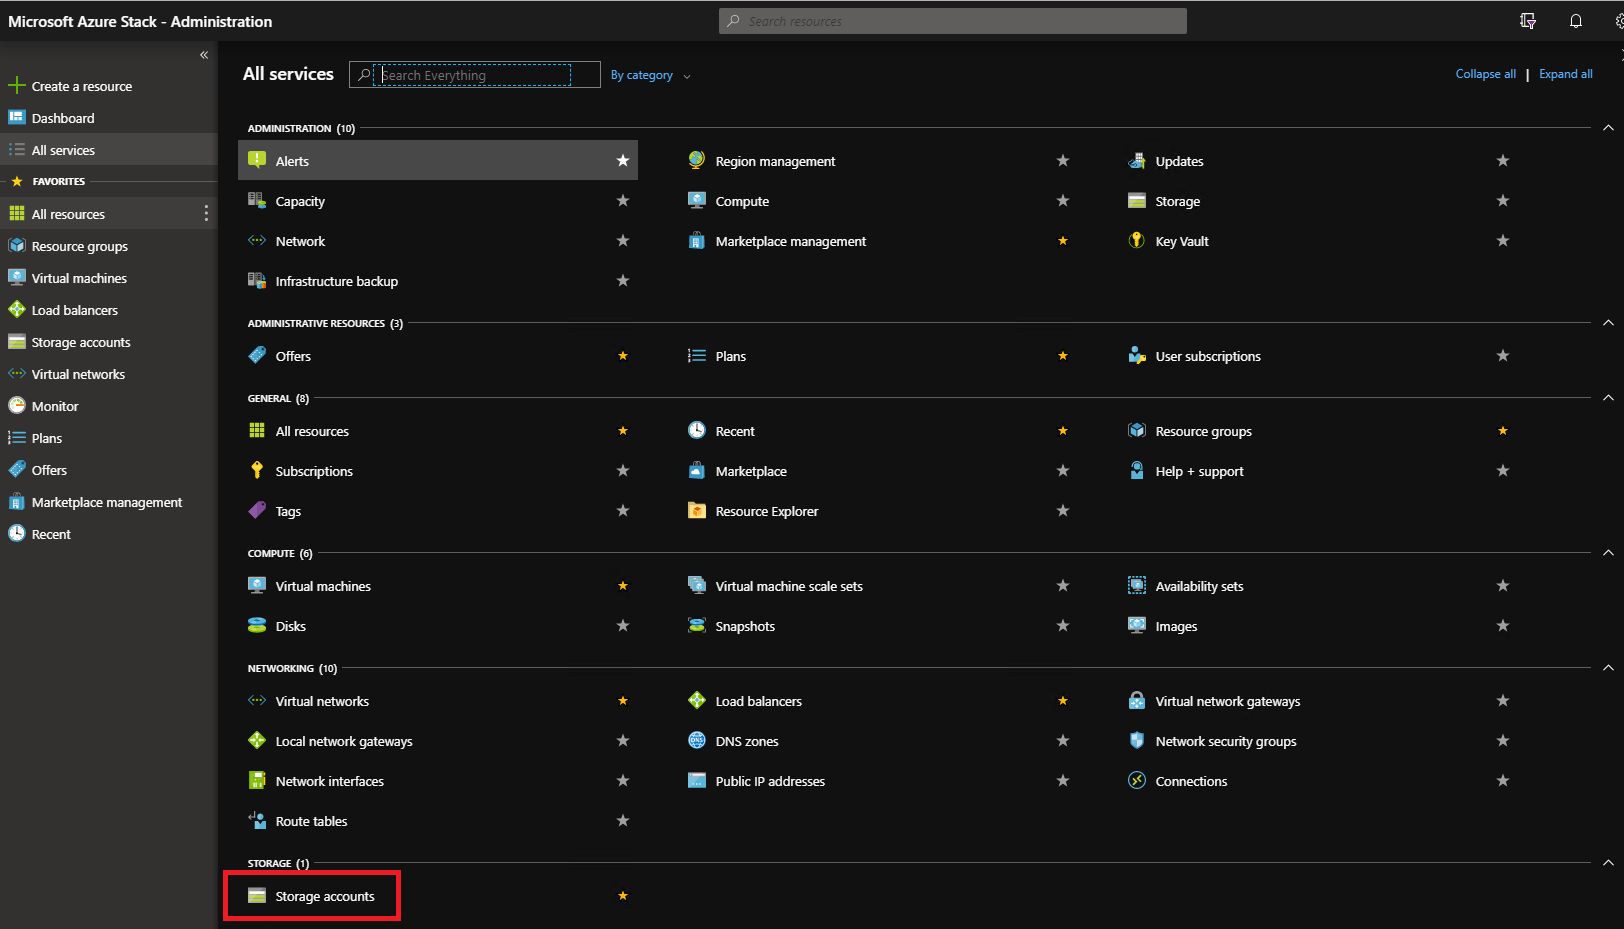
In the administration portal, select All services. Then, under the DATA + STORAGE category, select Storage accounts. (Or, in the filter box, start typing storage accounts, and select it.)
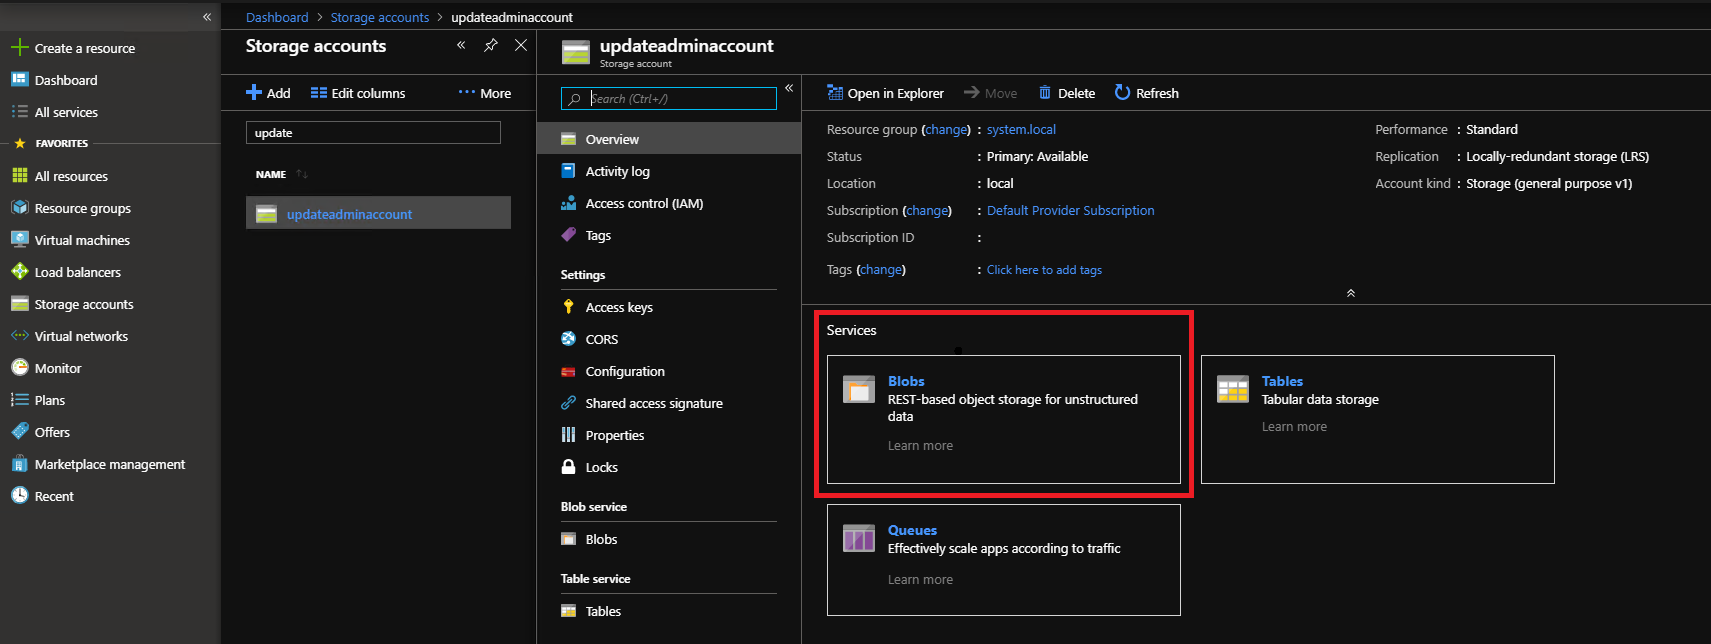
In the filter box, type update, and select the updateadminaccount storage account.
In the storage account details, under Services, select Blobs.
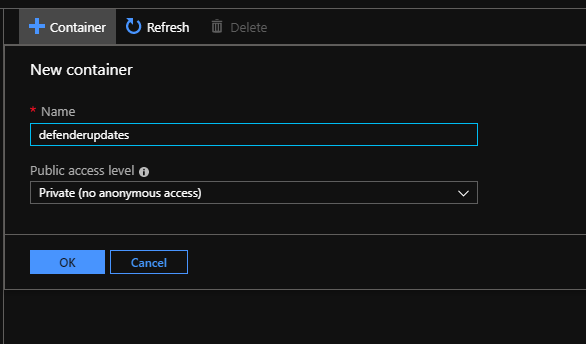
Under Blob service, select + Container to create a container. Enter the name that was specified with the Set-AzsDefenderManualUpdate (in this example defenderupdates) and then select OK.
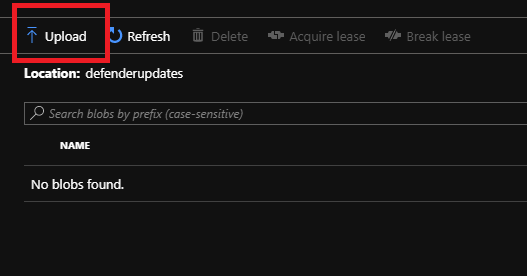
After the container is created, click the container name, and then click Upload to upload the package files to the container.
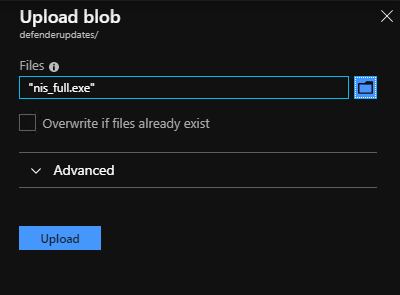
Under Upload blob, click the folder icon, browse to the Microsoft Defender Antivirus update mpam-fe.exe files and then click Open in the file explorer window.
Under Upload blob, click Upload.
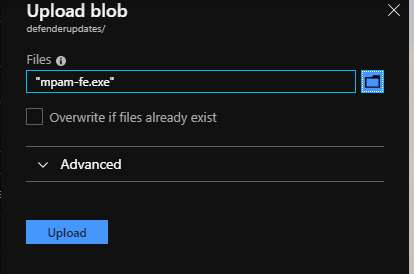
Repeat steps 8 and 9 for the nis_full.exe file.
A scheduled task scans the blob container every 30 minutes and applies any new Microsoft Defender Antivirus package.