Tutorial: Prepare an application for AKS
Applies to: AKS on Azure Stack HCI 22H2, AKS on Windows Server
In this tutorial, part one of seven, a multi-container application is prepared for use on a Kubernetes cluster when you're using Azure Kubernetes Service enabled by Azure Arc. Existing development tools such as Docker Compose are used to locally build and test an application.
You learn how to:
- Clone a sample application source from GitHub
- Create a container image from the sample application source
- Test the multi-container application in a local Docker environment
Once completed, the following application runs in your local development environment:
In later tutorials, the container image is uploaded to an Azure Container Registry, and then deployed into a Kubernetes cluster.
Before you begin
This tutorial assumes a basic understanding of core Docker concepts such as containers, container images, and docker commands. For a primer on container basics, see Get started with Docker.
To complete this tutorial, you need a local Docker development environment running Linux containers. Docker provides packages that configure Docker on Windows.
Note
AKS does not include the Docker components required to complete every step in these tutorials. Therefore, we recommend using a full Docker development environment.
Get application code
The sample application used in this tutorial is a basic voting app consisting of a front-end web component and a back-end Redis instance. The web component is packaged into a custom container image. The Redis instance uses an unmodified image from Docker Hub.
Use GitHub to clone the sample application to your development environment:
git clone https://github.com/Azure-Samples/azure-voting-app-redis.git
Change into the cloned directory:
cd azure-voting-app-redis
Inside the directory is the application source code, a pre-created Docker compose file, and a Kubernetes manifest file. These files are used throughout the tutorial set. The contents and structure of the directory are as follows:
azure-voting-app-redis
│   azure-vote-all-in-one-redis.yaml
│   docker-compose.yaml
│   LICENSE
│   README.md
│
├───azure-vote
│   │   app_init.supervisord.conf
│   │   Dockerfile
│   │   Dockerfile-for-app-service
│   │   sshd_config
│   │
│   └───azure-vote
│       │   config_file.cfg
│       │   main.py
│       │
│       ├───static
│       │       default.css
│       │
│       └───templates
│               index.html
│
└───jenkins-tutorial
        config-jenkins.sh
        deploy-jenkins-vm.sh
Create container images
You can use Docker Compose to automate building container images and the deployment of multi-container applications.
Use the sample docker-compose.yaml file to create the container image, download the Redis image, and start the application:
docker-compose up -d
When completed, use the docker images command to see the created images. Three images were downloaded or created. The azure-vote-front image contains the front-end application and uses the nginx-flask image as a base. The redis image is used to start a Redis instance.
$ docker images

REPOSITORY                                     TAG                 IMAGE ID            CREATED             SIZE
mcr.microsoft.com/azuredocs/azure-vote-front   v1                  84b41c268ad9        9 seconds ago       944MB
mcr.microsoft.com/oss/bitnami/redis            6.0.8               3a54a920bb6c        2 days ago          103MB
tiangolo/uwsgi-nginx-flask                     python3.6           a16ce562e863        6 weeks ago         944MB
Run the docker ps command to see the running containers:
$ docker ps

CONTAINER ID        IMAGE                                             COMMAND                  CREATED             STATUS              PORTS                           NAMES
d10e5244f237        mcr.microsoft.com/azuredocs/azure-vote-front:v1   "/entrypoint.sh /sta…"   3 minutes ago       Up 3 minutes        443/tcp, 0.0.0.0:8080->80/tcp   azure-vote-front
21574cb38c1f        mcr.microsoft.com/oss/bitnami/redis:6.0.8         "/opt/bitnami/script…"   3 minutes ago       Up 3 minutes        0.0.0.0:6379->6379/tcp          azure-vote-back
Test application locally
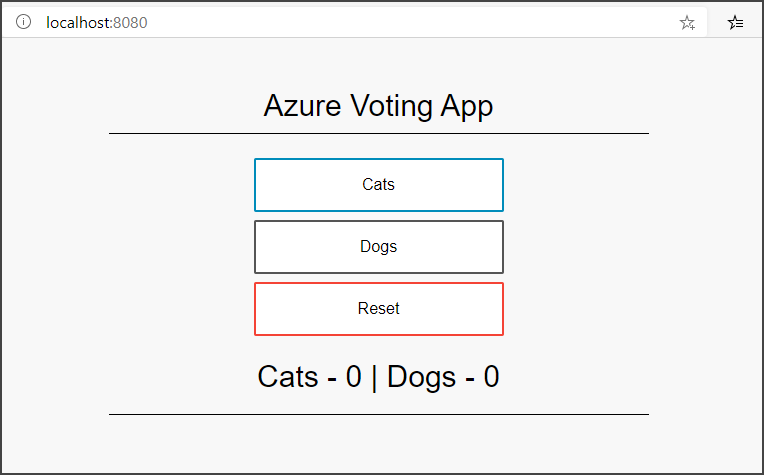
To see the running application, enter http://localhost:8080 in a local web browser. The sample application loads, as shown in the following example:
Clean up resources
Now that the application's functionality is validated, the running containers can be stopped and removed. Don't delete the container images - in the next tutorial, the azure-vote-front image is uploaded to an Azure Container Registry instance.
Stop and remove the container instances and resources with the docker-compose down command:
docker-compose down
When you remove the local application, you have a Docker image that contains the Azure Vote application, azure-vote-front, for use with the next tutorial.
Next steps
In this tutorial, an application was tested and container images created for the application. You learned how to:
- Clone a sample application source from GitHub
- Create a container image from the sample application source
- Test the multi-container application in a local Docker environment
Advance to the next tutorial to learn how to store container images in Azure Container Registry.
