Quickstart: Deploy your app with App Spaces
Note
App Spaces is in preview.
In this quickstart, you learn to connect to GitHub and deploy your code to a recommended Azure service with App Spaces. For more information, see App Spaces overview.
App Spaces uses a concept of components. The following table describes the component types, app types, and the Azure services used by App Spaces.
| Component type | App type | Azure service |
|---|---|---|
| App component | Back end | Azure Container Apps |
| Static app component | Front end | Static Web Apps |
| Database component | N/A | Azure Container Apps |
Prerequisites
To deploy your repository to App Spaces, you must have the following items:
- Azure account and subscription
- GitHub repository. If you don't have your own repository, see Deploy an App Spaces sample app.
- Write access to your chosen GitHub repository (for GitHub Actions).
Select your app
Follow these steps to deploy your app from a GitHub repository:
- Browse to the Azure portal.
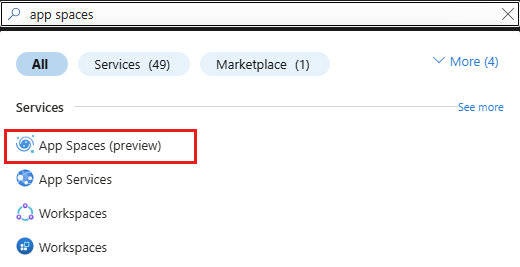
- In the search bar, search for app spaces and select it in the results.

- In the App Spaces page, select + Create App Space.
- In the Create new App Space page, under the Deploy code from your GitHub repository section, select GitHub repository.
Connect to GitHub to import your repository
- Enter the following values in the Connect to GitHub to import your repository section.
| Setting | Action |
|---|---|
| GitHub account | Select your GitHub account. |
| Organization | Select your organization. |
| Repository | Select your GitHub code repository. If you can't find your repository, you need to enable other permissions on GitHub. |
| Branch | Select your GitHub branch. |
| App location | Enter the location of your code in your GitHub repository. Use / for the root directory. |
| Listening port | Specify the port that your web server is listening on. External requests being made to port 80 or 443 get routed to this port internally for your application to server content from. |
| Startup command (optional) | Under Advanced configurations, enter a Startup command. |
Configure app details
Enter the following values in the Configure app details section.
Setting Action App Space name Enter myCustomAppSpace.Subscription Select your subscription. Region Select your region. Select Deploy button at the bottom of the Deploy App Space page.
The deployment can take a few minutes to complete. During deployment, App Spaces uses GitHub actions to deploy to an Azure service based on the code in the repository. The Azure service is either a Container App (App component) or a Static Web App (Static app component). Go to your app's Deployment tab to see your code deployment logs.
For a back-end app, App Spaces creates the following resources for you during deployment:
- Azure Container App environment
- Azure Container App
- Virtual network + subnet (sub resource of virtual network)
- Continuous deployment with GitHub Actions
- Contributor RBAC (Role-based access control) role assigned to user-assigned identity over the scope of the resource group (for OpenID Connect purposes)
- A Log Analytics workspace
Clean up resources
When you're finished with the sample app, you can remove all of the App Spaces resources from Azure. It helps you avoid extra charges and keeps your Azure subscription uncluttered. Deleting an App Spaces is the fastest way to remove all Azure resources for your app.
- From the App Space page, select Delete space to delete the App Spaces and its associated resources.