Discover what software is installed on your VMs
Important
Change Tracking and Inventory using Log Analytics agent has retired on 31 August 2024 and will work on limited support till 01 February 2025. We recommend that you use Azure Monitoring Agent as the new supporting agent. Follow the guidelines for migration from Change Tracking and inventory using Log Analytics to Change Tracking and inventory using Azure Monitoring Agent version.
In this tutorial, you learn how to use the Azure Automation Change Tracking and Inventory feature to find out what software is installed in your environment. You can collect and view inventory for software, files, Linux daemons, Windows services, and Windows Registry keys on your computers. Tracking the configurations of your machines can help you pinpoint operational issues across your environment and better understand the state of your machines.
In this tutorial you learn how to:
- Enable Change Tracking and Inventory
- Enable an Azure VM
- Enable a non-Azure VM
- View installed software
- Search inventory logs for installed software
Prerequisites
To complete this tutorial, you need:
- An Azure subscription. If you don't have one yet, you can activate your MSDN subscriber benefits or sign up for a free account.
- An Automation account to hold the watcher and action runbooks and the Watcher task.
- A virtual machine to enable for the feature.
Log in to Azure
Sign in to the Azure portal.
Enable Change Tracking and Inventory
First you need to enable Change tracking and Inventory for this tutorial. If you've previously enabled the feature, this step is not necessary.
Note
If the fields are grayed out, another Automation feature is enabled for the VM, and you must use same workspace and Automation account.
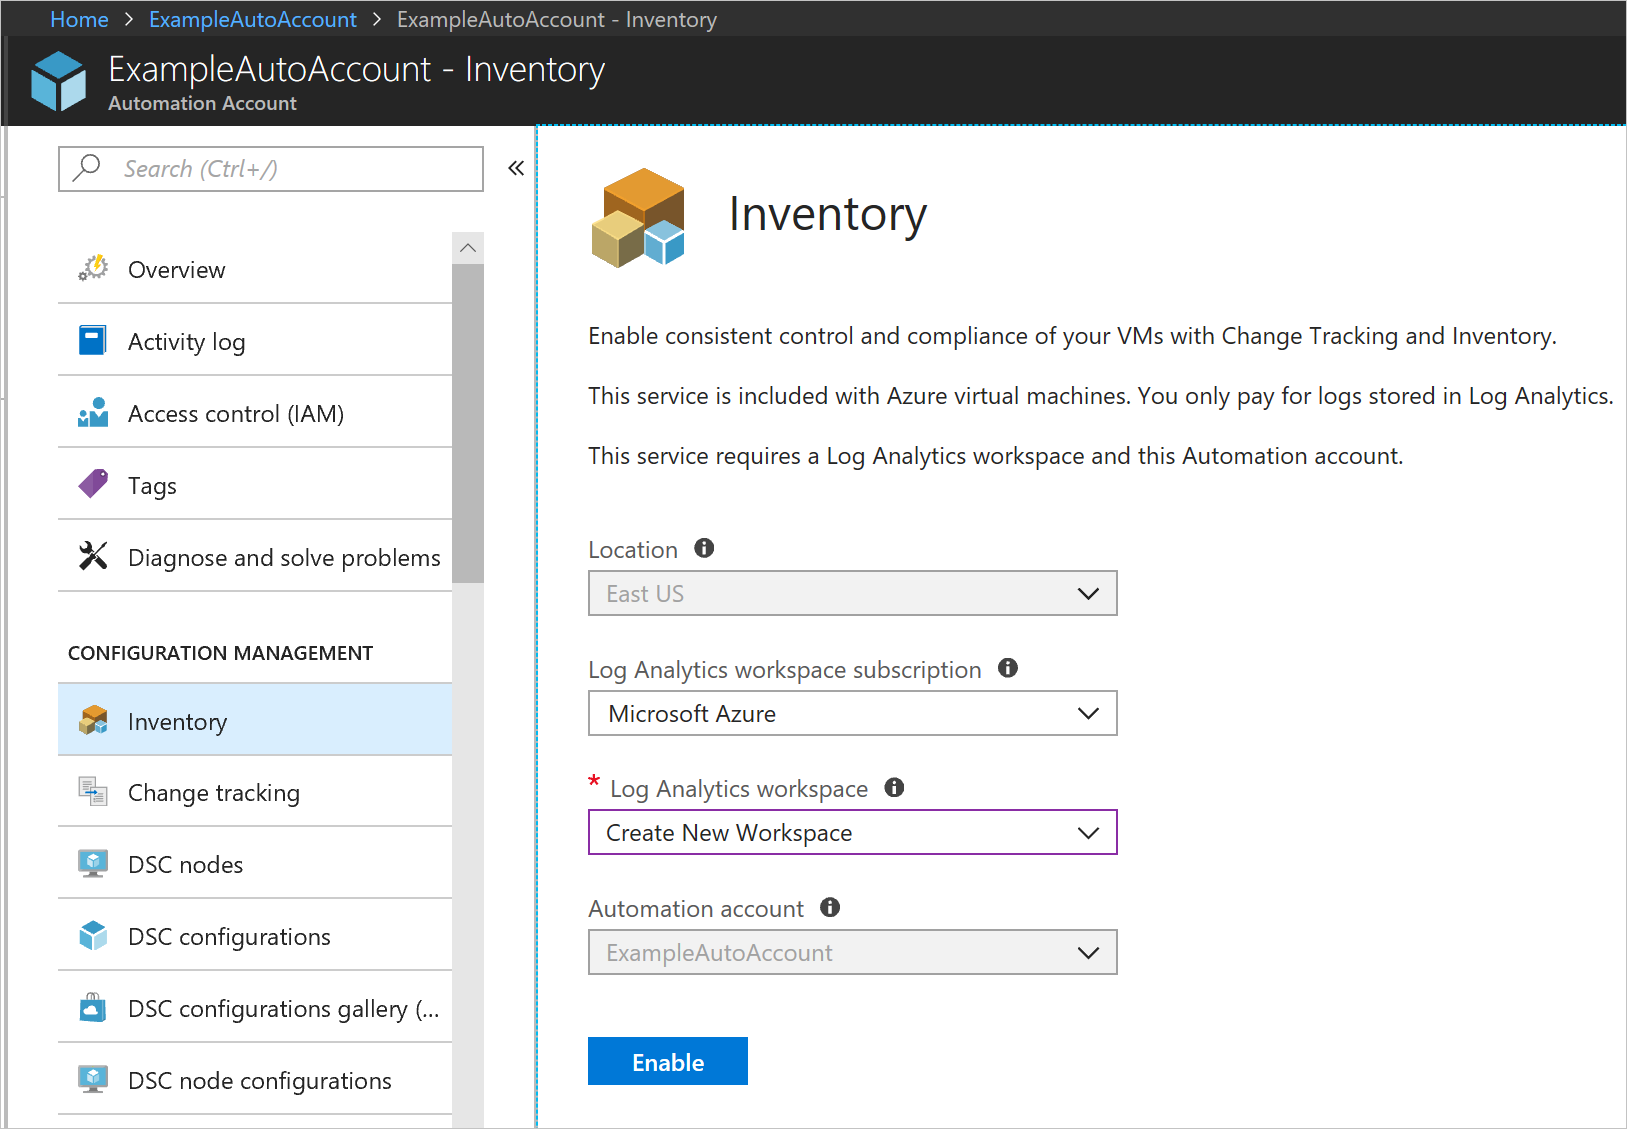
Navigate to your Automation account and select Inventory or Change tracking under Configuration Management.
Choose the Log Analytics workspace. This workspace collects data that is generated by features such as Change Tracking and Inventory. The workspace provides a single location to review and analyze data from multiple sources.
Note
This article was recently updated to use the term Azure Monitor logs instead of Log Analytics. Log data is still stored in a Log Analytics workspace and is still collected and analyzed by the same Log Analytics service. We are updating the terminology to better reflect the role of logs in Azure Monitor. See Azure Monitor terminology changes for details.
Select the Automation account to use.
Configure the location for the deployment.
Click Enable to deploy the feature for your VM.

During setup, the VM is provisioned with the Log Analytics agent for Windows and a Hybrid Runbook Worker. Enabling Change Tracking and Inventory can take up to 15 minutes. During this time, you shouldn't close the browser window.
After the feature is enabled, information about installed software and changes on the VM flows to Azure Monitor logs. It can take between 30 minutes and 6 hours for the data to be available for analysis.
Add an Azure VM to Change Tracking and Inventory
In your Automation account, navigate to Inventory or Change tracking under Configuration Management.
Select + Add Azure VM.
Select your VM from the list of VMs.
Click Enable to enable Change Tracking and Inventory on the VM. The Log Analytics agent for Windows is deployed to the VM and configures the VM to talk to the Log Analytics workspace. The setup operation can take a few minutes.
At this point, if desired, you can select a new VM from the list to enable for the feature.
Add a non-Azure machine to Change Tracking and Inventory
To enable non-Azure machines for the feature:
Install the Log Analytics agent for Windows or Log Analytics agent for Linux, depending on your operating system.
Navigate to your Automation account and go to Inventory or Change tracking under Configuration Management.
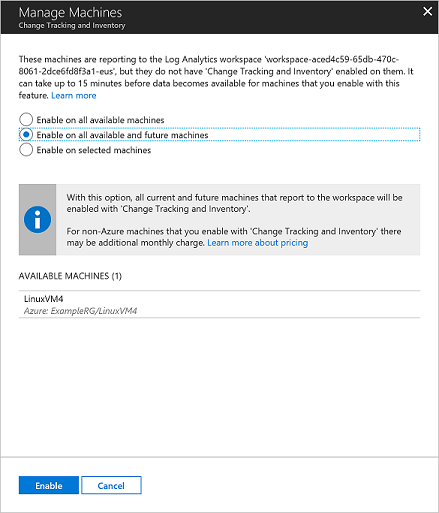
Click Manage Machines. You're presented with a list of the machines reporting to your Log Analytics workspace that do not have the Change Tracking and Inventory enabled. Select the appropriate option for your environment:
- Enable on all available machines - This option enables the feature on all the machines reporting to your Log Analytics workspace at this time.
- Enable on all available machines and future machines - This option enables the feature on all machines reporting to your Log Analytics workspace and subsequently on all future machines added to the workspace.
- Enable on selected machines - This option enables the feature only on the machines that you have selected.

View installed software
Once the Change Tracking and Inventory feature is enabled, you can view the results on the Inventory page.
In your Automation account, select Inventory under Configuration Management.
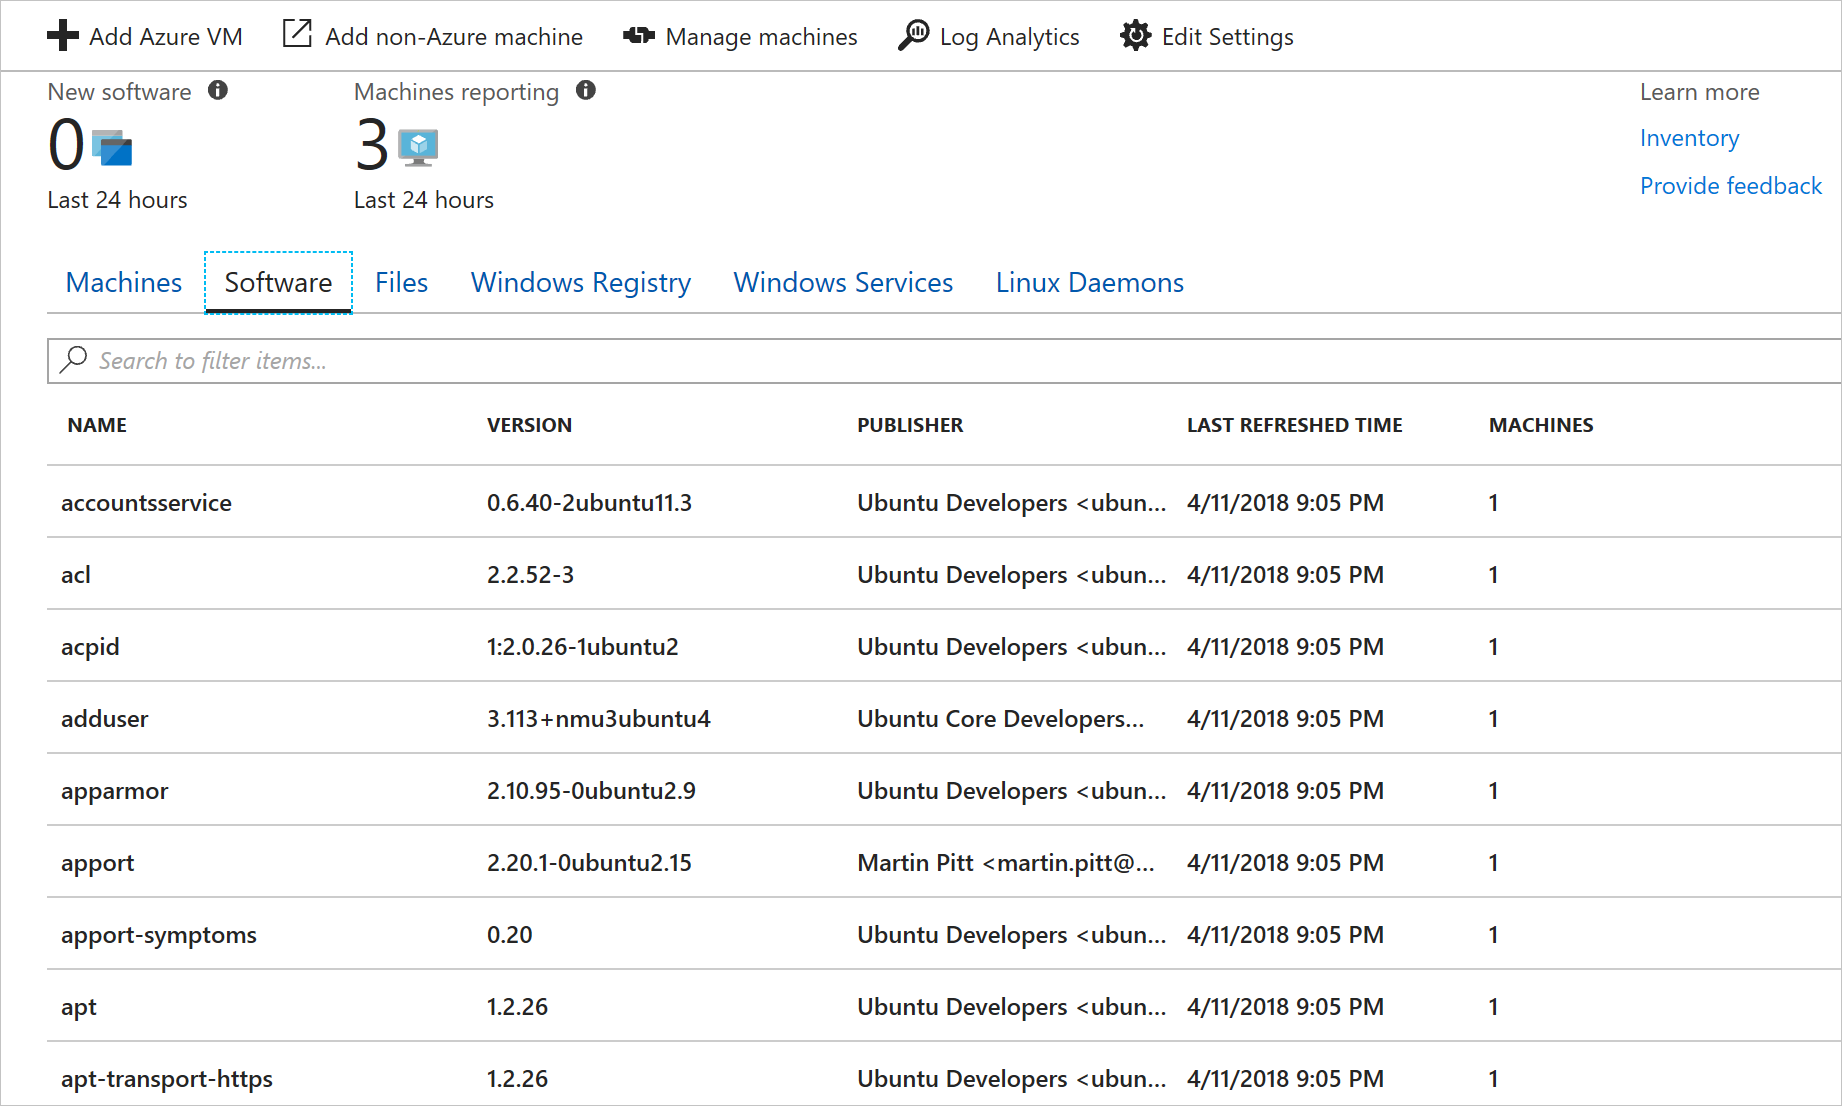
On the Inventory page, click on the Software tab.
Note a table that lists the software that has been found. The software is grouped by software name and version. The high-level details for each software record are viewable in the table. These details include the software name, version, publisher, last refreshed time (the most recent refresh time reported by a machine in the group), and machines (the count of machines with that software).

Click on a row to view the properties of the software record and the names of the machines with that software.
To look for a specific software or group of software, you can search in the text box directly above the software list. The filter allows you to search based off the software name, version, or publisher. For instance, searching for Contoso returns all software with a name, publisher, or version containing Contoso.
Search inventory logs for installed software
Change Tracking and Inventory generates log data that is sent to Azure Monitor logs. To search the logs by running queries, select Log Analytics at the top of the Inventory page. Inventory data is stored under the type ConfigurationData.
The following example Log Analytics query returns the inventory results for the publisher Microsoft Corporation.
ConfigurationData
| where ConfigDataType == "Software"
| where Publisher == "Microsoft Corporation"
| summarize arg_max(TimeGenerated, *) by SoftwareName, Computer
To learn more about running and searching log files in Azure Monitor logs, see Azure Monitor logs.
See the software inventory for a single machine
To see the software inventory for a single machine, you can access Inventory from the Azure VM resource page or use Azure Monitor logs to filter down to the corresponding machine. The following example Log Analytics query returns the list of software for a machine named ContosoVM.
ConfigurationData
| where ConfigDataType == "Software"
| summarize arg_max(TimeGenerated, *) by SoftwareName, CurrentVersion
| where Computer =="ContosoVM"
| render table
| summarize by Publisher, SoftwareName
Next steps
In this tutorial you learned how view software inventory:
- Enable Change Tracking and Inventory
- Enable an Azure VM
- Enable a non-Azure VM
- View installed software
- Search inventory logs for installed software
Continue to the overview for the Change Tracking and Inventory feature to learn more about it.