Clone and use a GitHub repository in Visual Studio Code
Article 05/07/2024
3 contributors
Feedback
In this article
Learn the steps to clone a public repository from GitHub to your local computer using Visual Studio Code.
Clone repository
The act of cloning a GitHub repository means to bring the cloud-based source code into a local development environment.
This action isn't available from this feature. Select a different tab.
This action isn't available from this feature. Select a different tab.
Open the command palette with the key combination of Ctrl + Shift + P .
At the command palette prompt, enter gitcl, select the Git: Clone command, then select Clone from GitHub and press Enter .
When prompted for the Repository URL , select clone from GitHub, then press Enter .
If you're asked to sign into GitHub, complete the sign-in process.
Enter azure-samples/js-e2e-express-server in the Repository URL field.
Select (or create) the local directory into which you want to clone the project then select Select as Repository Destination .
When you receive the notification asking if you want to open the cloned repository, select Open .
Open an integrated terminal from Terminal -> New Terminal .
Clone your repo with the following git command:
git clone https://github.com/YOUR-NAME-OR-ORGANIZATION/YOUR-REPO-NAME
Change your terminal into that new subdirectory:
cd YOUR-REPO-NAME
Then open in Visual Studio Code:
code .
Visual Studio Code uses Git authentication provided by the operating system (such as macOS KeyChain or Windows Credential manager) with any git functionality. Output is visible in Command Palette > Git: Show Git Output.
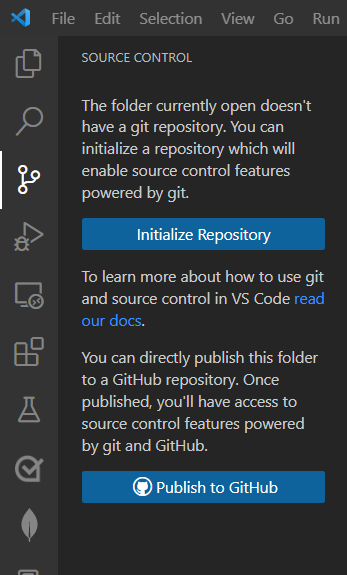
Initialize new repository
If you don't have a GitHub repository yet, but would like to start your project locally, initialize your folder with git.
Select source control from the activity bar, or use the key combination of Ctrl + Shift + G .
Select Initialize repository .
This action isn't available from this feature. Select a different tab.
Open the command palette with the key combination of Ctrl + Shift + P .
Filter with Git, then select Initialize repository.
Select the folder to select as the root of the repository.
Open an integrated terminal from Terminal -> New Terminal .
Initialize your folder with git with the following git command:
git init
Create a branch for changes
Create a new branch to capture changes and isolate from the main or default branch.
Select source control from the activity bar.
Select ellipsis (...) next to Source Control .
Select Branch -> Create Branch .
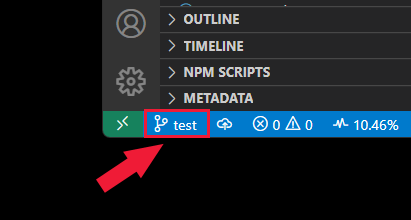
Select the branch name in the status bar. This opens the command palette.
The status bar is found at the bottom of Visual Studio Code.
In the command palette, select +Create a new branch .
Enter your new branch name.
Enter a new branch name. The branch name is visible in the status bar.
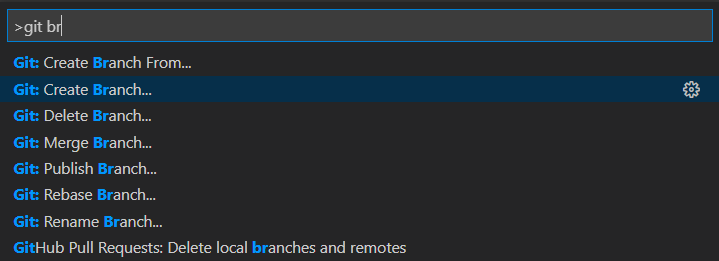
Open the command palette with the key combination of Ctrl + Shift + P .
Search for git branch and select Git: Create Branch.
Enter a new branch name, such as test.
The branch name is visible in the status bar.
Open an integrated terminal from Terminal -> New Terminal .
Create a new branch named MY-BRANCH with the following git command:
git checkout -b MY-BRANCH
Commit changes locally
Once you have made changes on your branch, commit the changes.
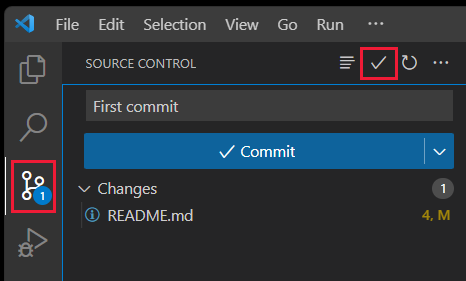
Select source control from the activity bar.
Enter your commit message, then select Commit .
This action isn't available from this feature. Select a different tab.
Open the command palette with the key combination of Ctrl + Shift + P .
In the command palette, filter with Git then select Commit.
Enter your commit message, then press Enter .
Open an integrated terminal from Terminal -> New Terminal .
Create a new branch named MY-BRANCH with the following git command:
git commit -m "YOUR COMMIT MESSAGE"
Push a local branch to GitHub
Select the Source Control icon from the activity bar.
Select Publish Branch . If the repository doesn't exist on GitHub, it creates the repository for you.
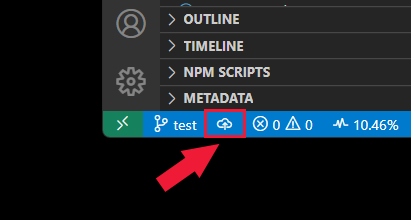
On the Visual Studio Code status bar, select the push icon to the right of the branch name.
Select the remote name from the pop-up box. If you have just one remote, you won't be asked to select the remote name.
Open the command palette with the key combination of Ctrl + Shift + P .
In the command palette, filter with Git then select Push.
If you have multiple upstream remotes, select the remote then press Enter .
Open an integrated terminal from Terminal -> New Terminal .
Create a new branch named MY-BRANCH with the following git command:
git push <remote-name> <branch-name>
View Git output
You can view the Git commands run when you use the Source control extension. This helps debug when a command fails.
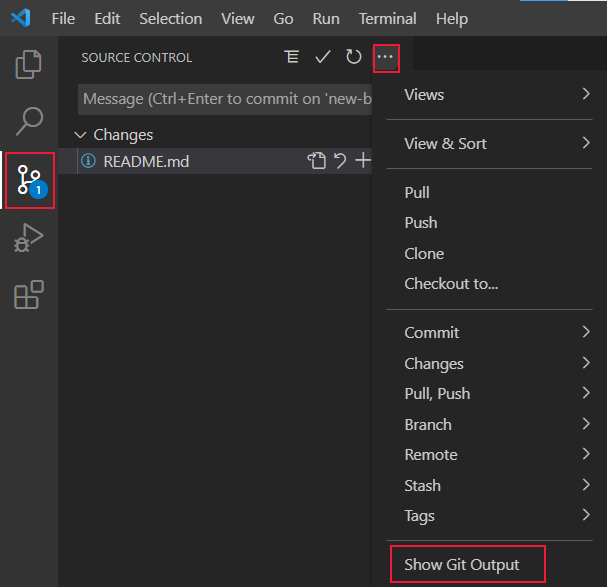
Select the Source Control icon from the activity bar.
Select the ellipsis (...) then select Show Git Output .
Working in Visual Studio Code with a repository uses separate tools.
Icon
Information
Access from
Git commands in command paletteF1
Source control extension
Activity bar
GitHub Pull Requests and Issues extensionActivity bar
GitHub Repositories extensionYou can quickly and easily open a GitHub repository either by searching for GitHub Repositories: Open Repository... from the Command Palette, F1 , or by choosing Open GitHub Repository... from the remote indicator (the green button in the lower left corner of the status bar).