Publish from the command line
Azure DevOps Services | Azure DevOps Server 2022 - Azure DevOps Server 2019
You can use the Cross-platform CLI for Azure DevOps (tfx-cli) to publish your extension to the Visual Studio Marketplace.
For more information, see the overview of publish, install, and share.
Prerequisites
Get the TFX CLI from Node Package Manager and generate a Microsoft Entra token or a personal access token (PAT). Also, if you haven't already, set up a Publisher in the Gallery.
Acquire the Cross-platform CLI for Azure DevOps
If you don't have it, download and install NodeJS. During set up, ensure that you leave Add to PATH chosen.
Open a Command Prompt and enter
npm i -g tfx-cli.
If you already have the TFX CLI installed, you can update to the latest release by running npm up -g tfx-cli.
Publish with a Microsoft Entra token as a service principal
It is also possible to publish an extension as a service principal.
Add the service principal as a member to a publisher account. You can get the service principal's ID from its profile using Profiles - Get. Then, you can add the service principal as a member to the publisher using the ID from the previous step.
Publish an extension via TFX CLI using a service principal. Execute the following TFX CLI command to use its access token:
tfx extension publish --publisher my-publisher --vsix my-publisher.my-extension-1.0.0.vsix --auth-type pat -t <ENTRA_TOKEN>
Publish with a personal access token
Sign in to your organization (
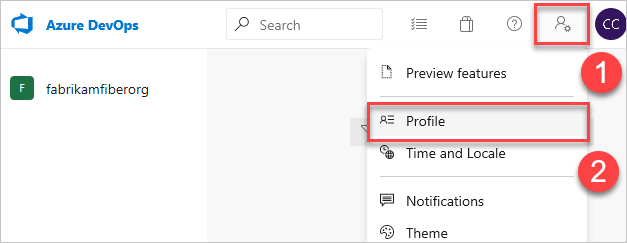
https:dev.azure.com/{organization}).From your home page, open the user settings icon, and then select Profile.

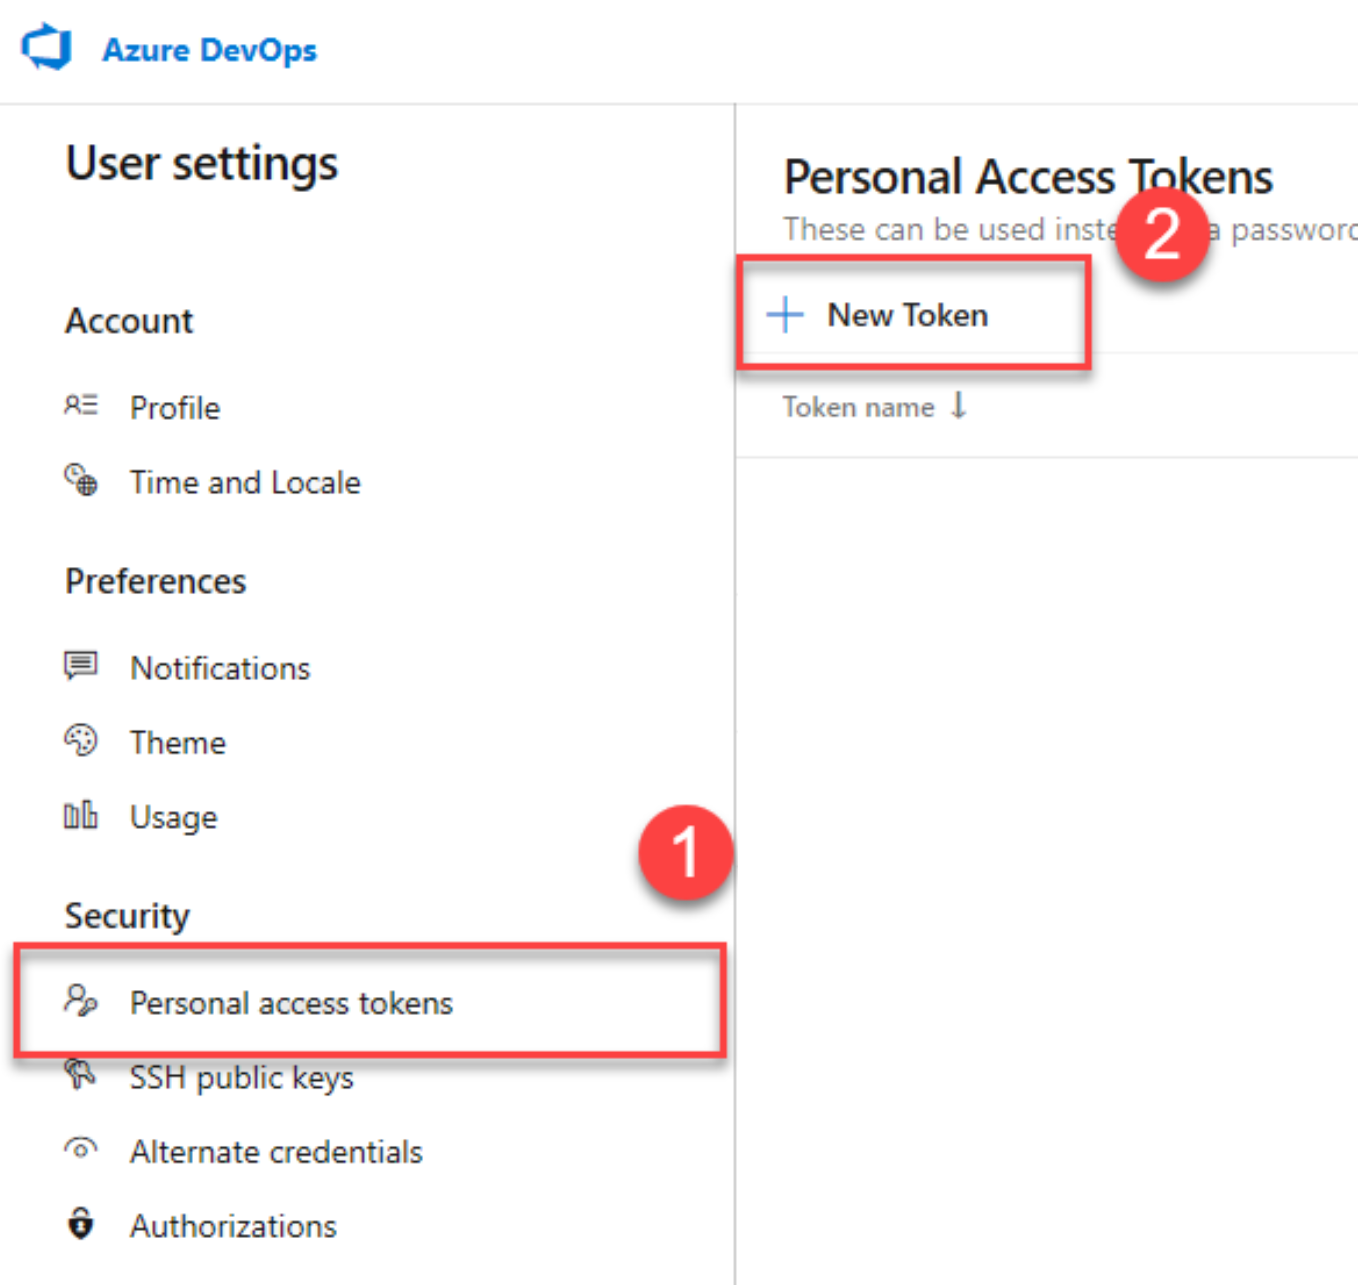
Under Security, select Personal access tokens, and then select New Token.

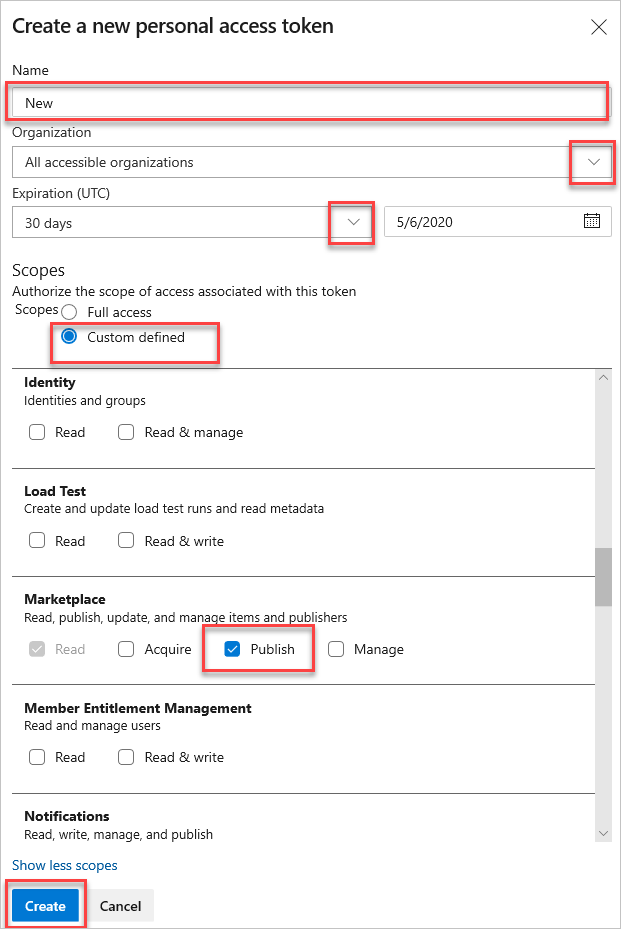
Complete the form:
- Name your token
- Select All accessible organizations, which is the only value that works when publishing via CLI. If you select only one organization, it results in an error, even if the PAT is valid
- Select an expiration time frame for your token. This is required because the Visual Studio Marketplace publishing APIs work outside of the context of an organization
- Set the scope of access associated with this token. Be sure to select the Marketplace (publish) scope. This scope limits the token to only being able to publish extensions to the Marketplace.
- Select Create

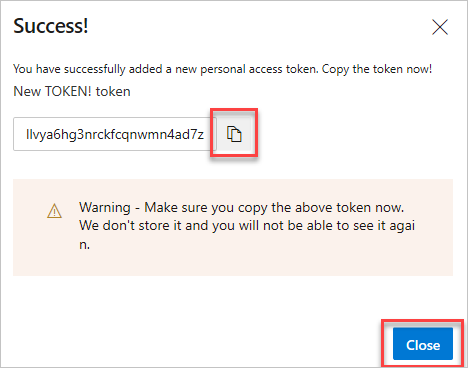
Copy your generated personal access token. Make sure to keep it secret.

Once TFX CLI is installed and you have your token, you can use the tool to package and publish your extension.
- Open a command prompt to the root directory of your extension.
- Run the following command to publish your extension. When prompted, enter your token to authenticate.
tfx extension publish --publisher <YOUR_PUBLISHER_ID> --manifest-js <YOUR_EXTENSION_MANIFEST> --share-with <ACCOUNT_NAME>
Potential Errors
You may receive the following error if your extension has already been published:
Failed Request: Internal Server Error(500) - Version number must increase each time an extension is published. Extension: fabrikam.my-extension Current version: 0.1.9 Updated version: 0.1.9
You can add the --rev-version flag to automatically increment the patch version of your extension. This also saves the new version to your manifest.
Note
All options available for create are available for the publish command.
Example
C:\vso-team-calendar>tfx extension publish --publisher publishFabrikam --manifest-js fabrikam.config.js --share-with fabrikam --rev-version
Copyright Microsoft Corporation
> Personal access token:
Checking if this extension is already published
It is, update the extension
Waiting for server to validate extension package...
Sharing extension with fabrikam.

=== Completed operation: publish extension ===
 - Packaging: C:\vso-team-calendar\fabrikam.team-calendar-0.2.6.vsix
 - Publishing: success
 - Sharing: shared with fabrikam