Set up networking in Azure Modeling and Simulation Workbench
In Azure Modeling and Simulation Workbench, you can customize networking to meet your security and business requirements. You can connect to the workbench by using one of these methods:
- Allowlisted public IP addresses
- A virtual private network (VPN) and/or Azure ExpressRoute
Each chamber has a dedicated connector. Each connector can support either of the previously mentioned protocols to establish network access between a customer's on-premises or cloud environment and the workbench.
Add a VPN or ExpressRoute connection
If your organization has a presence in Azure or requires that connections to the Workbench be over a VPN, the VPN or ExpressRoute connector should be used.
When a connector is created, the Workbench Owner (Subscription Owner) can link an existing virtual network with a VPN gateway and/or ExpressRoute gateway. This link provides a secure connection between your on-premises network and the chamber.
Create a VPN or ExpressRoute connector
Before you create a Connector for private IP networking via VPN or ExpressRoute, the Workbench needs a role assignment. Azure Modeling and Simulation Workbench requires the Network Contributor role set for the resource group in which you're hosting your virtual network connected with ExpressRoute or VPN.
Setting Value Role Network Contributor Assign access to User, group, or service principal Members Azure Modeling and Simulation Workbench Important
Some users may have the Azure Modeling and Simulation Workbench registered with its previous name in their tenant. If you can't find Azure Modeling and Simulation Workbench as an application, try Azure HPC Workbench instead.
When you create your connector, specify VPN or ExpressRoute as your method to connect to your on-premises network.
A list of available virtual network subnets within your subscription appears. Select a subnet other than the gateway subnet within the same virtual network for the VPN gateway or ExpressRoute gateway.
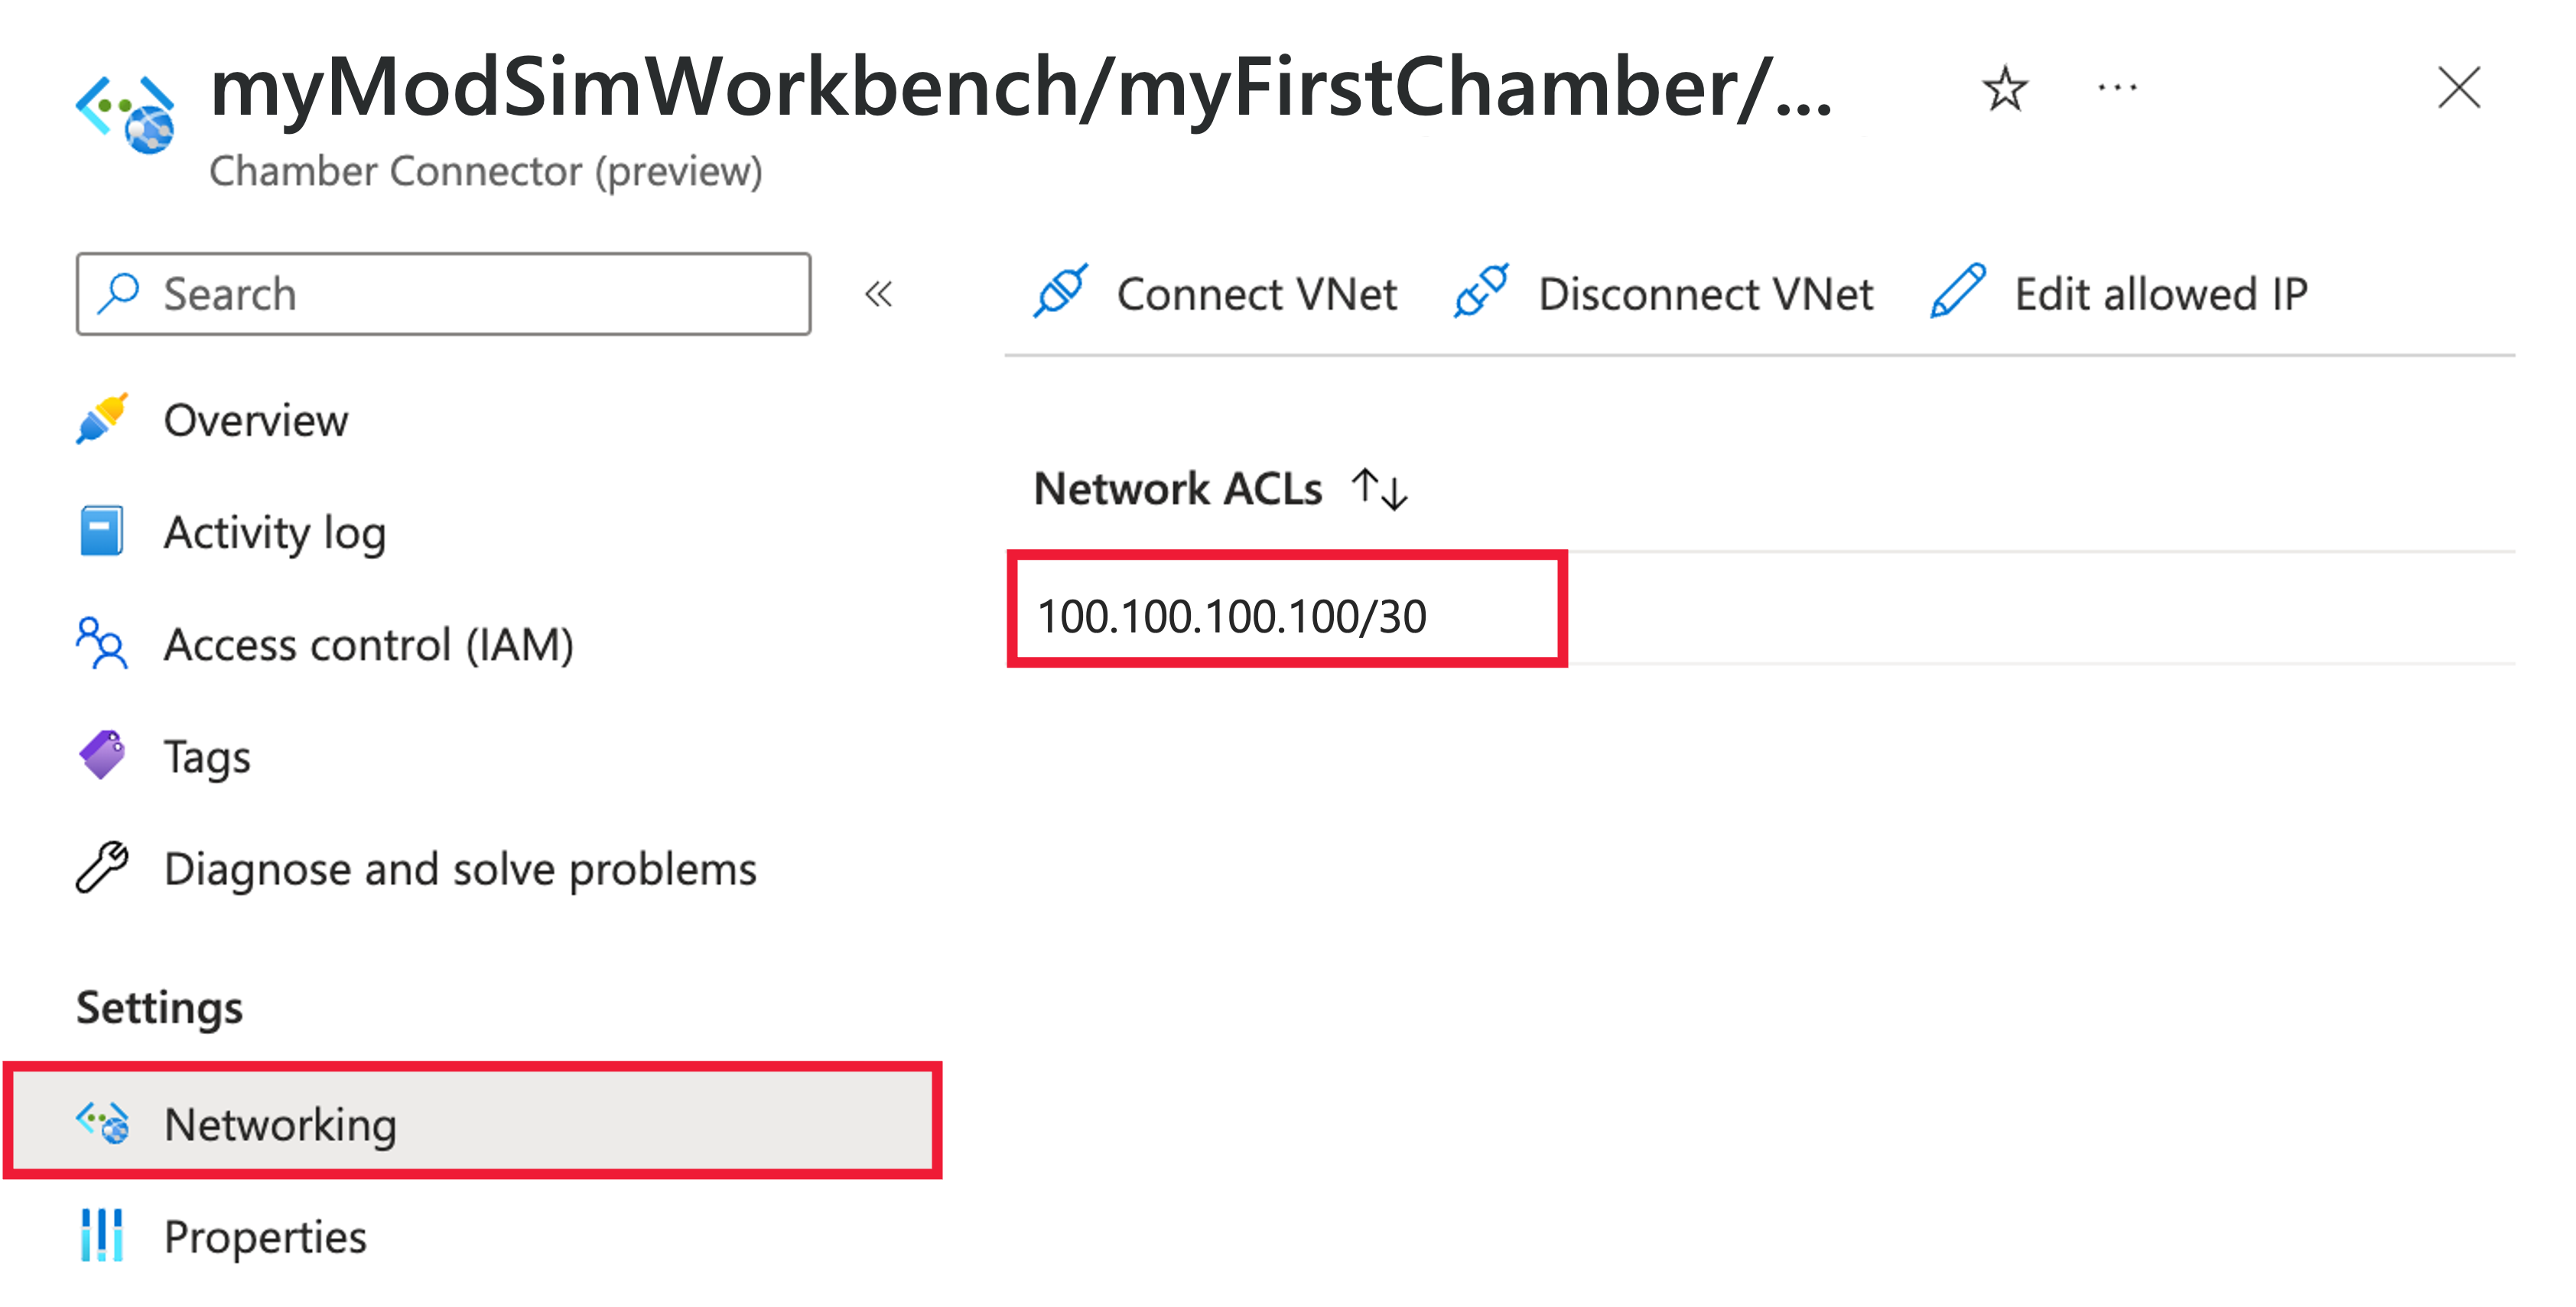
Edit allowed public IP addresses
IP addresses can be allowlisted in the Azure portal to allow connections to a chamber. Only one IP address can be specified for a Public IP connector when creating a new Workbench. After the connector is created, you can specify other IP addresses. Standard CIDR (Classless Inter-Domain Routing) mask notation can be used to allow ranges of IP addresses across a subnet.
Workbench Owners and Chamber Admins can add to and edit the allowlisted public addresses for a connector after the connector object is created.
To edit the list of allowed IP addresses:
In the Azure portal, go to the Networking pane for the connector object.
Select Edit allowed IP. From here, you can delete existing IP addresses or add new ones.
Select Submit to save your changes.
Refresh the view for connector networking and confirm that your changes appear.
Redirect URIs
A redirect URI is the location where the Microsoft identity platform redirects a user's client and sends security tokens after authentication. Each time you create a new connector, you need to register the redirect URIs for your application registration in Microsoft Entra ID.
To find redirect URIs:
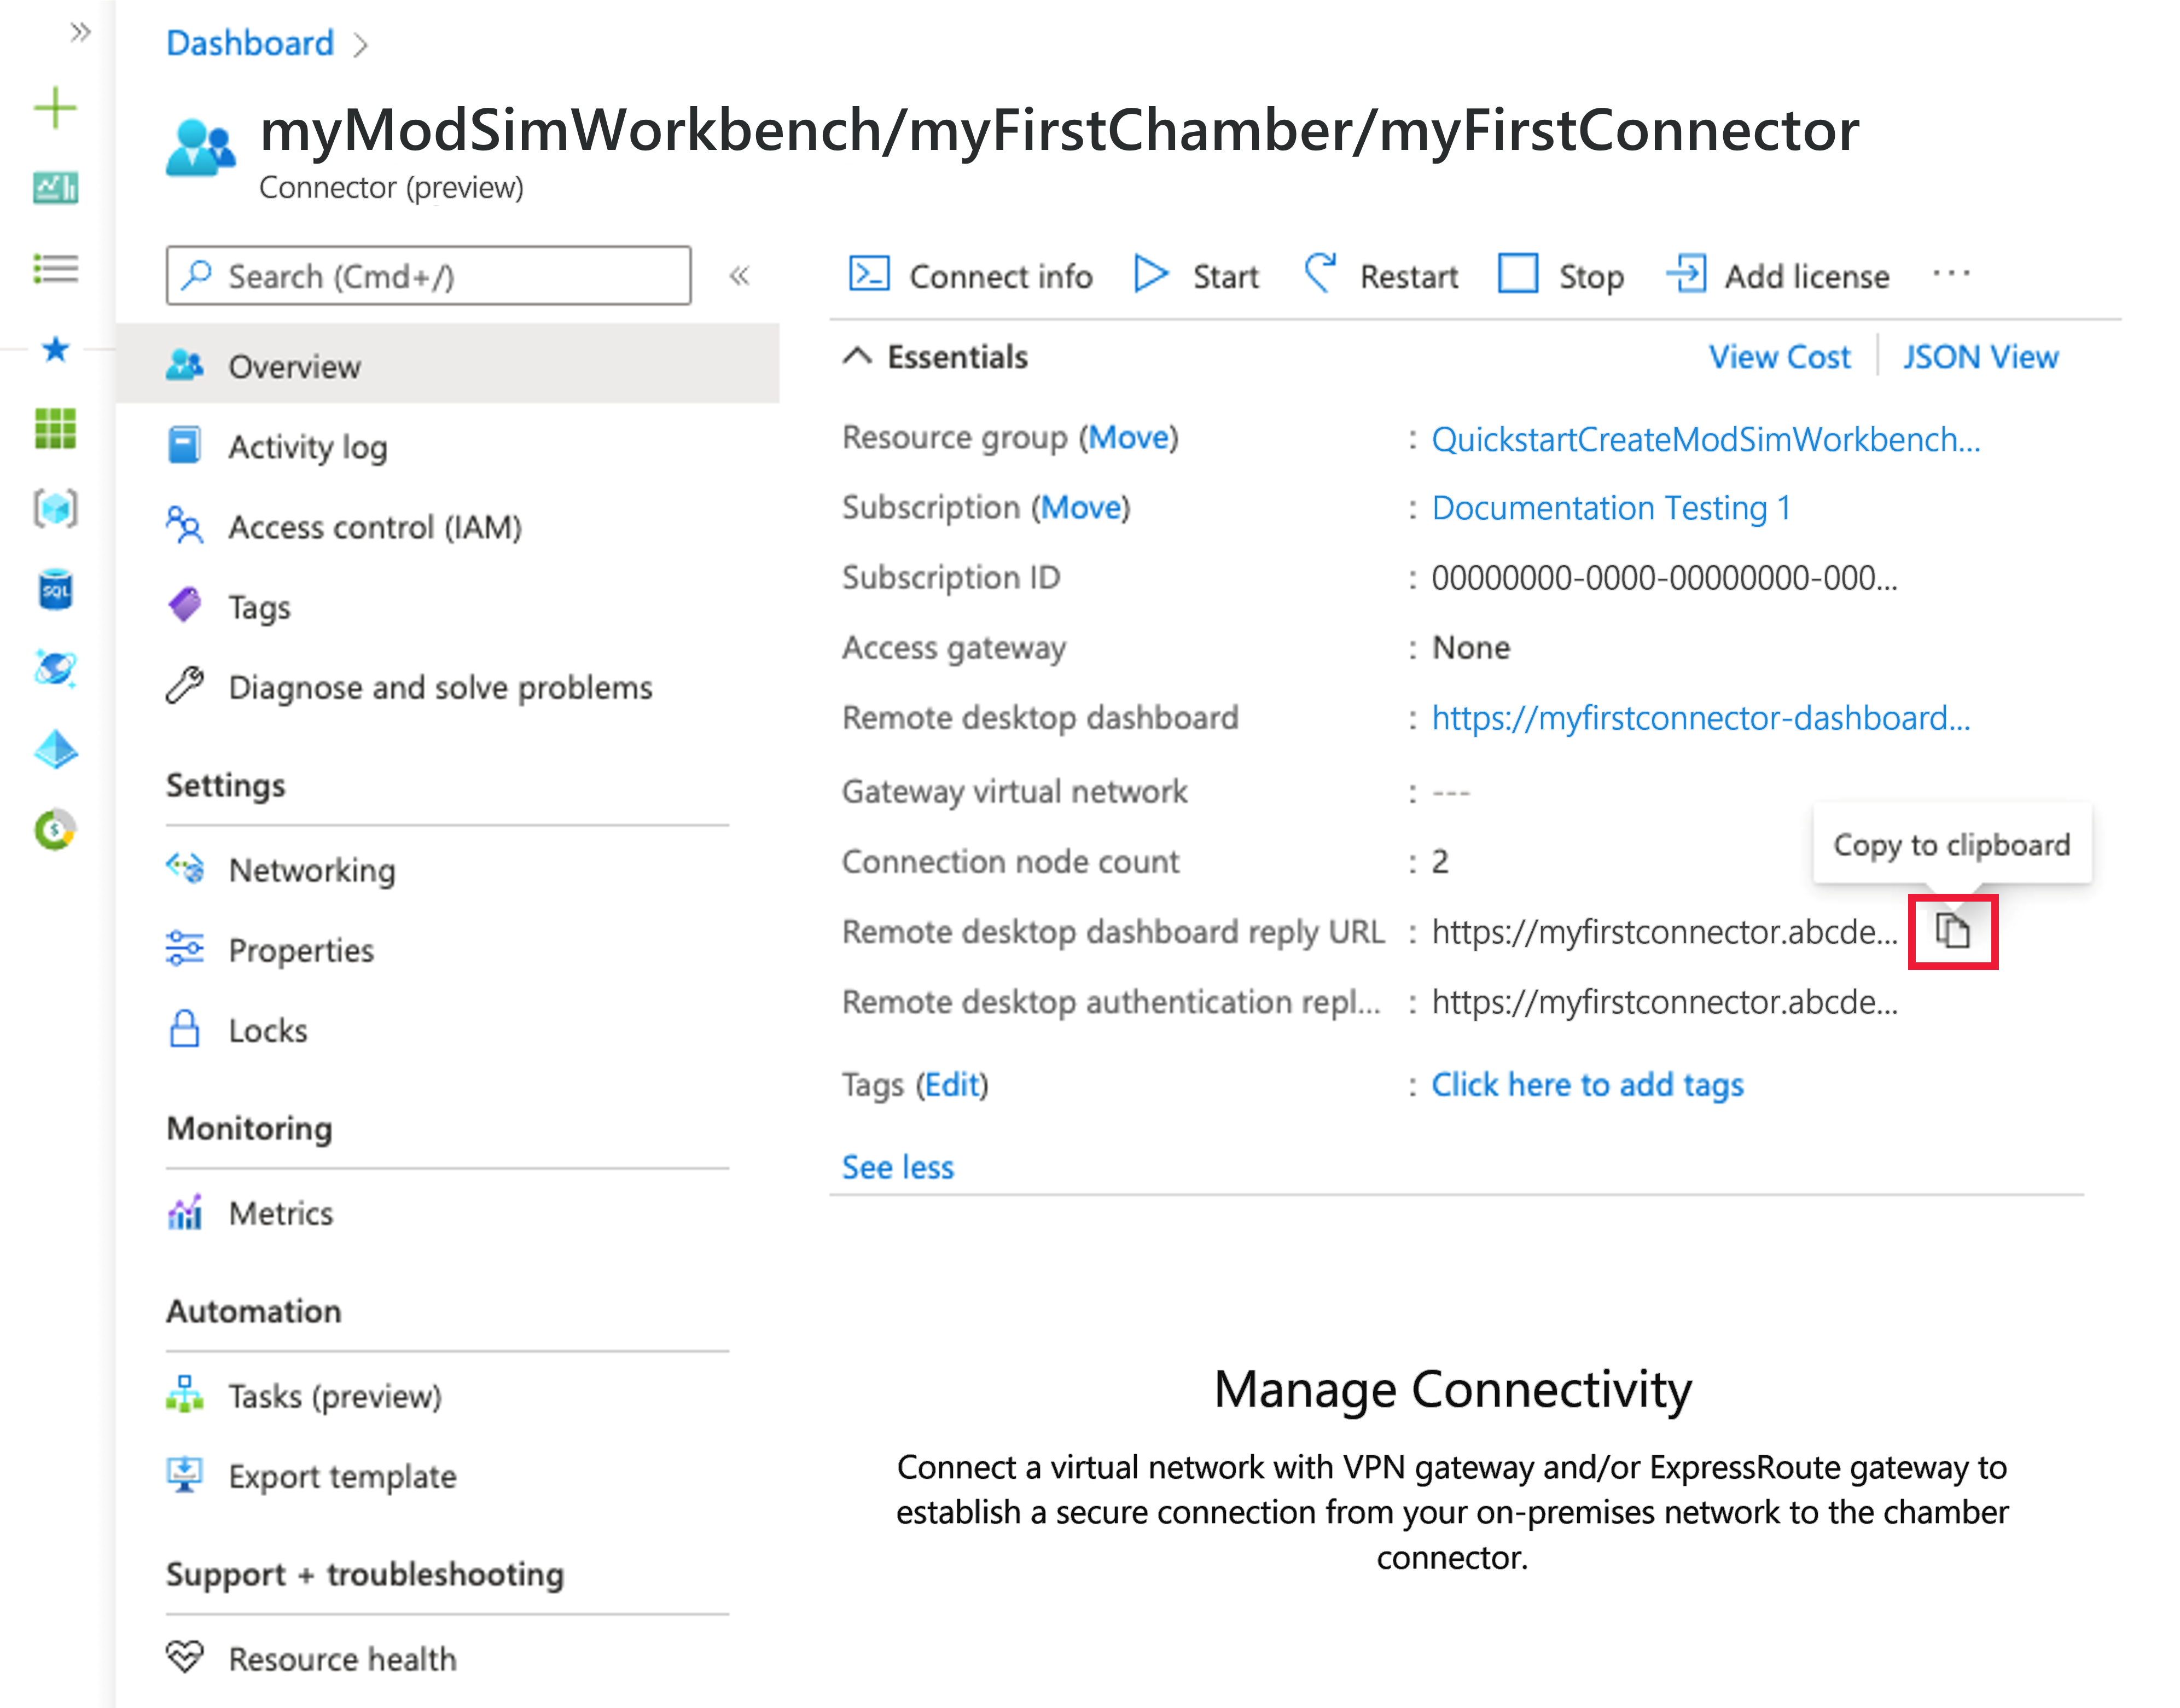
On the page for your new workbench in Azure Modeling and Simulation Workbench, select Connector on the left menu. Then select the connector in the resource list.
On the Overview page, locate and document the following two connector properties by using the Copy to clipboard icon. If these properties aren't visible, select the See More button to expand the window.
- Dashboard reply URL: For example, https://<dashboardFqdn>/etx/oauth2/code
- Authentication reply URL: For example, https://<authenticationFqdn>/otdsws/login?authhandler=AzureOIDC
The redirect URIs must be registered with the Application registration to properly authenticate and redirect users to the workbench. To learn how to add redirect URIs, see How to add redirect URIs.
Ports and IP addresses
Ports
The Azure Modeling and Simulation Workbench require certain ports to be accessible from users workstation. Firewalls and VPNs might block access on these ports to certain destinations, when accessed from certain applications, or when connected to different networks. Check with your system administrator to ensure your client can access the service from all your work locations.
- 53/TCP and 53/UDP: DNS queries.
- 443/TCP: Standard https port for accessing the VM dashboard and any Azure portal page.
- 5510/TCP: Used by the ETX client to provide VDI access for both the native and web-based client.
- 8443/TCP: Used by the ETX client to negotiate and authenticate to ETX management nodes.
IP addresses
For the Public IP connector, Azure IP addresses are taken from Azure's IP ranges for the location in which the Workbench was deployed. A list of all Azure IP addresses and Service tags is available at Azure IP Ranges and Service Tags – Public Cloud. It's not possible to list all Workbench IP addresses when the public IP connector is implemented.
Caution
The pool of IP addresses can increase not only by adding VMs, but users as well. Connection nodes are scaled when more users are added to the chamber. Discovery of endpoint IP addresses may be incomplete once the userbase increases.
For more control over destination IP addresses and to minimize changes to corporate firewalls, a VPN and ExpressRoute connector is suggested. When using a VPN Gateway, the access point of the workbench is limited only to the gateway IP address.