Step 2: Create the token & install the agent
A personal access token (PAT) is created in Visual Studio Team Services. This token is your password, and is used by the VSTS build agent to authenticate. The token is only shown when you create it. After that, it isn't shown anymore. So once you create it, save it to another file in a remember-able location.
More info on PAT at Authenticate access with personal access tokens for VSTS and TFS.
After you create the token, you install the build agent, and configure it to use this token.
Before you begin
Complete Step 1 - Add Application project and update json.
Sign into Azure DevOps, and create the token
Go to https://app.vsaex.visualstudio.com/go/profile, and sign-in with your work or school account. After you sign in, your VSTS account is listed. In the following example, the account is
dev.azure.com/v-vabi: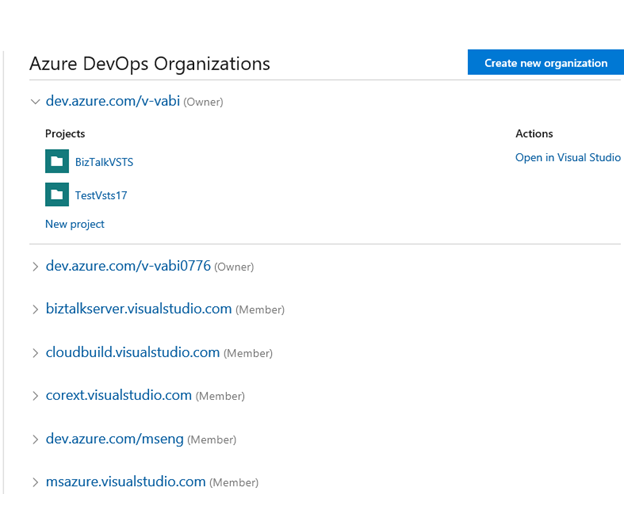
If you don’t have an account, select Create new account, and enter a name. To manage your code, choose your personal preference between Git or Team Foundation Version Control. When finished, your new account is created, and a site similar to
https://dev.azure.com/v-vabi/BizTalkVSTSopens: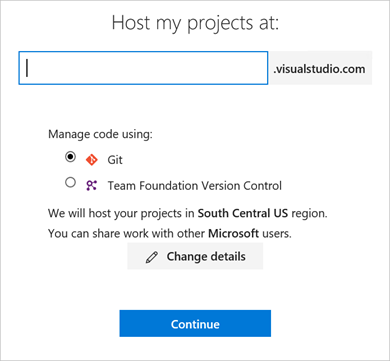
Open your DevOps account (
https://dev.azure.com/v-vabi/). Select your icon in the top second right-side corner, and select User settings > Personal access tokens: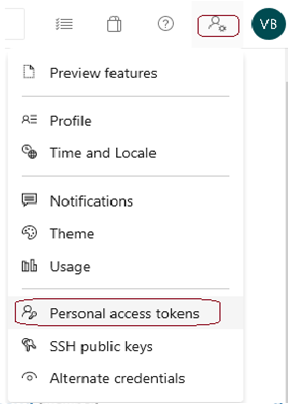
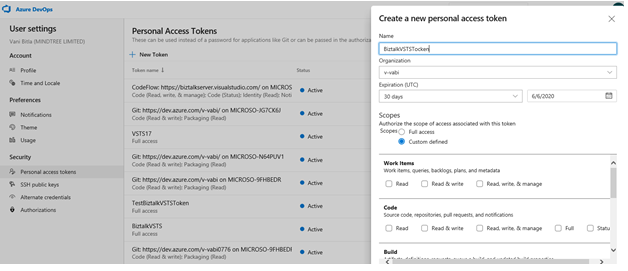
All the personal access tokens are shown.
Important
You must know the access token. If you don’t, and didn’t note it anywhere, it cannot be retrieved. In this situation, create a new agent.
If you don’t have an existing agent, select Add, enter a description, set the expiration date, and select your account. In Selected scopes, select Agent Pools (read, manage):
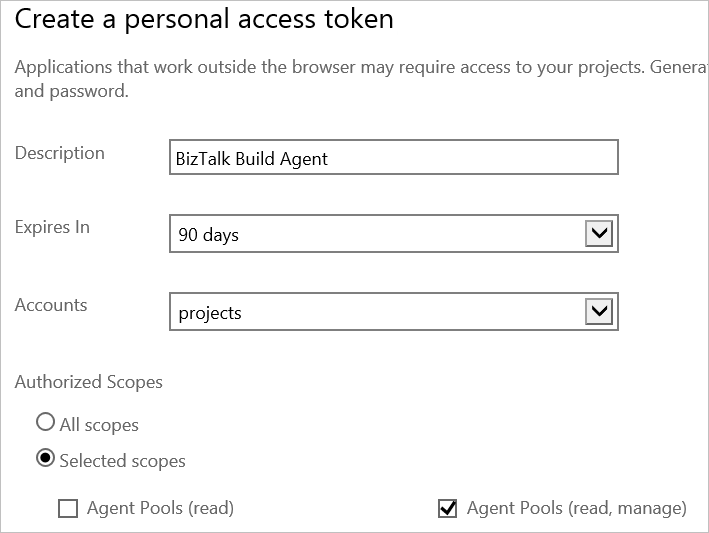
Select Create Token. Note the token value; you need in future steps.
Select Repos > Clone in Visual Studio:
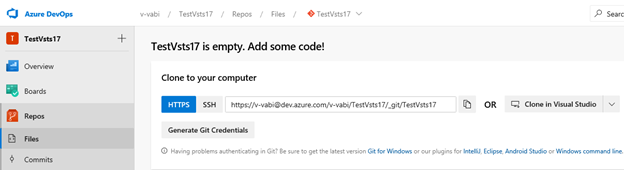

Visual Studio opens. Within Visual Studio, open your BizTalk solution.
Install the Build Agent
Note
The build agent is installed on the BizTalk development computer. If using deployment groups, the build agent is installed on all the BizTalk servers you want to deploy to. Also, use these same steps to add a build computer, which might be different than the BizTalk development computer.
Optionally, you can build BizTalk projects using the Azure Pipelines agent pool, instead of the Build Agent. To use the Azure Pipelines agent pool, skip this section, and go to Step 3: Create the build definition.
The following steps show you how to install the build agent on a single computer. For details on using deployment groups, see Deployment groups.
Open your Azure DevOps account and project, which is something like
https://dev.azure.com/v-vabi/BizTalkVSTS. Select the project settings icon, and select Agent Pools: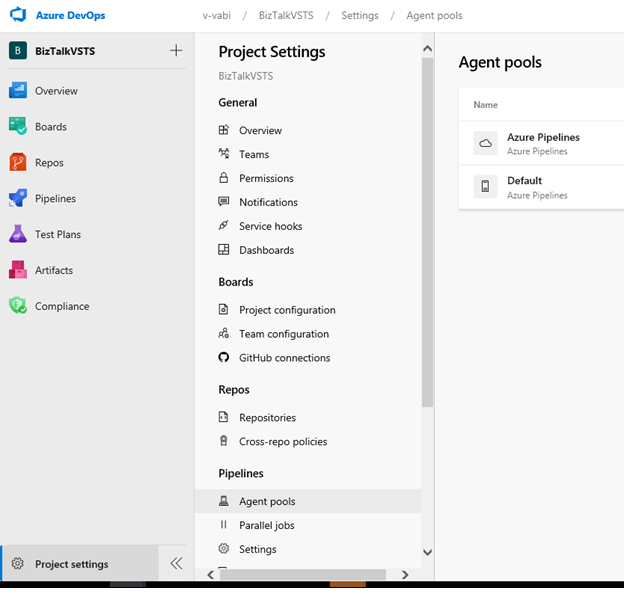
Select the Default agent > New Agent Download. Save the file to your Downloads folders.
The install steps automatically open. Follow those steps for the most up-to-date details. Here is some guidance:
Open Windows PowerShell as Administrator.
To create the agent, enter:
PS C:\> mkdir agent ; cd agent

PS C:\agent> Add-Type -AssemblyName System.IO.Compression.FileSystem ; [System.IO.Compression.ZipFile]::ExtractToDirectory("$HOME\Downloads\vsts-agent-win7-x64-2.124.0.zip", "$PWD")
The vsts-agent file version changes. So follow the VSTS install steps for specific details. After you hit enter, it may take a couple of minutes for the prompt to return.
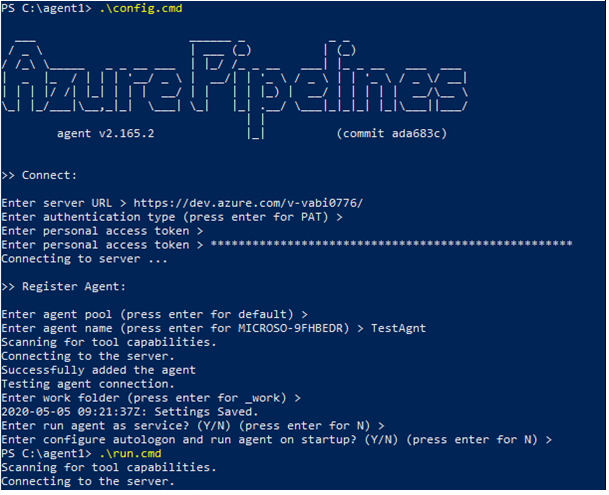
To configure the agent, enter:
PS C:\agent> .\config.cmdEnter the following details:
- Server URL: Enter
https://{your-account}.visualstudio.com. - Authentication Type: Enter
PAT. - Personal access token: Paste your Azure DevOps token.
- Agent pool: Enter for the default.
- Agent name: Enter for the default.
- Replace: Only displays if you have an existing agent.
- Work folder: Enter for the default.
- Run agent as a service: Enter
Y. - User account: This value is up to you, but you may run into a permissions issue. Consider entering your current logged-on account, which is a local admin.
- Server URL: Enter
When finished, your PowerShell window looks like the following:
Open services.msc and locate the new service Azure Pipeline Agent. It should be running.
If the service fails to start, remove and re-configure an agent using an account with more privileges.
What you did
You signed into your Azure DevOps account, and created a security token. This security token is like a password, and gives you access to your Azure DevOps project. It's only shown once, so be sure you saved it. You also cloned your Azure DevOps project into Visual Studio, and created an agent that runs as a service on your BizTalk development computer. This agent uses the security token.
Next steps
Step 3: Create the build definition
Step 4: Create the release definition
Configure environmental tokens and variables