Link alerts to another incident in the Microsoft Defender portal
While Microsoft Defender already uses advanced correlation mechanisms, you might want to decide differently whether a given alert belongs with a particular incident or not. In such a case, you can unlink an alert from one incident and link it to another. Every alert must belong to an incident, so you must link the alert either to another existing incident, or to a new incident that you create on the spot.
This article explains how to unlink alerts from one incident and link them to another.
Prerequisites
- Users must have permissions to view the incidents queue.
- Users must have read and write permissions on all the alerts they wish to move between incidents.
Access the panel to unlink alerts
There are many ways to get to this panel. You can access it from anywhere you can select or take action on alerts. For example:
In any of the following locations, select one or more alerts by marking the checkboxes at the beginning of their rows. When one or more alerts are marked, the Link alerts to another incident button appears on the toolbar.
- The Incidents queue. Expand a given incident to reveal the alerts it contains.
- The Alerts tab on the incident details page.
- The Alerts queue.
Also, on the details panel on an alert details page, the Link alerts to another incident button always appears.
Select the alert or alerts to unlink
Open one of the locations mentioned in the previous section.
Select the alert or alerts you want to move by marking the checkboxes at the beginning of their rows in the queue. When one or more alerts are marked, the Link alerts to another incident button appears on the toolbar.
Select Link alerts to another incident from the toolbar. A flyout panel opens. If you selected only one alert, the panel is labeled Link alert to another incident. If you selected two or more alerts, it's labeled Link multiple alerts to another incident. In all other respects, it's the same panel.
If the alert or alerts belong with another existing incident, select Link to an existing incident. Otherwise, select Create a new incident. Alerts must belong to an incident.
Link alert or alerts to an existing incident
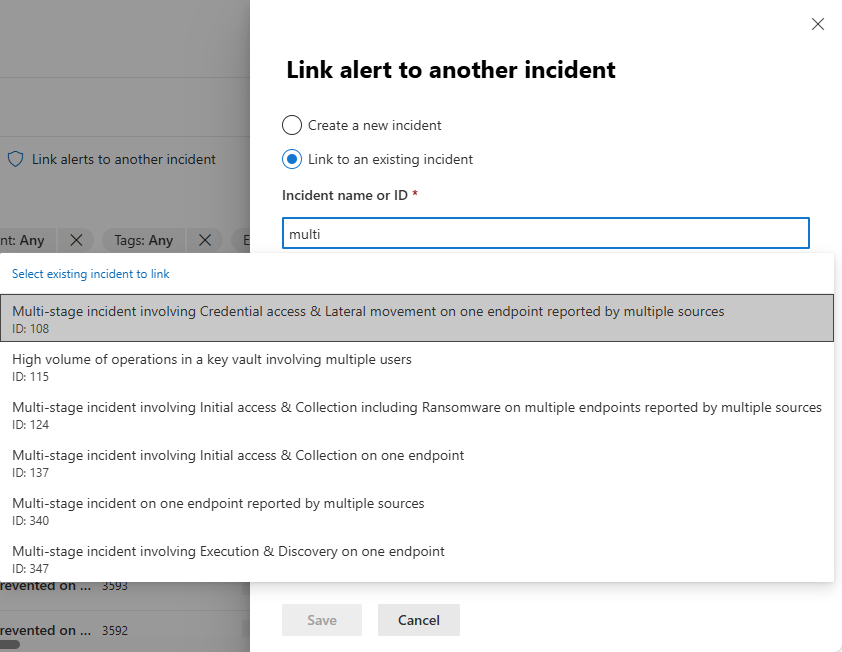
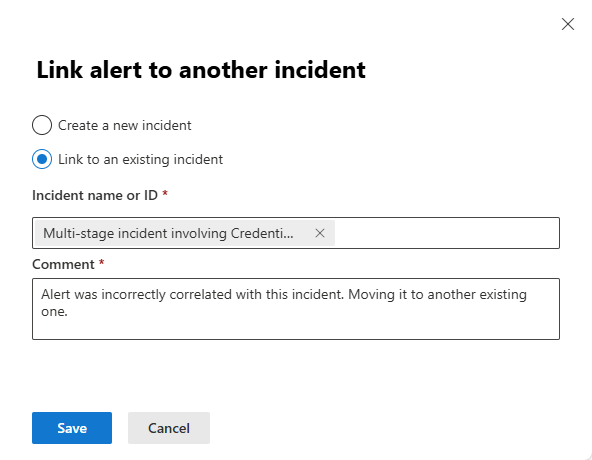
If you selected Link to an existing incident, a new text field, Incident name or ID, appears immediately following the selection. Begin typing the name or ID number of the incident you want to link the alert or alerts to. As you type, the list of available incidents is dynamically displayed and filtered by what you type. When you see the one you want in the list, select it.

In the Comment field, type a comment explaining why you want to move the alerts.

Select Save at the bottom of the panel to execute the move.
Link alert or alerts to a new incident
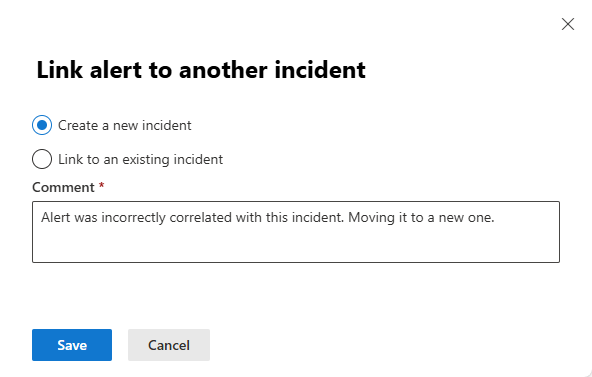
If you selected Create a new incident, all you need to do then is enter a comment explaining why you want to move the alerts.
Select Save at the bottom of the panel to execute the move.

When the process is completed, a new incident is created with the alert or alerts you moved to it. The incident is given a name automatically based on the name of the alert or alerts.
Activity log
When an alert is correlated with an incident, a message is written to the incident's activity log, attesting that the alert was correlated with it. This message is written in either of the following circumstances:
- An alert is created and automatically correlated with a new or existing incident.
- An alert is unlinked from one incident and linked to another. The message appears in the log of the destination incident.
