Integrate a custom captcha service with Customer Insights - Journeys forms
Customer Insights - Journeys forms allow you to use custom captcha bot protection to validate form submissions. This article gives an example of how to integrate Google reCAPTCHA. The flow is similar for other captcha services. The steps in this article apply to marketing and event registration form types.
Note
In the current app version, only one captcha implementation can be active. If you use your own captcha provider (as outlined in the next sections), existing forms that use the out-of-the-box captcha will stop working. A custom captcha implementation requires at least basic knowledge of writing and debugging dataverse plugins.
The process consists of these steps:
- Add reCAPTCHA to the form.
- Add the captcha text value to the form submission once the form is submitted.
- Activate reCAPTCHA plugin and safely store the private key.
Step-by-step example: Integrate Google reCAPTCHA
1. Add reCAPTCHA to the form
Create a form in the Customer Insights - Journeys form editor.
Add a
data-validate-submission="true"attribute to the<form>element, which enables custom validation on the form submission:
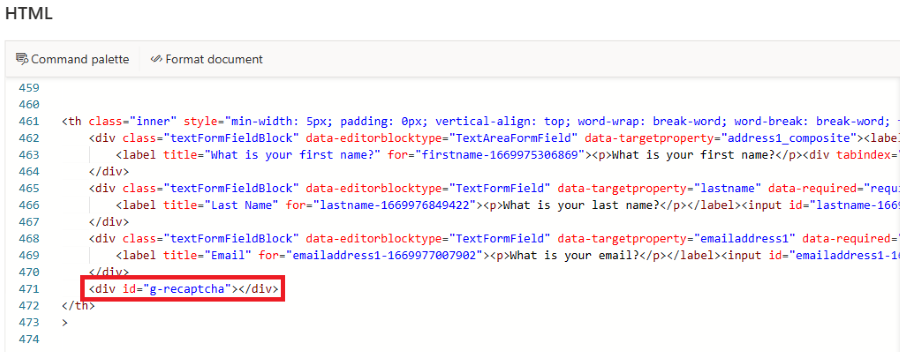
Add a
<div id="g-recaptcha">in the form as placeholder for reCAPTCHA. This div ID is used as a reference later. You should put the placeholder between the last field and submit button.
Publish the form and embed the form into your website.
Edit the page where the form was embedded. Add the script provided by Google into the page header. This script loads the reCAPTCHA with the
onLoadcallback parameter. This callback is called as soon as the captcha is loaded.<script src="https://www.google.com/recaptcha/api.js?onload=onloadCallback" async defer></script>Add the onLoadCallback function:
function onloadCallback() {
    grecaptcha.render('g-recaptcha',
    {
      sitekey: '{sitekey}',
    });
}
Replace the
{sitekey}placeholder with the one provided by Google. This callback function renders the reCAPTCHA inside the placeholder<div id="g-recaptcha">you created earlier.Register the onloadCallback function to be called by the form loader:
document.addEventListener("d365mkt-afterformload", onloadCallback);
2. Add the captcha text value to the form submission
Once the form is submitted, the g-recaptcha-response parameter is added automatically to the form submission. In the next steps, you'll build a plugin that hides this value, as it will be added to the ValidationOnlyFields list in the response object returned by the plugin code.
3. Activate reCAPTCHA plugin
- Navigate to Settings > Form settings > reCAPTCHA.
- Enter the private key. Your private key is saved in a secure storage location.
- Activate the plugin by switching the Status toggle.

