Invoke custom actions from a workflow
Workflows have numerous capabilities supporting business scenarios. Calling basic SDK actions for a record, such as create, update, and delete, from within a workflow solves quite a few business scenarios. However, if you couple the capabilities of the workflows with the power of the custom actions invoked directly from within a workflow you add a whole new range of business scenarios to your application without needing to write code.
Let’s look at the scenario in which a custom action is invoked from a workflow. We’ll invoke a custom action to request the manager’s approval when a discount for a particular opportunity exceeds 20%.
Create a custom action
In solution explorer select Processes.
On the Nav bar, choose New. Give the process a name and choose the Action category.
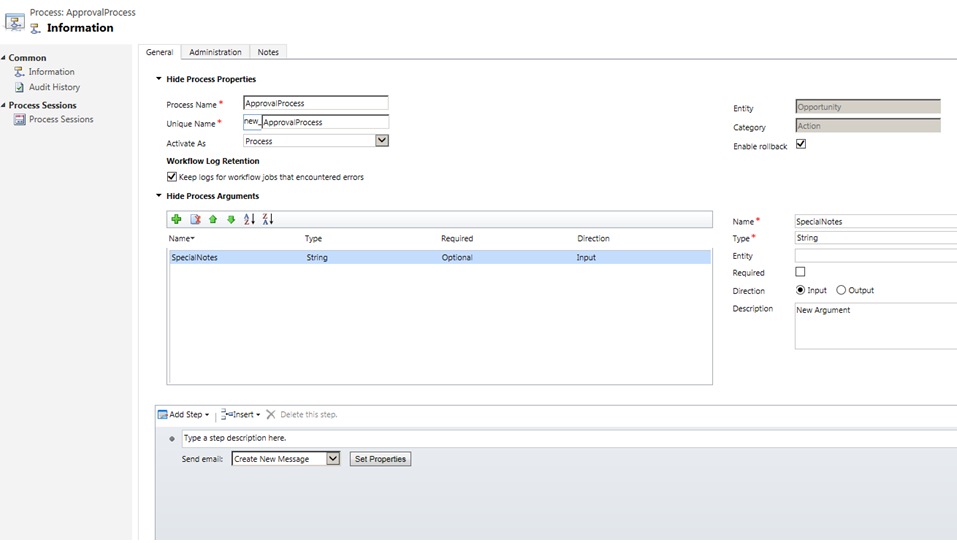
To request an approval for the discount, we’re using a custom action called Approval Process. We added an input parameter, SpecialNotes, and a Send email step to create a new message and send a request for the manager’s approval, as shown here.
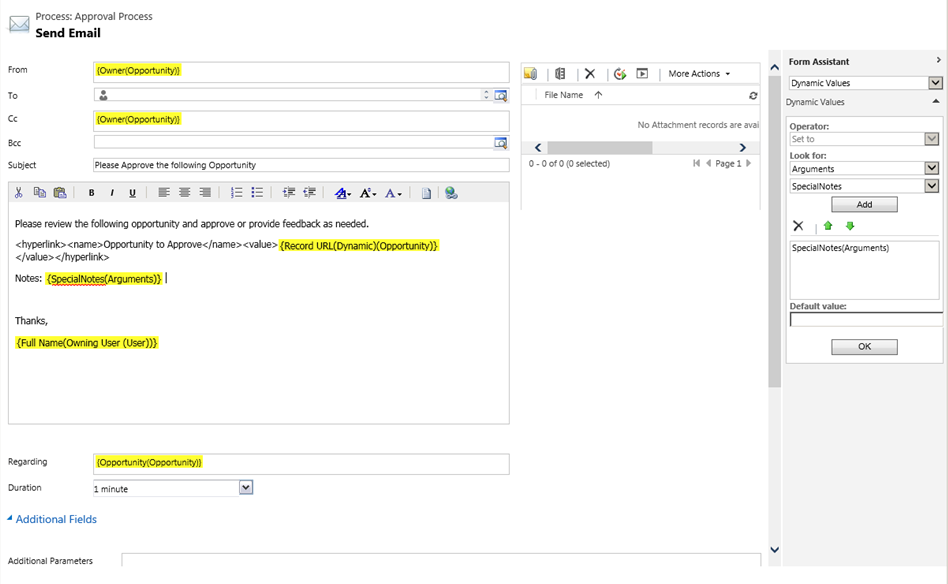
To configure the email message, choose Set Properties. When the form opens, use the Form Assistant to add special notes and other information to the email, as highlighted on the screenshot. To add the special notes, place the cursor where you want them to appear in the message, and then, in the Form Assistant, under Look for, choose Arguments in the first drop-down list and choose SpecialNotes in the second drop-down list, and then choose OK.
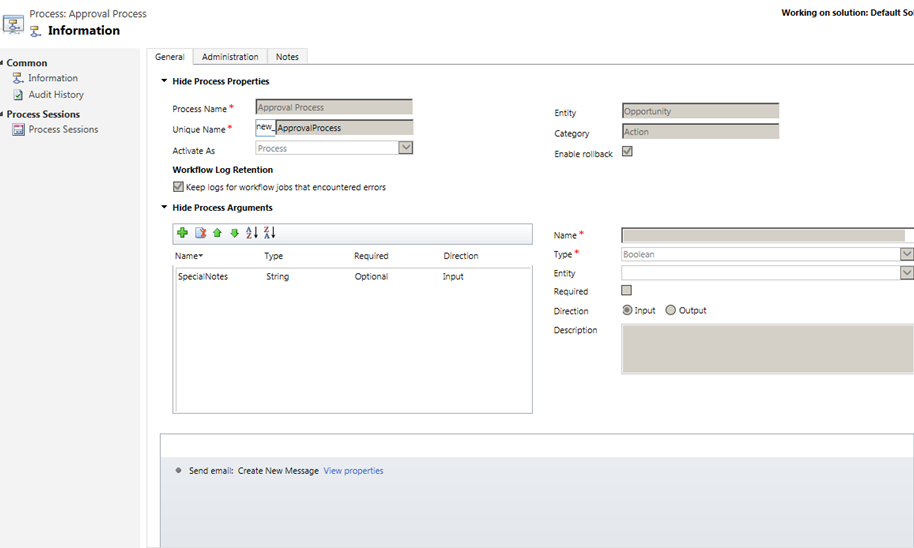
Before you can invoke the action from a workflow, you have to activate it. After you have activated the action, you can view its properties by choosing View properties.
Invoke a custom action from a workflow
Go to Settings > Processes.
On the Nav bar, choose New. Give the process a name and choose the Workflow category.
We created a workflow that invokes the Approval Process custom action whenever the manager’s approval for a discount over 20% for an opportunity is required.
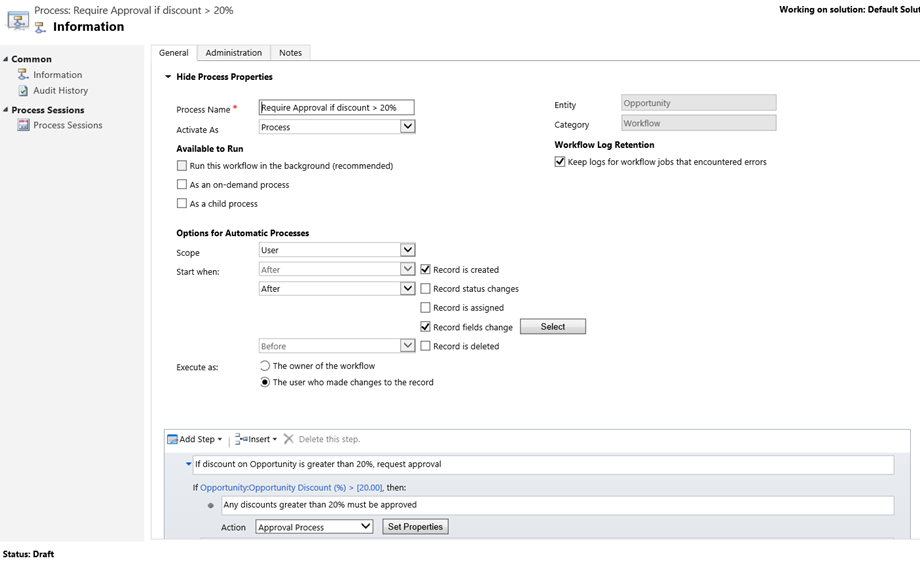
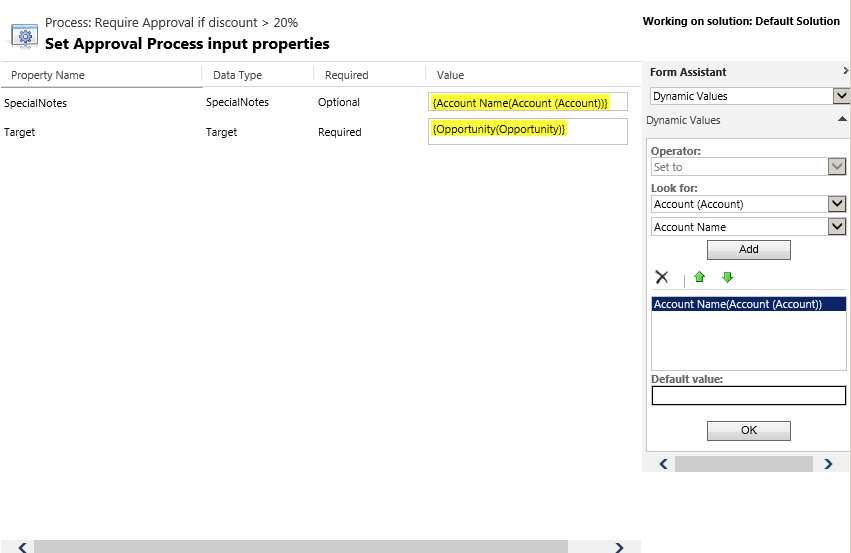
You can set the action’s input properties by choosing Set Properties. We added a name of the account related to the opportunity in the special notes. In the Form Assistant, under Look for, choose Account in the first drop-down list, choose Account Name in the second drop-down list, and then choose OK. The Target property is required and it is populated by the system. The {Opportunity(Opportunity)} in the Target property is the same opportunity that the calling workflow is running on. Alternatively, you can choose a specific opportunity for the target property by using lookup.
See also
Actions overview
Configure custom actions from a workflow
Workflow processes overview