Transform data using dbt
Note
Apache Airflow job is powered by Apache Airflow.
Apache Airflow is an open-source platform used to programmatically create, schedule, and monitor complex data workflows. It allows you to define a set of tasks, called operators, that can be combined into directed acyclic graphs (DAGs) to represent data pipelines.
dbt(Data Build Tool) is an open-source command-line interface (CLI) that simplifies data transformation and modeling within data warehouses by managing complex SQL code in a structured, maintainable way. It enables data teams to create reliable, testable transformations at the core of their analytical pipelines.
When paired with Apache Airflow, dbt's transformation capabilities are enhanced by Airflow's scheduling, orchestration, and task management features. This combined approach, using dbt's transformation expertise alongside Airflow's workflow management, delivers efficient and robust data pipelines, ultimately leading to faster and more insightful data-driven decisions.
This tutorial illustrates how to create an Apache Airflow DAG that uses dbt to transform data stored in the Microsoft Fabric Data Warehouse.
Prerequisites
To get started, you must complete the following prerequisites:
Enable Apache Airflow Job in your Tenant.
Note
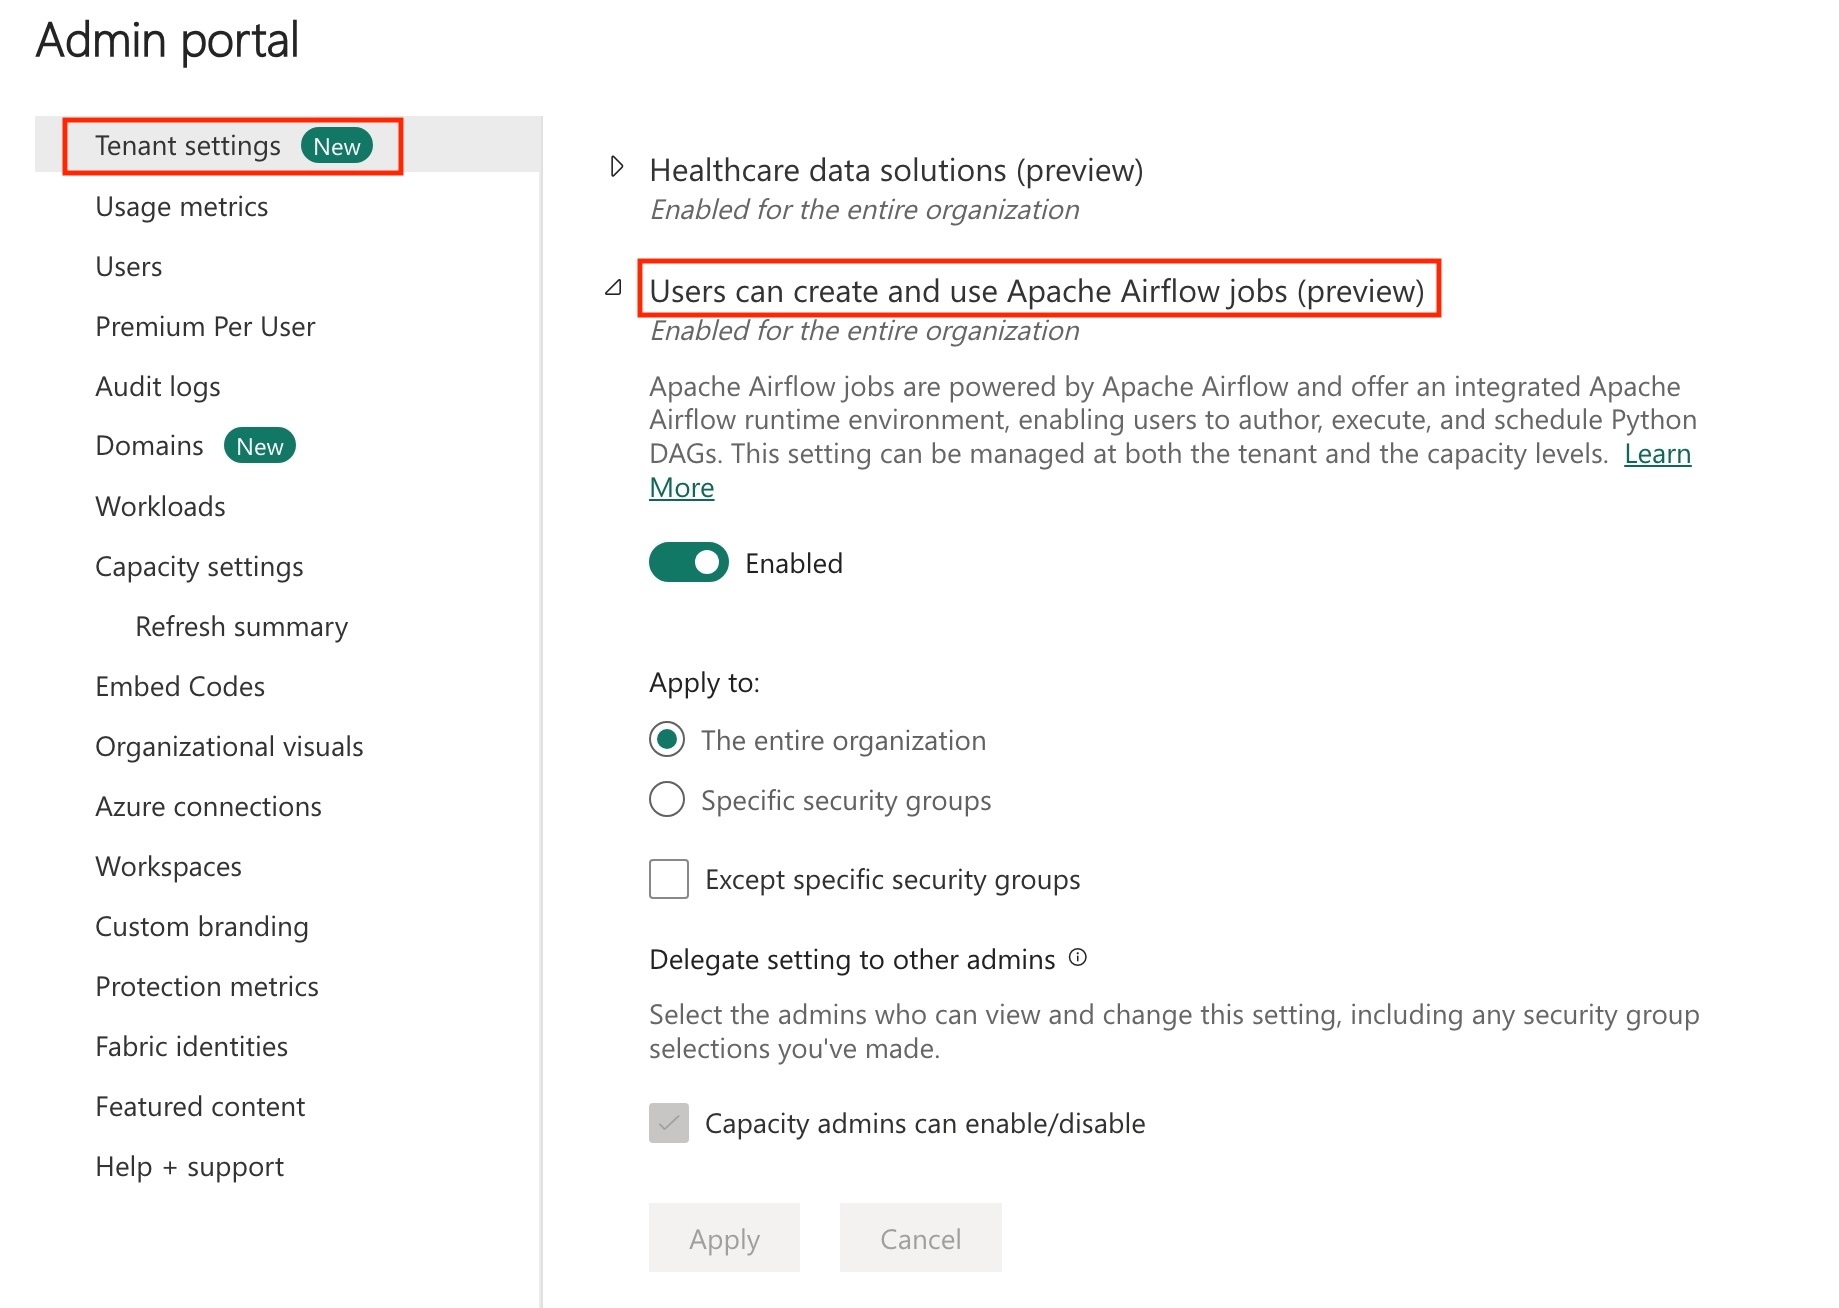
Since Apache Airflow job is in preview state, you need to enable it through your tenant admin. If you already see Apache Airflow Job, your tenant admin may have already enabled it.
Go to Admin Portal -> Tenant Settings -> Under Microsoft Fabric -> Expand "Users can create and use Apache Airflow Job (preview)" section.
Select Apply.
Create the Service Principal. Add the service principal as the
Contributorin the workspace where you create data warehouse.If you don't have one, Create a Fabric warehouse. Ingest the sample data into the warehouse using data pipeline. For this tutorial, we use the NYC Taxi-Green sample.

Transform the data stored in Fabric warehouse using dbt
This section walks you through the following steps:
- Specify the requirements.
- Create a dbt project in the Fabric managed storage provided by the Apache Airflow job..
- Create an Apache Airflow DAG to orchestrate dbt jobs
Specify the requirements
Create a file requirements.txt in the dags folder. Add the following packages as Apache Airflow requirements.
astronomer-cosmos: This package is used to run your dbt core projects as Apache Airflow dags and Task groups.
dbt-fabric: This package is used to create dbt project, which can then be deployed to a Fabric Synapse Data Warehouse
   astronomer-cosmos==1.0.3
   dbt-fabric==1.5.0
Create a dbt project in the Fabric managed storage provided by the Apache Airflow job.
In this section, we create a sample dbt project in the Apache Airflow Job for the dataset
nyc_taxi_greenwith the following directory structure.dags |-- my_cosmos_dag.py |-- nyc_taxi_green | |-- profiles.yml | |-- dbt_project.yml | |-- models | | |-- nyc_trip_count.sql | |-- targetCreate the folder named
nyc_taxi_greenin thedagsfolder withprofiles.ymlfile. This folder contains all the files required for dbt project.
Copy the following contents into the
profiles.yml. This configuration file contains database connection details and profiles used by dbt. Update the placeholder values and save the file.config: partial_parse: true nyc_taxi_green: target: fabric-dev outputs: fabric-dev: type: fabric driver: "ODBC Driver 18 for SQL Server" server: <sql connection string of your data warehouse> port: 1433 database: "<name of the database>" schema: dbo threads: 4 authentication: ServicePrincipal tenant_id: <Tenant ID of your service principal> client_id: <Client ID of your service principal> client_secret: <Client Secret of your service principal>Create the
dbt_project.ymlfile and copy the following contents. This file specifies the project-level configuration.name: "nyc_taxi_green" config-version: 2 version: "0.1" profile: "nyc_taxi_green" model-paths: ["models"] seed-paths: ["seeds"] test-paths: ["tests"] analysis-paths: ["analysis"] macro-paths: ["macros"] target-path: "target" clean-targets: - "target" - "dbt_modules" - "logs" require-dbt-version: [">=1.0.0", "<2.0.0"] models: nyc_taxi_green: materialized: tableCreate the
modelsfolder in thenyc_taxi_greenfolder. For this tutorial, we create the sample model in the file namednyc_trip_count.sqlthat creates the table showing number of trips per day per vendor. Copy the following contents in the file.with new_york_taxis as ( select * from nyctlc ), final as ( SELECT vendorID, CAST(lpepPickupDatetime AS DATE) AS trip_date, COUNT(*) AS trip_count FROM [contoso-data-warehouse].[dbo].[nyctlc] GROUP BY vendorID, CAST(lpepPickupDatetime AS DATE) ORDER BY vendorID, trip_date; ) select * from final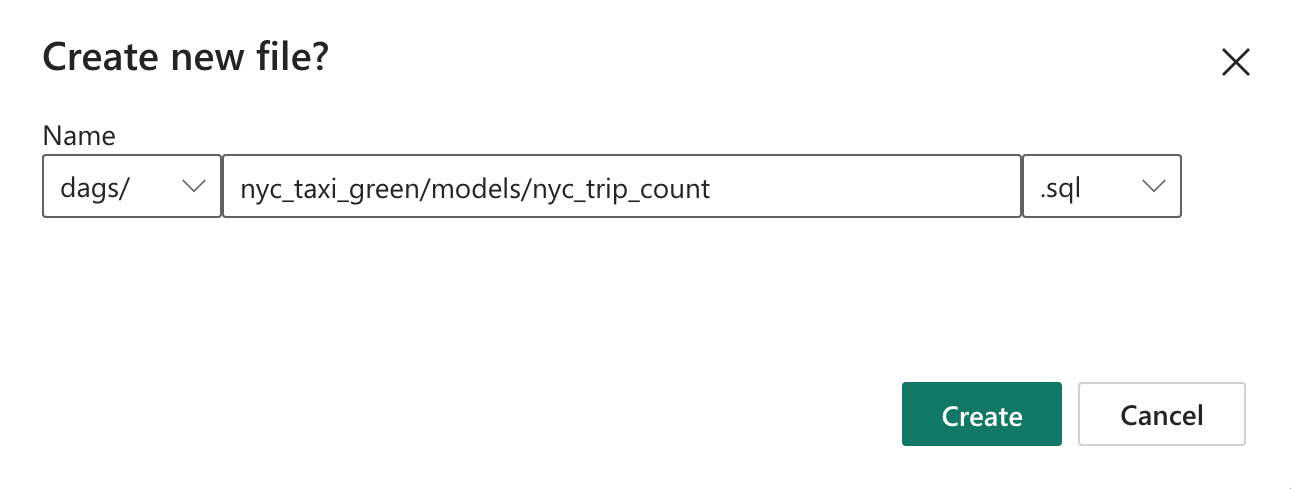


Create an Apache Airflow DAG to orchestrate dbt jobs
Create the file named
my_cosmos_dag.pyindagsfolder and paste the following contents in it.import os from pathlib import Path from datetime import datetime from cosmos import DbtDag, ProjectConfig, ProfileConfig, ExecutionConfig DEFAULT_DBT_ROOT_PATH = Path(__file__).parent.parent / "dags" / "nyc_taxi_green" DBT_ROOT_PATH = Path(os.getenv("DBT_ROOT_PATH", DEFAULT_DBT_ROOT_PATH)) profile_config = ProfileConfig( profile_name="nyc_taxi_green", target_name="fabric-dev", profiles_yml_filepath=DBT_ROOT_PATH / "profiles.yml", ) dbt_fabric_dag = DbtDag( project_config=ProjectConfig(DBT_ROOT_PATH,), operator_args={"install_deps": True}, profile_config=profile_config, schedule_interval="@daily", start_date=datetime(2023, 9, 10), catchup=False, dag_id="dbt_fabric_dag", )
Run your DAG
Run the DAG within Apache Airflow Job.
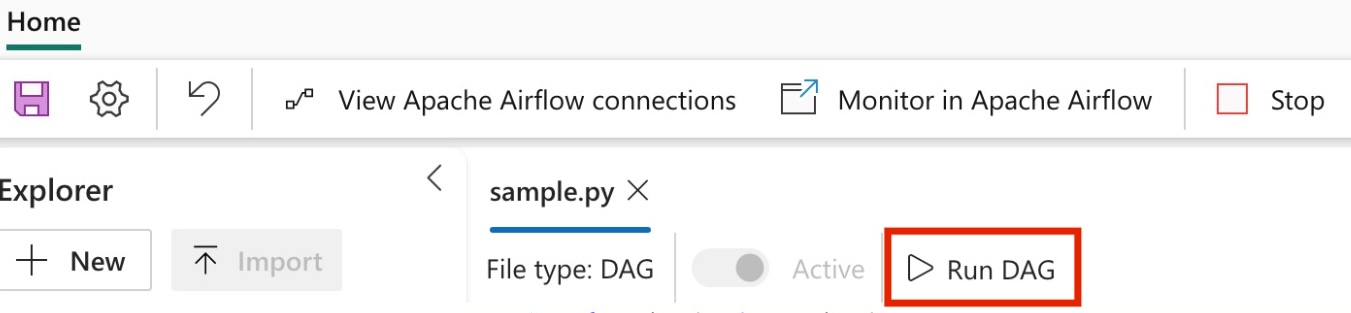
To see your dag loaded in the Apache Airflow UI, Click on
Monitor in Apache Airflow.


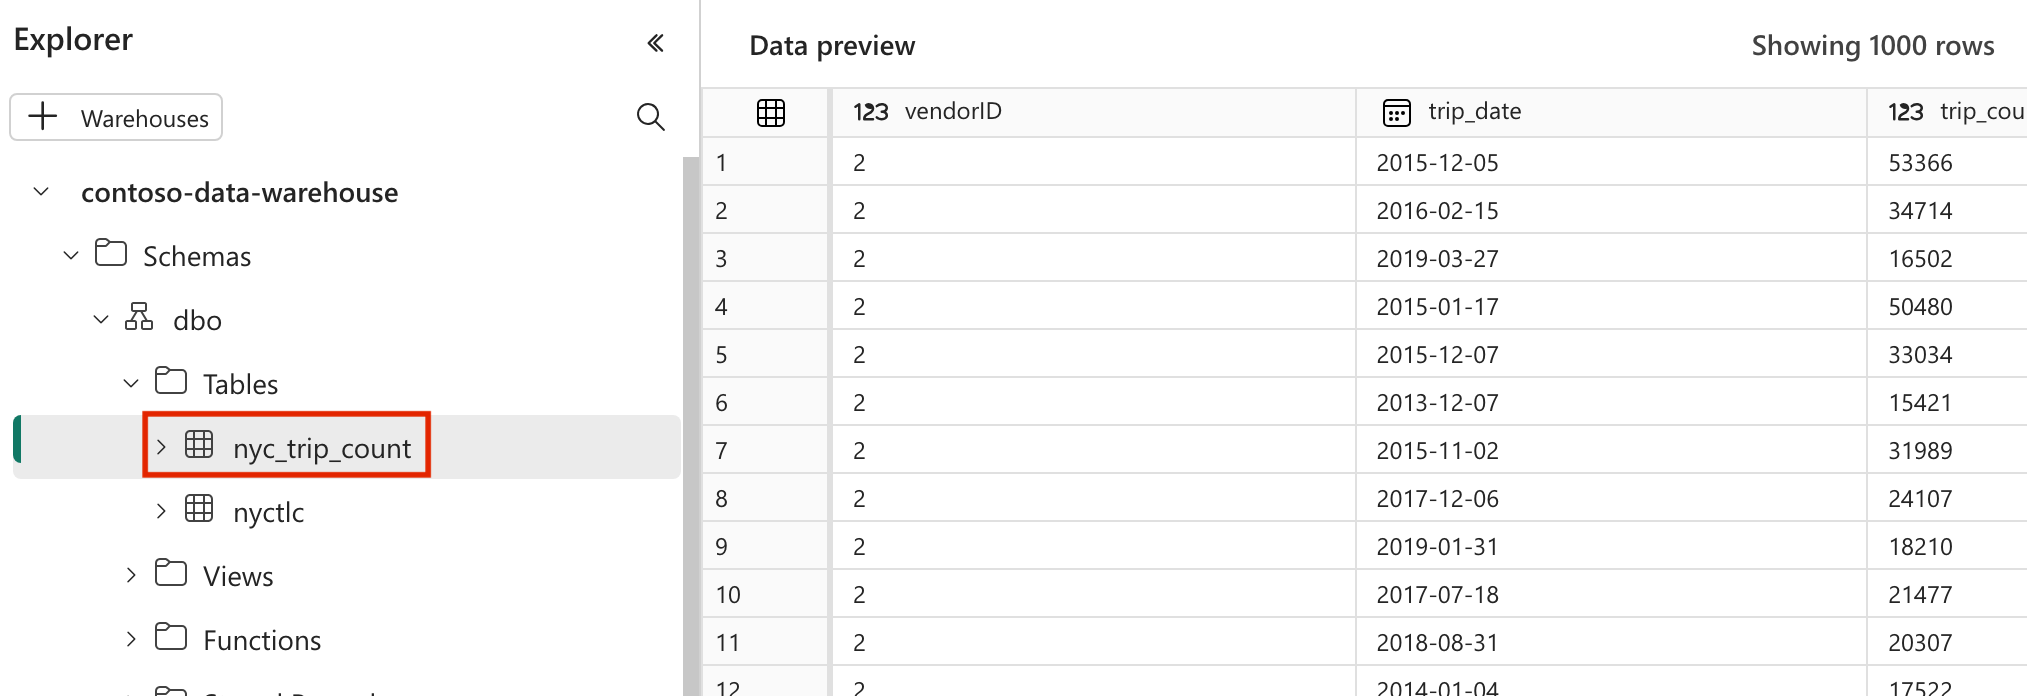
Validate your data
- After a successful run, to validate your data, you can see the new table named 'nyc_trip_count.sql' created in your Fabric data warehouse.