Setting up PlayFab authentication using Facebook and HTML5
This tutorial is designed to guide you through PlayFab authentication using Facebook and HTML5/JavaScript.
Requirements
- A Facebook account for testing.
- A registered PlayFab title.
- A familiarity with sign-in basics and best practices.
- A minimal server, with a valid domain name to serve static HTML file.
Note
If you are unsure if you have the proper requirements for this activity, please consult the Running an HTTP server for testing tutorial.
Server and domain
As part of the requirements to set up your PlayFab authentication, you must have a server with a valid domain to follow. If you don't have a registered domain and remote web server yet, please follow our Running an HTTP server for testing tutorial to run a local web server with a valid domain name.
Throughout this guide, we'll assume your domain is ['http://playfab.example'](http://playfab.example).
Registering a Facebook application
Start by navigating to the Facebook Developer Portal.
- Select the My Apps button.

- Select Create App to create a new app.
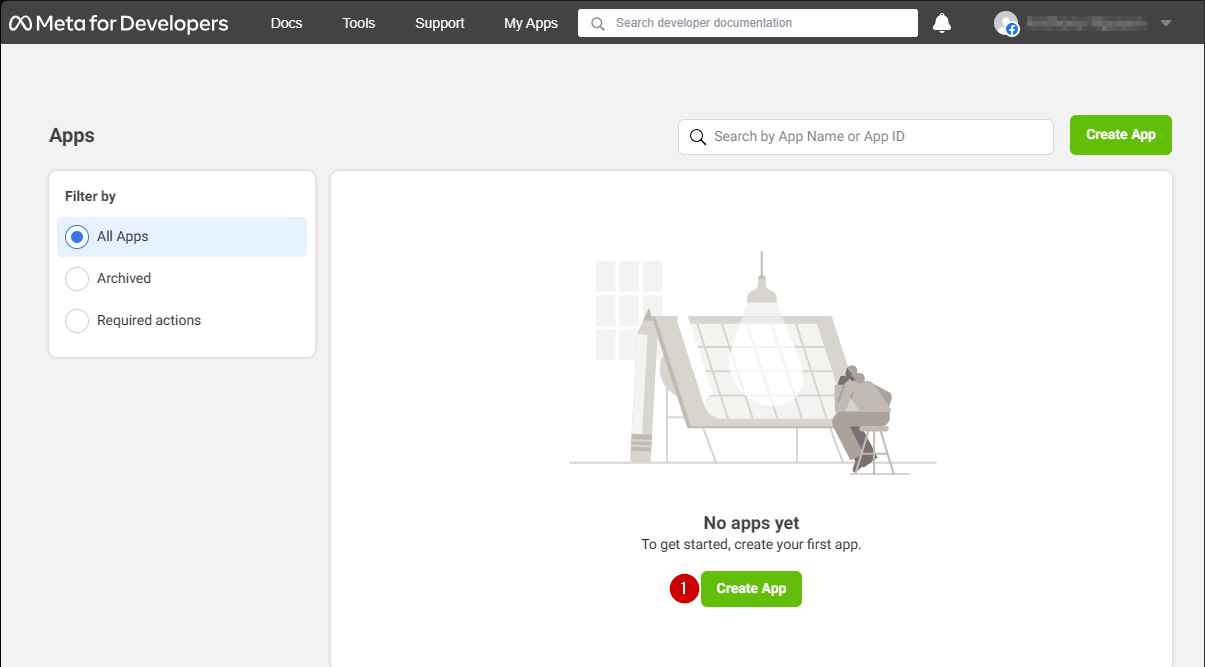
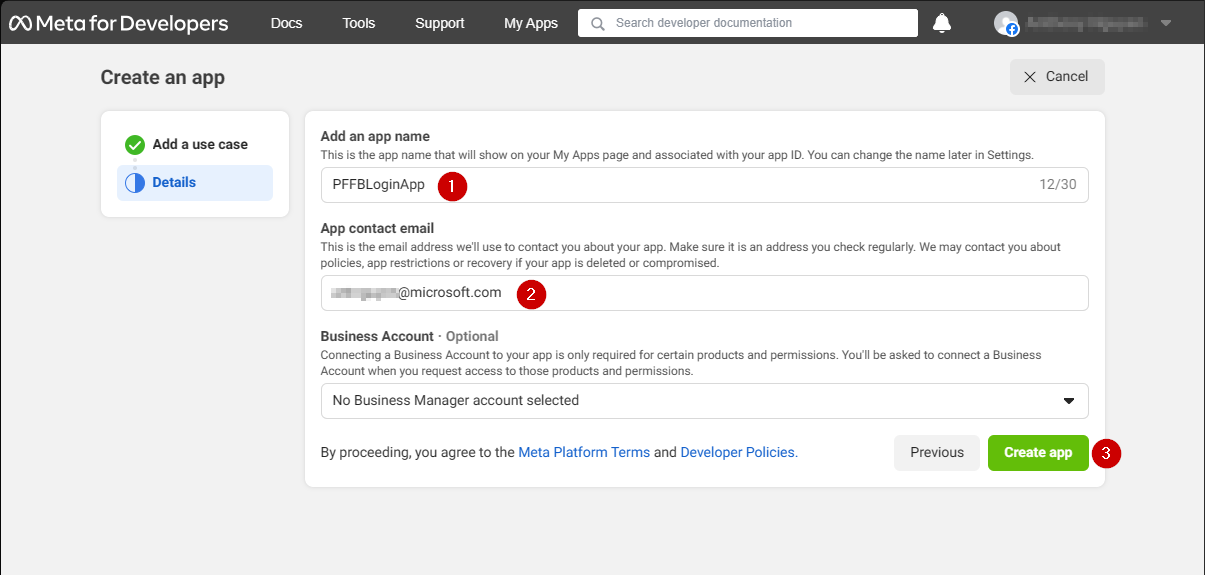
A new Application pop-up opens.
- Enter a name for your Application in the field under Add an app name.
- Enter a contact email address in the field under App contact email.
- Select the Create app button to save.
Note
Make sure to come up with your own unique application name and email, as shown in the example provided below.
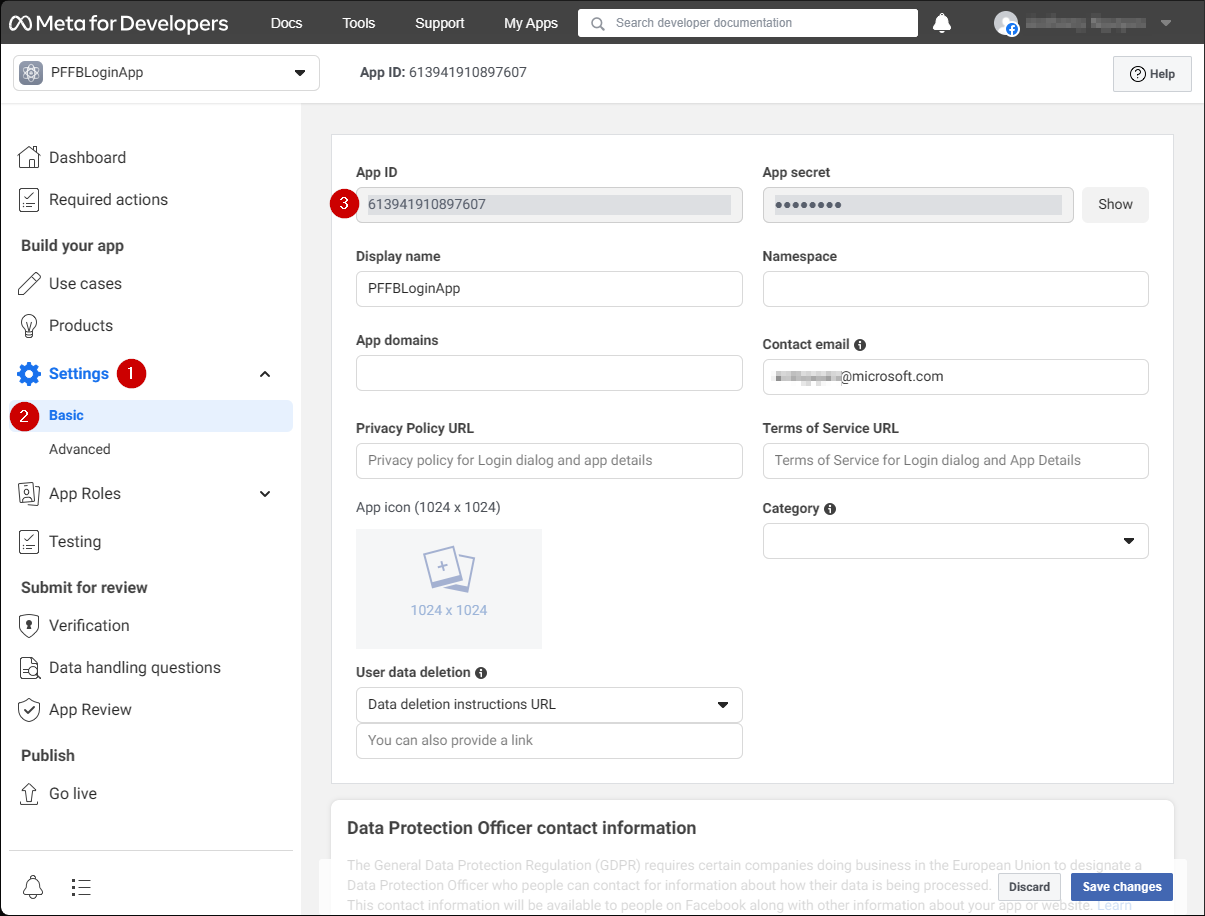
- Navigate to the Settings tab.
- Select the Basic sub-tab.
- Locate your App ID.
Note
Copy your App ID to a safe place, we will use it later to set up the Facebook SDK.
- Go to the menu on the left of your screen and select the Products item.
- Locate Configure in the Facebook Login area and select Settings from the dropdown menu.
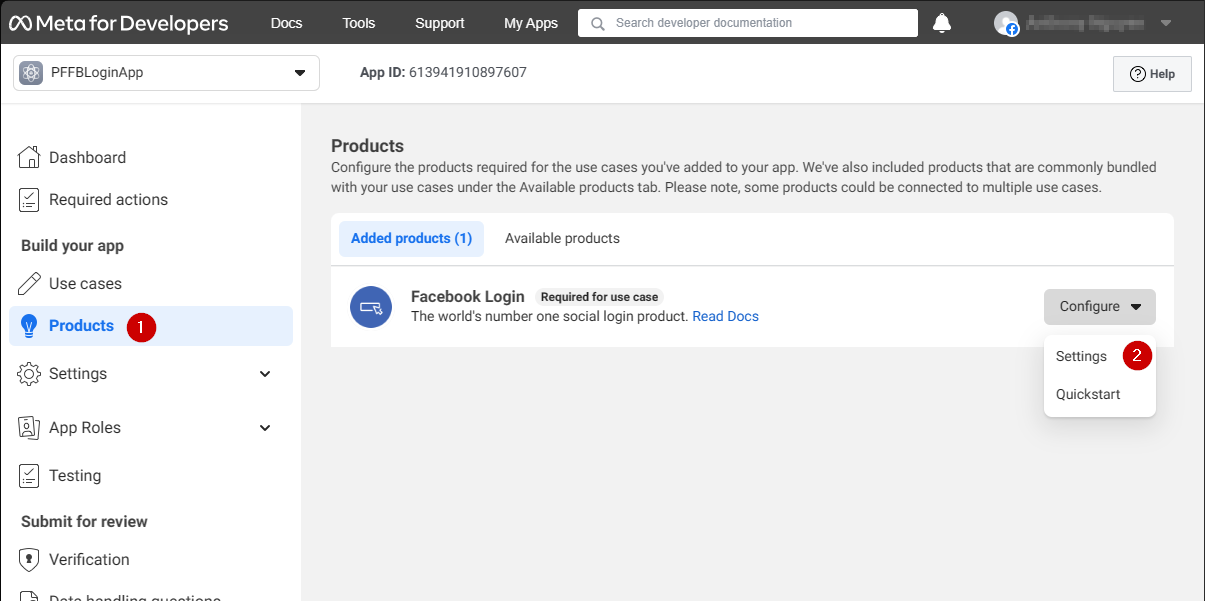
The page should open to display the example shown below.
- Verify that both the Client OAuth and Web OAuth are on (marked Yes).
- Set the Valid OAuth redirect URIs to your own auth page URI.
Note
This will be playfab.example in your case.
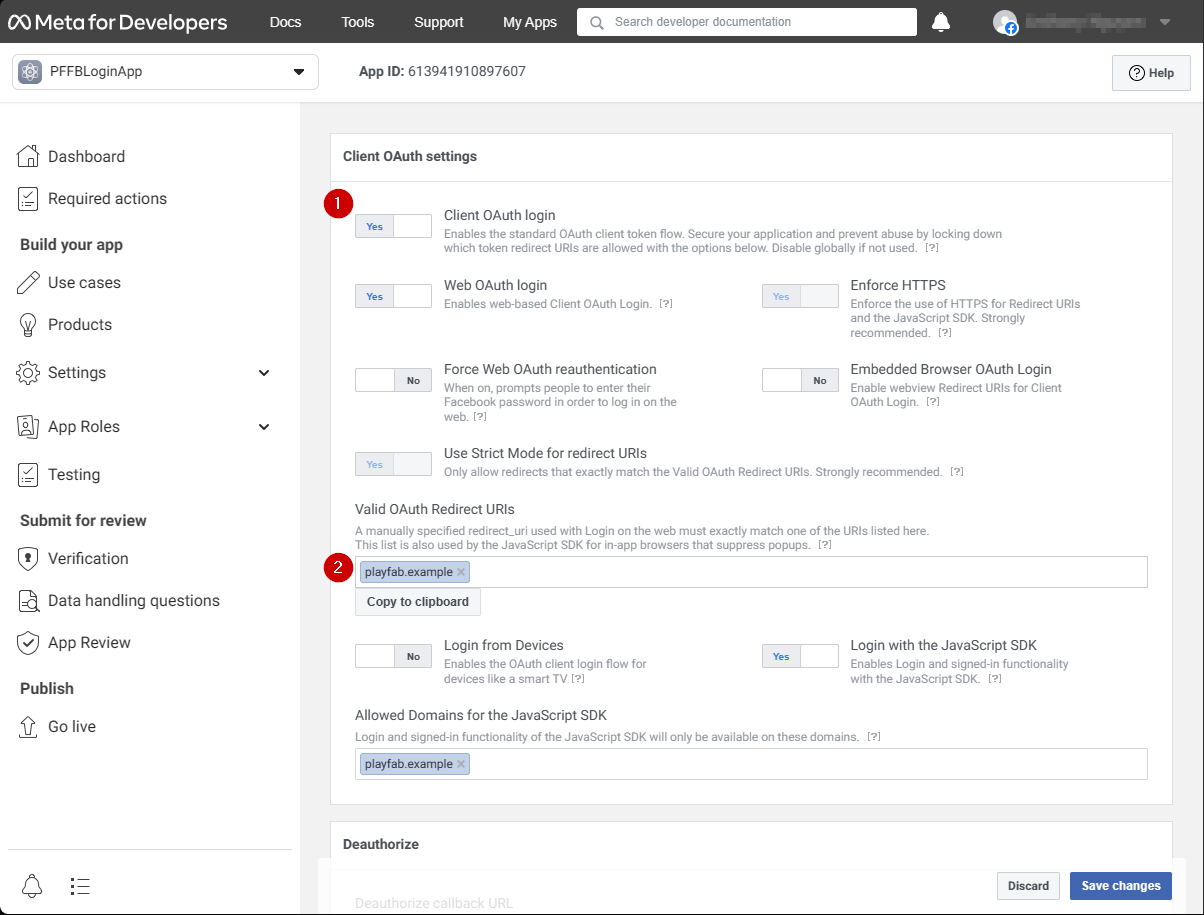
In the Client OAuth Settings screen:
- Verify that Login with the JavaScript SDK is on (marked Yes)
- Set the Valid OAuth redirect URIs to your own auth page URI.
Note
This will be playfab.example in your case.
3. Select Save Changes to commit.

On the Application Manager page:
- Open Settings/Basic (1) in your menu.
- Select the Add Platform (2) button.
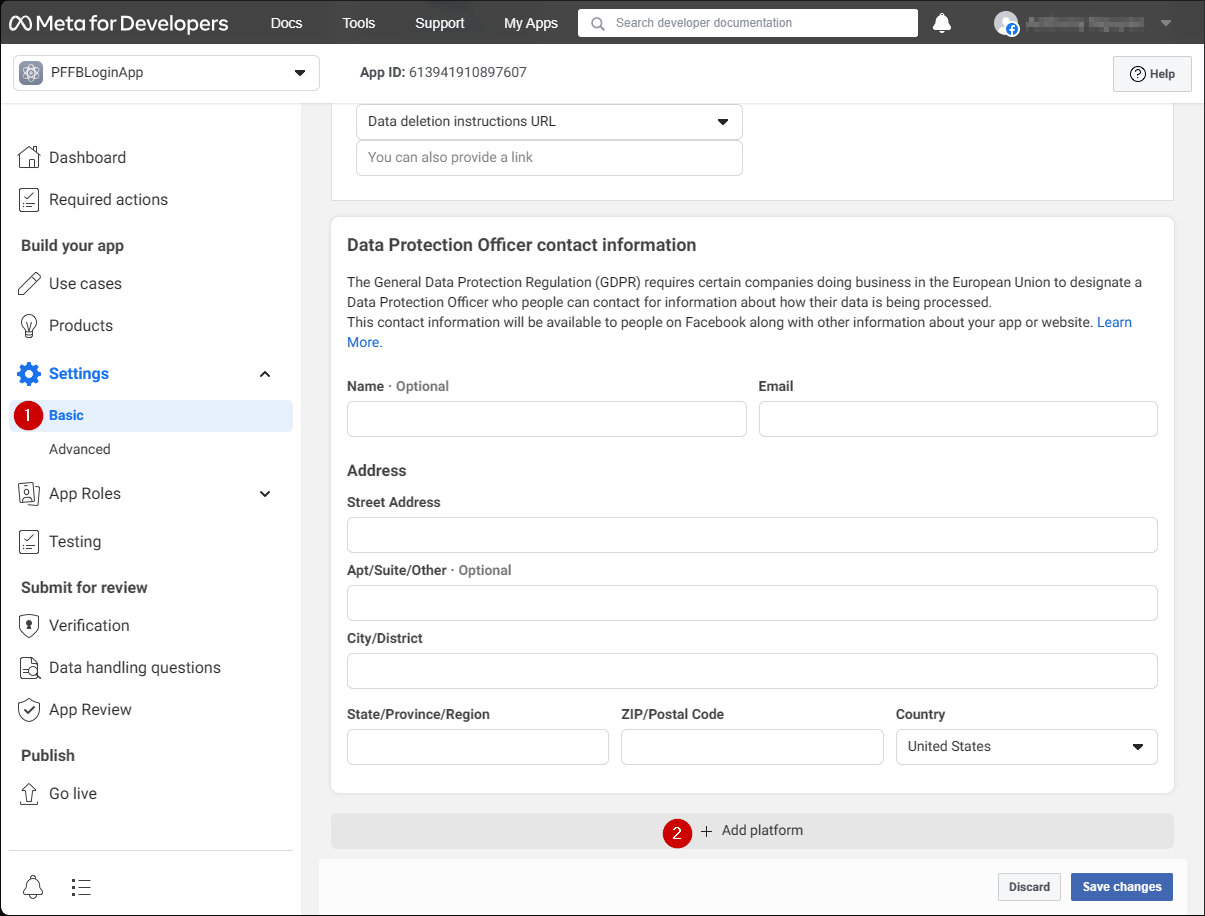
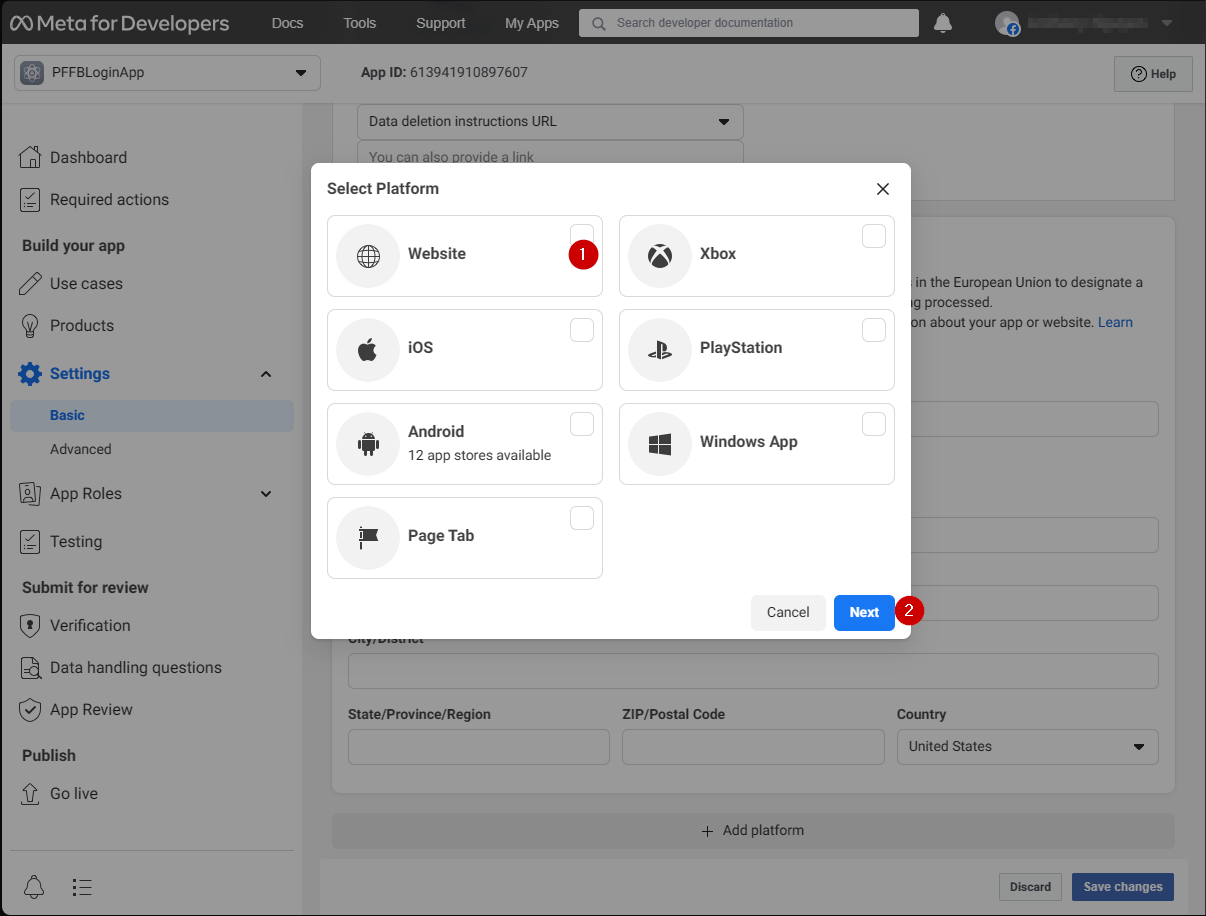
A pop-up appears on your screen:
- Select the Website icon.
- Then select Next.
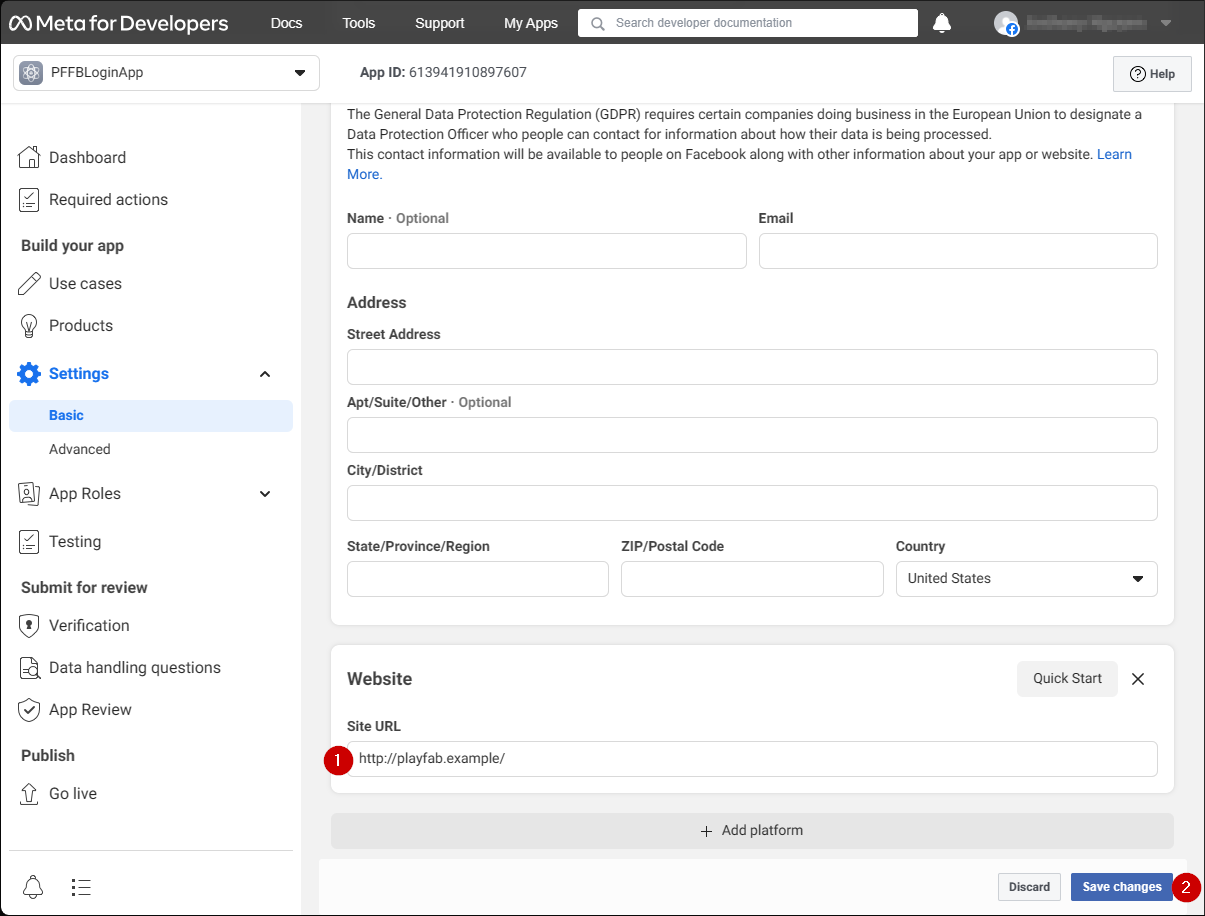
The Website configuration panel should now appear.
- In the Site URL field, enter your auth page URL (this is
playfab.examplein your case). - Select Save changes to commit.
Testing
Use the following HTML file to test your PlayFab authentication using Facebook.
Note
Make sure to replace YOUR-APPLICATION-ID and YOUR-PLAYFAB-TITLE with your own.
<!DOCTYPE html>
<html>
<head>
   <script>
        // This function will be called when Facebook SDK is loaded
        window.fbAsyncInit = function() {

            // Make sure to use your own App ID for the configuration
            FB.init({
                appId      : 'YOUR-APPLICATION-ID',
                xfbml      : true,
                version    : 'v2.9'
            });

            // Record PageView event for analytics
            FB.AppEvents.logPageView();
        };

        // Facebook SDK loader. Creates a script entry to load the SDK
        (function(d, s, id){
            var js, fjs = d.getElementsByTagName(s)[0];
            if (d.getElementById(id)) {return;}
            js = d.createElement(s); js.id = id;
            js.src = "//connect.facebook.net/en_US/sdk.js";
            fjs.parentNode.insertBefore(js, fjs);
        }(document, 'script', 'facebook-jssdk'));
    </script>
    <script src="https://download.playfab.com/PlayFabClientApi.js"></script>
</head>
<body>
    <p>Facebook Auth Example</p>
    <button onclick="loginWithFacebook()">Log In with Facebook</button>
    <script>
        // This method is invoked when you press the button
        function loginWithFacebook() {
            logLine("Logging in via Facebook...");

            // Standard practice: make call to FB.login.
            // This will show Facebook popup window. To prevent browsers from locking it,
            // always make sure to call it from Button click event
            FB.login(function(response){
                if(!response.authResponse){
                    logLine("Problem authenticating via Facebook!");
                } else {
                    loginWithPlayfab(response.authResponse.accessToken);
                }
            });
        }

        function loginWithPlayfab(accessToken){

            logLine("Logging in via PlayFab...");

            // When given accessToken, make call to LoginWithFacebook API Call
            // Make sure to use your own PlayFab Title ID
            PlayFabClientSDK.LoginWithFacebook({
                AccessToken: accessToken,
                TitleId: "YOUR-PLAYFAB-TITLE",
                CreateAccount: true
            }, onPlayFabResponse);
        }

        // Handles response from playfab.
        function onPlayFabResponse(response, error) {
            if (response)
                logLine("Response: " + JSON.stringify(response));
            if (error)
                logLine("Error: " + JSON.stringify(error));
        }

        function logLine(message) {
            var textnode = document.createTextNode(message);
            document.body.appendChild(textnode);
            var br = document.createElement("br");
            document.body.appendChild(br);
        }
    </script>
</body>
</html>
Request the following file from your server using the domain you set up during Facebook Application configuration (playfab.example in our case).
- Once the Facebook Auth Example page opens, select Log In with Facebook button.
- Follow any Facebook instructions in the pop-up window.
Watch the output.
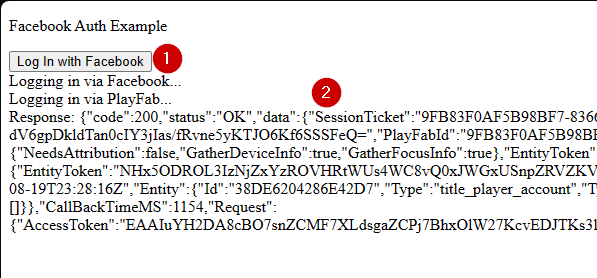
You'll obtain a PlayFab session ticket. At this point you have successfully configured PlayFab and Facebook authentication using HTML5 and JavaScript.