Am I ready to publish?
Before submitting your Microsoft 365 app for review, make sure it's ready to be released to customers.
- Ensure that your app works properly in all compatible, supported operating systems, browsers, and devices.
- Verify that your app meets international accessibility standards. See the documentation that pertains to the Microsoft 365 product your app is targeting for more applicable guidelines. For an example, see the Office Add-ins accessibility guidance.
- Some requirements apply to general commercial marketplace apps but not to apps that only target larger organizations or enterprises. To see how your app is affected, review the answer to "If my app targets enterprises, how does that affect my submission?" in the FAQ.
Also, ensure that you're making the most of your app description page because it's the page that customers see when they download your app.
- Verify that your app works without errors and provides the functionality, features, and deliverables you mention in your app description page and any related materials.
To learn more, see Create effective listings in Microsoft AppSource and Microsoft 365 app stores.
Note
Sharepoint Add-ins have been deprecated and can no longer be submitted for publishing. Existing Add-ins will continue to be available for download by customers until April 2026.
Submission checklist
The following is a checklist to help you ensure your submission and review go smoothly.
Step 1: Determine your launch timeline
Submitting your app for review can take up to four weeks from first submission until final approval, so preparation is crucial.
Make sure to include time in your deployment schedule for our team to not only review your app, but also for changes to be made to your app if needed.
Note
Your validation application might not be approved at first submission. This is common if this is your team's first time submitting an app.
Step 2: Review all the Microsoft 365 app policies
Make sure you read through our Marketplace general policies on the Commercial marketplace certification policies page. Additionally, read through the policies that pertain to the Microsoft 365 product your app is targeting:
- Microsoft 365
- Office Add-ins for apps targeting Outlook, Word, Excel, and PowerPoint
- Teams apps
- Power BI visuals and template apps
- SharePoint Framework Solutions
Step 3: Check that your manifest is compliant
There's a tool you can use to validate your manifest file. This tool uses the same package validation service we use in our review process. This helps ensure you pass our automated testing before you submit.
Step 4: Decide what platforms you want to support
If you're supporting Apple iOS or Android, make sure you have your correct ID information associated with your Partner Center Profile.
For example, for an app available on iOS, you need to have your Apple ID in your Partner Center account settings page.
Note: Outlook is the only Microsoft 365 product that supports Android. Learn how to configure this setting in Partner Center before you submit here.
Step 5: Provide testing information, including for any additional purchases of required external services or SaaS offers
Provide necessary instructions about how to fully test and exercise all your app functionality. Be prepared to include appropriate product keys, test credentials, and sample accounts so the certification reviewer can completely verify and test the app. If you're submitting an add-in that contains custom functions, provide test instructions for at least one custom function so your custom functions can be validated on submission.
Make sure you have any external service information ready to include in your submission. In the submission process, you have to check the additional purchases box (shown in the following image).

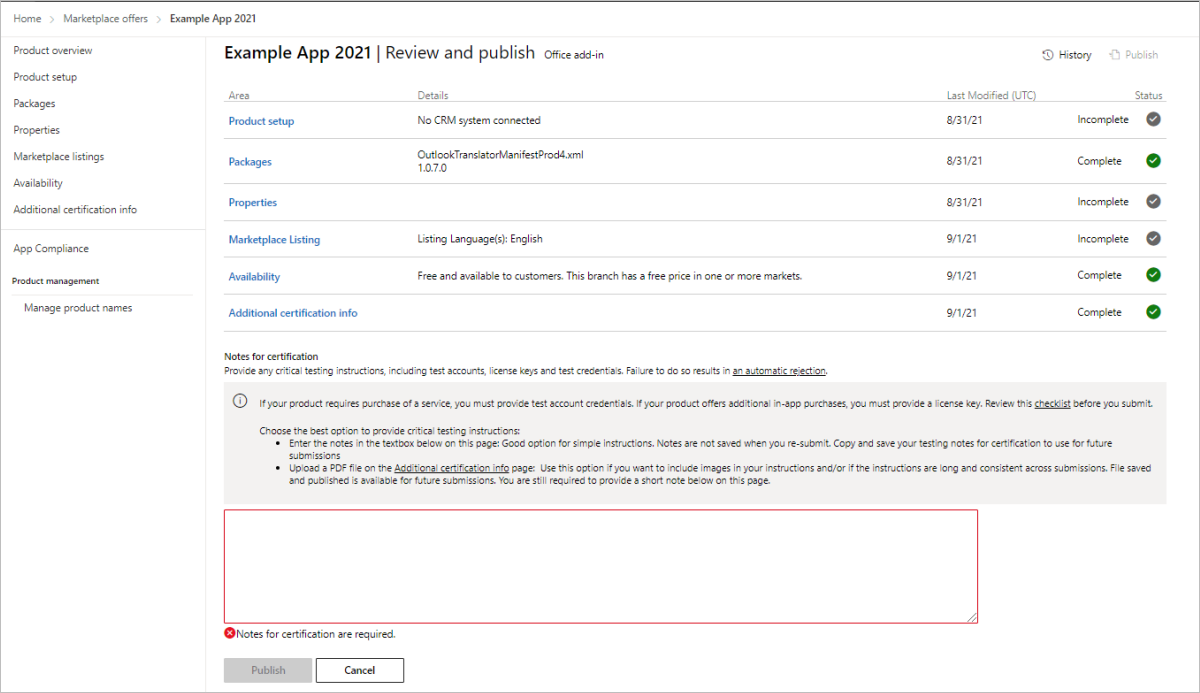
Next, you need to provide license keys, sample accounts, test credentials, and any other critical instructions so that our review team can test the in-app purchase. This information should go in the Notes for certification box (as shown in the following picture).

Your test plans and any testing accounts and instructions need to be included here.
Step 6: Include critical information links with https:// URLs
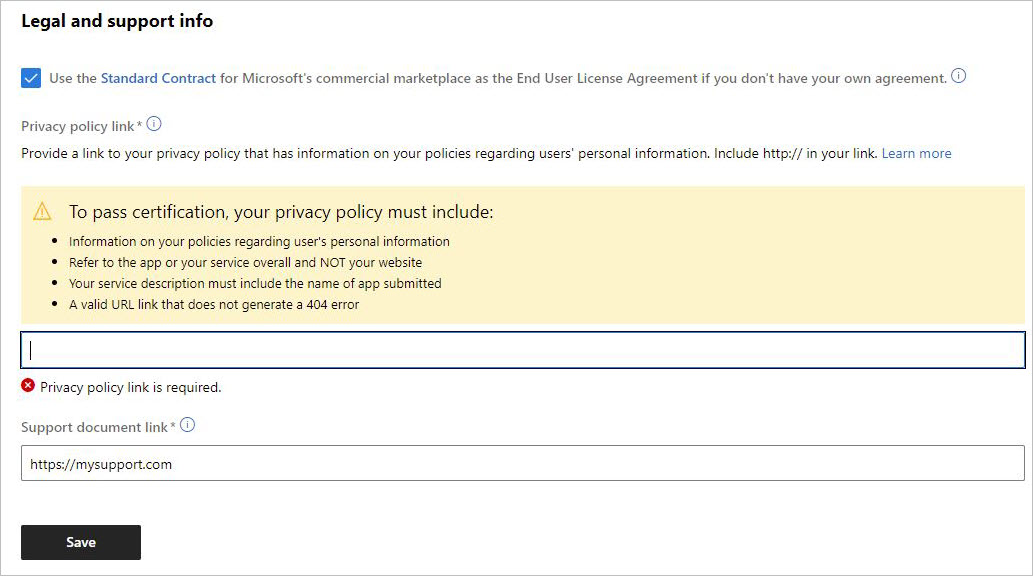
The addresses for a support URL, a privacy policy URL, and an end user license agreement (EULA) URL are required. One of the top reasons an app submission fails our validation process is when these links aren't included in submission. The following image shows the box that asks for the support information.

Make sure you provide a link to your support page so that your users can reach you if they have a problem
Provide a URL so customers who have issues with your app can contact your company for support.
Note
This can't be an email address, it must be an https:// URL.
Ensure your company has a privacy policy that includes your app
Provide the URL for your app's privacy policy.
The privacy policy you link to must include:
- Information on your policies regarding users' personal information. That is, how users' personal information is handled.
- A reference to the app OR your service overall, not only your website.
- A description of your service that includes the name of the app you're submitting.
- A valid link that doesn't generate a 404 error.
If your privacy policy is missing any of the preceding items, it will fail validation and require resubmission.
Note
A Terms of Use policy isn't considered a privacy policy. You must include a privacy policy that's separate from your Terms of Use policy.
Include an End User License Agreement
Make sure you have an https:// URL for your EULA policy ready when you submit. If you don't already have one and have consulted with your legal counsel, you can use this one from Microsoft.
Step 7: Prepare your store listing with your team
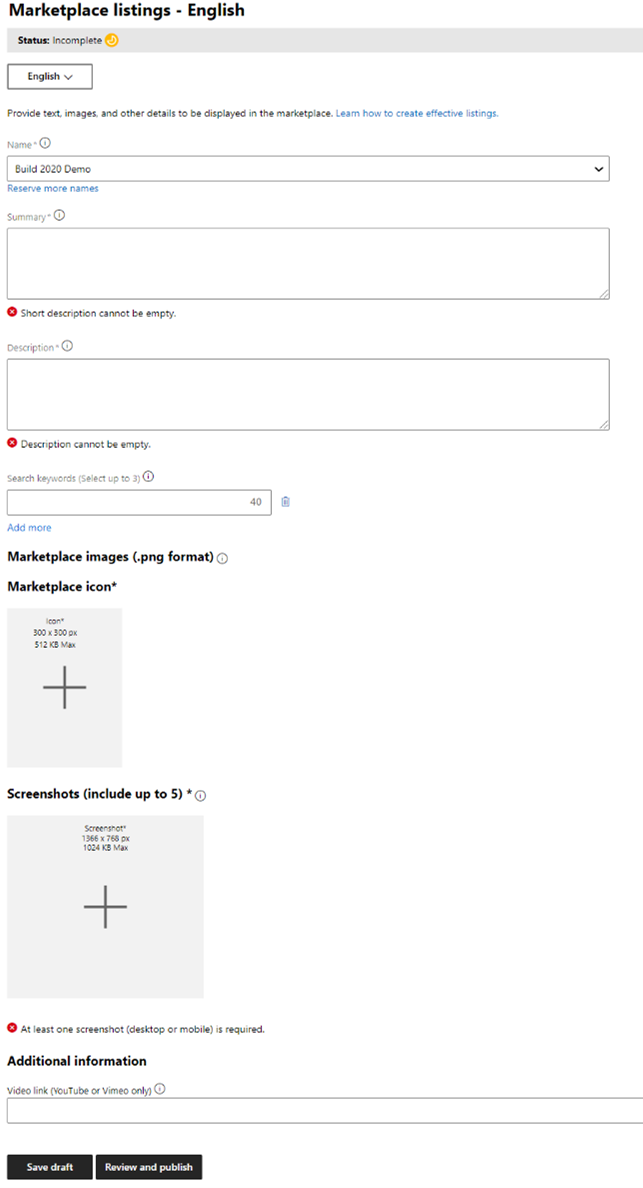
Your final step in preparing your submission is to fill out a marketplace listing that will appear in the store to customers. This listing includes the copy in your listing, your branding, your app name, and any screenshots and videos you want to use to promote it.
You need to provide the correct metadata indicating how you want your app to be listed in the store, including:
Your app name.
A short description of your app and its value.
A long description of your app with HTML formatting.
Important: If your app requires additional services or accounts, the long description should include information like their names and links to how to acquire them. If your app requires additional purchases from external services or SaaS offers, the long description should note any charges, subscriptions, or licenses that are required to use advertised features or to activate additional features or content.
Tip
We recommend you use an HTML editor to create your description ahead of time, so that you can preview how it looks before you paste it into the description field. There isn't a preview in our submission process. Otherwise, you might have to re-submit your app for another review to fix any formatting issues or typos.

You also need to provide:
- Correct icons that are the right sizes.
- Any screenshots and video demos. Read our tips on doing this effectively. One screenshot is required.
Related content
Read our step-by-step submission guide to learn how to submit your app for validation.