Allowlist your Power Automate tenant to allow registration and connect with sign-in
For added security, connect with sign-in now requires your Power Automate tenant to be allowlisted to authorize connections on Active Directory domain-joined machines that aren't Microsoft Entra joined. Learn more about this security patch here.
Allowlisting a tenant also allows this machine to register to that tenant.
How to find your Power Automate tenant ID
Use the following steps if you don't know your tenant ID:
- Sign into the Power Automate portal.
- Select Ctrl + Alt + A.
- Locate the tenant ID in the
tenantIdproperty.
How to allowlist a tenant ID on your machine
Important
The following steps can be used to allowlist your tenant on a single machine. However, we recommend consulting with your domain administrators to create a Group Policy Object (GPO) that applies the appropriate allowlist across all your machines. Creating a GPO like this can centrally specify which tenants are trusted to use Power Automate Desktop on the machines in your tenant.
Open the registry editor and navigate to this key
Computer\HKEY_LOCAL_MACHINE\SOFTWARE\WOW6432Node\Microsoft\Power Automate Desktop\RegistrationIf the
AllowedRegistrationTenantsregistry value doesn't already exist, create it by right-clicking and selecting New > String Value. Name itAllowedRegistrationTenants.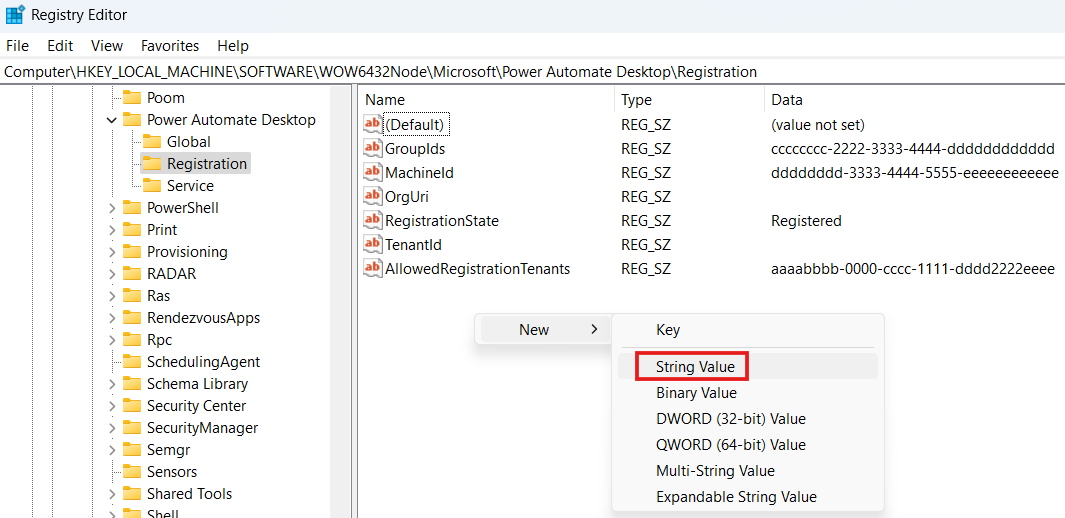
Right click the AllowedRegistrationTenants registry value and select Modify. Edit the value to add your tenant ID. The expected value is a comma-separated list of tenant IDs such as "aaaabbbb-0000-cccc-1111-dddd2222eeee" or "aaaabbbb-0000-cccc-1111-dddd2222eeee,bbbbcccc-1111-dddd-2222-eeee3333ffff".