Submit a template to the Power Automate gallery
Templates help you to create flows more easily, and to imagine additional scenarios that would benefit from a cloud flow.
On the left pane, select My flows.
Select and open a cloud flow you want to publish.
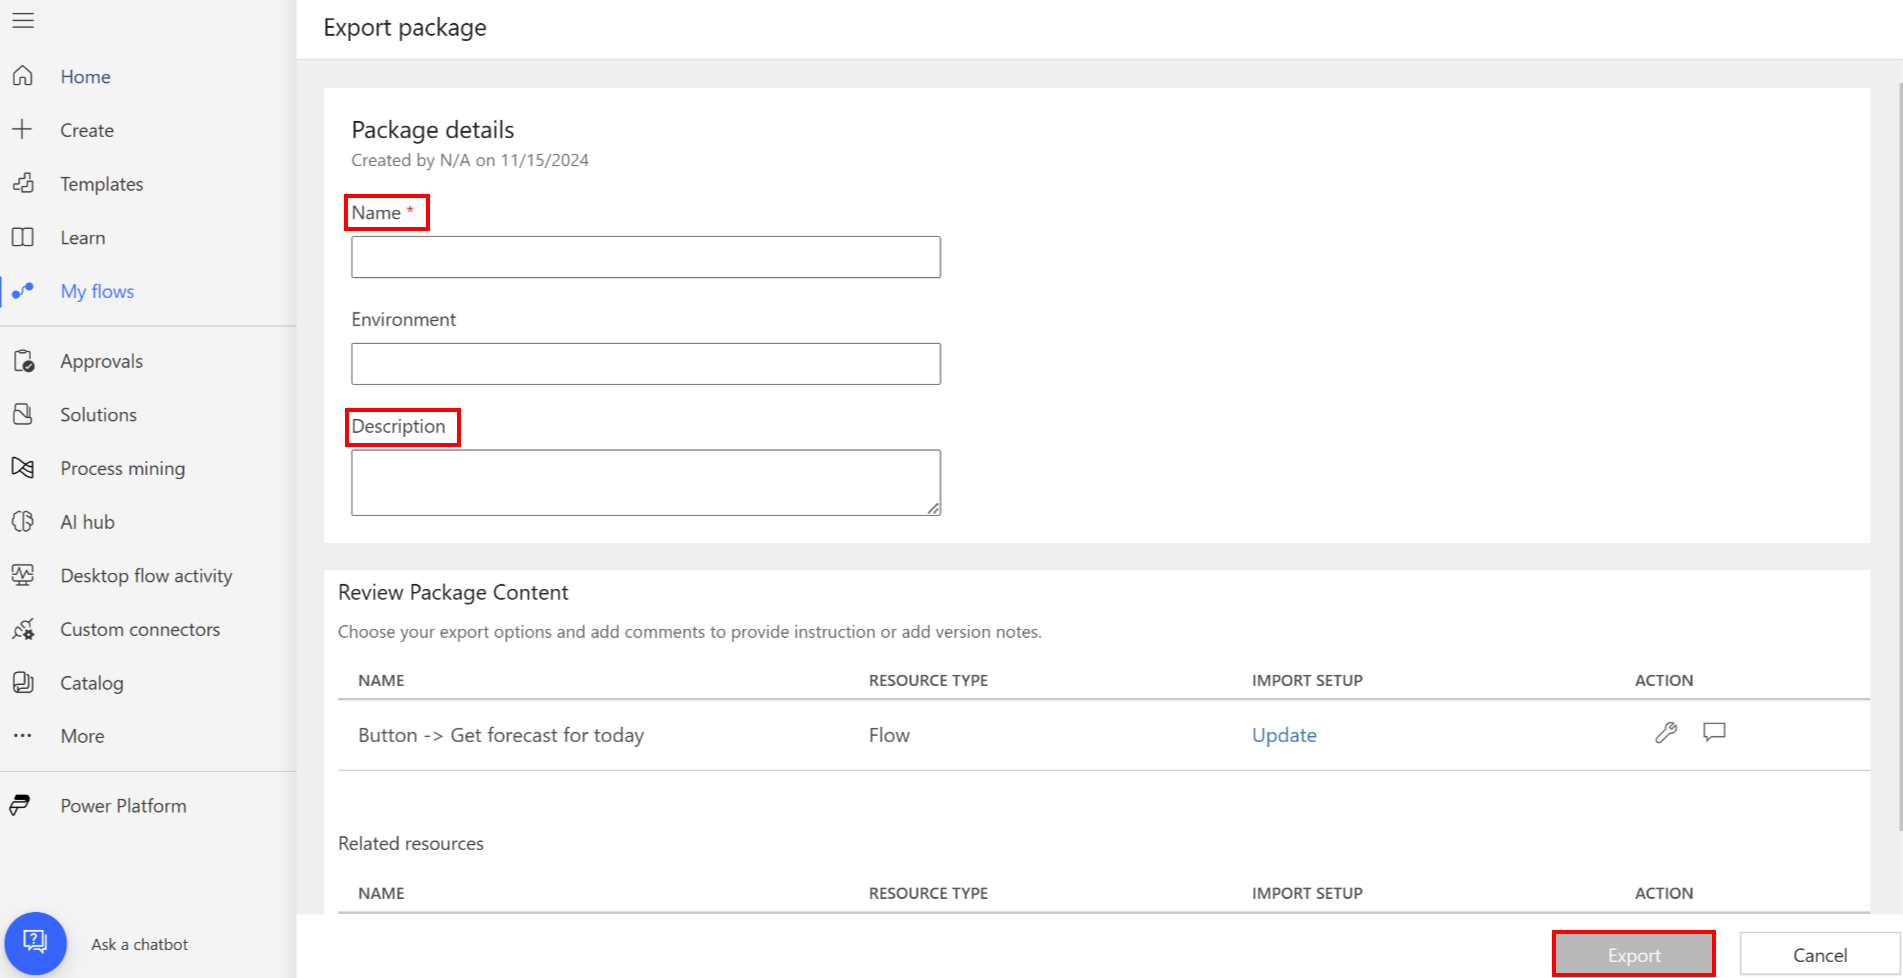
On the menu at the top, select Export > Package (.zip).

Provide the following details for your connector template so the end user is able to search the right template:
- Name
- Description
To download the connector template files, select Export.

Upload the package to a storage blob and generate the SAS URL.
Ensure that your SAS URI is valid for at least 15 days.
Set up your Partner Center Seller account
This is a one-time process for creating a Seller account in Partner Center. Seller accounts go through a vetting process before they can publish offers through Partner Center.
If you already have a Seller account, you need to enroll in the Microsoft 365 and Copilot program.
To create a new Seller account, follow these steps:
If you have an existing developer account in Partner Center, use those same credentials to access Partner Center.
If you don't have an account, then follow the steps in Create a Microsoft AI Cloud Partner Program account in Partner Center.
Ensure you have the valid email address configured in your Entra ID account. To configure the email ID, follow the steps in Manage user profile info.
Note
If the Email ID for the Entra account is missing, the certification request is auto-rejected.
Before you can publish, verify your account information. Learn more in Verify your account information when you enroll in a new Partner Center program.
Submit your package for certification
Sign in to Partner Center.
Under the Home heading, select Marketplace offers card.
On the Marketplace offers | Overview page, select Microsoft 365 and Copilot program.
On the Microsoft 365 and Copilot page, select New offer > Connectors & Agents in Microsoft Copilot Studio.
In the Name field in the New Connectors & Agents in Microsoft Copilot Studio screen, enter a unique name for your offer.
This name is used to help you identify your offer in Partner Center. We recommend that you include the name of your connector and associated AI enabled connector.
Next, you're taken to the Product setup page. You don't need to enter information here. The Status is marked as Complete to indicate there's nothing for you to do.
Package your connector based templates
- On the navigation bar to the left, select Packages.
- On the Packages tab in the SAS URI field, enter the link to the SAS URI of your package containing the connector based template.
- Ensure your package complies with Marketplace Policies for Power Platform listed in 5000 Power Platform Connectors.
- Select Save draft.
Set properties
On the navigation bar to the left, select Properties.
On the Properties tab, do the following steps:
- In the General Info group, choose up to three (3) categories that your connector and/or AI enabled connector associates best with.
- In the Legal and support info group, you need to provide three (3) pieces of information.
In the first field, you can either enter an HTTPS URL to your End User Licensing Agreement, or you can use the Microsoft commercial marketplace Standard Contract. We recommend that you use the Standard Contract.
To choose the Standard Contract, select the checkbox.
In the Privacy policy link field, enter the privacy link for your policies regarding the user's personal information.
In the Support document link field, enter the support link for customers to refer to in case they have issues.
- Select Save to save your draft.
Post-submission steps
After you submit your offer, wait 24 to 48 hours for Microsoft to review your offer.
You can review the status of your offer as it is progressing through certification lifecycle. Inside your offer, go to the Product overview tab.
Within 48 hours, Microsoft updates the certification report in the Product overview tab.
If your package passed the certification guidelines, you're asked to move to next stage. If it didn't pass, you're required to update the package based on the certification report and resubmit the package.
Once the certification is completed in the Product overview for your offer under Publisher signoff, select Go live.
Wait for deployment
The Power Automate team verifies and possibly modifies your template. If the team approves your template, it appears in the gallery of templates for Power Automate. After your offer is live, we deploy your connector template across all products and regions within 48 hours.
Note
- If you want to update your offer content in future, for example, you want to submit version upgrades to the connector template, follow the same rules: To initiate the update request, select the Product overview tab for your certified offer, and select the update present for the section you want to modify.
- Templates are for use in the public gallery only. They aren't supported for private use.