Capacity add-ons
Capacity add-ons can be purchased for various business applications products. The content below describes the process of allocating add-ons, where applicable. Microsoft Dataverse storage capacity add-ons do not require allocation at an environment level because all storage capacity add-ons accrue to tenant-level storage entitlements. For more information, see legacy model storage or new model storage.
There are three stages for using capacity add-ons:
- Purchase: you buy individual capacity add-ons. For purchasing information, see the Power Apps and Power Automate Licensing Guide.
- Allocate: assign the purchased add-ons to an environment.
- Consume: once allocated, you can consume the capacity add-ons.
Tip
Consider purchasing Power Apps per app plans which allow individual users to run one application or one portal. See About Power Apps per app plans.
View capacity add-ons in Power Platform admin center
If your organization has purchased capacity add-ons, an Add-ons tile appears on the Capacity screen in the Microsoft Power Platform admin center. Sign in to the admin center, and select Resources > Capacity > Summary tab.
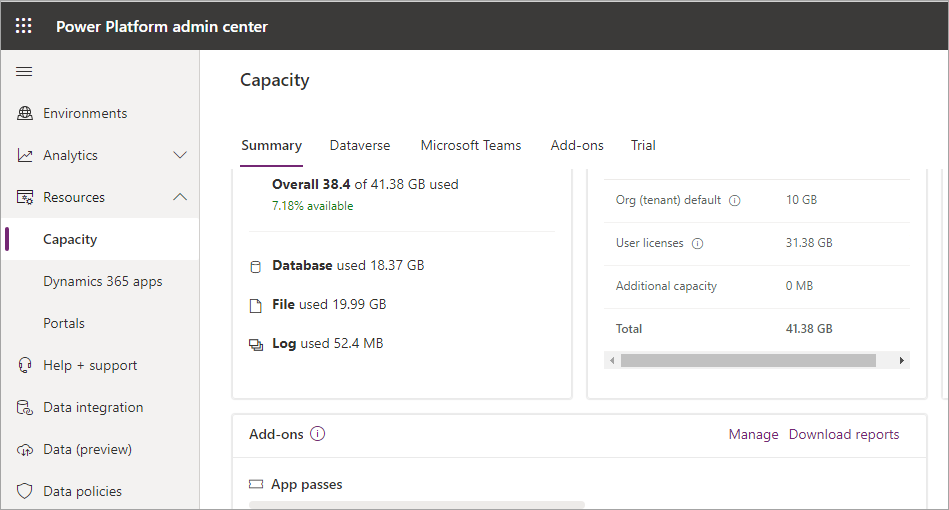
The Add-ons tile shows summary information about the capacity add-ons that your organization has.
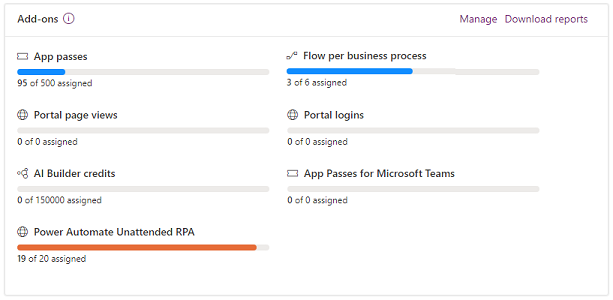
Each capacity has a usage gauge that shows how many units have been assigned compared to the available capacity. Capacities are measured in different ways depending on the product. For example, App passes are assigned individually, while AI Builder capacity is measured in credits. Refer to the product documentation for more information about metering.
Allocate or change capacity in an environment
To allocate capacity to an environment:
Sign in to the Power Platform admin center.
Select Resources > Capacity > Summary tab.
On the Summary tab view, do one of the following to open the Manage add-ons screen:
- Scroll down to the Add-ons tile, and then select Manage on the top-right corner of the Add-ons tile.
- Select the Add-ons tab. Select Assign to an environment in the upper-left menu bar.
- Select the Add-ons tab. Select an environment, and then select Manage add-ons in the upper-left menu bar.
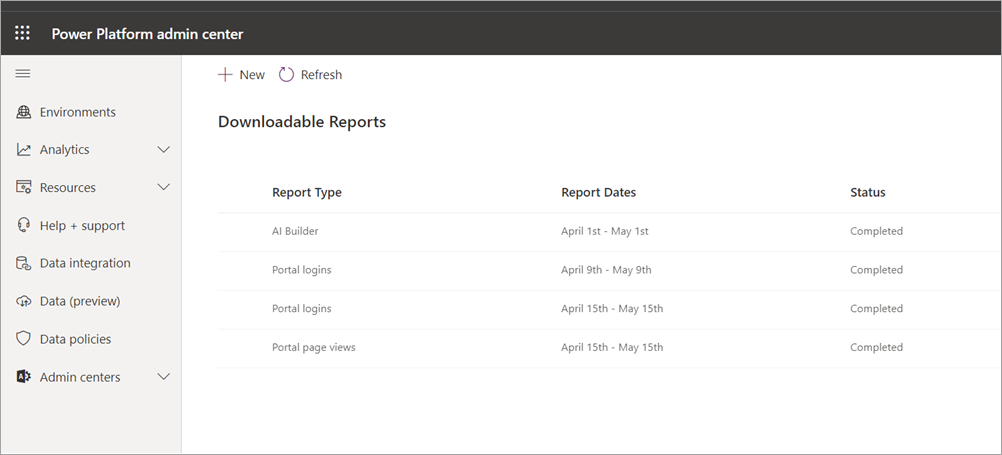
You can also select Download reports to download usage reports for various capacities.
Select the environment where you want to add capacity from the Environment drop-down menu, and then allocate from your available capacity.
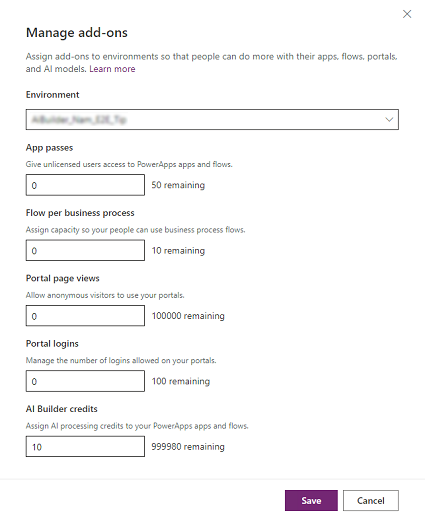
Some examples
- If you have 10 users who are going to be using 1 app each, you should assign 10 app passes to the app environment.
- If you want to create 5 flows in an environment which are going to be used for business process flows, assign a capacity of 5 for flow per business process.
- If a company has created a portal and anticipate 50,000 views of the portal, they should allocate 50,000 portal page views.
Note
If you want to update many add-on allocations across environments at scale, see Tutorial: Allocate add-ons to environments (preview) for more information.
Control who can allocate add-on capacity
As an admin, you can restrict who can allocate add-on capacity to environments.
Sign in to the Power Platform admin center at https://admin.powerplatform.microsoft.com.
Select the Gear icon (
 ) in the upper-right corner of the Power Platform site.
Select Power Platform settings.
Under Who can allocated add-on capacity to environments, select Only specific admins.
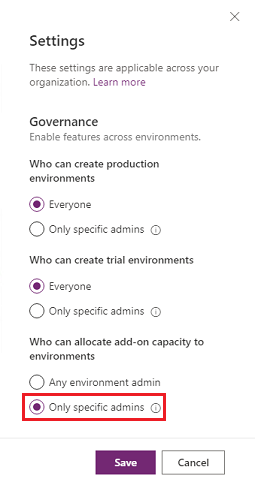
The following admins will be able to allocate add-on capacity in the Power Platform admin center:
- Dynamics 365 admins
- Power Platform admins
See also
About Power Apps per app plans AI Builder consumption report