Get started managing the SAP Supplier Self Service solution
You can set up your suppliers and users so they have access to your SAP Supplier Self Service site and you can activate a copilot chat bot to assist users on the site.
Set up suppliers and users
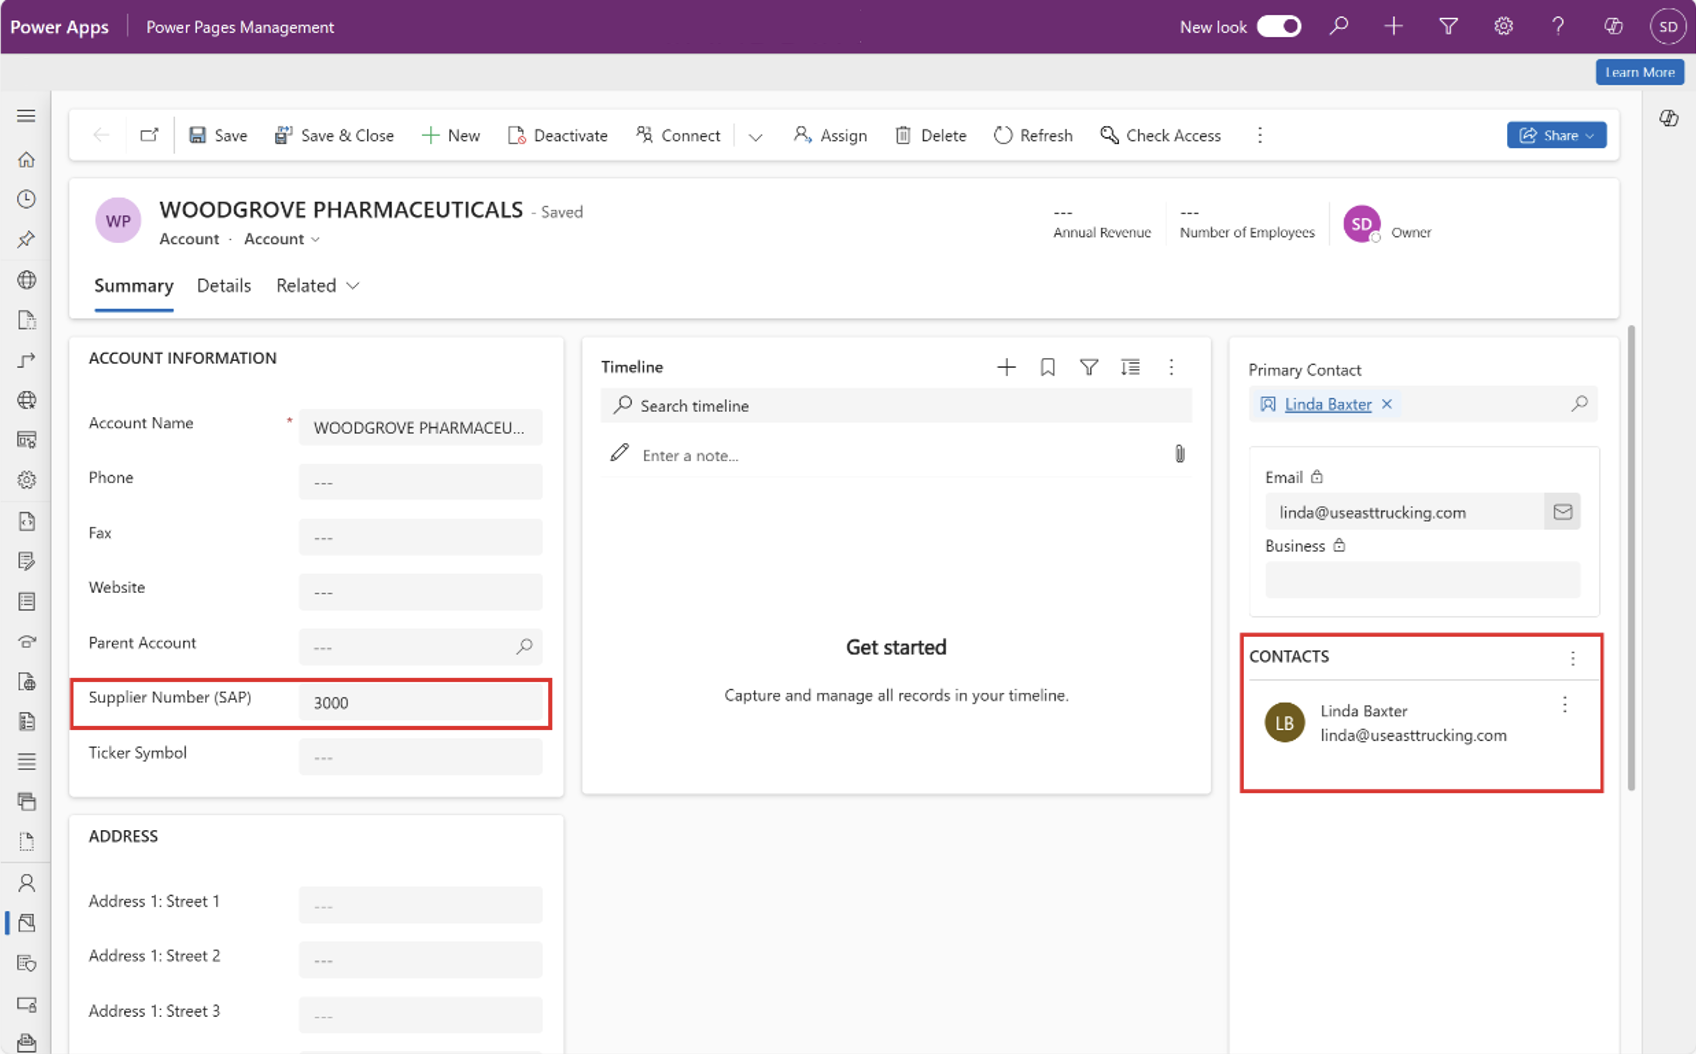
The SAP Supplier Self Service template is set up to save the Supplier's SAP ID in Account Table in Dataverse. You want to set up your account information first and then associate users with each account. Take these steps to get started:
- Open the Power Pages Management model-driven app.
- Go to the Account page.
- Set up each existing account record. Be sure to add the Supplier's SAP ID to Supplier Number (SAP) in the Account Information card.
Once all the accounts are set up, portal users can be set up and related to each Account record.
Learn more about how to set up portal users.

Activate a chat bot
You can activate a chat bot to provide site demos and assist suppliers on the site. Take these steps to get started:
- Open Microsoft Copilot Studio.
- Select your environment and select Copilots to see a list of copilots.
- Select Supplier Bot.
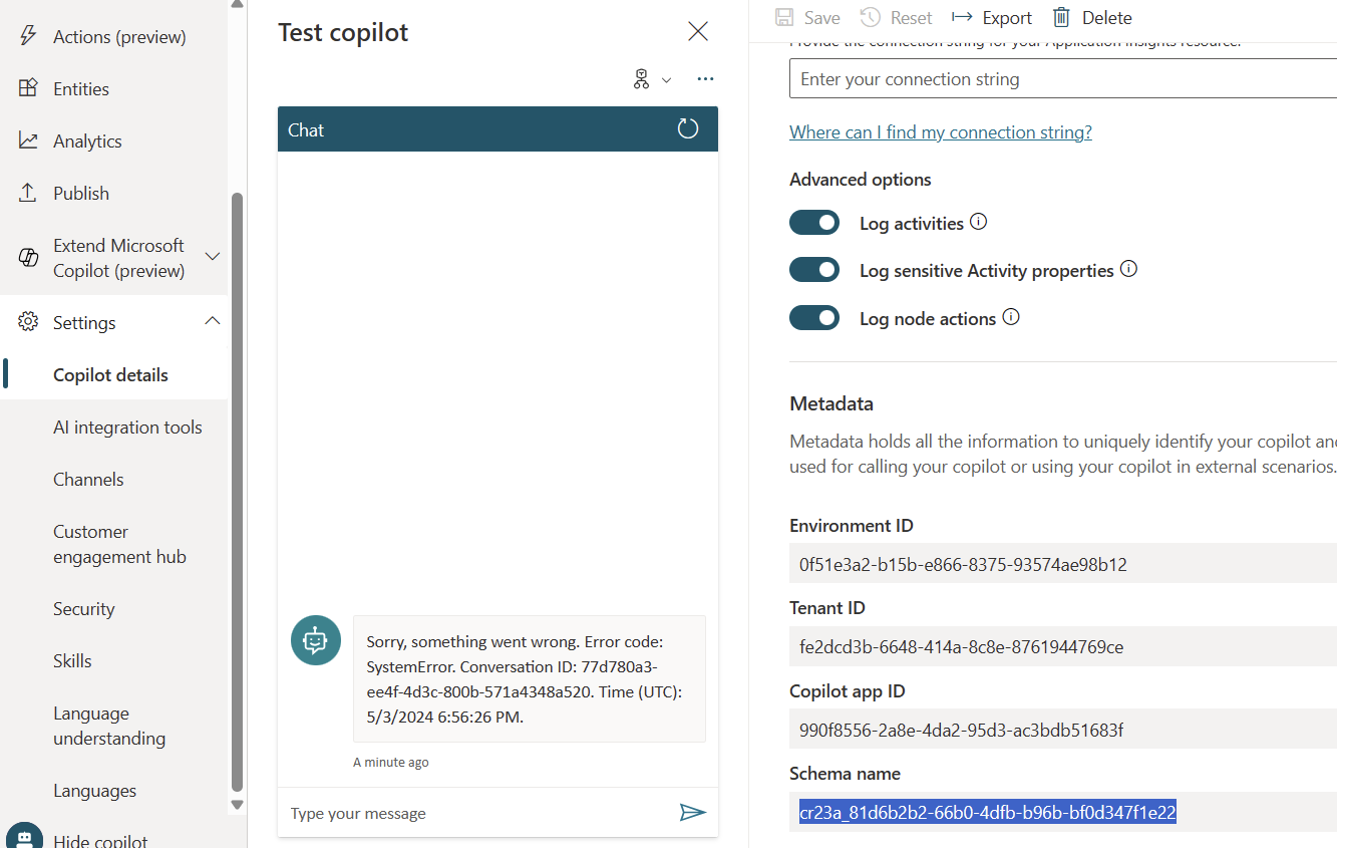
- Open Settings select Copilot details and then Advanced.
- In Metadata, copy the schema ID displayed in Schema name.

Now that you have copied the schema name, you'll need to go to Power Pages to set the bot up. Take these steps to get started:
Select Data.
Search for and select Site Component to see a table.
Select the Component Type column in the table.
Choose the filter icon and enter Bot Consumer.
Select Apply.

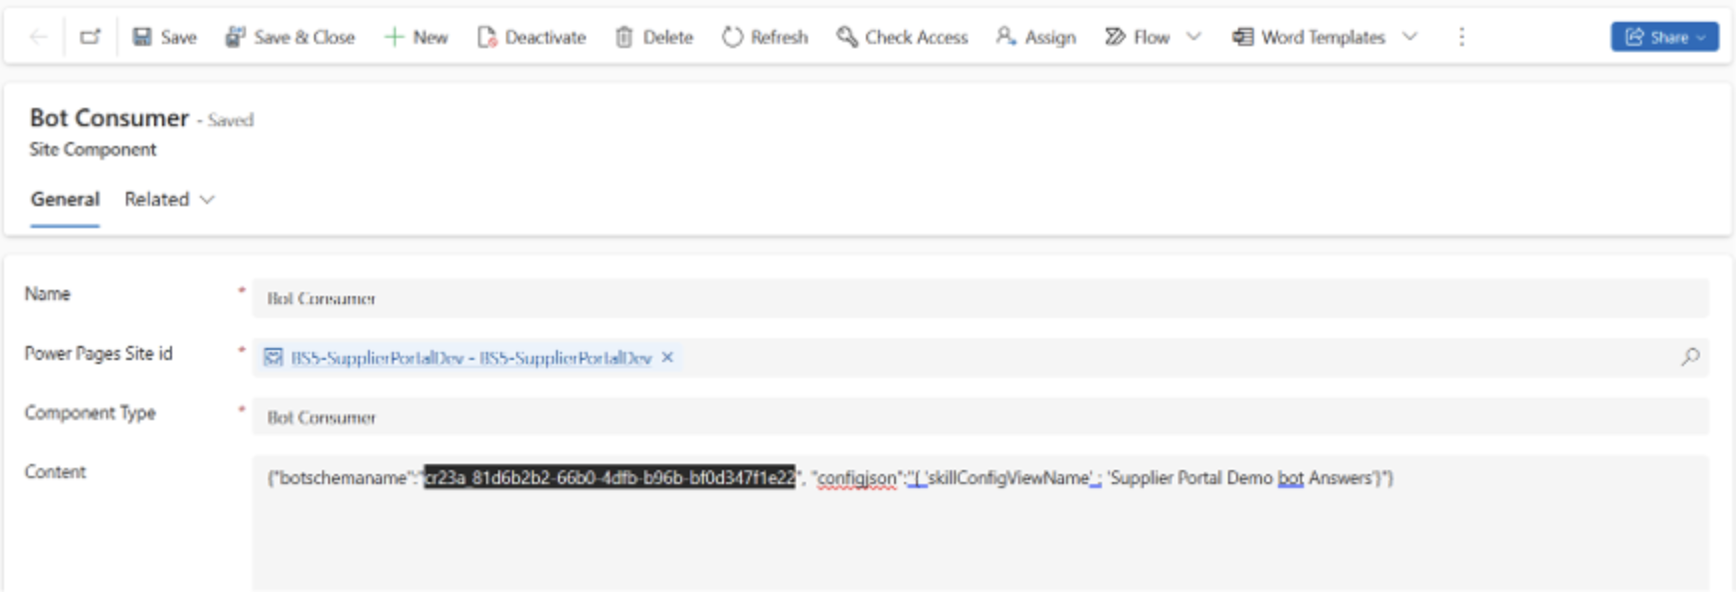
Choose Existing Site data row and select Edit row using form. This opens a new tab that displays the bot's information.

In the Content section, update the
botschemanameschema ID previously copied in Microsoft Copilot Studio.
Sync your site and reload so a new bot will load onto your site.