Get started managing appointment bookings
As an administrator, go to the Appointment Booking Admin app to set up and manage your organization's Appointment Reference options. You set up the options for location, appointment type, and appointment room number.

You can also support multiple languages by localizing application strings, view data, and monitor for errors in the Appointment Booking Admin app.
Set up appointment location options
Meeting Providers and Requestors need to know what locations are available. Set up the location options in the Appointment Booking Admin app to make the options available in the Appointment Booking app that Meeting Providers and Requestors use.
Once set up, Meeting Providers can select the appointment location options they want to be made available to people who are submitting meeting requests with them.
To add locations, take these steps:
- Go to the Appointment Booking Admin app (model-driven app).
- Select Locations under Appointment Reference.
- Select + New on the top toolbar and enter the Location Name for the new location you are setting up.
- Select Save.
- Repeat the process until you have set up all the locations that you want to be available in the booking experience.
Set up appointment types
Meeting Providers and Requestors need to know what types of appointments are available. Set up the types of appointment options in the Appointment Booking Admin app to make the options available in the Appointment Booking app that Meeting Providers and Requestors use.
Once set up, Meeting Providers can select the appointment type options they want to be made available to people who are submitting meeting requests with them.
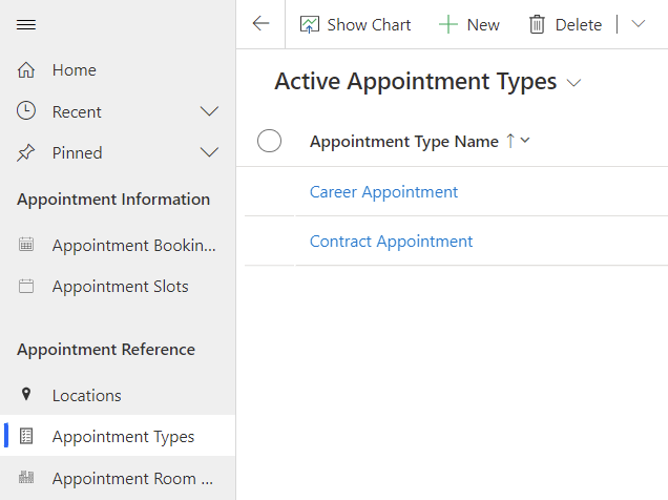
To add appointment types, take these steps:
- Go to the Appointment Booking Admin app (model-driven app).
- Select Appointment Types under Appointment Reference.
- Select +New on the top toolbar and fill out the Appointment Type name for the new type of appointment.
- Select Save.
- Repeat the process until you have set up all the types of appointments you want to be available in the appointment booking experience.
Set up appointment room numbers
Meeting Providers and Requestors need to know what rooms are available. Set up the room number options in the Appointment Booking Admin app to make the options available in the Appointment Booking app that Meeting Providers and Requestors use.
Once set up, Meeting Providers can select the room number options they want to be made available to people who are submitting meeting requests with them.
- Go to the Appointment Booking Admin app (model-driven app).
- Select +New on the top toolbar and fill out the Room Number and Location for the new room.
- Select Save
- Repeat the process until you have set up all the location room numbers you want to be available in the appointment booking experience.
Support more languages
You can localize all the strings in the Appointment Booking app to support the diverse set of languages that may be spoken at your organization. The app contains default strings for all text, but checks to see if there's a localized version in the IT Base Localization table that's installed alongside the Appointment Booking solution. The IT Base solution and the Appointment Booking solution are accessed together from AppSource.
To localize app strings, users must have the IT Template Admin security role assigned to them by a Power Platform admin. Once assigned, a user can take these steps:
Go to the IT Template Administrator app.
Select Localizations on the left pane.
Select +New.
Fill out the form:
- English Value. The text (value) in the app that you replace
- Language. The language you are translating into
- Localized Value. The translated string you set up
- String Type. The type of string you're replacing or filter you can apply. This field is optional
Select Save & Close.