Tutorial: Connect Logic App to your Azure IoT Suite Remote Monitoring preconfigured solution
The Microsoft Azure IoT Suite remote monitoring preconfigured solution is a great way to get started quickly with an end-to-end feature set that exemplifies an IoT solution. This tutorial walks you through how to add Logic App to your Microsoft Azure IoT Suite remote monitoring preconfigured solution. These steps demonstrate how you can take your IoT solution even further by connecting it to a business process.
If you’re looking for a walkthrough on how to provision a remote monitoring preconfigured solution, see Tutorial: Get started with the IoT preconfigured solutions.
Before you start this tutorial, you should:
- Provision the remote monitoring preconfigured solution in your Azure subscription.
- Create a SendGrid account to enable you to send an email that triggers your business process. You can sign up for a free trial account at SendGrid by clicking Try for Free. After you have registered for your free trial account, you need to create an API key in SendGrid that grants permissions to send mail. You need this API key later in the tutorial.
To complete this tutorial, you need Visual Studio 2015 or Visual Studio 2017 to modify the actions in the preconfigured solution back end.
Assuming you’ve already provisioned your remote monitoring preconfigured solution, navigate to the resource group for that solution in the Azure portal. The resource group has the same name as the solution name you chose when you provisioned your remote monitoring solution. In the resource group, you can see all the provisioned Azure resources for your solution. The following screenshot shows an example Resource group blade for a remote monitoring preconfigured solution:
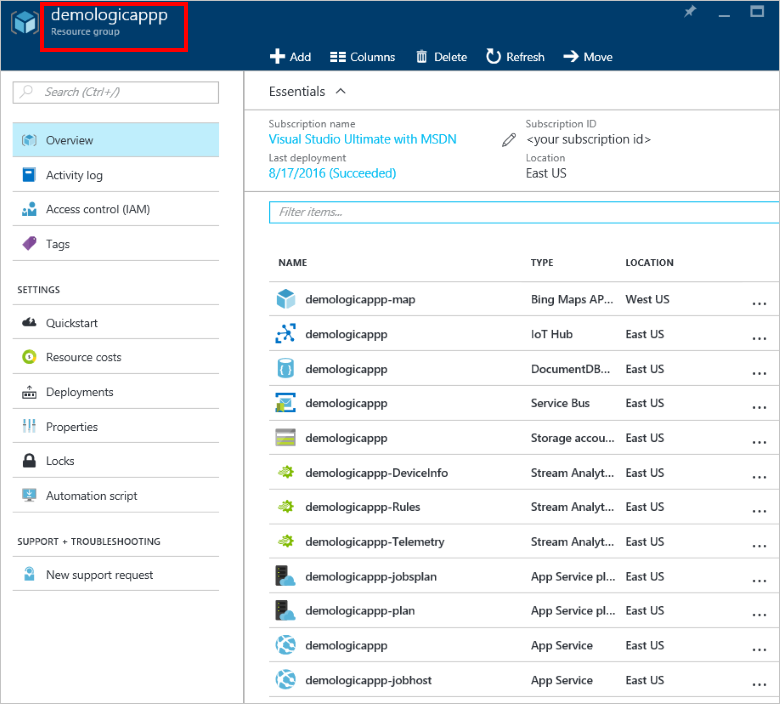
To begin, set up the logic app to use with the preconfigured solution.
Set up the Logic App
Click Add at the top of your resource group blade in the Azure portal.
Search for Logic App, select it and then click Create.
Fill out the Name and use the same Subscription and Resource group that you used when you provisioned your remote monitoring solution. Click Create.
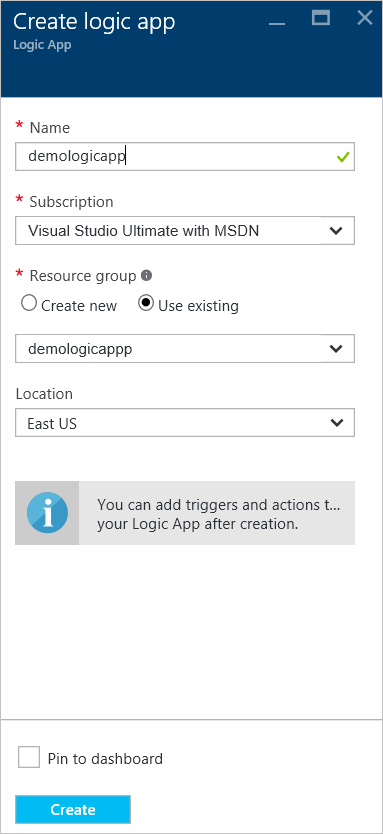
When your deployment completes, you can see the Logic App is listed as a resource in your resource group.
Click the Logic App to navigate to the Logic App blade, select the Blank Logic App template to open the Logic Apps Designer.
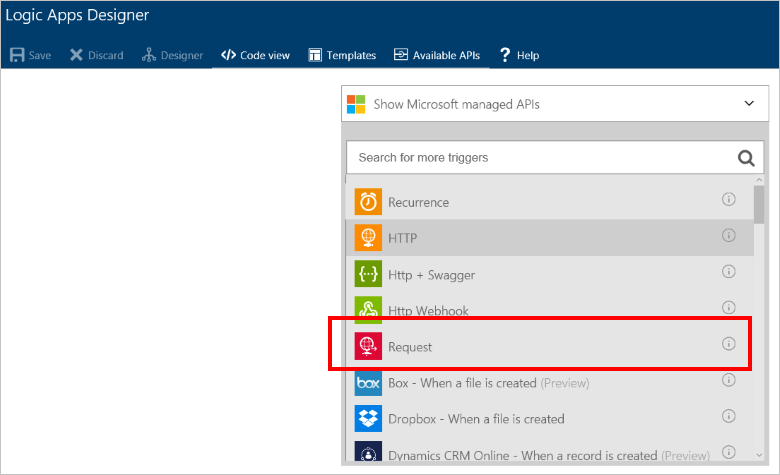
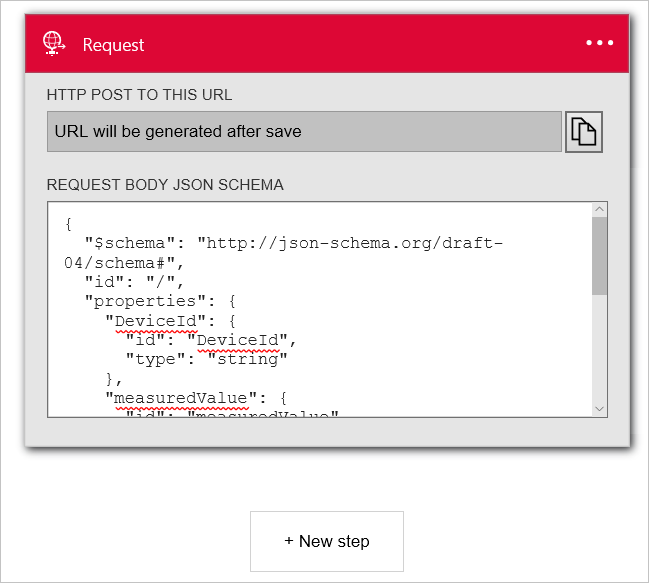
Select Request. This action specifies that an incoming HTTP request with a specific JSON formatted payload acts as a trigger.
Paste the following code into the Request Body JSON Schema:
{
  "$schema": "http://json-schema.org/draft-04/schema#",
  "id": "/",
  "properties": {
    "DeviceId": {
      "id": "DeviceId",
      "type": "string"
    },
    "measuredValue": {
      "id": "measuredValue",
      "type": "integer"
    },
    "measurementName": {
      "id": "measurementName",
      "type": "string"
    }
  },
  "required": [
    "DeviceId",
    "measurementName",
    "measuredValue"
  ],
  "type": "object"
}
Note
You can copy the URL for the HTTP post after you save the logic app, but first you must add an action.
Click + New step under your manual trigger. Then click Add an action.
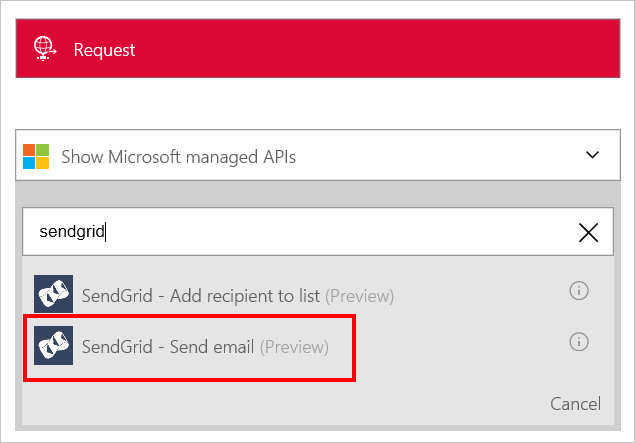
Search for SendGrid - Send email and click it.
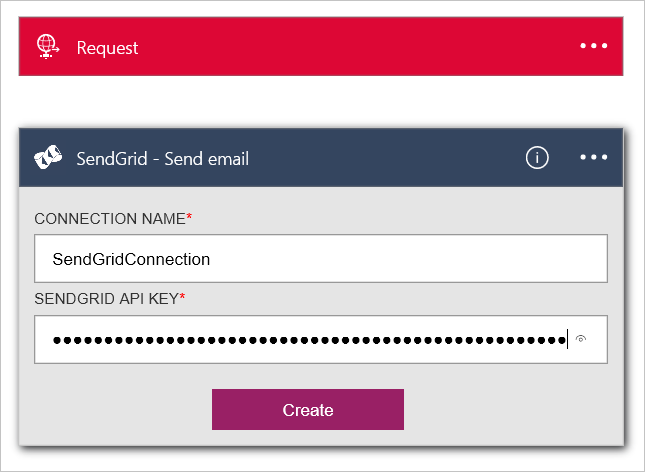
Enter a name for the connection, such as SendGridConnection, enter the SendGrid API Key you created when you set up your SendGrid account, and click Create.
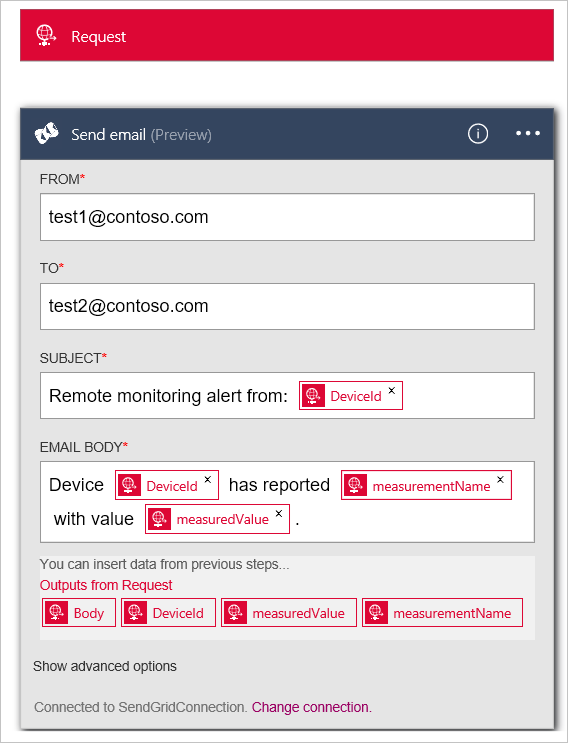
Add email addresses you own to both the From and To fields. Add Remote monitoring alert [DeviceId] to the Subject field. In the Email Body field, add Device [DeviceId] has reported [measurementName] with value [measuredValue]. You can add [DeviceId], [measurementName], and [measuredValue] by clicking in the You can insert data from previous steps section.
Click Save in the top menu.
Click the Request trigger and copy the Http Post to this URL value. You need this URL later in this tutorial.
Note
Logic Apps enable you to run many different types of action including actions in Office 365.
Set up the EventProcessor Web Job
In this section, you connect your preconfigured solution to the Logic App you created. To complete this task, you add the URL to trigger the Logic App to the action that fires when a device sensor value exceeds a threshold.
Use your git client to clone the latest version of the azure-iot-remote-monitoring github repository. For example:
git clone https://github.com/Azure/azure-iot-remote-monitoring.gitIn Visual Studio, open the RemoteMonitoring.sln from the local copy of the repository.
Open the ActionRepository.cs file in the Infrastructure\Repository folder.
Update the actionIds dictionary with the Http Post to this URL you noted from your Logic App as follows:
private Dictionary<string,string> actionIds = new Dictionary<string, string>()
{
    { "Send Message", "<Http Post to this URL>" },
    { "Raise Alarm", "<Http Post to this URL>" }
};
Save the changes in solution and exit Visual Studio.
Deploy from the command line
In this section, you deploy your updated version of the remote monitoring solution to replace the version currently running in Azure.
Following the dev set-up instructions to set up your environment for deployment.
To deploy locally, follow the local deployment instructions.
To deploy to the cloud and update your existing cloud deployment, follow the cloud deployment instructions. Use the name of your original deployment as the deployment name. For example if the original deployment was called demologicapp, use the following command:
build.cmd cloud release demologicappWhen the build script runs, be sure to use the same Azure account, subscription, region, and Active Directory instance you used when you provisioned the solution.
See your Logic App in action
The remote monitoring preconfigured solution has two rules set up by default when you provision a solution. Both rules are on the SampleDevice001 device:
- Temperature > 38.00
- Humidity > 48.00
The temperature rule triggers the Raise Alarm action and the Humidity rule triggers the SendMessage action. Assuming you used the same URL for both actions the ActionRepository class, your logic app triggers for either rule. Both rules use SendGrid to send an email to the To address with details of the alert.
Note
The Logic App continues to trigger every time the threshold is met. To avoid unnecessary emails, you can either disable the rules in your solution portal or disable the Logic App in the Azure portal.
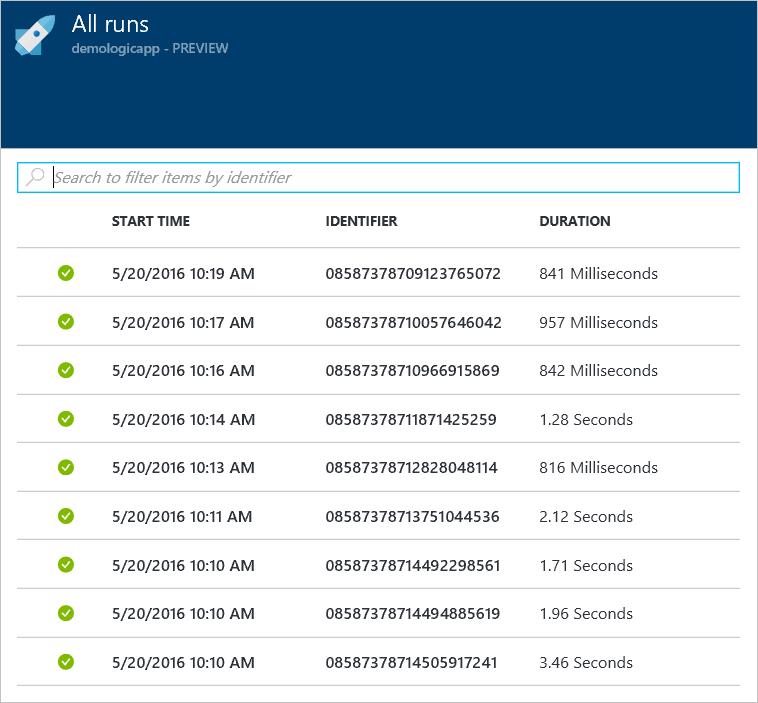
In addition to receiving emails, you can also see when the Logic App runs in the portal:
Next steps
Now that you've used a Logic App to connect the preconfigured solution to a business process, you can learn more about the options for customizing the preconfigured solutions: