Work with the Node.js interactive window
Applies to: ![]() Visual Studio
Visual Studio ![]() Visual Studio for Mac
Visual Studio for Mac
Note
This article applies to Visual Studio 2017. If you're looking for the latest Visual Studio documentation, see Visual Studio documentation. We recommend upgrading to the latest version of Visual Studio. Download it here
Node.js Tools for Visual Studio include an interactive window for the installed Node.js runtime. This window allows you to enter JavaScript code and see the results immediately, as well as execute npm commands to interact with the current project. The interactive window is also known as a REPL (Read/Evaluate/Print Loop).
Open the interactive window
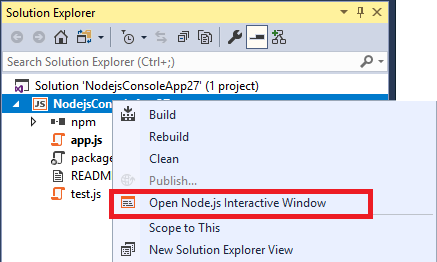
You can open the interactive window by right-clicking the Node.js project node in Solution Explorer and selecting Open Node.js Interactive Window.

The default short-cut keys to open the Node.js interactive window are [CTRL] + K, N. Or, you can open the window from the toolbar by choosing View > Windows > Node.js Interactive Window.
Use the REPL
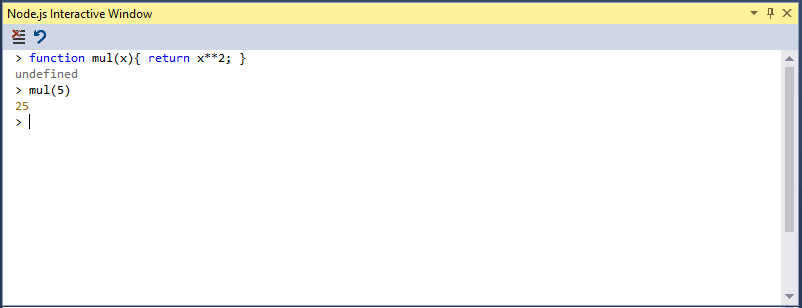
Once opened, you can enter commands.

The interactive window has several built-in commands, which start with a dot prefix to distinguish them from any JavaScript function that you declare. The following commands are supported:
.cls, .clear Clears the contents of the editor window, leaving the history and execution context intact.
.help Displays help on the specified command, or on all available commands and key bindings if none is specified.
.info Shows information about the current used Node.js executable.
.npm
Runs an npm command. If the solution contains more than one project, specify the target project using .npm [projectname] <npm arguments>.
.reset Resets the execution environment to the initial state, keep history.
.save Saves the current REPL session to a file.