Digital Major Incident Response Plan (MIRP)
Glossary
- Microsoft Services Hub: The current version of Microsoft Services Hub.
- Microsoft Engage Center (Services Hub): Enhanced version of Microsoft Services Hub with modernized Azure infrastructure.
Background
Through the new capability in Microsoft Engage Center, we provide customers with a new workload-based digital experience that offers near real-time insights on their Azure health configurations, plus trackable incident readiness actions all on modernized infrastructure like the Azure portal.
This experience is designed to help you prepare for, respond to, and recover from major incidents.
Identify critical workloads
A MIRP Review needs to be done every six months for all Customers' critical workloads. Your Customer Success Account Manager (CSAM) works with you to collect information about your organization’s critical workloads and document the subscriptions associated with those workloads.
Access Digital MIRP
To get access to the Digital MIRP, your organization's Microsoft Engage Center admin (Customer Support Manager) must add you a Microsoft Entra group that has permissions to access Digital MIRP. Reach out to your Customer Success Account Manager or your organization admin if you have questions related to access.
Begin in Microsoft Services Hub
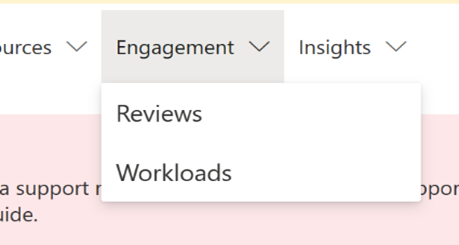
Navigate to the "Engagement" tab in the top menu and select Reviews.
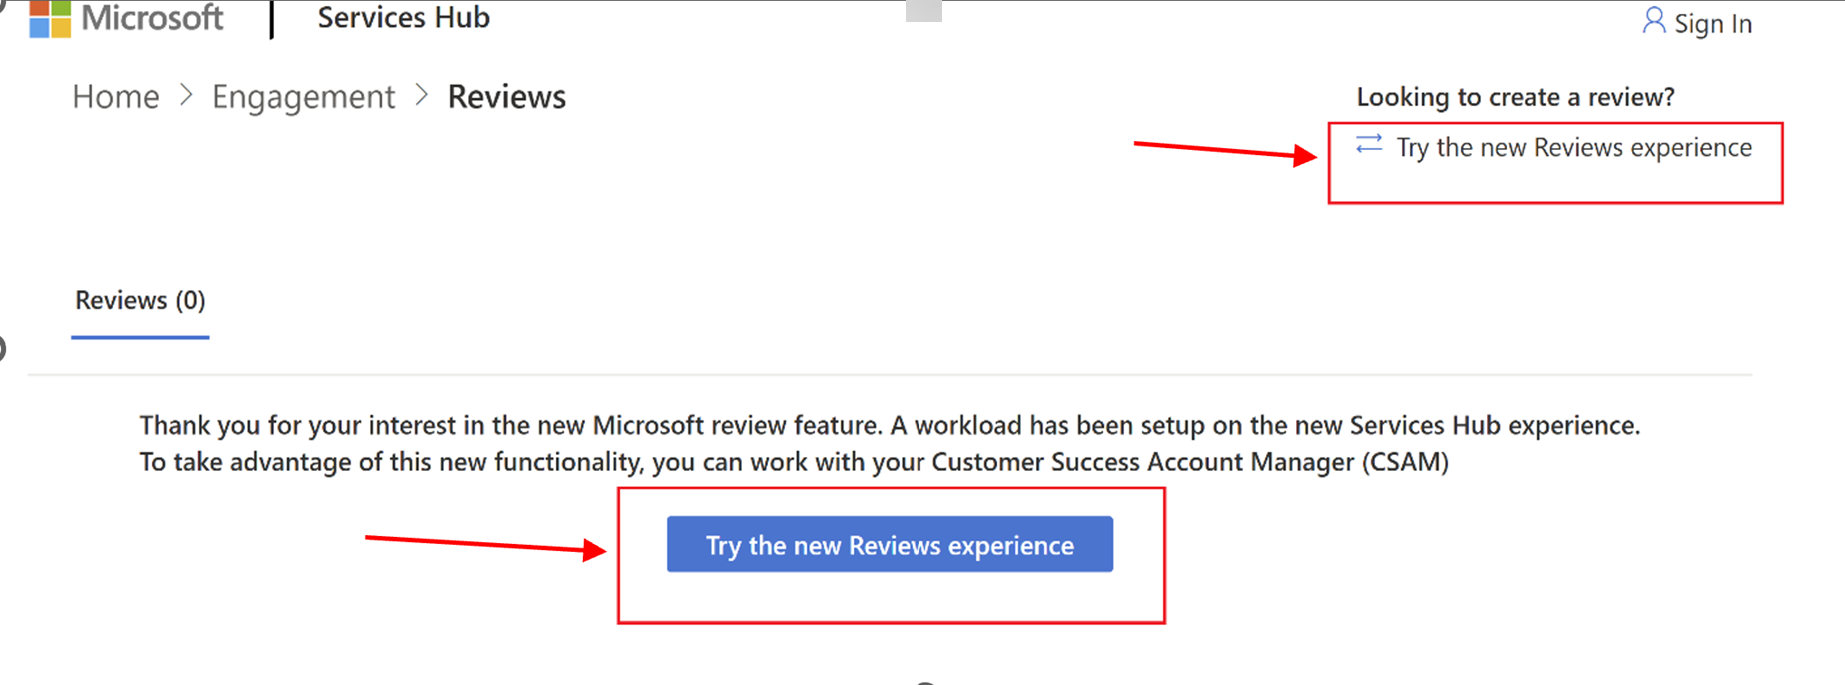
Select the "Try the new Reviews experience" button and enter the Microsoft Engage Center (Services Hub) Engagement Reviews experience.
Create a MIRP
Your Customer Success Account Manager (CSAM) works with you to initiate a new Digital MIRP. A new MIRP can be initiated by you or your CSAM if there is no pending/active MIRP for that workload.
Steps to create a new MIRP Review:
Use the dropdown list and/or search bar at its top to select your desired workload name.
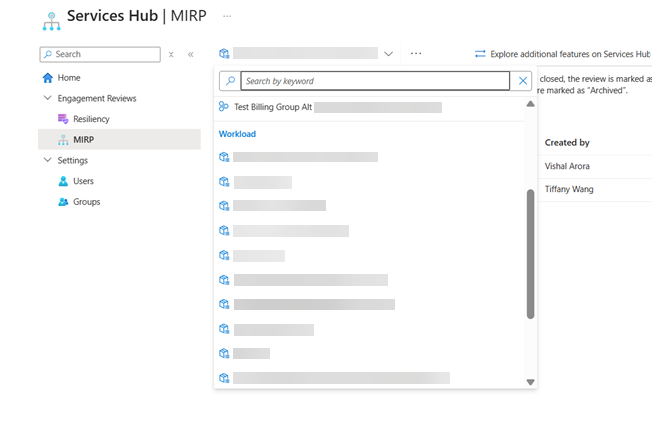
Select the "Create review" button.
Provide a unique name for your new review.
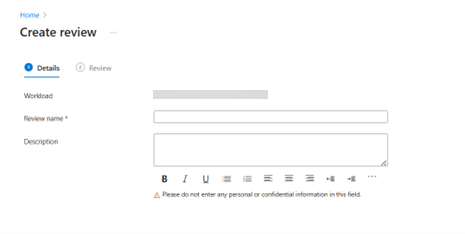
Optional: Add a description for your new review.
Select the "Next" button.
Review and save your changes.
View MIRP details
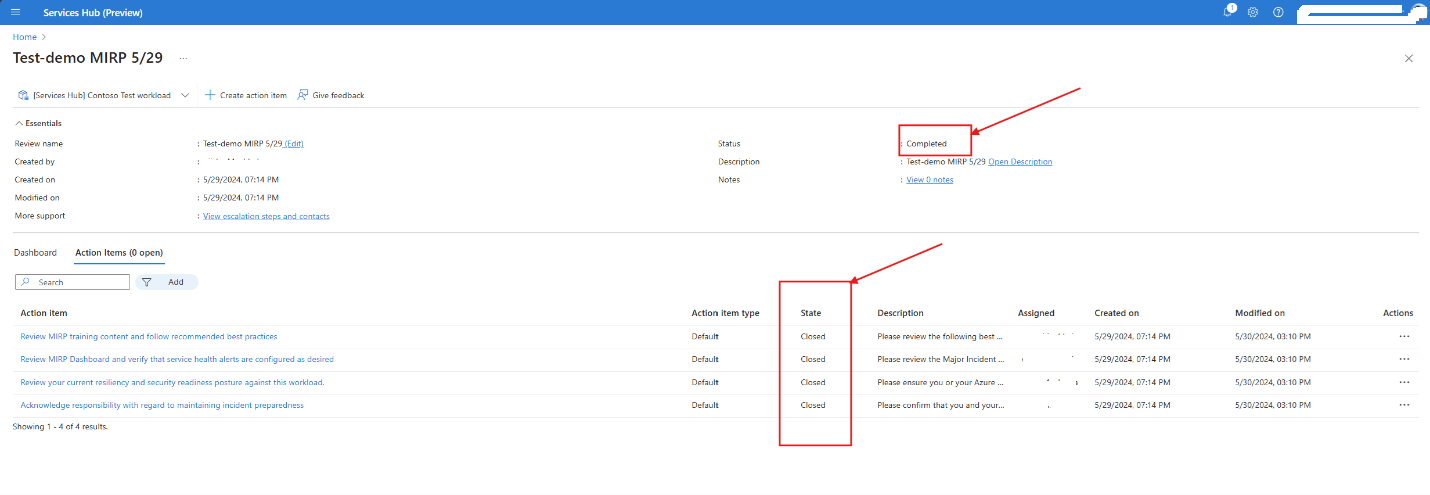
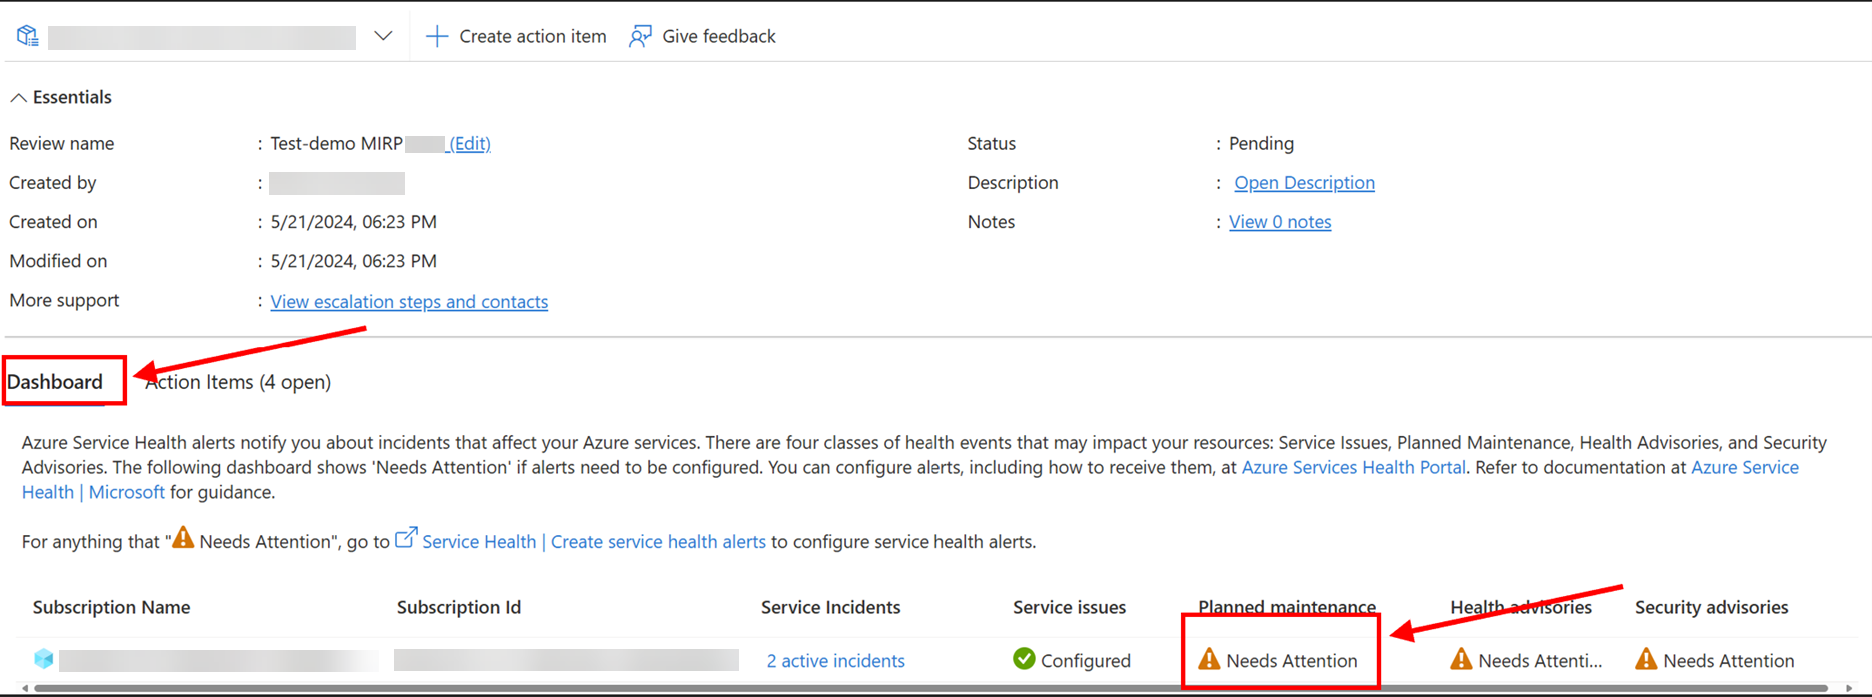
Once the MIRP is successfully created, you can view the following MIRP details:
- "Review Name"
- "Created by"
- "Created date"
- "Modified date"
- "Status"
- "Description"
- "Notes"
- "More support"

Review Azure Service Health Configurations
Under Dashboard view, you can see data about Service Health Alert settings for all the Azure subscriptions linked to your workload. The data includes the status of Service Incident, Service Issue, Planned Maintenance Health Advisories, and Security Advisories.
Set up alerts on Azure Service Health if alerts show as "Needs Attention", You can go to Azure Service Health | Microsoft for help.
If alerts are labeled "Needs Attention", you should configure alerts on Azure Service Health.
View and Manage Action items
Review default Action items:
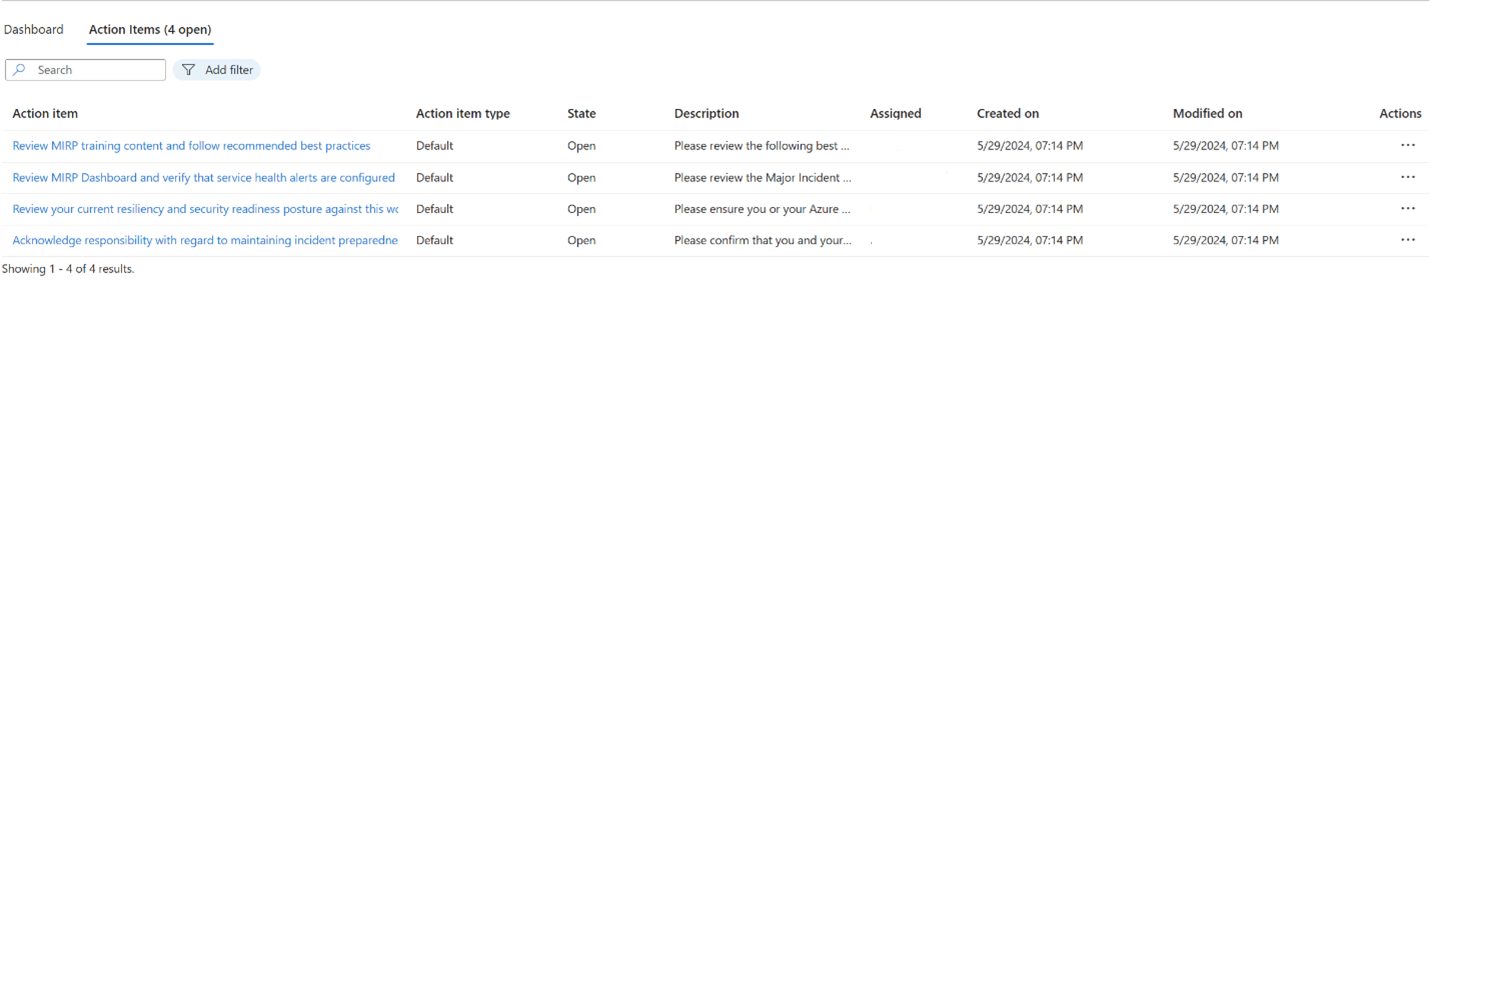
Select the “Action items” tab to review all four default action items. These action items help your organization be prepared for any Major incidents.
Manage action items:
Select an action item to open the action items pane.

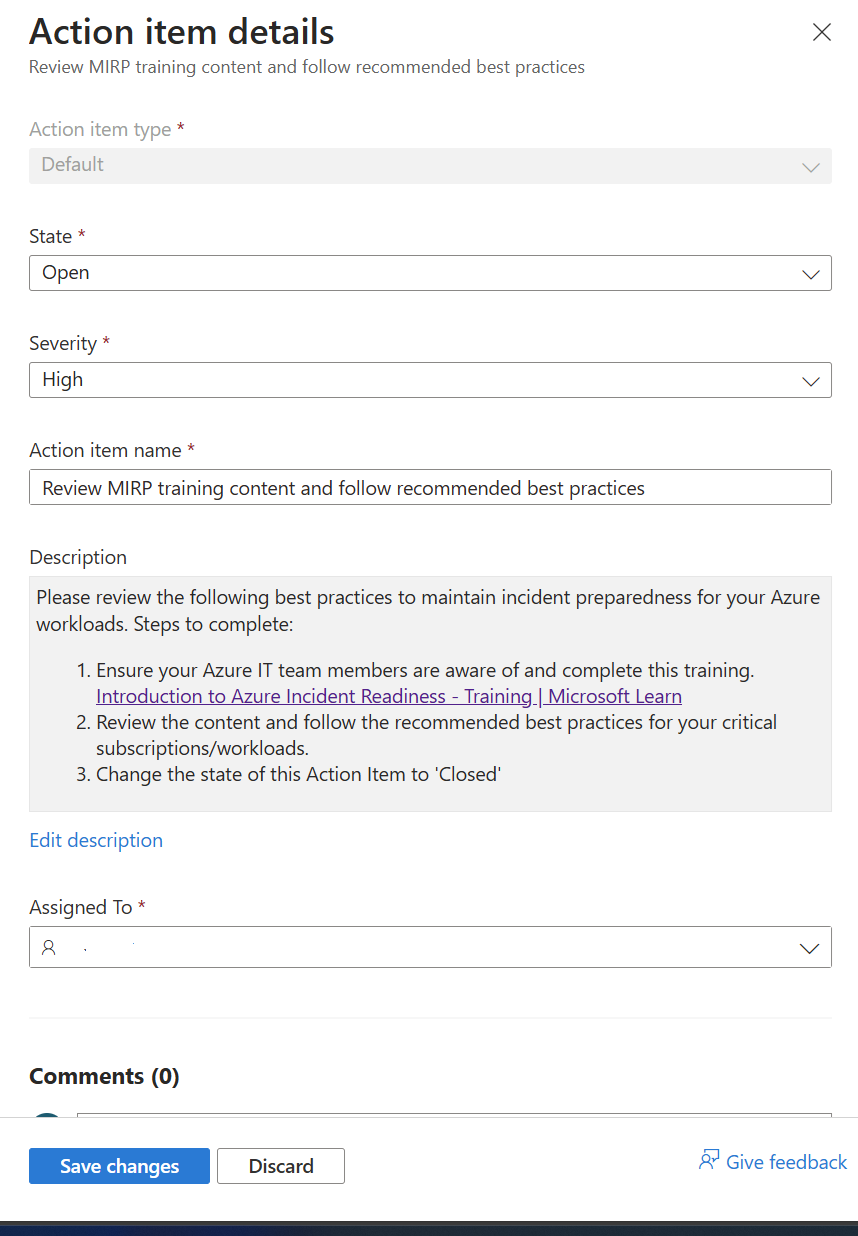
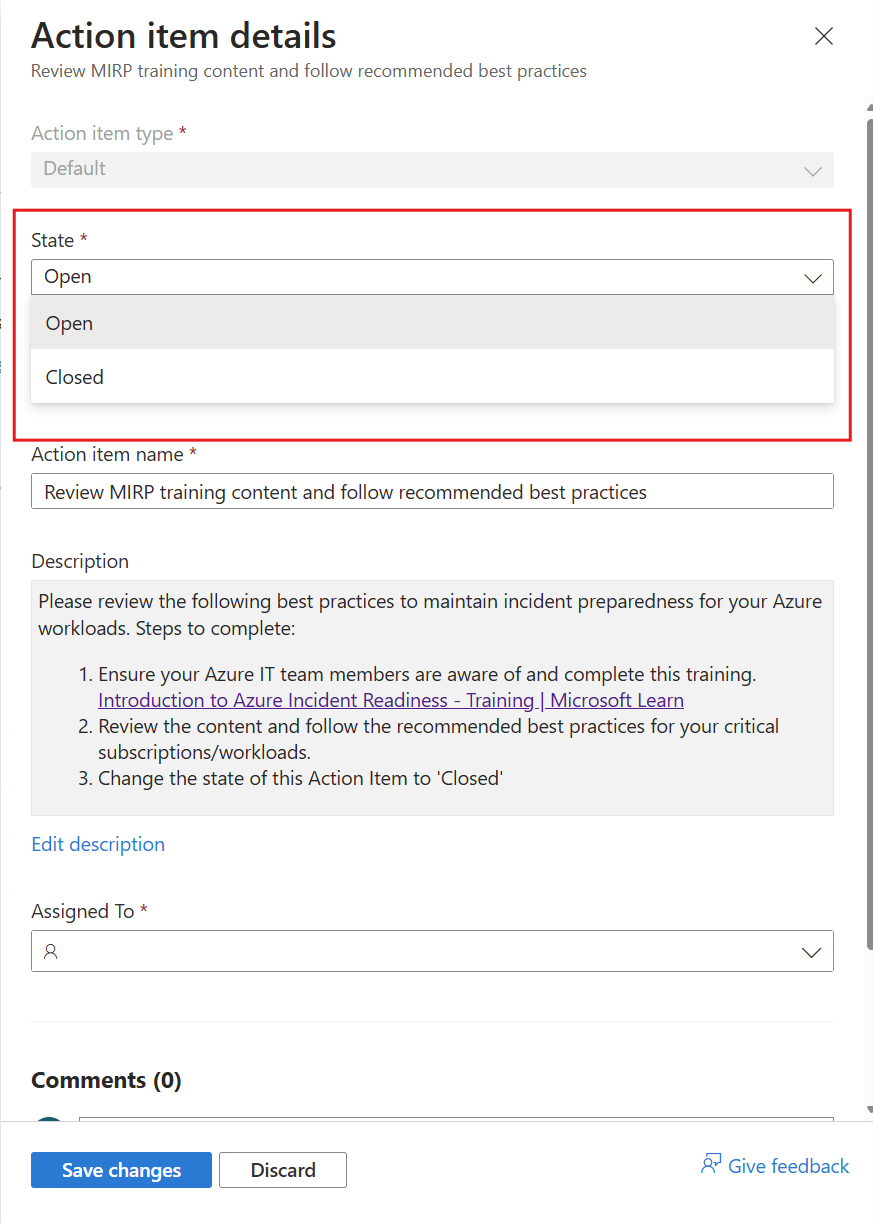
Update State:
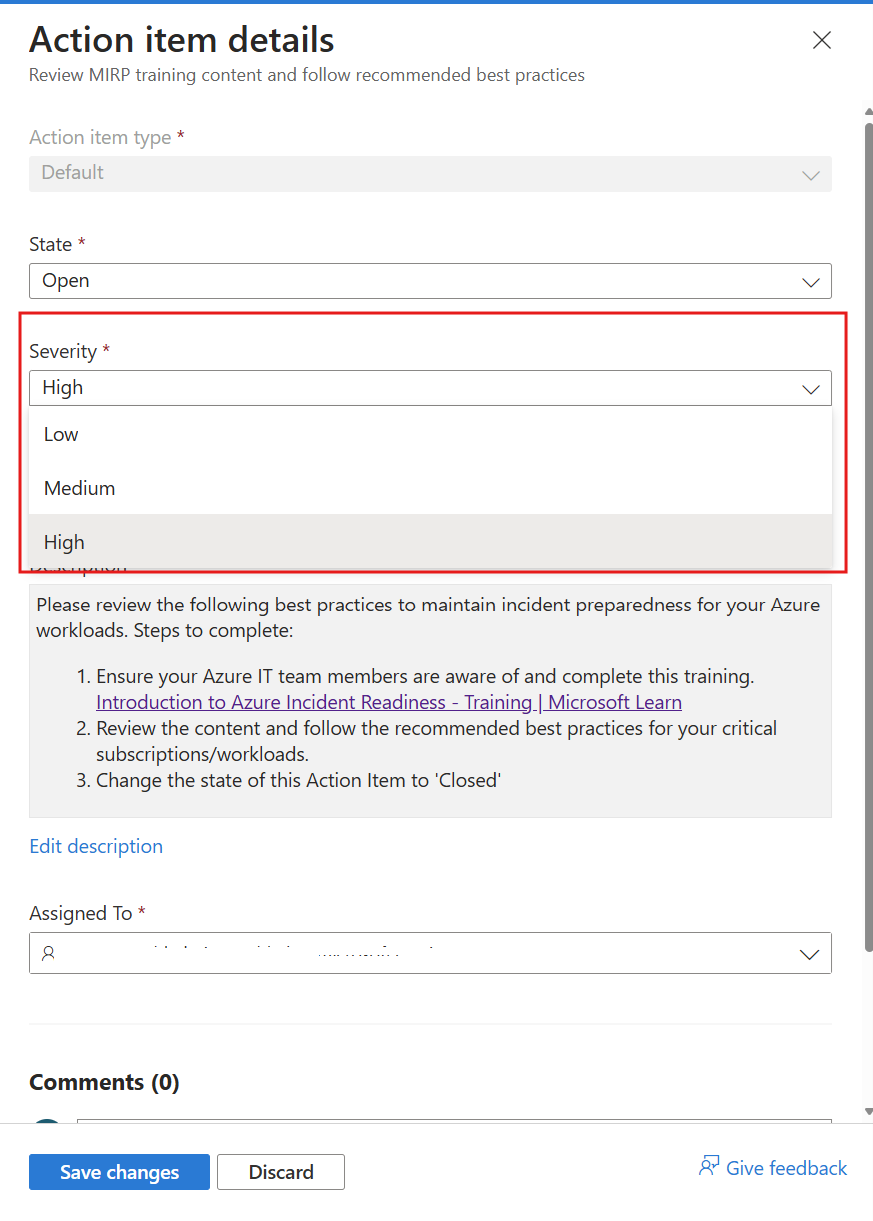
Update Severity:
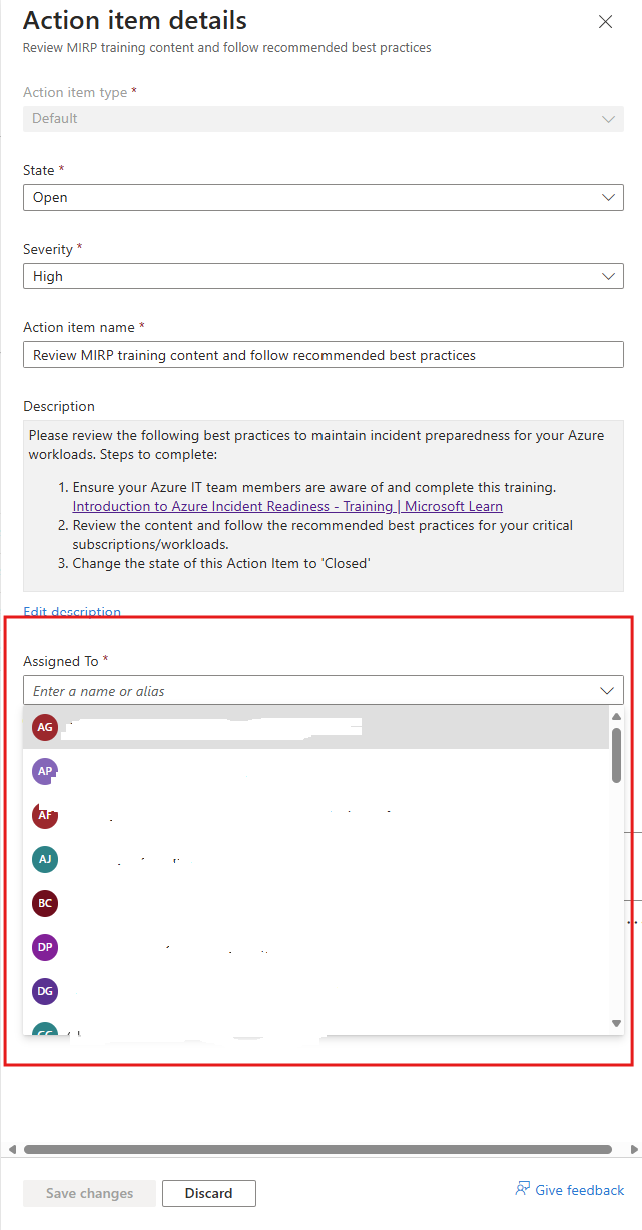
Assign Action item to anyone from your account team:
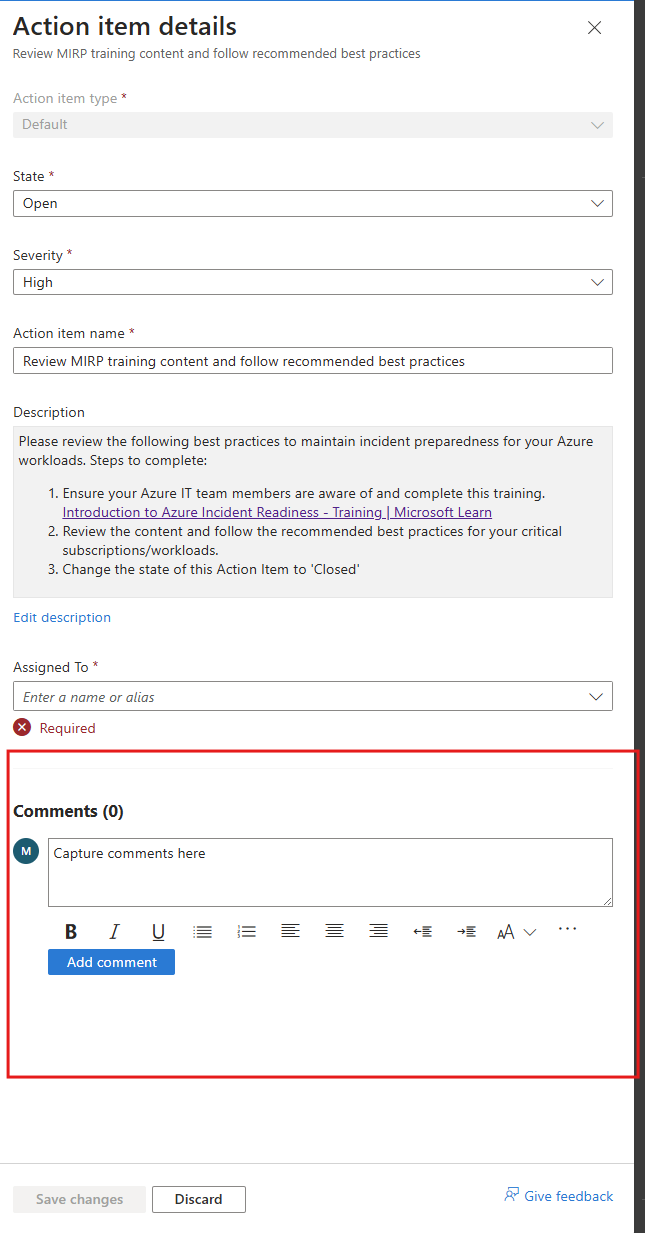
Add Comments:
Create new action items
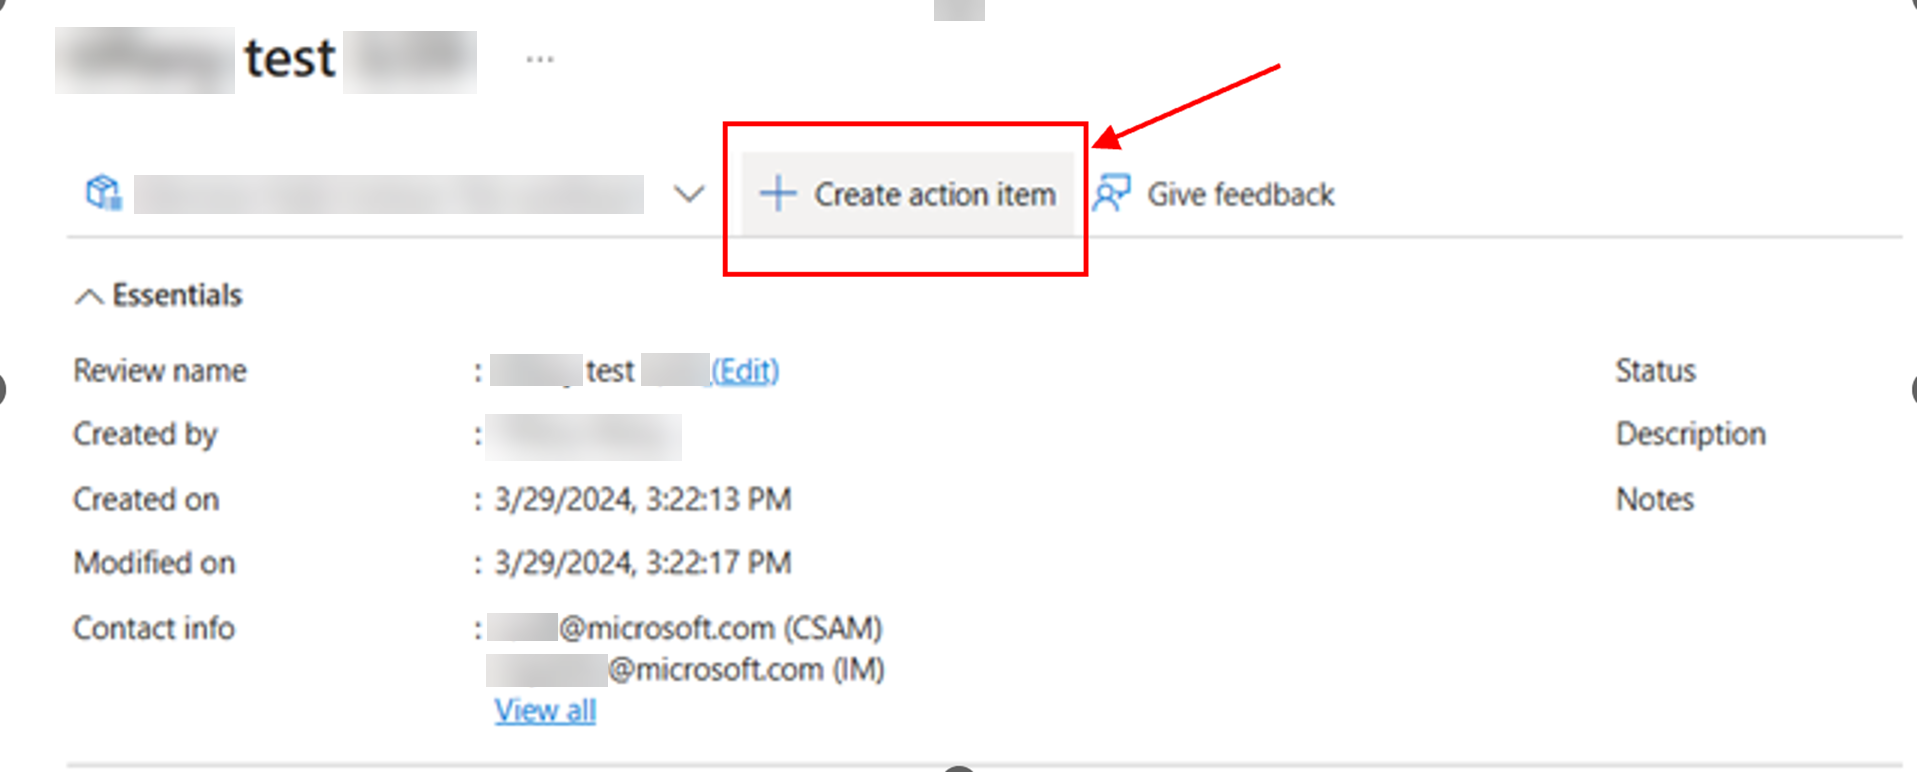
Select “Create action item” to create a new action item.
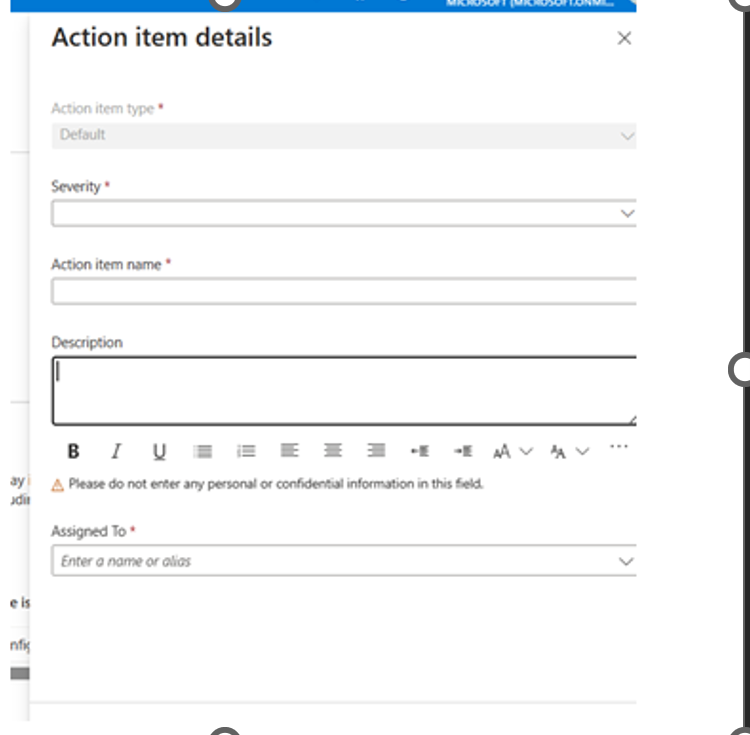
Provide essential details like “Severity” and “Action item name,” for your new action item, and assign the action item to an individual.
Identify and capture High-impact crisis contacts
If there's an incident, someone from your Microsoft account team will need to reach out to you. You can select the "Edit contacts" button, which opens a page where you and your account team can collectively identify the point of contact for when there's an incident.


Getting support during an incident
If an incident occurs, follow the Escalation steps that are available in your Digital MIRP.
Select "View escalation steps and contact" under the More support.

View Steps for escalation

Select "View your full account team" to see your full account team and their contact details.


Close a MIRP
Close all the default action items to close a MIRP.
