Create an automated workflow using invoice processing
Discover invoice processing on AI Builder's home page
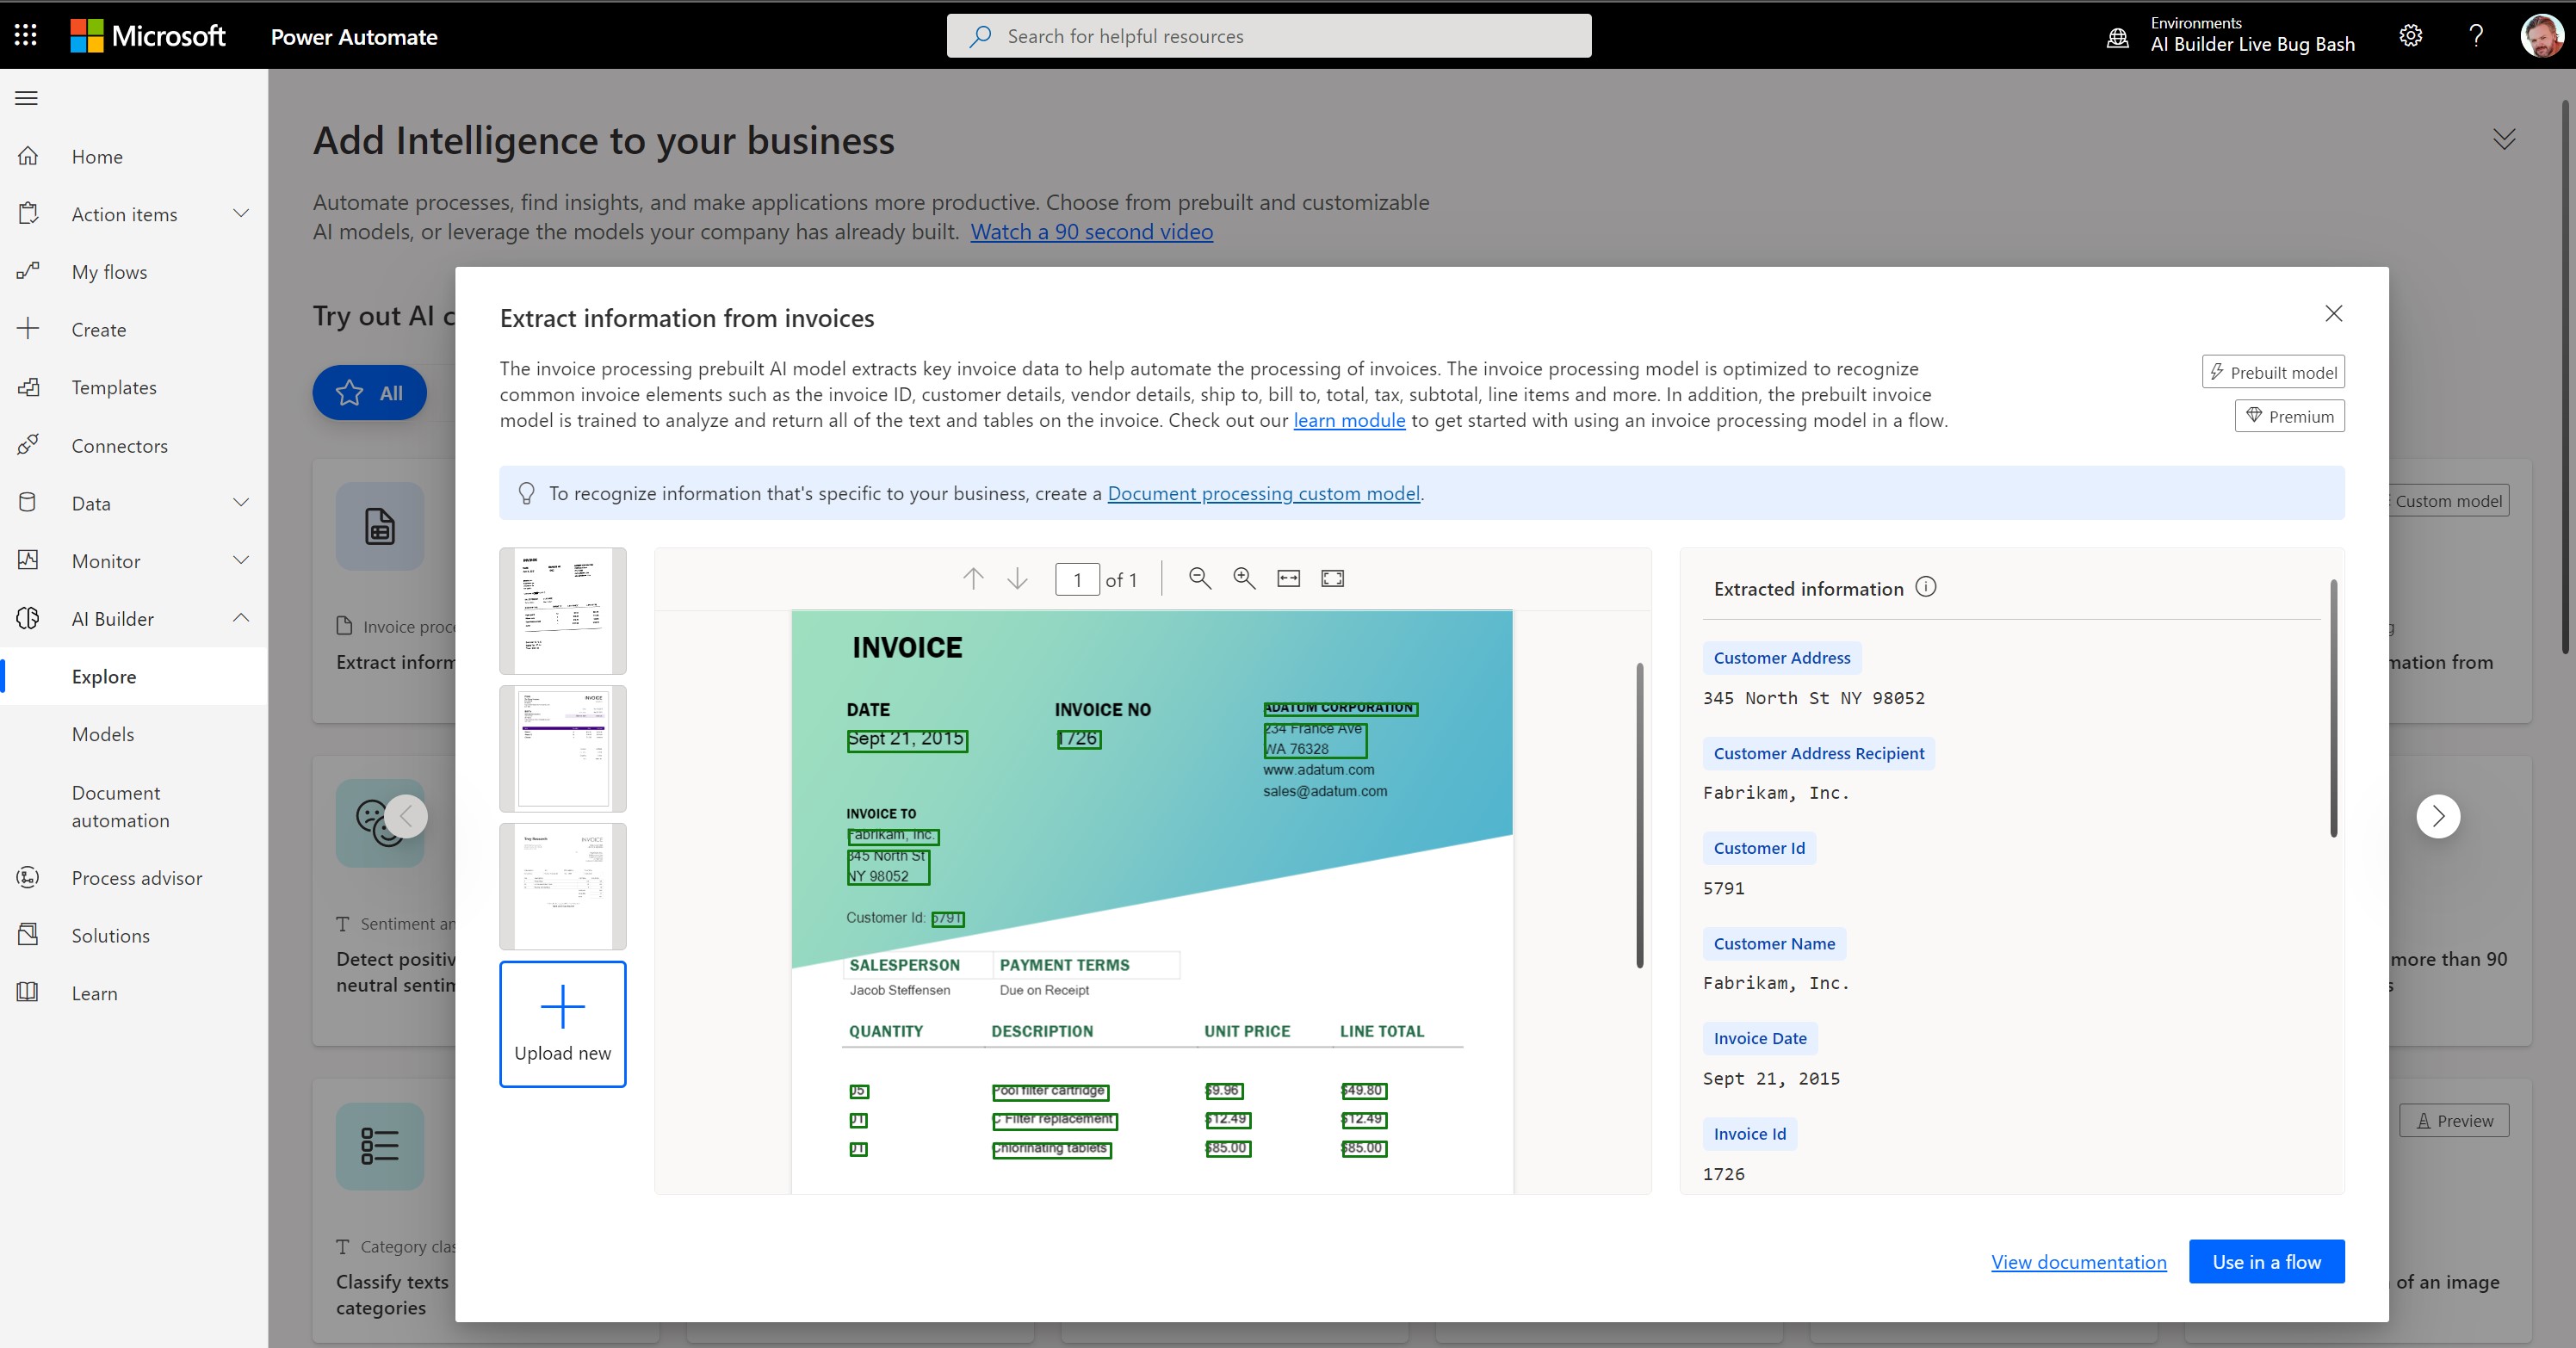
When you log into either Power Automate or Power Apps, you can navigate to AI Builder on the left menu and then select Build.
On the AI Builder home page, you'll see all the AI capabilities that are at your disposal. In the Get straight to productivity section, you'll see an entry for Invoice Processing. By selecting it, you'll learn more about this AI capability plus a Try it out section where you can see some sample invoices and try your own invoices right away. Give it a try!
Create an automated workflow using invoice processing
When you have multiple invoices to process an automated workflow can save you considerable time by scanning each invoice for you automatically in the background.
Create a new flow
In this exercise, you'll create a flow that automatically runs whenever a new invoice file is added to a OneDrive for Business folder. This flow will scan the image for key invoice information and will then write it into a Microsoft Excel spreadsheet.
Sign into Microsoft Power Automate
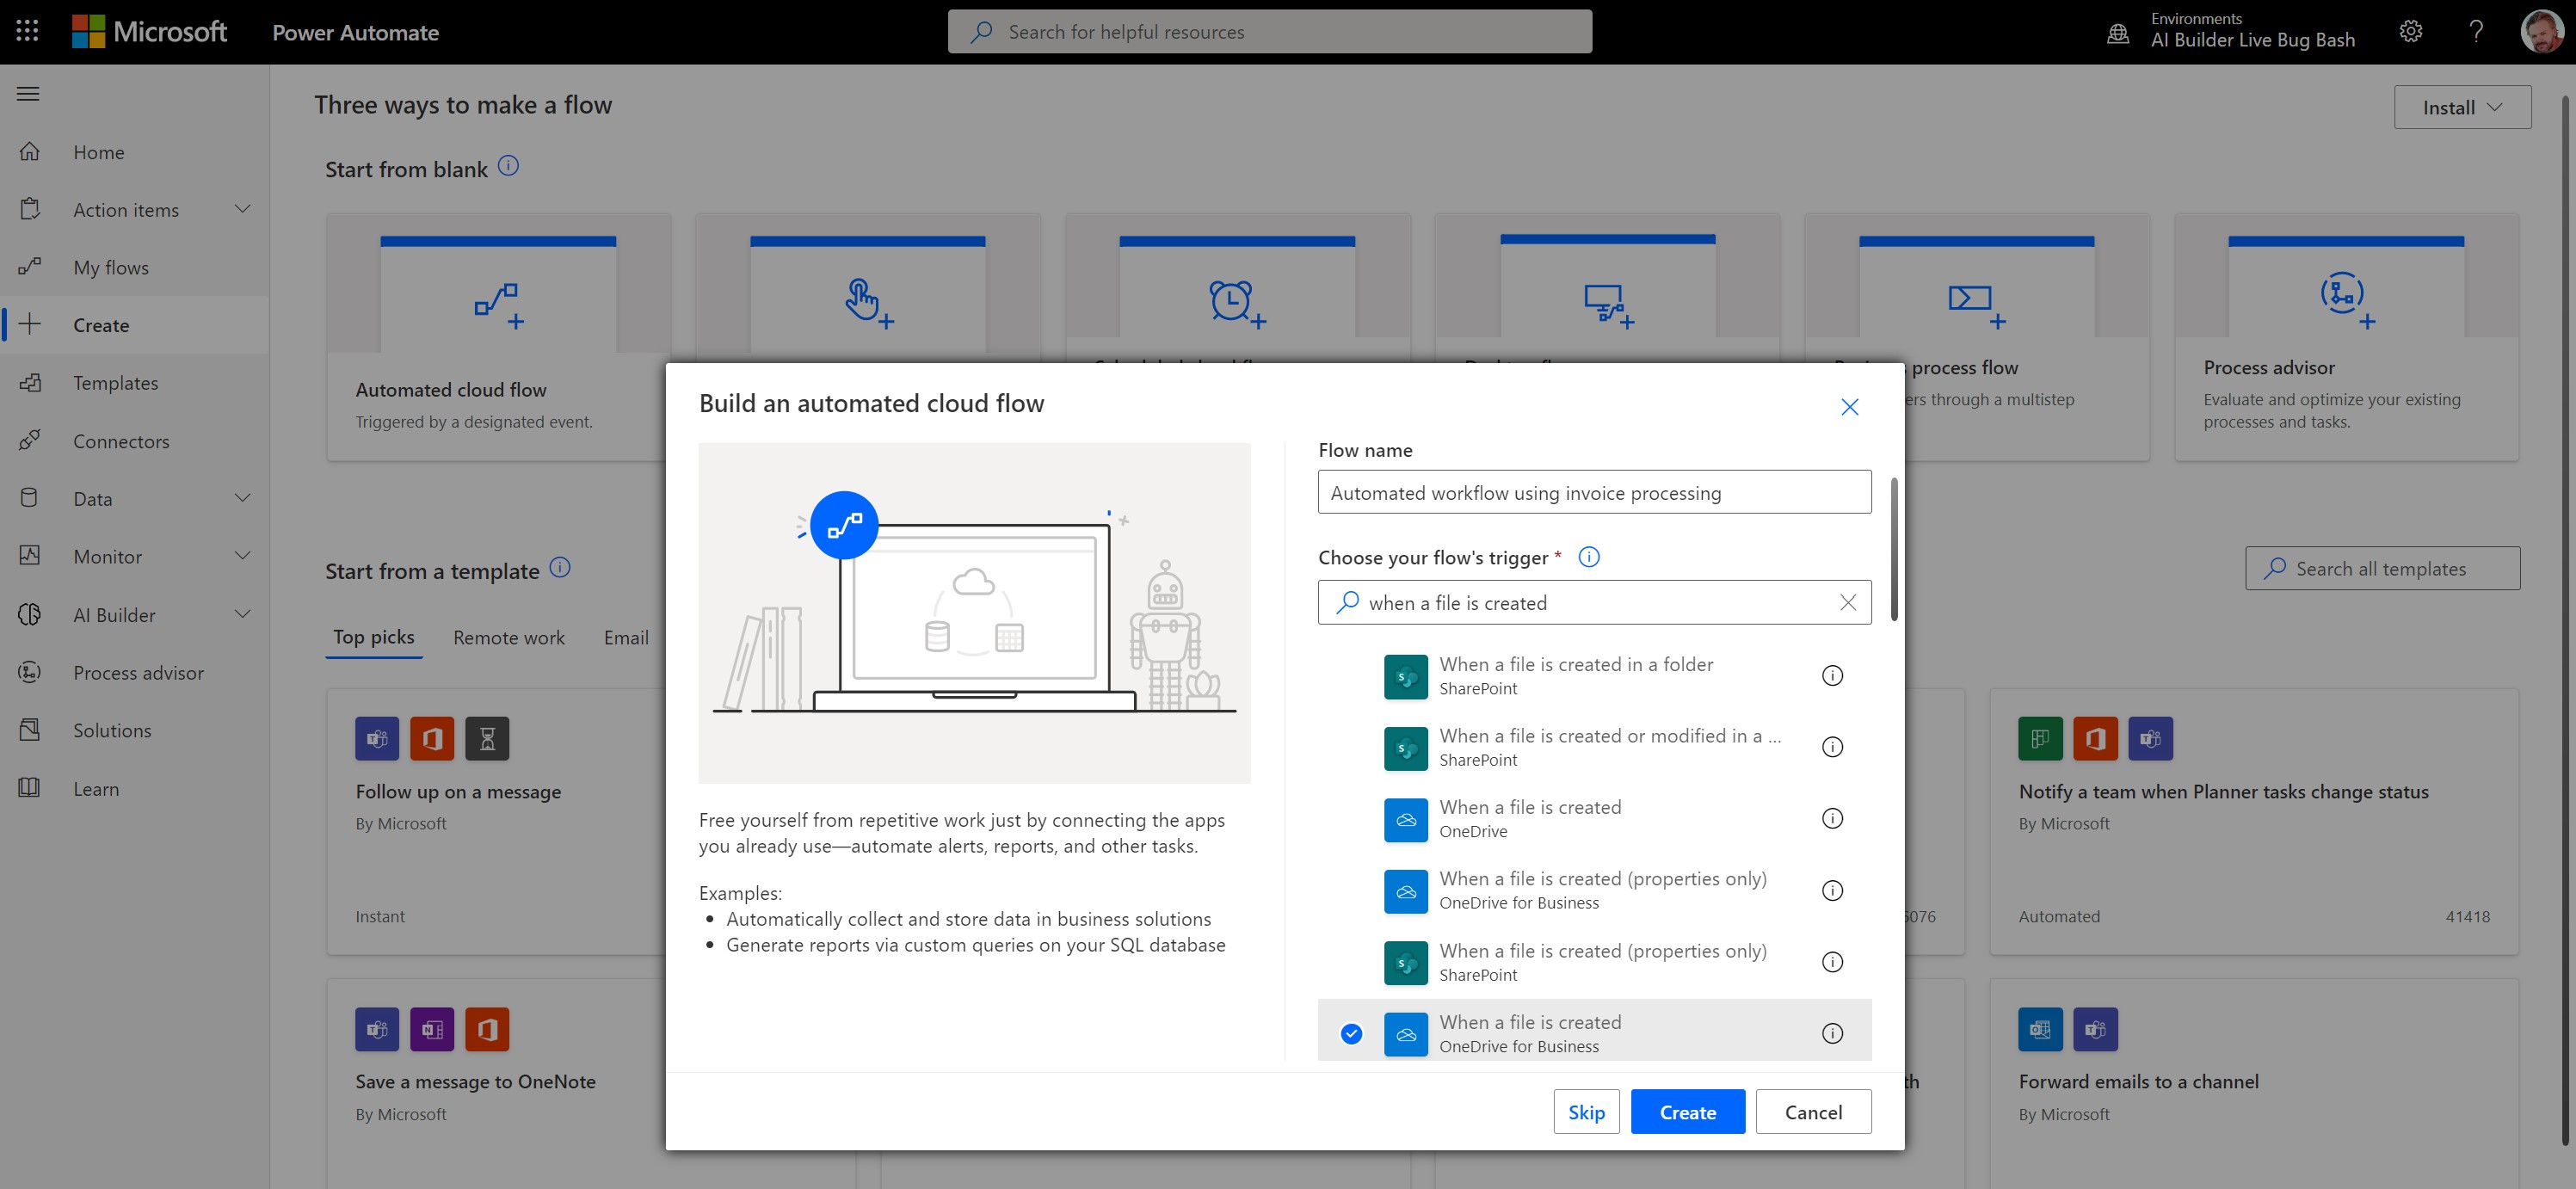
Create a new flow by going to the Create menu on the left and select Automated cloud flow. Give your flow a name and select as trigger When a file is created for OneDrive for Business.
Configure the trigger
Once the flow has been created, you'll see that the When a file is created OneDrive trigger has been automatically added. Now you have to specify the folder in your OneDrive for business that you want to use to put your invoices in the Folder field.
Scan the invoice file
Next, you'll scan the contents of the image file for the key invoice information.
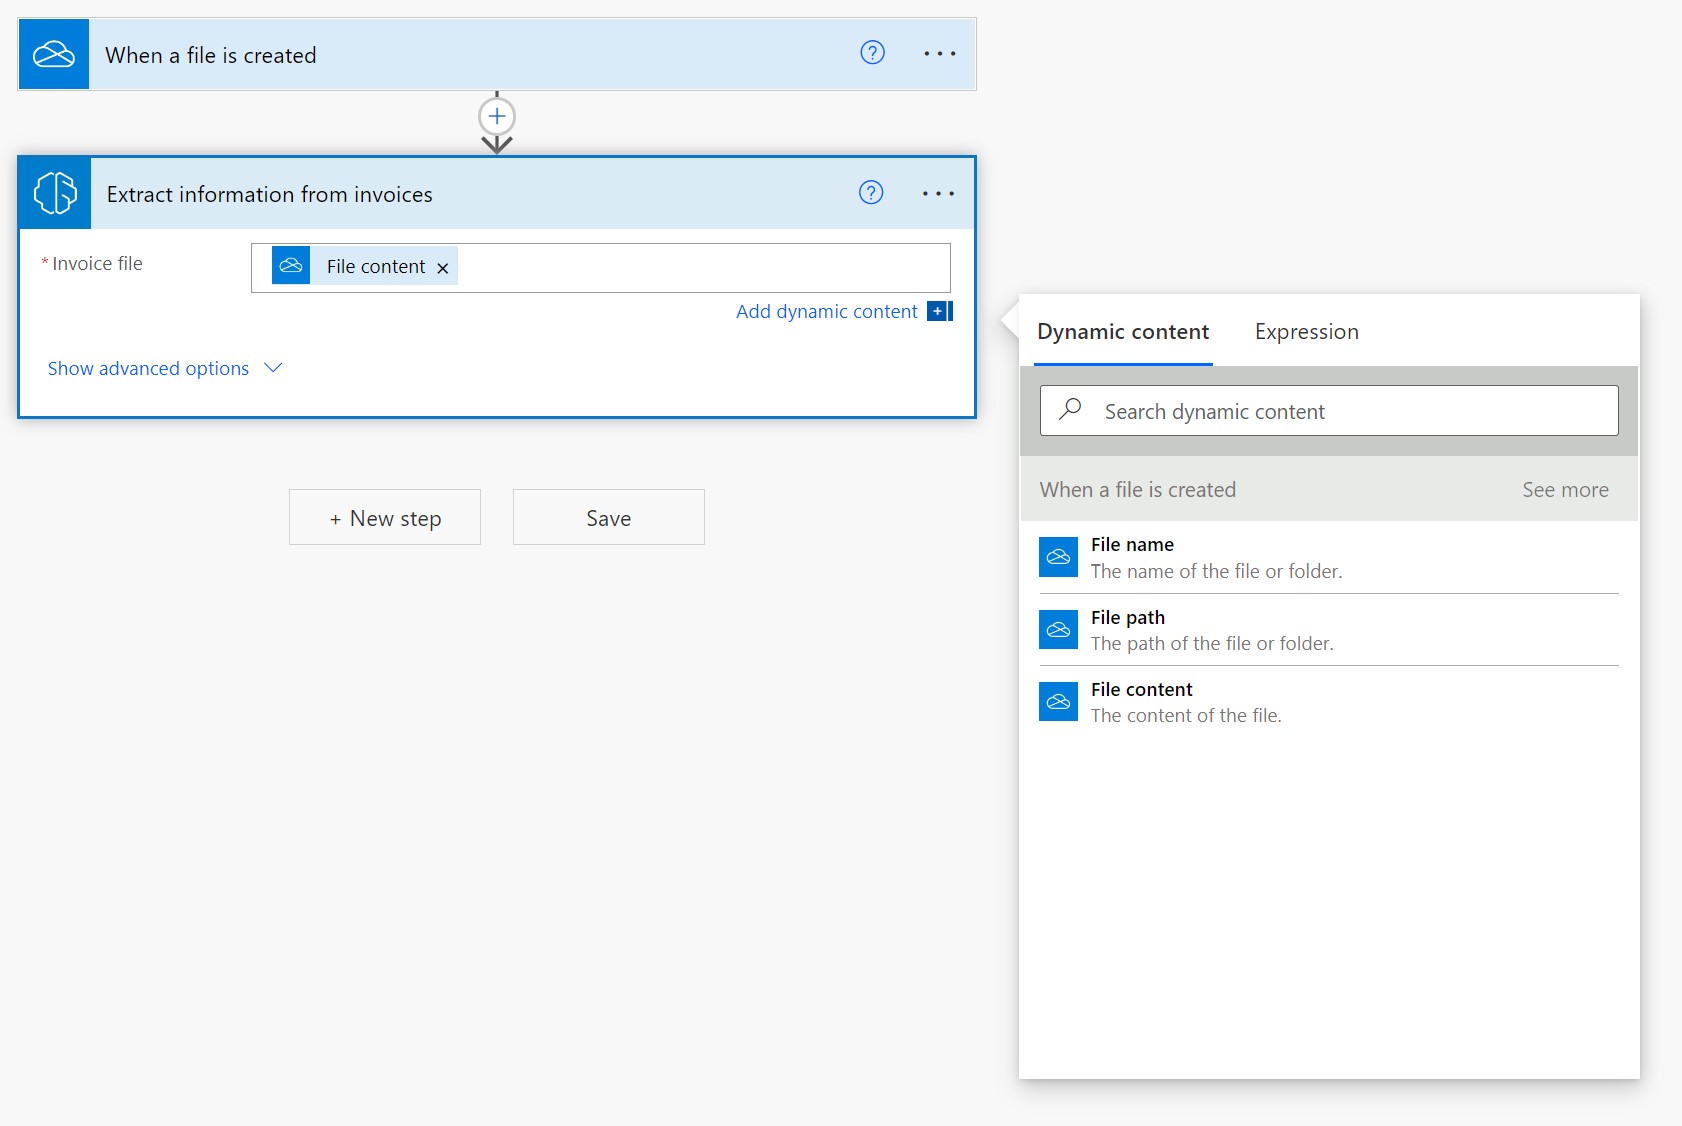
Select + New step.
Search for the AI Builder connector or select it from the list of connectors.
Select the Extract information from invoices action.
In the Invoice file field, select the File content dynamic content from the OneDrive trigger.
Create an Excel table
Create a new Excel spreadsheet in a OneDrive or SharePoint folder.
In the first row, enter the following values in their own cells, which will serve as the column headers for your table: Invoice ID, Date, Vendor, and Total amount.
Select the cells that you entered and then format them as a table, marking the first row as the header.
Write the data to Excel
Now that your table is set up, you can add the extracted invoice information to the Excel spreadsheet.
Select + New step.
Search for the Excel Online (Business) connector or select it from the list of connectors.
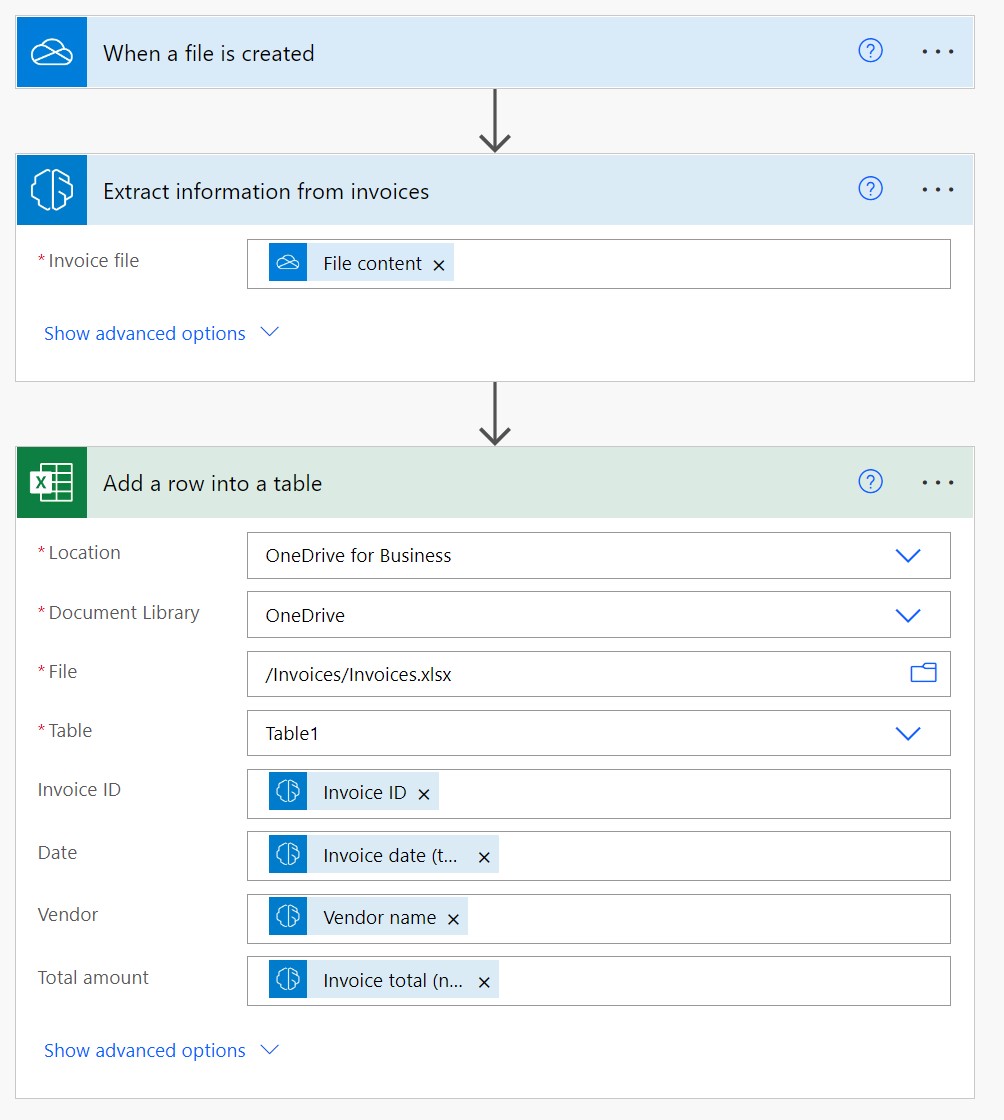
Select the Add a row into a table action.
In the Location, Document Library, and File fields, specify the location in SharePoint where your file is stored.
In the Table field, select the table that you created.
In the Invoice ID field, select the Invoice ID dynamic content from the AI Builder action.
In the Date field, select the Invoice date (text) dynamic content from the AI Builder action.
In the Vendor field, select the Vendor name content from the AI Builder action.
In the Total amount field, select the Invoice total (number) content from the AI Builder action.
Test the flow
We're done building the flow. Now let's test it. Select the Save button on the top right and then on the Test button next to it. Select the option to trigger the action.
Next, take an invoice and put it in the folder you defined on the OneDrive trigger in your flow. Once the invoice is uploaded to your OneDrive, the flow will get executed after some seconds: AI Builder will extract the data from the uploaded invoices and a new entry will be added to Excel with the extracted information.
Congratulations! You've created an automated workflow by using invoice processing. Now, whenever you add a new invoice file to that OneDrive folder, a new entry will be added to the Excel file.


