Conditional formatting
Applying conditional formatting to your app can enhance the user experience. Remember, each control has slightly different properties, which means that the conditional formatting for one control might not be the same for another. Examples of how you can use conditional formatting include setting the Visible property of an Image control to hide it when certain users are signed in, or to change the DisplayMode of a button to Disabled until all of the fields in a Form control have data entered in them. Conditional formatting can greatly enhance the user experience with visual indicators and modified functionality based on conditions.
Conditional formatting for text color
Continuing with our example using the Sum function, let's craft a formula to apply conditional formatting to the lblSum Color property. Go back to the first screen in your practice app that we created in Unit 3 (refer to the screenshot).
With lblSum selected, go to the Color property. If you select the formula field, notice how the information just below the field shows that the value of
RGBA(0, 0, 0, 1)is a black-colored square and the Data type is Color.
Erase the current value and enter the following into the Power fx entry field for Color:
If(Sum(Value(TextInput2.Text)*Value(TextInput3.Text))>50,Color.Green,Color.Blue)The Color property defines the color of the text in the label control. For this example, if the Sum calculation of the two TextInput controls is greater than 50, then the color is green, if not then the color is blue. Also, notice how, if you put your cursor in the formula bar after you change the formula, the output data type is Color.
When setting the Color property in Power Apps, there are different options available. You can provide a color object in your formula, as shown in the example, by using Color.Green or Color.Blue (or any of the other predefined colors in Power Apps). There's also a ColorValue (which uses CSS color names and 6 and 8-digit hex color values) and an RGBA function available to use any creatable color scheme.
Reference text property to update color
You can also reference the Text property to determine the Color property.
Let's paint a scenario that we want our customers to receive feedback based on the item they order. If a particular product is entered, we change the color of the summary text.
When you use text as a value in your formula, your text case is important. Therefore, we can use a function like Lower for our formula, such as Lower(yourtextvalue), which would return whatever your text value is in lower-case.
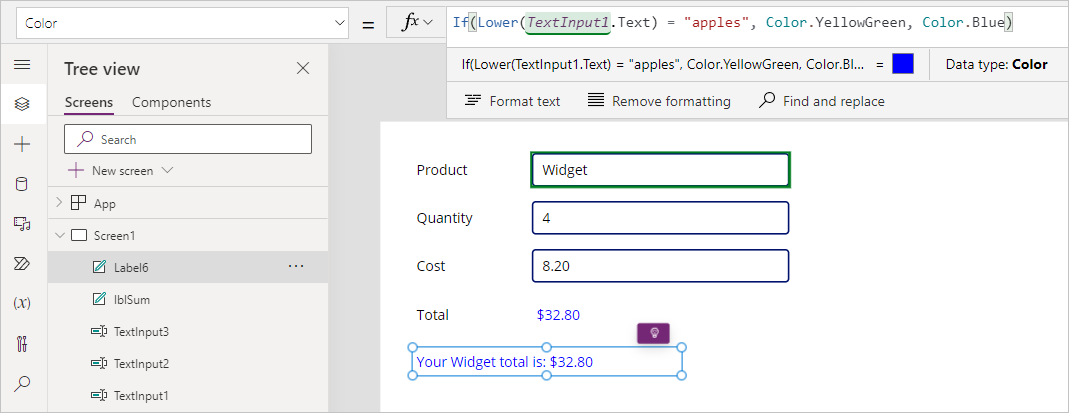
Try replacing the formula in the Color property for your transaction summary to the following:
If(Lower(TextInput1.Text) = "apples", Color.YellowGreen, Color.Blue)
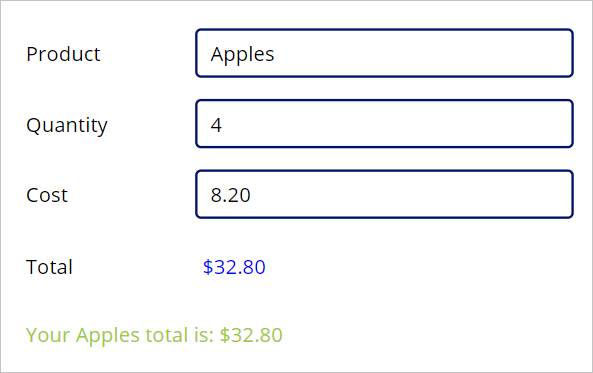
Notice how the label text immediately changes to blue. Now put your app in preview mode and type "Apples" into the Product input field, and you can see how the text color of your transaction summary changes to the yellow-green color. Also notice how we entered our apples with a capital "A," but the formula still worked. The letter case of our entry doesn't matter, only the spelling.

Hopefully, you're beginning to see how conditional formatting in your canvas app can enhance the user experience. Keep your practice app open; we'll use it again as we learn about some Data validation functions.

