Create a one-to-many relationship between tables
This unit shows how to implement one-to-many relationships in Microsoft Dataverse with the following steps.
Tip
One-to-many or many-to-one relationships are the same if you are looking at the relationship from one side or the other.
One-to-many relationship
Sign into Power Apps maker portal
Select the environment that you want to work within by using the drop-down list in the top menu bar.
Select Tables from the side navigation panel to see a list of the available tables.
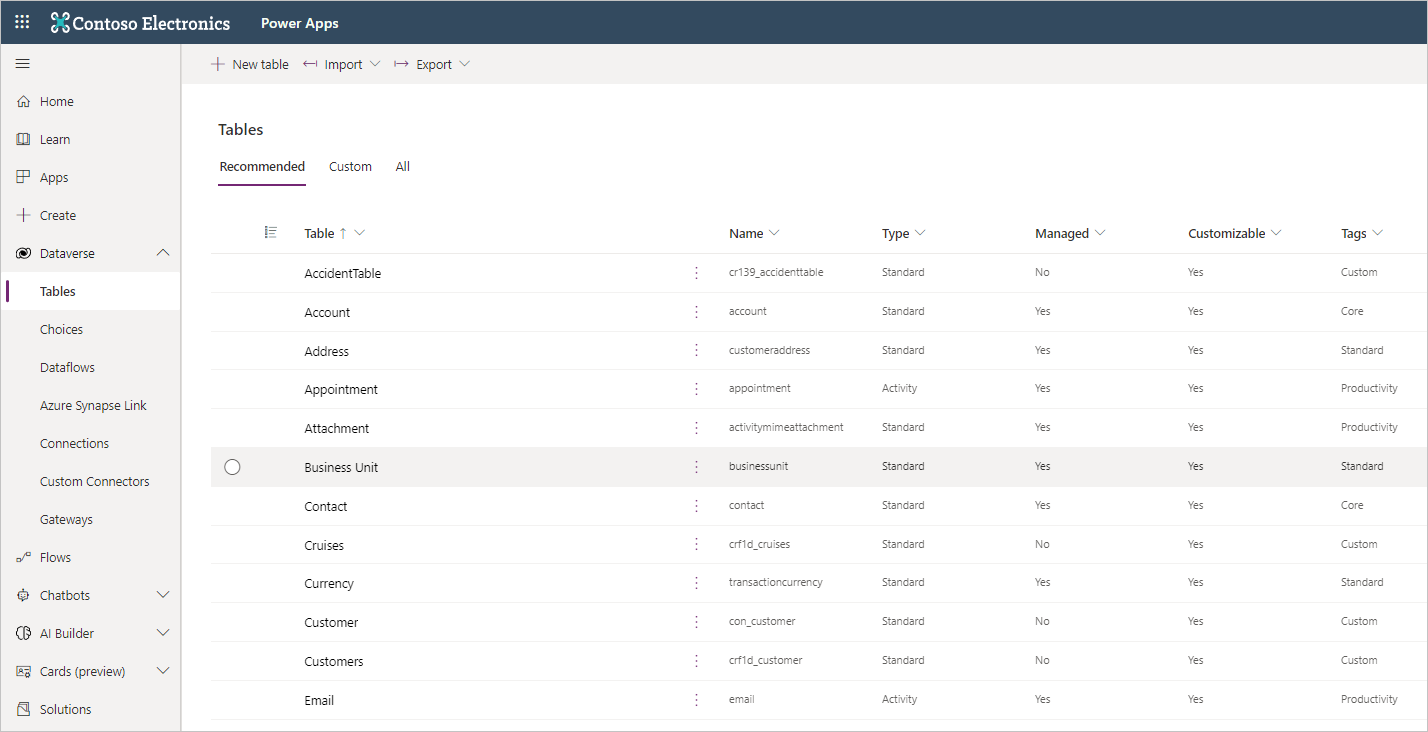
Select any of the tables where you could create a relationship to another table.
On the resulting Tables view screen, look for the Schema pane and select the Relationships to view the relationships that table has with others.

From the Relationships view screen, you can see all of the current relationships that your table has. You might have some that are One-to-many, Many-to-one or Many-to-many. If you want to create a new relationship, select + New relationship from the command bar.
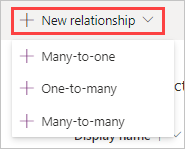
Next you can select a Many-to-One, a One-to-many or a Many-to-many relationship option. In this example, we'll select a One-to-many relationship.
You'll see a window appear on the right side of the screen with the name of the type of relationship that you chose (One-to-many in this case), along with a drop-down field to choose the related table.
Tip
With either choice, a lookup column will be created on the primary table.
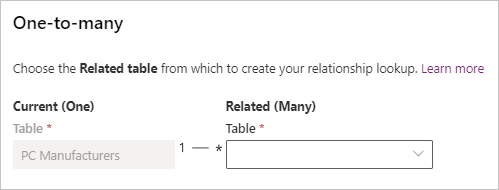
The Related (Many) Table field allows you to choose the table to create this relationship with.
Once you select a table, Dataverse automatically creates a Lookup column, and everything needed to relate this table to the parent table.
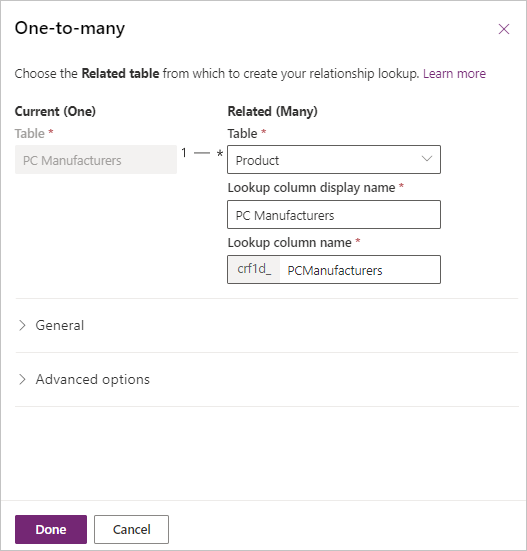
To save the new relationship, select Done.
After you save the new relationship, you'll see it appear in your Relationships list.
Now, you can use this relationship and the lookup in your business solution. A lookup column will be available to use that shows all the many (child) rows.
One-to-many relationship behaviors
Some tables don't make sense on their own and they're typically created to support other tables and processes. They'll typically have a required lookup column to link to the primary table they support. For example, business requirement could be that Project row shouldn't exist without a related account. In this case the Project table will have a Many-to-one relationship with the Account table and the account lookup column will be set to business required.
Besides defining how rows can be related to other rows, One-to-many table relationships also provide metadata to address the following questions:
When I delete a row, should any rows that are related to that row also be deleted?
When I assign a row to a new owner, do I also have to assign all related rows to the new owner?
How can I streamline the data entry process when I create a new related row in the context of an existing row?
How should people who view a row be able to view the related rows?
You can use the relationship behavior on one-to-many relationships to define how rows in the many side of a table relationship are affected by operations such as assign, share, and delete on the parent row. Relationship behaviors are important because they help ensure data integrity.
Behaviors
There are several kinds of behaviors that can be applied when certain actions occur:
| Behavior | Description |
|---|---|
| Cascade All | Perform the action on all related table rows. |
| Cascade Active | Perform the action on all active related table rows. |
| Cascade User Owned | Perform the action on all related table rows owned by the same user as the primary table row. |
| Cascade None | Do nothing. |
| Remove Link | Remove the lookup value for all related rows. |
| Restrict | Prevent the primary table row from being deleted when related table rows exist. |
Actions
The actions that are controlled by behaviors are:
| Column | Description | Behaviors |
|---|---|---|
| Delete | What should happen when the primary table row is deleted? | Cascade All, Remove Link, Restrict |
| Assign | What should happen when the primary table row is assigned to someone else? | Cascade All, Cascade Active, Cascade User-owned, Cascade None |
| Reparent | What should happen when the lookup value of a related table in a parental relationship is changed? | Cascade All, Cascade Active, Cascade User-owned, Cascade None |
| Share | What should happen when the primary table row is shared? | Cascade All, Cascade Active, Cascade User-owned, Cascade None |
| Unshare | What should happen when a primary table row is unshared? | Cascade All, Cascade Active, Cascade User-owned, Cascade None |
| Merge | What should happen when a primary table row is merged? | Cascade All, Cascade None |
| Rollup View | What is the desired behavior of the rollup view associated with this relationship? | Cascade All, Cascade Active, Cascade User-owned, Cascade None |
Note
The behaviors only operate on related rows when the action is performed on the parent row, not for actions performed on the related rows i.e. behaviors operate in the one-to-many direction not the many-to-one direction.
Types of behavior
To simplify setting relationship behaviors, Microsoft has grouped the behaviors into types:
| Type | Description |
|---|---|
| Parental | Any action taken on a row of the parent table is also taken on the related child table rows. |
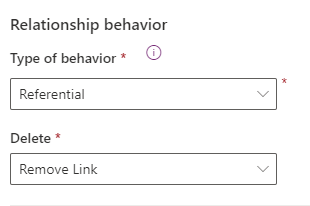
| Referential, Restrict Delete | Any related rows can be navigated to. Actions taken on the parent row won't be applied to the child row, but the parent row can't be deleted while the child row exists. |
| Referential, Remove Link | Any related rows can be navigated to, and actions taken on one won't affect the other. This is the default. |
| Custom | The behavior for each possible action can be selected. |
One-to-many relationship mappings
You can map columns between tables that have a one-to-many relationship. This lets you set default values for a row that is created in the context of another row. Mappings are used to streamline the data entry process when users create a new related row from the parent row's form in a model-driven app.
For example, when an account row is opened, and new related contact is created, this feature will prepopulate the contact form with selected information from the account such as the office address, main phone number, etc.
Mapping considerations:
Are a model-driven app feature
Only apply to one-to-many relationships.
Only apply when a new related row is creating from within the context of the parent row form.
Don't apply if the related row is created and linked by selecting a lookup column.
Values in columns on the parent row are copied to the child row.
Only columns of the same data type can be mapped.
Users can overwrite the values before the row is created.
The copy of values is once only on create and no future synchronization will take place.
Note
Use the classic Solution explorer to configure mappings for a relationship.
Hierarchical relationships
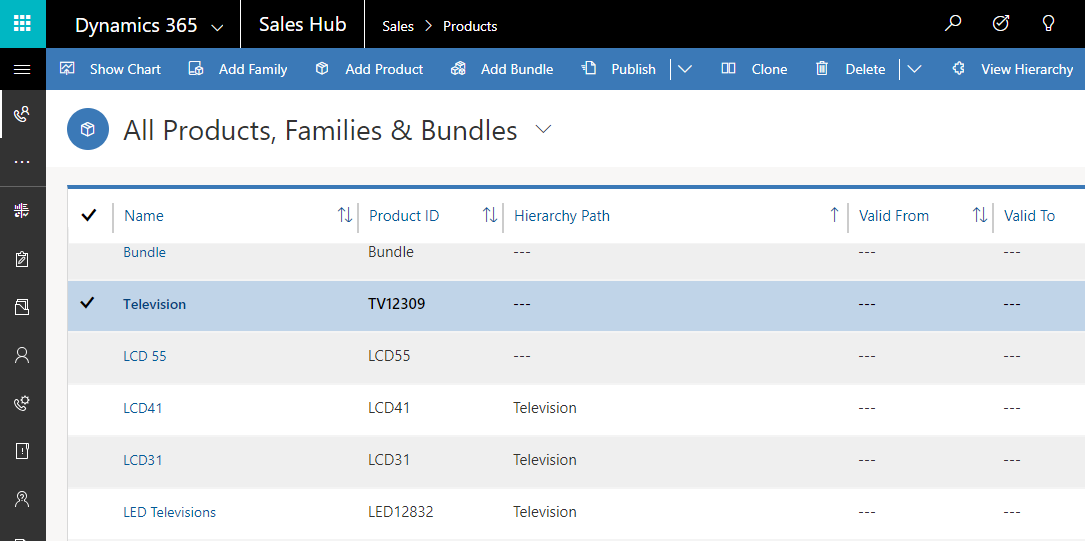
Some standard tables in Dataverse already have hierarchies defined such as Account. The rows in a hierarchy can be displayed visually in model-driven apps.
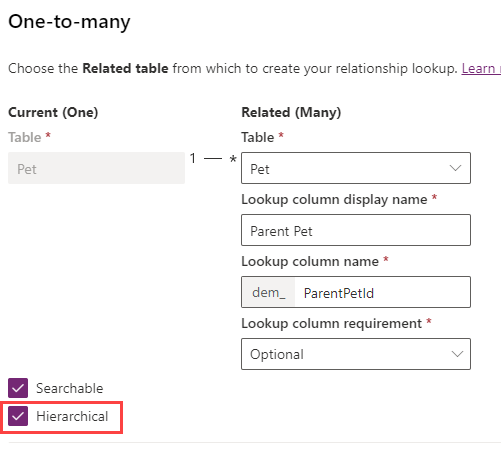
The option to define a hierarchical relationship is only available for self-referential relationships. A self-referential relationship is a One-to-many relationship between a table and itself where the same table is defined as both the primary and the related table.
For more information about table relationships, see, Table Relationships.
