Create a basic copilot
Now that we examined key elements of a copilot, let’s examine the process for building a high-level bot. Bots are created using the Copilot Studio designer. In the designer, you can not only create bots, but you can also manage any existing bots you might have.

At a high-level, the process for creating and publishing a copilot with Copilot Studio is as follows:
Create a copilot.
Build out the topics you want for the copilot.
Add generative AI as required.
Test the copilot.
Publish the copilot and deploy it to specific channels.
Create the copilot
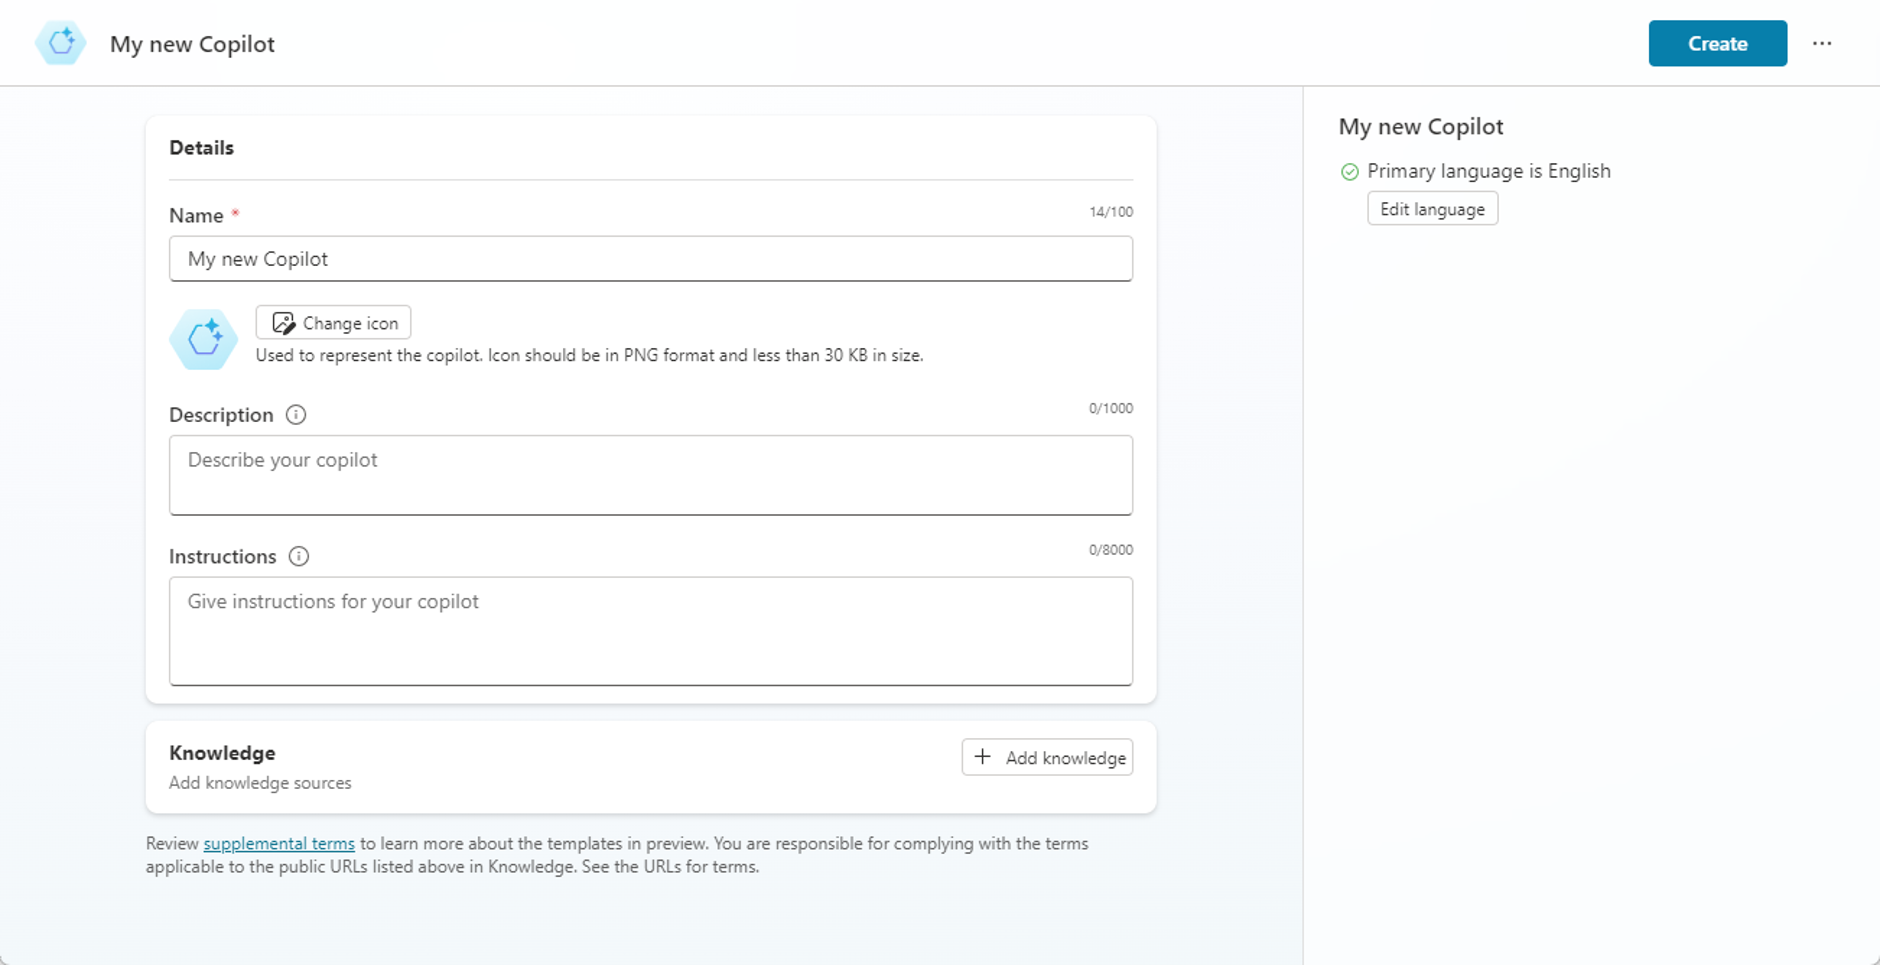
There are different elements that make up a copilot. Each of the elements impacts different things such as how the copilot behaves, who can access it etc. For example, for each copilot, you can specify things such as the skill the copilot possesses, how conversations flow, and where the copilot is deployed. New copilots can be created from the Copilot Studio home page. As you create a copilot, you need to provide a name and specify the language it speaks.
In the image, we see an example of the Create a Copilot screen where you define key details about your copilot. The details include name, language description, and the icon you want associated with it. Additionally, you can add knowledge sources to your Copilot. These knowledge sources are used to populate generative answers.
Copilot Studio not only includes an intuitive authoring canvas, but it also includes powerful and flexible capabilities from Bot Framework Composer. These capabilities provide designers with a single authoring canvas where any member of the team, irrespective of their skill level, can collaborate on copilot building - from low-code makers through to pro developers alike.
This experience provides designers with:
Rich response authoring that supports both text and speech variations. This capability helps to make your copilots more engaging across a wider variety of channels.
Deep Power Fx integration for data and variable manipulation and authoring productivity improvements, including cut, copy, and paste.
Copilot authors can select from a set of prebuilt Adaptive Card templates in Copilot Studio and fill them in with their data. Cards can enrich conversational experiences and address business scenarios.
Conversation boosting enables designers to build custom natural language understanding models to predict the overall intention of an incoming utterance and extract valuable information from it.
Define your copilot topics
As mentioned previously, topics are dialog trees that describe how your copilot responds to a user's question. Each copilot you create includes multiple system topics that oversee things such as greeting customers, escalating conversations, and ending conversations. You can add as many different topics as are required based on your needs.
A topic consists of two primary elements:
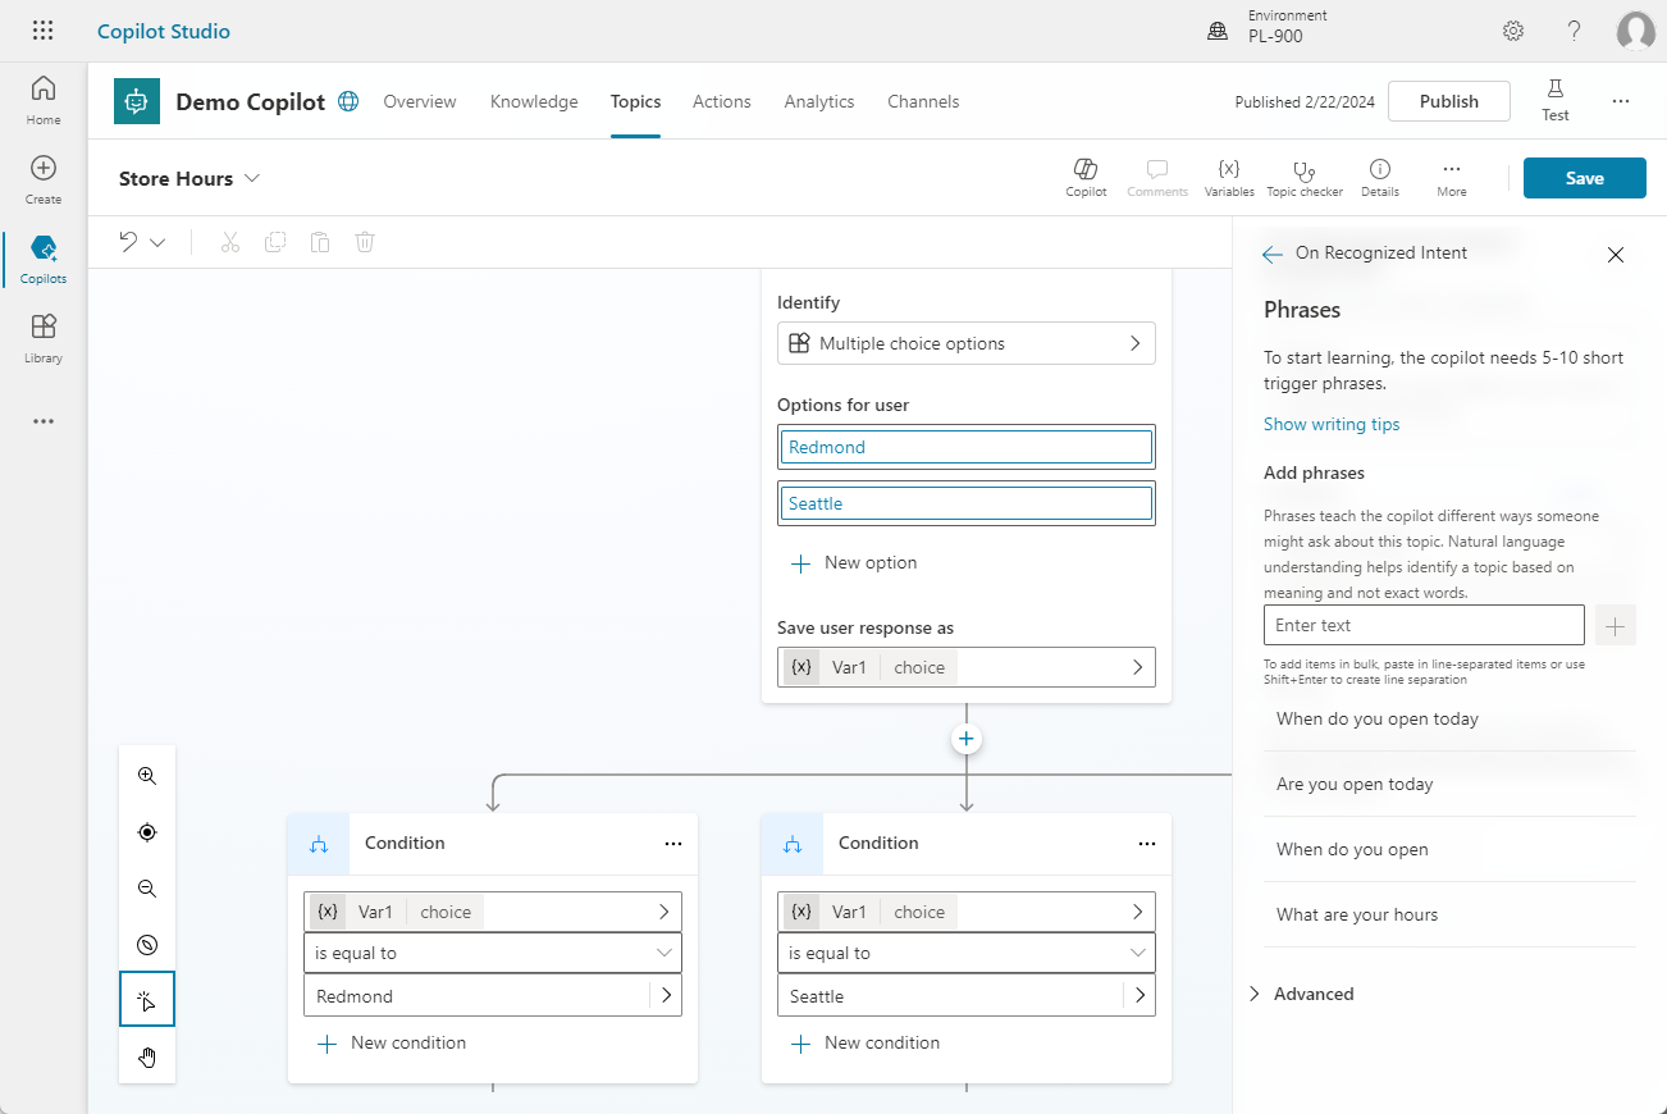
Trigger Phrases: Represent phrases users might enter that triggers the topic. For example, a trigger phrase for a store hours topic, might be something like, "When are you open?" A typical topic could have twenty or more trigger phrases defined.
Conversation Path: This element defines the path that is taken based on input provided by the customer. Conversation paths are made up of different conversation nodes. The nodes do things such as displaying messages, asking questions, switching between topics and more.
The following conversation nodes are the most used:
Show a message: Displays a message to the user.
Ask a Question: Presents the user with a question. The user’s answers are stored for later. Question nodes provide designers with the ability to finely control reprompt behavior and create custom validation rules.
Call an Action: This conversation node enables Power Automate to bring in information from other services. An example would be interacting with a weather service to display local forecast details.
Redirect to another topic: Sends the end user to another topic.
The image shows an example of what a Store Hours topic might look like. The copilot asks the user for which stores they want hours. Based on their answers, they're presented with either the store hours for the Redmond or Seattle locations. On the right side of the screen, you see the trigger phrases defined for this topic.
Test your content in real time
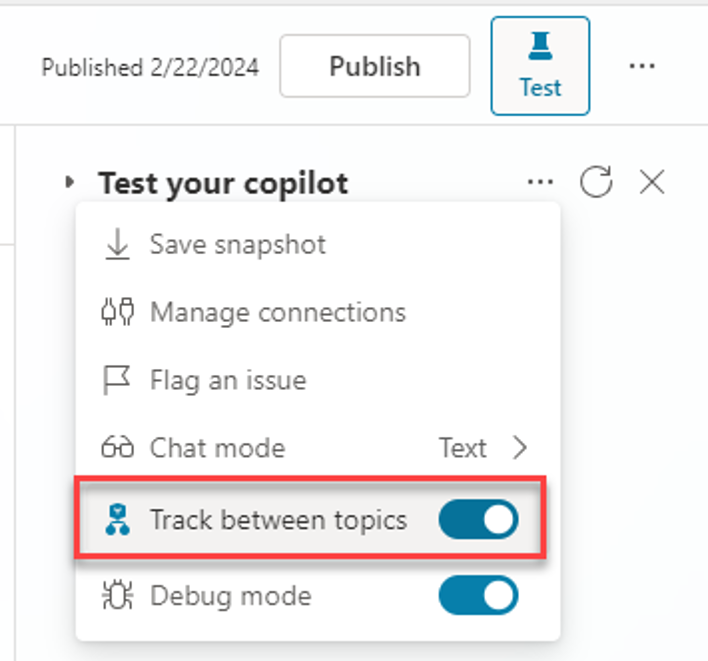
As you're authoring your topics, you should evaluate them in real-time to see if they worked as you expected. To help with this process, there's a test pane that you can use to evaluate your copilot. It can be displayed by selecting the Test button in the upper right corner of the application.
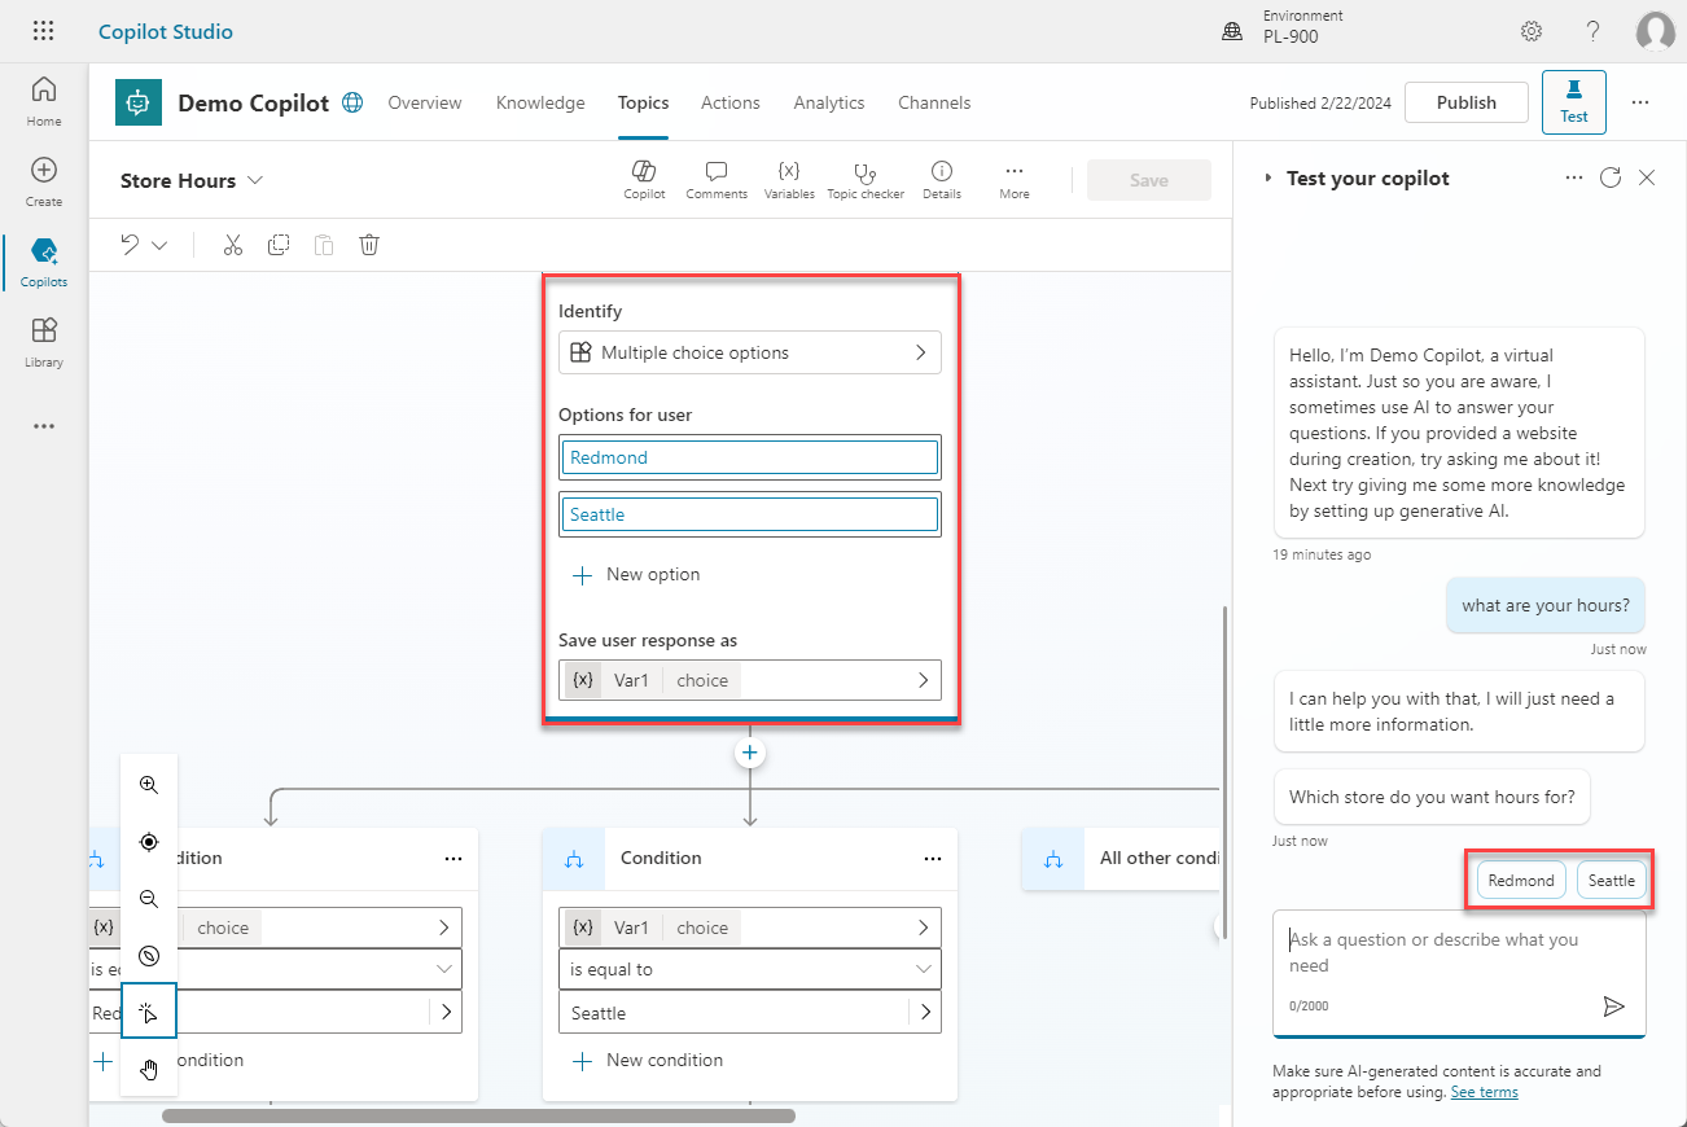
Often, while testing, you're trying to find out if the topic is performing as expected. But you also want to ensure that it's interacting as expected with the other topics in your copilot. Enabling Track between topics lets you follow along with the copilot as it executes your dialog. You start to see parts of your dialog tree highlighted as the copilot gets to that portion of the dialog.
As you interact with the copilot, you're able to see how the copilot is progressing through the conversation path.
Configure generative AI
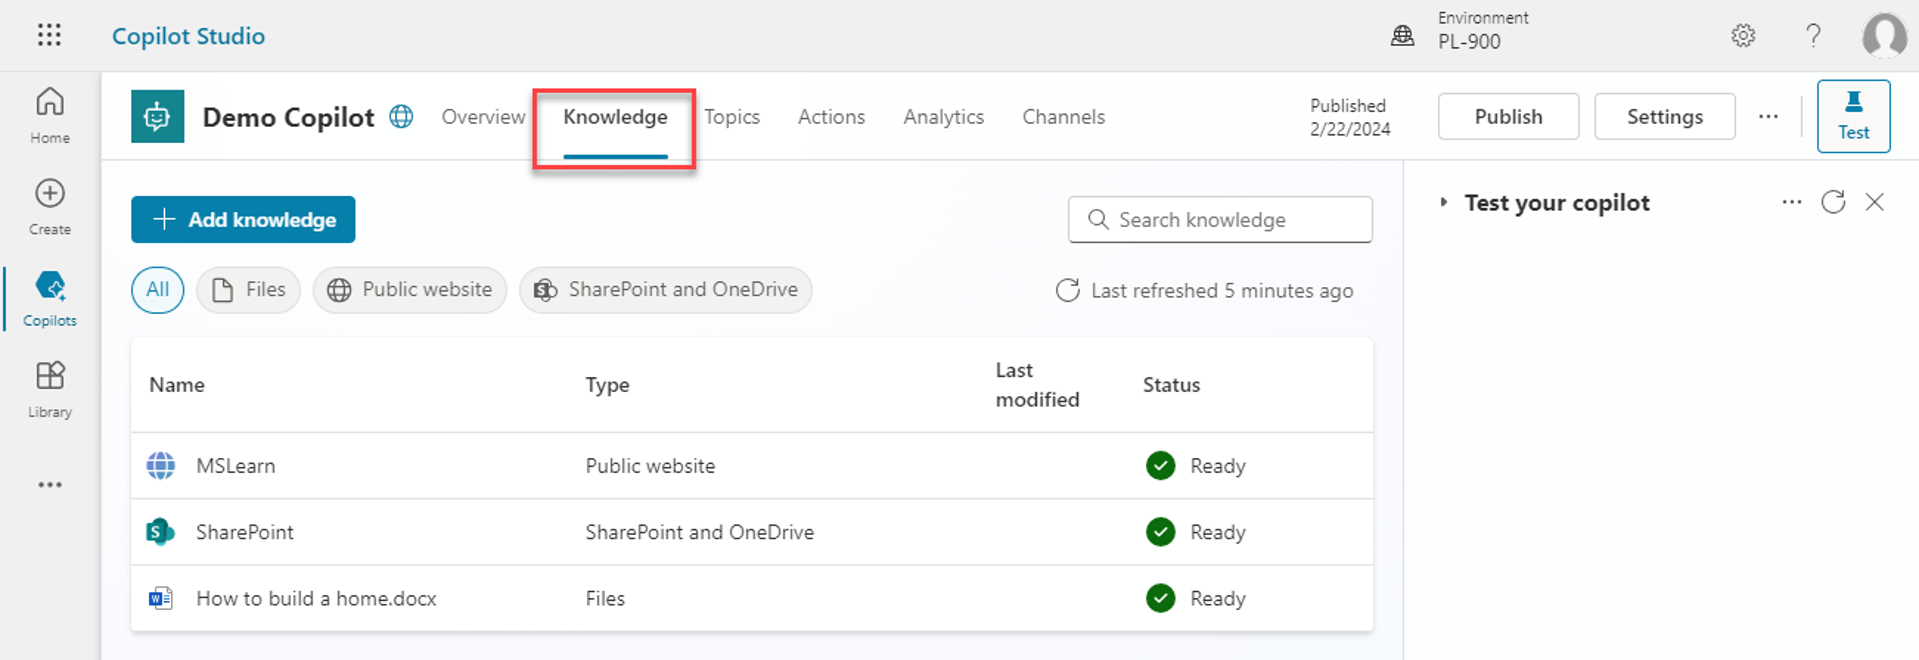
With generative AI, users are provided with a more intuitive and conversational experience. When you first create your copilot, you can define the knowledge sources that you want to use for generative AI. The Knowledge tab is where you can define the different sources for the generative text.
A knowledge source can be any number of sources including but not limited to:
External resources:
Bing Web Search—doesn't require external configuration.
Bing Custom Search—requires external configuration.
Internal resources:
SharePoint
OneDrive
Documents uploaded to Dataverse
Custom data (internal or external): Supply your own source, such as a Power Automate Flow or Skill.
Publish your copilot
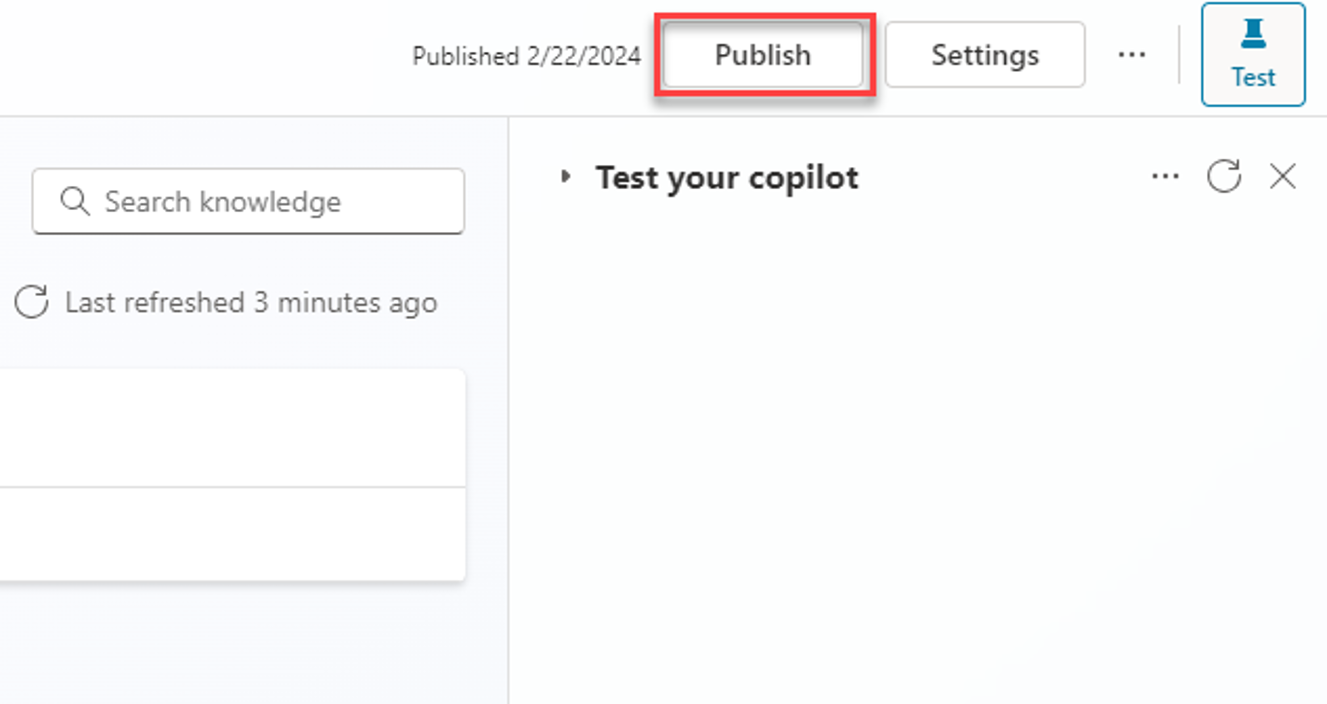
Once you're fine with the content authored in your copilot, you can publish your copilot so it can be used across different channels such as websites, social media, and more. This is accomplished by selecting Publish in the navigation menu.
Initially the copilot is published to a demo website where you can evaluate it, but it could also be published to different channels based on your needs.