Exercise - Validate the data model
The Dataverse tables, columns, and relationships that represent a relational version of the ServiceRequest FHIR resource, including the expansion tables and multi-table lookups, are now part of the solution. You created New Entity and Attribute maps representing the ServiceRequest FHIR resource so you can ingest data using the Dataverse Healthcare APIs.
Next, you validate the updated data model and related transformation maps by sending sample FHIR resource bundles to the Dataverse Healthcare APIs.
In this exercise, you configure a model driven app to display the Service Request record and its expansion relations, configure Insomnia to connect to the Dataverse Healthcare APIs, and post FHIR bundles to the endpoint.
For details and examples on the Dataverse Healthcare APIs for FHIR bundle ingestion, see Overview of Dataverse healthcare APIs - Upsert bundle API and Use the Dataverse healthcare APIs on Microsoft Learn.
Prerequisites
You need to meet the following prerequisites:
Microsoft Cloud for Healthcare trial with the Data integration toolkit installed.
Sample data is deployed in your instance.
Access to the developer tools that allow you to call the REST API endpoints.
Access to the following sample FHIR Bundles.
ServiceRequest_One.json – contains a ServiceRequest FHIR resource and related resources like Patient, Practitioner, Location, Encounter, and Organization
ServiceRequest_Two.json – contains an additional ServiceRequest resource with references to the ones in ServiceRequest_One.json
ServiceRequest_Three.json – contains an additional ServiceRequest resource with references to the ones in ServiceRequest_One.json
System Administrator rights are granted for the user on a Microsoft Dataverse instance. For more information, see Microsoft Cloud for Healthcare training environment preparation.
Create a model driven app
To view the Service Request data, you need to configure the primary form and some associated views. Once you create the records using the Dataverse Healthcare APIs, you can view the list of records and open the Service Request main form to view the detailed column data and the related child records.
Sign in to the Power Apps maker portal.
Open the ServiceRequest solution.
In the left navigation pane, select Apps. Select New > App > Model-driven app.
In the New model-driven app window, enter the following details.
Property Value Name Service Request Testing Description Testing data model and transformation maps Use components from a solution Checked Solution Service Request Site map Default site map Select Create.
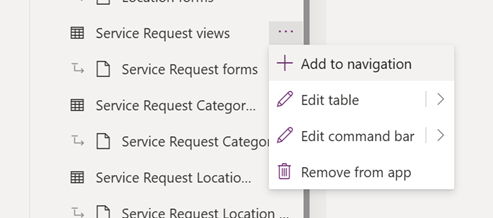
In the App designer Pages pane, under All other pages, select the Service Request views item horizontal ellipses.
Select Add to navigation.
Once the designer loads, select Save.

Modify the Service Request form
Select the Service Request form item, and select the edit tool to edit the form.

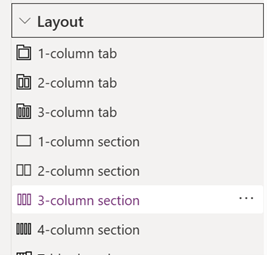
In the main Form editor, select the Component toolbar item, and from the left navigation, expand Layout, and select a new section from the list of available layouts.
Change the Label property to Details and Name to tab_main_section_details.
In the left navigation, select Table columns, and filter by Custom in the Search area.

In the new section, add the custom columns for Service Request. You can organize the columns as you prefer.

Select Save and publish.
In the main Form editor, select the Component toolbar item, and from the left navigation, expand Layout, and select a new tab from the list of available layouts.
Change the Label property to Service Request Category and Name to tab_category.
Select the default section and change the Label property to Main and Name to tab_category_section_main.
Select the Component toolbar item, and from the left navigation, expand Grid, and select Subgrid.
In the Select subgrid views panel, select Show related records.
Select Service Request Categories from the Table list.
Select the grid and change the Label property to Categories and the name to subgrid_category.
Repeat the steps regarding subgrid tabs for the following expansion tables.
Service Request Replaces
Service Request Location Codes
Service Request Location References
Service Request Reason Codes
Select Save and publish.


Modify the Service Request and expansion views
You can modify the expansion table views to make it easier to view related records on the parent Service Request form by adding columns to the default view.
Open the ServiceRequest solution.
In the left navigation, expand Tables, expand the Service Request Category table, and select Views.
Select the view named Active Service Request Categories to edit.
Add the following columns to the view:
Service Request
Category
Select Save and Publish.
Repeat these steps for the following expansion tables.
Table View Columns Service Request Location Code Active Service Request Location Codes • Service Request
• Location CodeService Request Location Reference Active Service Request Location References • Service Request
• LocationService Request Reason Code Active Service Reason Codes • Service Request
• CodeService Request Replaces Active Service Request Replaces • Service Request
• ReplacesService Request Active Service Requests • Azure FHIR Id
• Created On
• Quantity Code
• Quantity Value
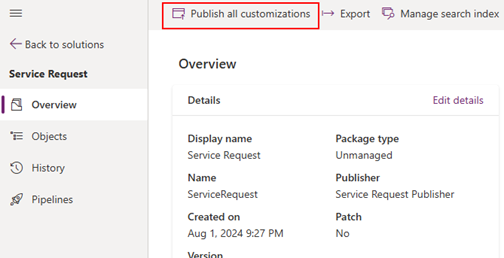
• Quantity UriNavigate to the main overview are of the Service Request Solution, in the main.

Configure Insomnia
In a previous exercise, you connected to the Dataverse SDK APIs to create multi-table lookups. The Dataverse Healthcare APIs can be accessed in a similar way. Because the authentication is the same, you can reuse this method when calling the Dataverse Healthcare APIs.
Open the Insomnia tool.
Select the HTTP request named MultiColumnLookups and right-click to open the context menu.
Select Duplicate from the context menu.

Name the new HTTP request POSTFHIRtoDataverse.
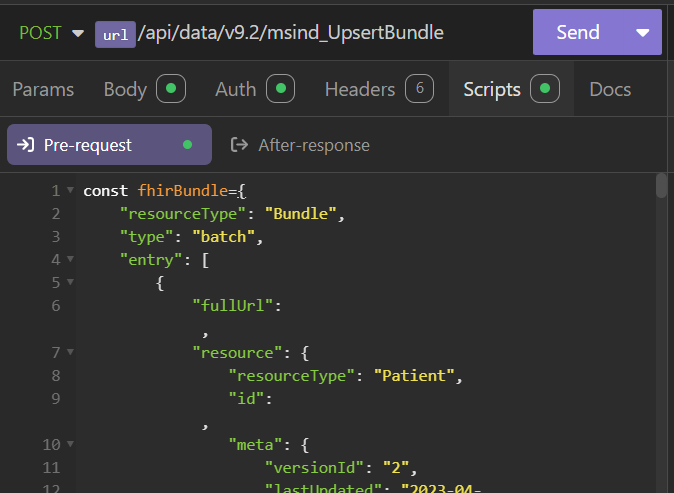
Set the request Method to POST and the URL to {{url}}/api/data/v9.2/msind_UpsertBundle, replacing {{url}} with your Dataverse server URL.
Select the Scripts tab.
Add the following script to the Pre-request script section:
const fhirBundle={};
insomnia.environment.set('fhirbundlestring',
JSON.stringify(JSON.stringify(fhirBundle)))
Select the Body tab.
Update the body to the following JSON:
{
    "msind_BundleTag": "PatientDatatest",
    "msind_JSON": "{{fhirbundlestring}}"
}


Your Insomnia HTTP request should now be configured to post to the Dataverse Healthcare API endpoint for Upsert.
Post FHIR messages
To validate the schema and maps, you post FHIR bundles to the Dataverse Healthcare APIs. This means a ServiceRequest FHIR message and related messages for the references. The sample JSON files include ServiceRequest FHIR resources and related FHIR resources that are referenced by the ServiceRequest elements. ServiceRequest_One.json posts Patient and other resources, while posting.
You post these messages to the Upsert API endpoint and validate that they have been ingested into Dataverse correctly. Before posting the messages, you must first enable maps for the messages included in the sample bundles. This ensures that related FHIR resources included in the bundles are processed.
Sign in to your Dataverse instance and open the Data Integration Toolkit application.
In the left navigation, select Map Setup > Entity Maps.
For each Entity map in the list, perform the following steps:
Open the Entity map record to edit.
Set Disable to No.
Select Save & Close.
Following are the Entity Maps that you must enable.
Entity Name Azure FHIR Resource msemr_device Device msemr_devicecontactpoint Device msemr_devicedevicename Device msemr_deviceproperty Device msemr_devicesafety Device msemr_devicespecialization Device msemr_devicestatus Device msemr_deviceversion Device msemr_identifier Device msemr_encounter Encounter msemr_encounteraccount Encounter msemr_encounterclasshistory Encounter msemr_encounterdiagnosis Encounter msemr_encounterepisodeofcare Encounter msemr_encounterhospitalizationarrangement Encounter msemr_encounterhospitalizationcourtesy Encounter msemr_encounterhospitalizationdiet Encounter msemr_encounterlocation Encounter msemr_encounterreason Encounter msemr_group Group msemr_groupcharacteristic Group msemr_groupmember Group msemr_identifier Group msemr_daysofweek Location msemr_identifier Location msemr_location Location msemr_locationhoursofoperation Location msemr_locationtelecom Location msemr_locationtype Location account Organization contact Patient msemr_contactlink Patient msemr_medicalidentifier Patient contact Practitioner msemr_daysofweek PractitionerRole msemr_identifier PractitionerRole msemr_practitionerrole PractitionerRole msemr_practitionerroleavailabletime PractitionerRole msemr_practitionerrolecode PractitionerRole msemr_practitionerrolelocation PractitionerRole msemr_practitionerrolenotavailable PractitionerRole msemr_practitionerrolespecialty PractitionerRole msemr_practitionerroletelecom PractitionerRole Open the Insomnia tool.
Select the HTTP request named POSTFHIRtoDataverse select the Scripts tab.
In the Pre-request script, replace the value of the fhirBundle constant, currently set to {}, with the contents of ServiceRequest_One.json.
Select Send.
Once completed, you see the response from the UpsertBundle API call in the results window.
Navigate to your Service Request Testing model driven app.
In the main view, you should see new Service Request records.

Repeat these steps using the bundles found in ServiceRequest_Two.json and ServiceRequest_Three.json.
You might create extra messages and test the extra maps.


Next Steps
You can take extra steps to validate maps by:
Updating the sample ServiceRequest messages.
Adding items to the expansion maps.
Changing Codeable Concept references.
Linking to new Encounter references.
This depends on the types of messages you expect to see in your environment.