Exercise - Add a build badge
It's important for team members to know the build status. An easy way to quickly determine the build status is to add a build badge to the README.md file on GitHub. Let's check in on the team to see how it's done.
Andy is at his desk sifting through his emails. He's answering the third email that's related to the build status for the Space Game website.
Andy: There has to be some way to automate a status message. We have the pipeline, so we should be able to put a status somewhere. Maybe Mara knows how we can do it.
Andy finds Mara talking with Amita in the break room.
Andy: Hi, Amita. Mind if I borrow Mara for a second?
Amita: I have to get to a meeting anyway. Borrow away.
Mara: Hi Andy. What's up?
Andy: I really like the changes we've made to our build pipeline by using Azure Pipelines, and Git is a great version-control system. I was wondering, is there a way to let people know the build status?
Mara: Yes, actually. We can use a build badge.
What is a build badge?
A badge is part of Microsoft Azure Pipelines. It has methods you can use to add an SVG image that shows the status of the build on your GitHub repository.
Most GitHub repositories include a file named README.md, which is a Markdown file that includes essential details and documentation about your project. GitHub renders this file on your project's home page.
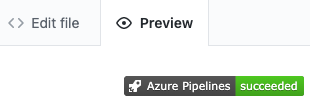
Here's an example build badge:

For this exercise, you make your build badge visible to everyone. This might not be a good idea for your private projects, because your build information will be made available to the public.
To check that your build badge is visible:
In Azure DevOps, navigate to your organization.
Select Organization settings from the bottom corner.
Under Pipelines, select Settings.
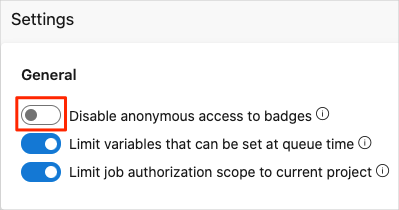
Turn off Disable anonymous access to badges.

You need to make a similar change to your project:
- Go to your project.
- Navigate to Project settings from the bottom corner.
- Under Pipelines, select Settings.
- Turn off Disable anonymous access to badges.
Add the build badge
Up until now, you created Git branches locally to make changes to the Space Game project. You can also propose changes directly through GitHub. In this section, you do that to set up your status badge.
In Azure DevOps, in the left pane, select Pipelines, then select your pipeline.
Select the ellipsis (...) in the upper right, then select Status badge.

Under Sample Markdown, select the Copy button to copy the Markdown code to the clipboard.
In GitHub, go to your project.
Make sure you're on the
mainbranch. In the files area, open the README.md file.Select Edit this file (the pencil icon) to open the file in the editor.
At the top of the page, add a blank line, and then paste the contents of the clipboard.
Select the Preview tab to see your proposed changes.
GitHub renders the Markdown file and shows you the build badge.

Commit your changes to main
In this section, you commit your changes to the main branch on GitHub.
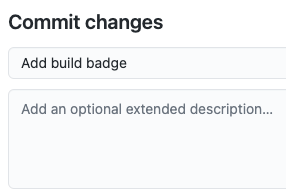
Select Commit changes.
In the Commit message area, specify a commit message, such as "Add build badge".

Leave the Commit directly to the
mainbranch option selected, then select Commit changes to commit your changes to themainbranch.Your badge is displayed on the README.md page.

This process is a more basic way to merge code into GitHub. Instead of committing directly, you could have created a pull request with your changes for others to review.
In practice, you'd switch to the
mainbranch and pull the latest changes from GitHub the next time you need to add a feature or address a bug.
Andy: Mara, you just made a change directly to main. Why didn't you use the flow you taught me? You know, with the feature branches.
Mara: We could've done that. But sometimes when people are changing only the README file or other documentation files, they commit to main right then. Plus, you and I were able to verify the work together before we merged the change.
But this brings up a good point. If we can all just commit to main when we want to, we could be letting problems in the code slip into our main branch.
Andy: I've been meaning to talk to you about that.
Andy and Mara continue this conversation while walking back to their offices.