Configure and manage Microsoft Entra roles
Microsoft Entra ID is Microsoft’s cloud-based identity and access management service, which helps your employee's sign-in and access resources in:
- External resources, such as Microsoft 365, the Azure portal, and thousands of other SaaS applications.
- Internal resources, such as apps on your corporate network and intranet, along with any cloud apps developed by your own organization.
Who uses Microsoft Entra ID?
Microsoft Entra ID is intended for:
- IT admins - As an IT admin, you can use Microsoft Entra ID to control access to your apps and your app resources, based on your business requirements. For example, you can use Microsoft Entra ID to require multifactor authentication when accessing important organizational resources. Additionally, you can use Microsoft Entra ID to automate user provisioning between your existing Windows Server AD and your cloud apps, including Microsoft 365. Finally, Microsoft Entra ID gives you powerful tools to automatically help protect user identities and credentials and to meet your access governance requirements.
- App developers - As an app developer, you can use Microsoft Entra ID as a standards-based approach for adding single sign-on (SSO) to your app, allowing it to work with a user's pre-existing credentials. Microsoft Entra ID also provides APIs that can help you build personalized app experiences using existing organizational data.
- Microsoft 365, Office 365, Azure, or Dynamics CRM Online subscribers - As a subscriber, you're already using Microsoft Entra ID. Each Microsoft 365, Office 365, Azure, and Dynamics CRM Online tenant is automatically a Microsoft Entra tenant. You can immediately start to manage access to your integrated cloud apps.
In Microsoft Entra ID, if one of your users needs permission to manage Microsoft Entra resources, you must assign them to a role that provides the permissions they need.
If you're new to Azure, you might find it a little challenging to understand all the different roles in Azure. The following section helps explain the following roles and provides additional information on Azure roles and Microsoft Entra roles:
- Classic subscription administrator roles
- Azure roles
- Microsoft Entra roles
Microsoft Entra roles
Microsoft Entra roles are used to manage Microsoft Entra resources in a directory. Actions such as create or edit users are the most common. However, the need to assign administrative roles to others, reset user passwords, manage user licenses, and manage domains are common. The following table describes a few of the more important Microsoft Entra roles.
| Microsoft Entra role | Permissions | Notes |
|---|---|---|
| Global Administrator | Manage access to all administrative features in Microsoft Entra ID, and services that federate to Microsoft Entra ID | The person who signs up for the Microsoft Entra tenant becomes the first Global Administrator. |
| Assign administrator roles to others | ||
| Reset the password for any user and all other administrators | ||
| User Administrator | Create and manage all aspects of users and groups | |
| Manage support tickets | ||
| Monitor service health | ||
| Change passwords for users, Helpdesk administrators, and other User Administrators | ||
| Billing Administrator | Make purchases | |
| Manage subscriptions | ||
| Manage support tickets | ||
| Monitors service health |
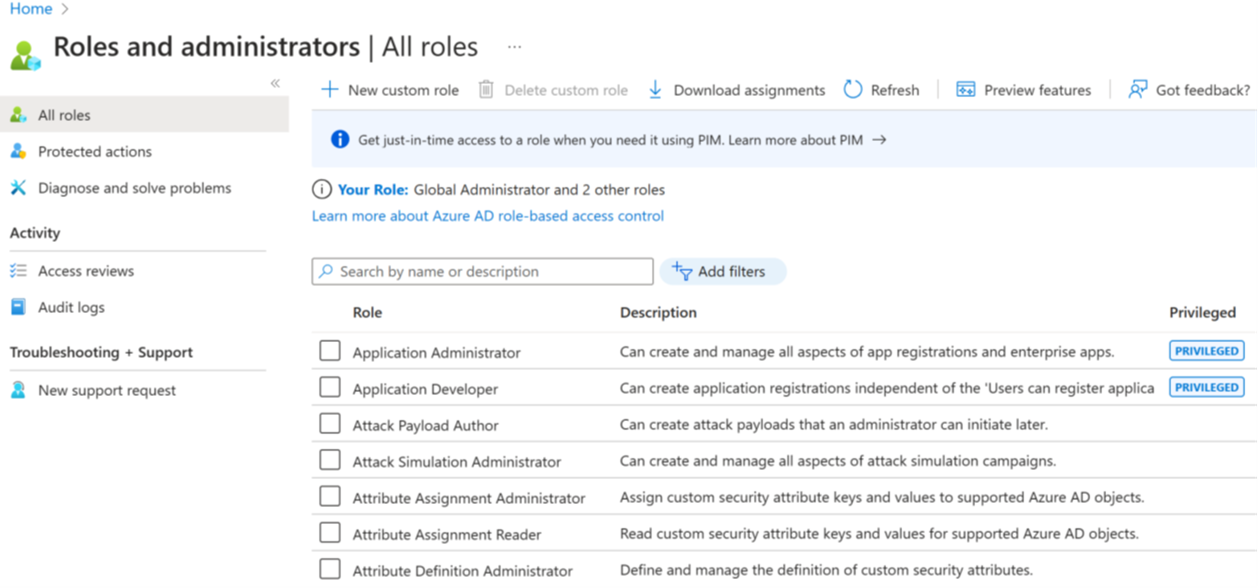
In the Azure portal, you can see the list of Microsoft Entra roles on the Roles and administrators screen.

Differences between Azure roles and Microsoft Entra roles
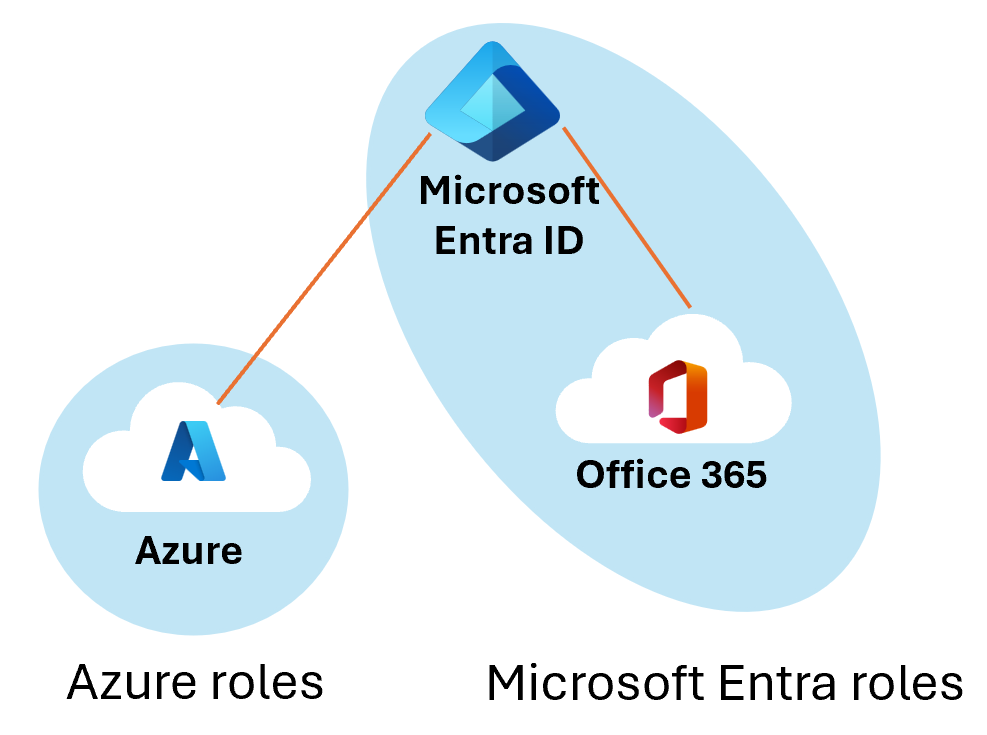
At a high level, Azure roles control permissions to manage Azure resources, while Microsoft Entra roles control permissions to manage Microsoft Entra resources. The following table compares some of the differences.
| Azure roles | Microsoft Entra roles |
|---|---|
| Manage access to Azure resources | Manage access to Microsoft Entra resources |
| Supports custom roles | Supports custom roles |
| Scope can be specified at multiple levels (management group, subscription, resource group, resource) | Scope is at the tenant level or can be applied to an Administrative Unit |
| Role information can be accessed in Azure portal, Azure CLI, Azure PowerShell, Azure Resource Manager templates, REST API | Role information can be accessed in Azure admin portal, Microsoft 365 admin center, Microsoft Graph, and PowerShell |
Do Azure roles and Microsoft Entra roles overlap?
By default, Azure roles and Microsoft Entra roles don't span Azure and Microsoft Entra ID. However, if a Global Administrator elevates their access by choosing the Access management for Azure resources switch in the Azure portal, the Global Administrator will be granted the User Access Administrator role (an Azure role) on all subscriptions for a particular tenant. The User Access Administrator role enables the user to grant other users access to Azure resources. This switch can be helpful to regain access to a subscription.
Several Microsoft Entra roles span Microsoft Entra ID and Microsoft 365, such as the Global Administrator and User Administrator roles. For example, if you're a member of the Global Administrator role, you have global administrator capabilities in Microsoft Entra ID and Microsoft 365, such as making changes to Microsoft Exchange and Microsoft SharePoint. However, by default, the Global Administrator doesn't have access to Azure resources.

Assign roles
There are multiple ways to assign roles within Microsoft Entra ID. You need to pick the one that best meets your needs. The user interface might be slightly different for each method, however the configuration options are similar. Methods for assigning roles include:
Assign a role to a user or group
- Microsoft Entra ID - Roles and administration - Select a role - + Add Assignment
Assign a user or group to a role
- Microsoft Entra ID - Open Users (or Groups) - Select an User (or group) - Assigned roles - + Add Assignment
Assign a role to a broad-scope, like a Subscription, Resource Group, or Management Group
- Done via the Access control (IAM) within each settings screen
Assign a role using PowerShell or Microsoft Graph API
Assign a role using Privileged Identity Management (PIM)
The best method for your configuration needs can be used, but care must be taken as there are no built in restrictions. You could accidentally assign an administrative role to a group with users who don't need administrative access. Extra permissions could lead to a solution modified by a user without proper knowledge of what they're doing, or even a potential avenue for attackers. Proper identity governance is the key.
Example - using PIM to assign a role
A common way to assign Microsoft Entra roles to a user is on the Assigned roles page for a user. You can also configure the user eligibility to be elevated just-in-time into a role using Privileged Identity Management (PIM).
Note
If you have an Microsoft Entra ID Premium P2 license plan and already use PIM, all role management tasks are performed in the Privileged Identity Management experience. This feature is currently limited to assigning only one role at a time. You can't currently select multiple roles and assign them to a user all at once.

Create and assign a custom role in Microsoft Entra ID
This section describes how to create new custom roles in Microsoft Entra ID. For the basics of custom roles, see the custom roles overview. The role can be assigned either at the directory-level scope or an app registration resource scope only.
Custom roles can be created in the Roles and administrators tab on the Microsoft Entra ID overview page.
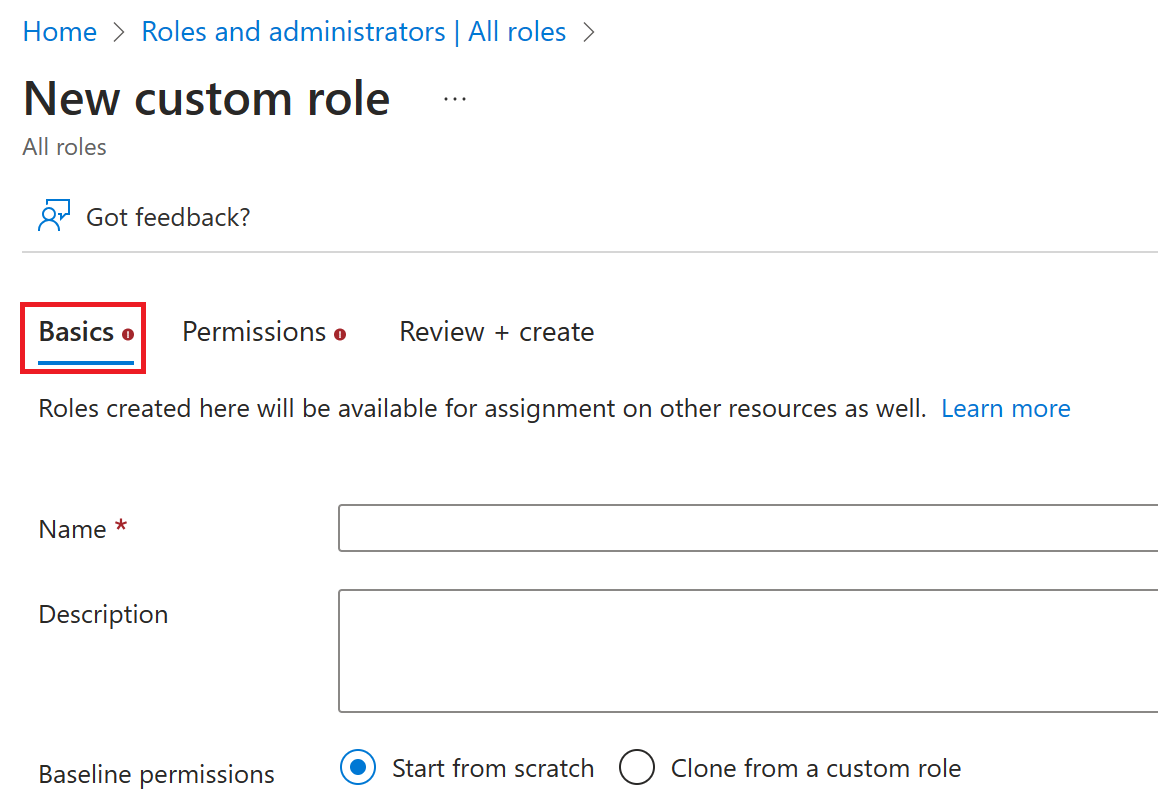
Select Microsoft Entra ID - Roles and administrators - New custom role.

On the Basics tab, provide a name and description for the role and then select Next.

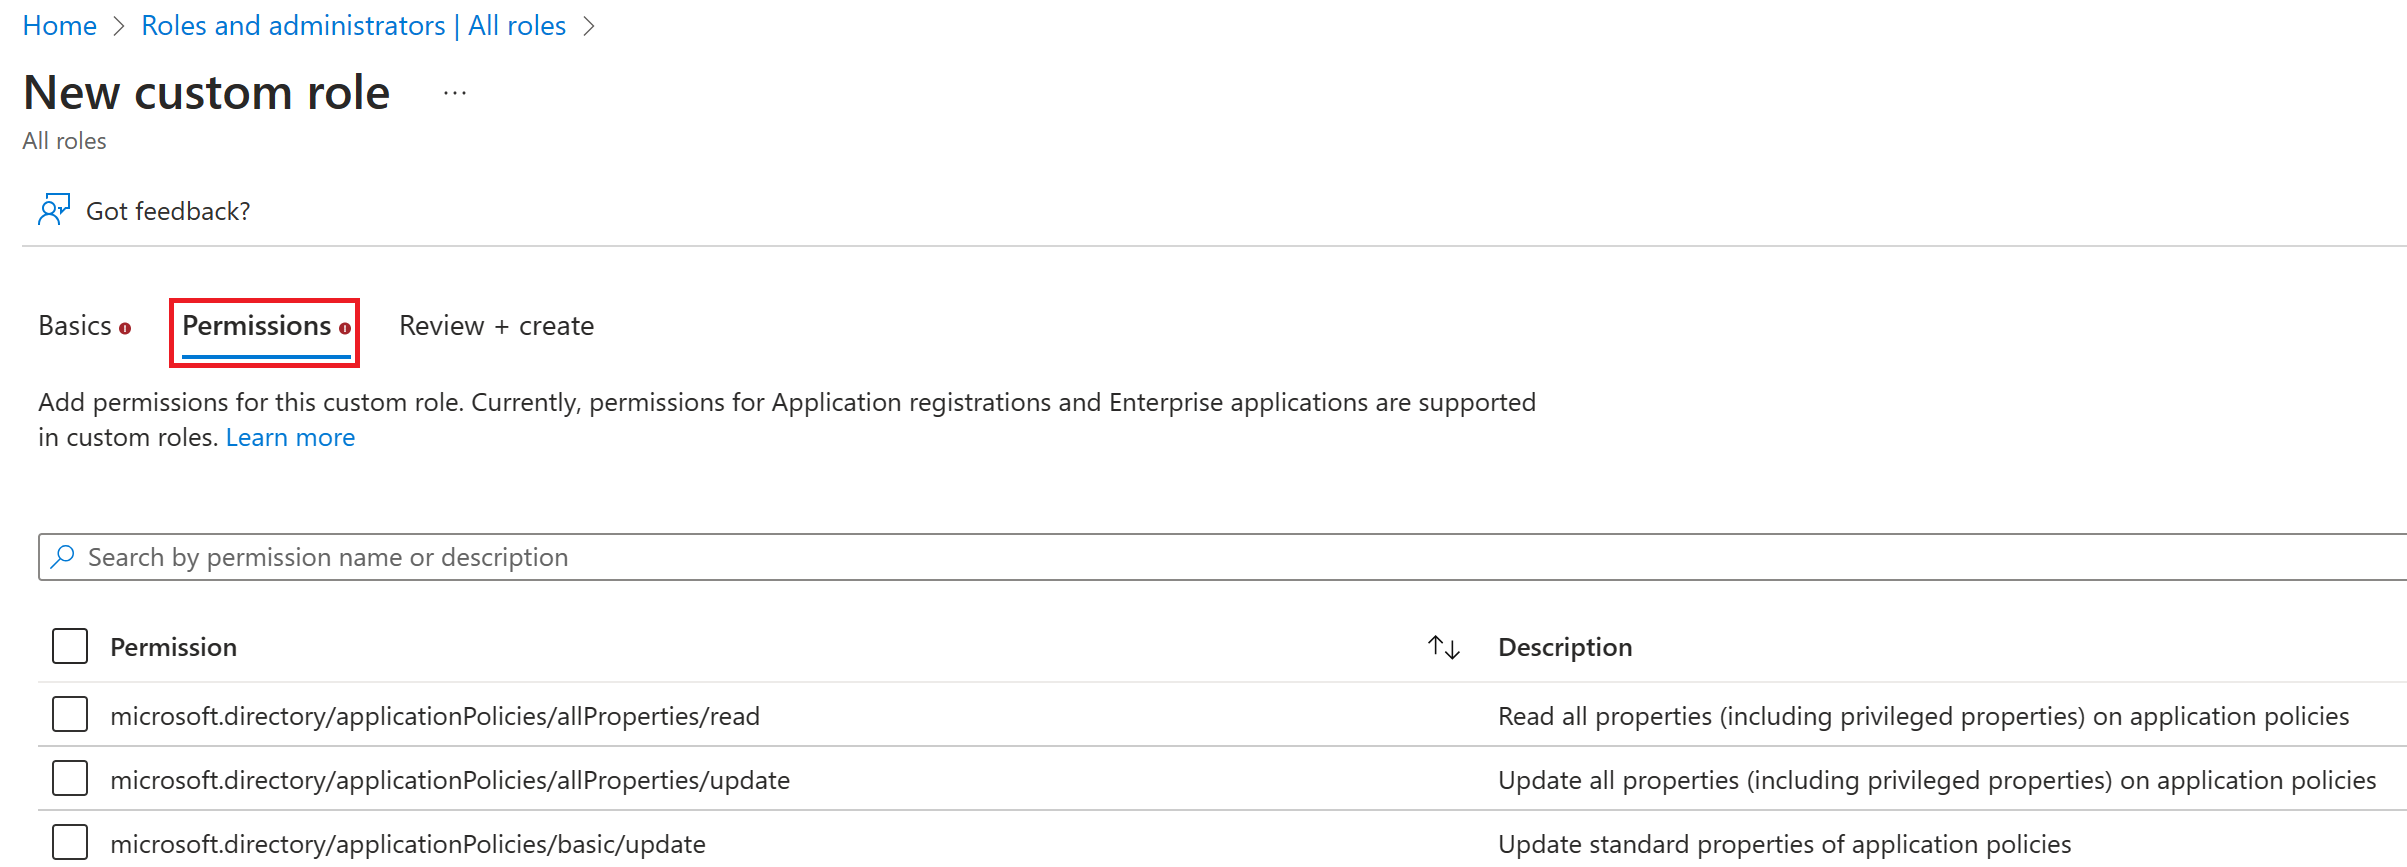
On the Permissions tab, select the permissions necessary to manage basic properties and credential properties of app registrations.
First, enter "credentials" in the search bar and select the
microsoft.directory/applications/credentials/updatepermission.
Next, enter "basic" in the search bar, select the
microsoft.directory/applications/basic/updatepermission, and then select Next.On the Review + create tab, review the permissions and select Create.
Your custom role will show up in the list of available roles to assign.