API discovery and consumption
API discovery and consumption are an important part of using APIs throughout an organization.
In this unit, you'll see how the API Center VS Code extension allows you to easily discover and consume APIs.
Prerequisites
To govern your APIs through API Center extension on VS Code, you'll need to:
- Install Visual Studio Code
- Install API Center extension
The following Visual Studio Code extensions are optional and needed only for certain scenarios as indicated:
- REST client extension - to send HTTP requests and view the responses in Visual Studio Code directly.
- Microsoft Kiota extension - to generate API clients.
API discovery and consumption
You can view your organization's API catalog directly in Visual Studio Code, with all your APIs, versions, definitions, environments, and deployments. With one glance, you instantly get an overview of all the APIs available within your organization.
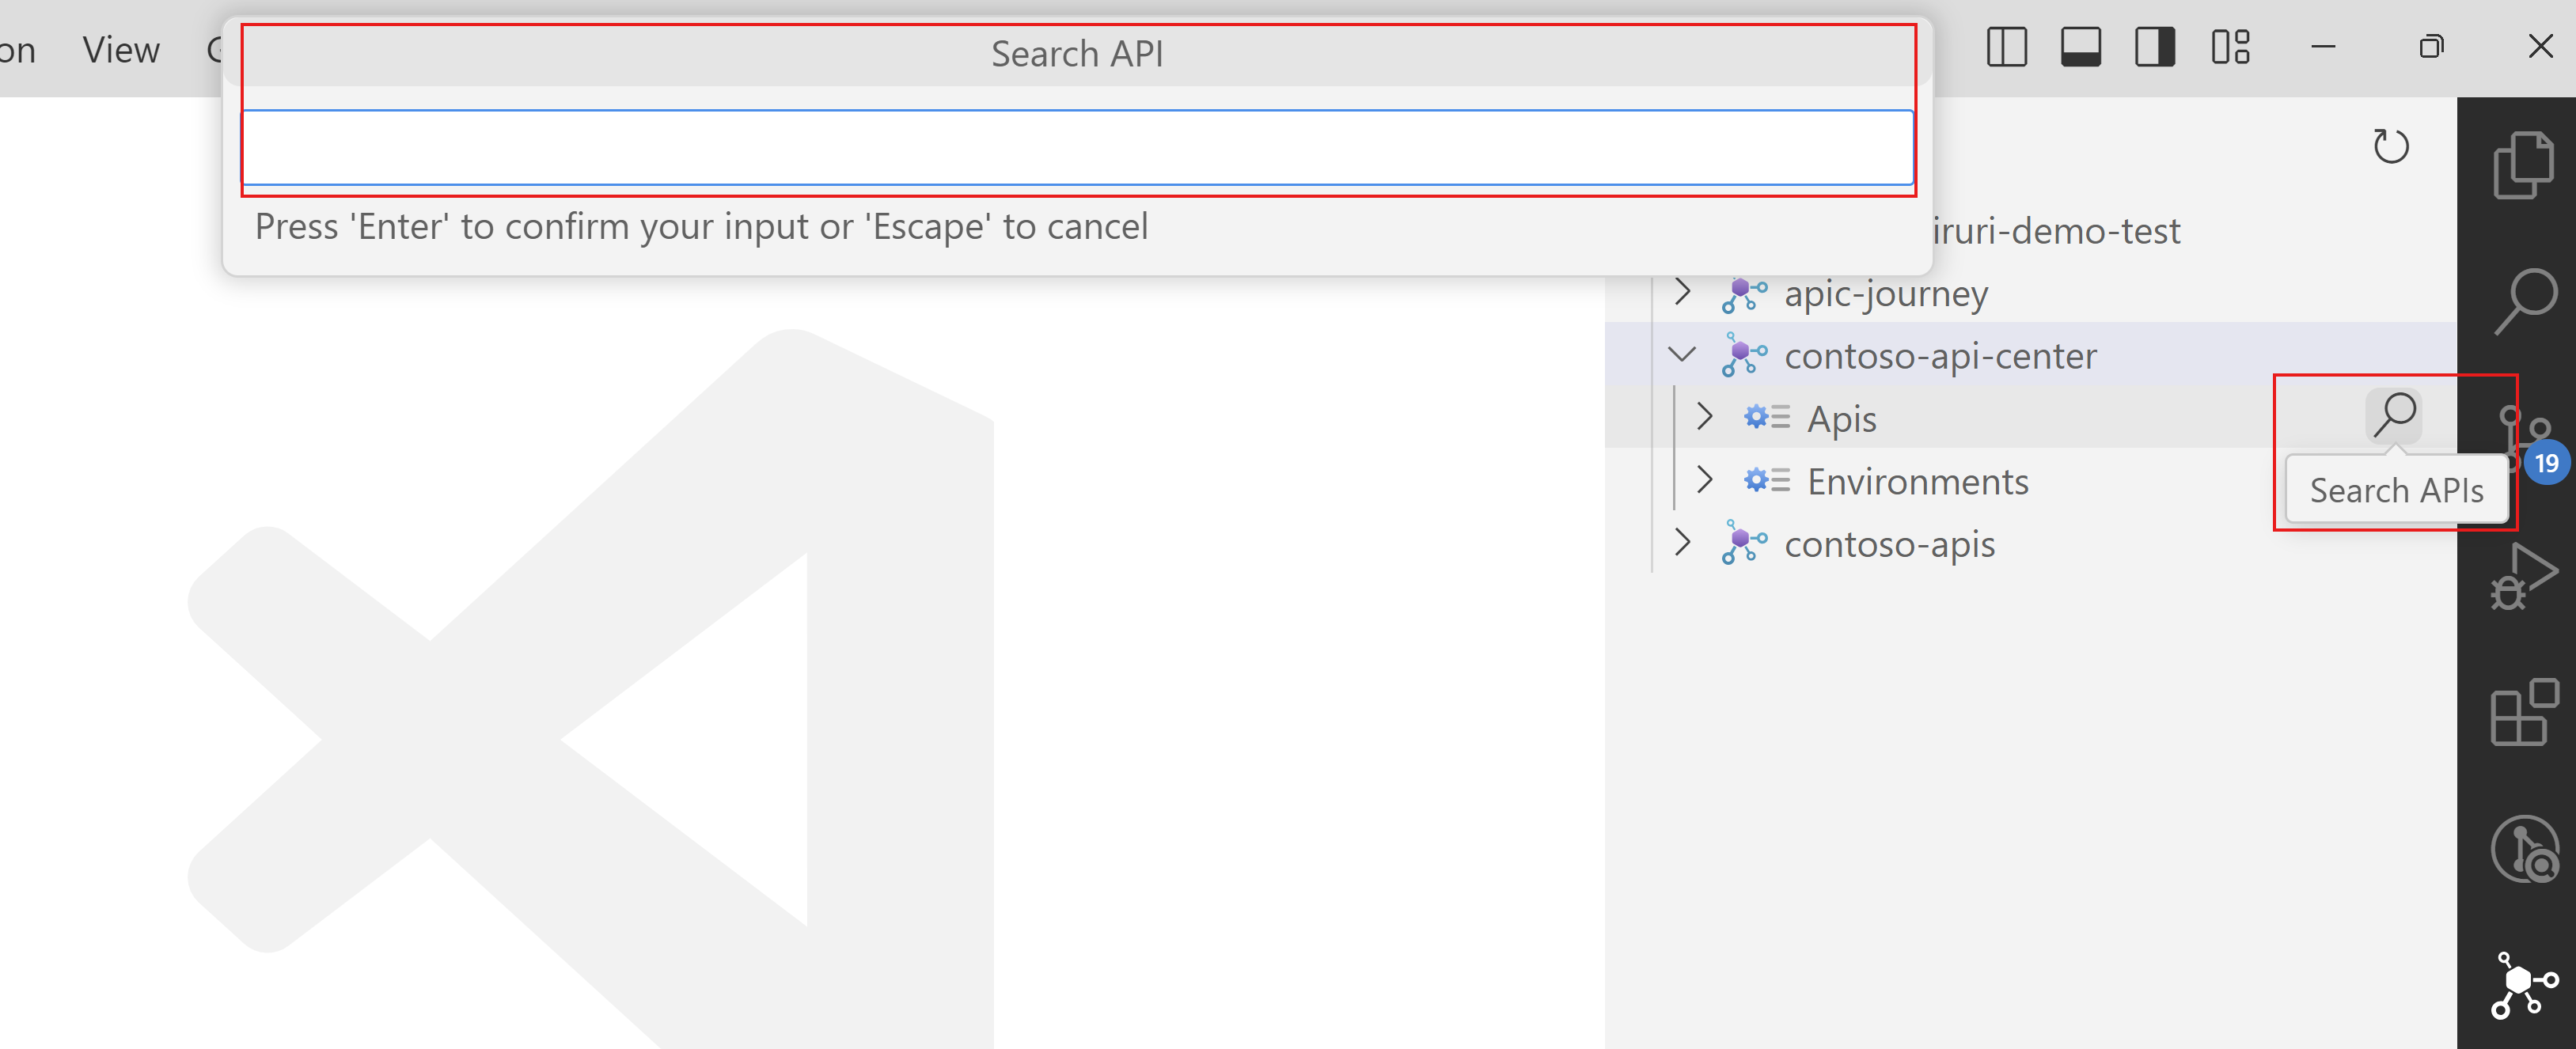
But what if your organization has hundreds or thousands of APIs? Don’t you worry, you can search for APIs through the search icon as shown below.
View API documentation
You can also quickly access, preview API documentations and test endpoints for your APIs on VS Code.
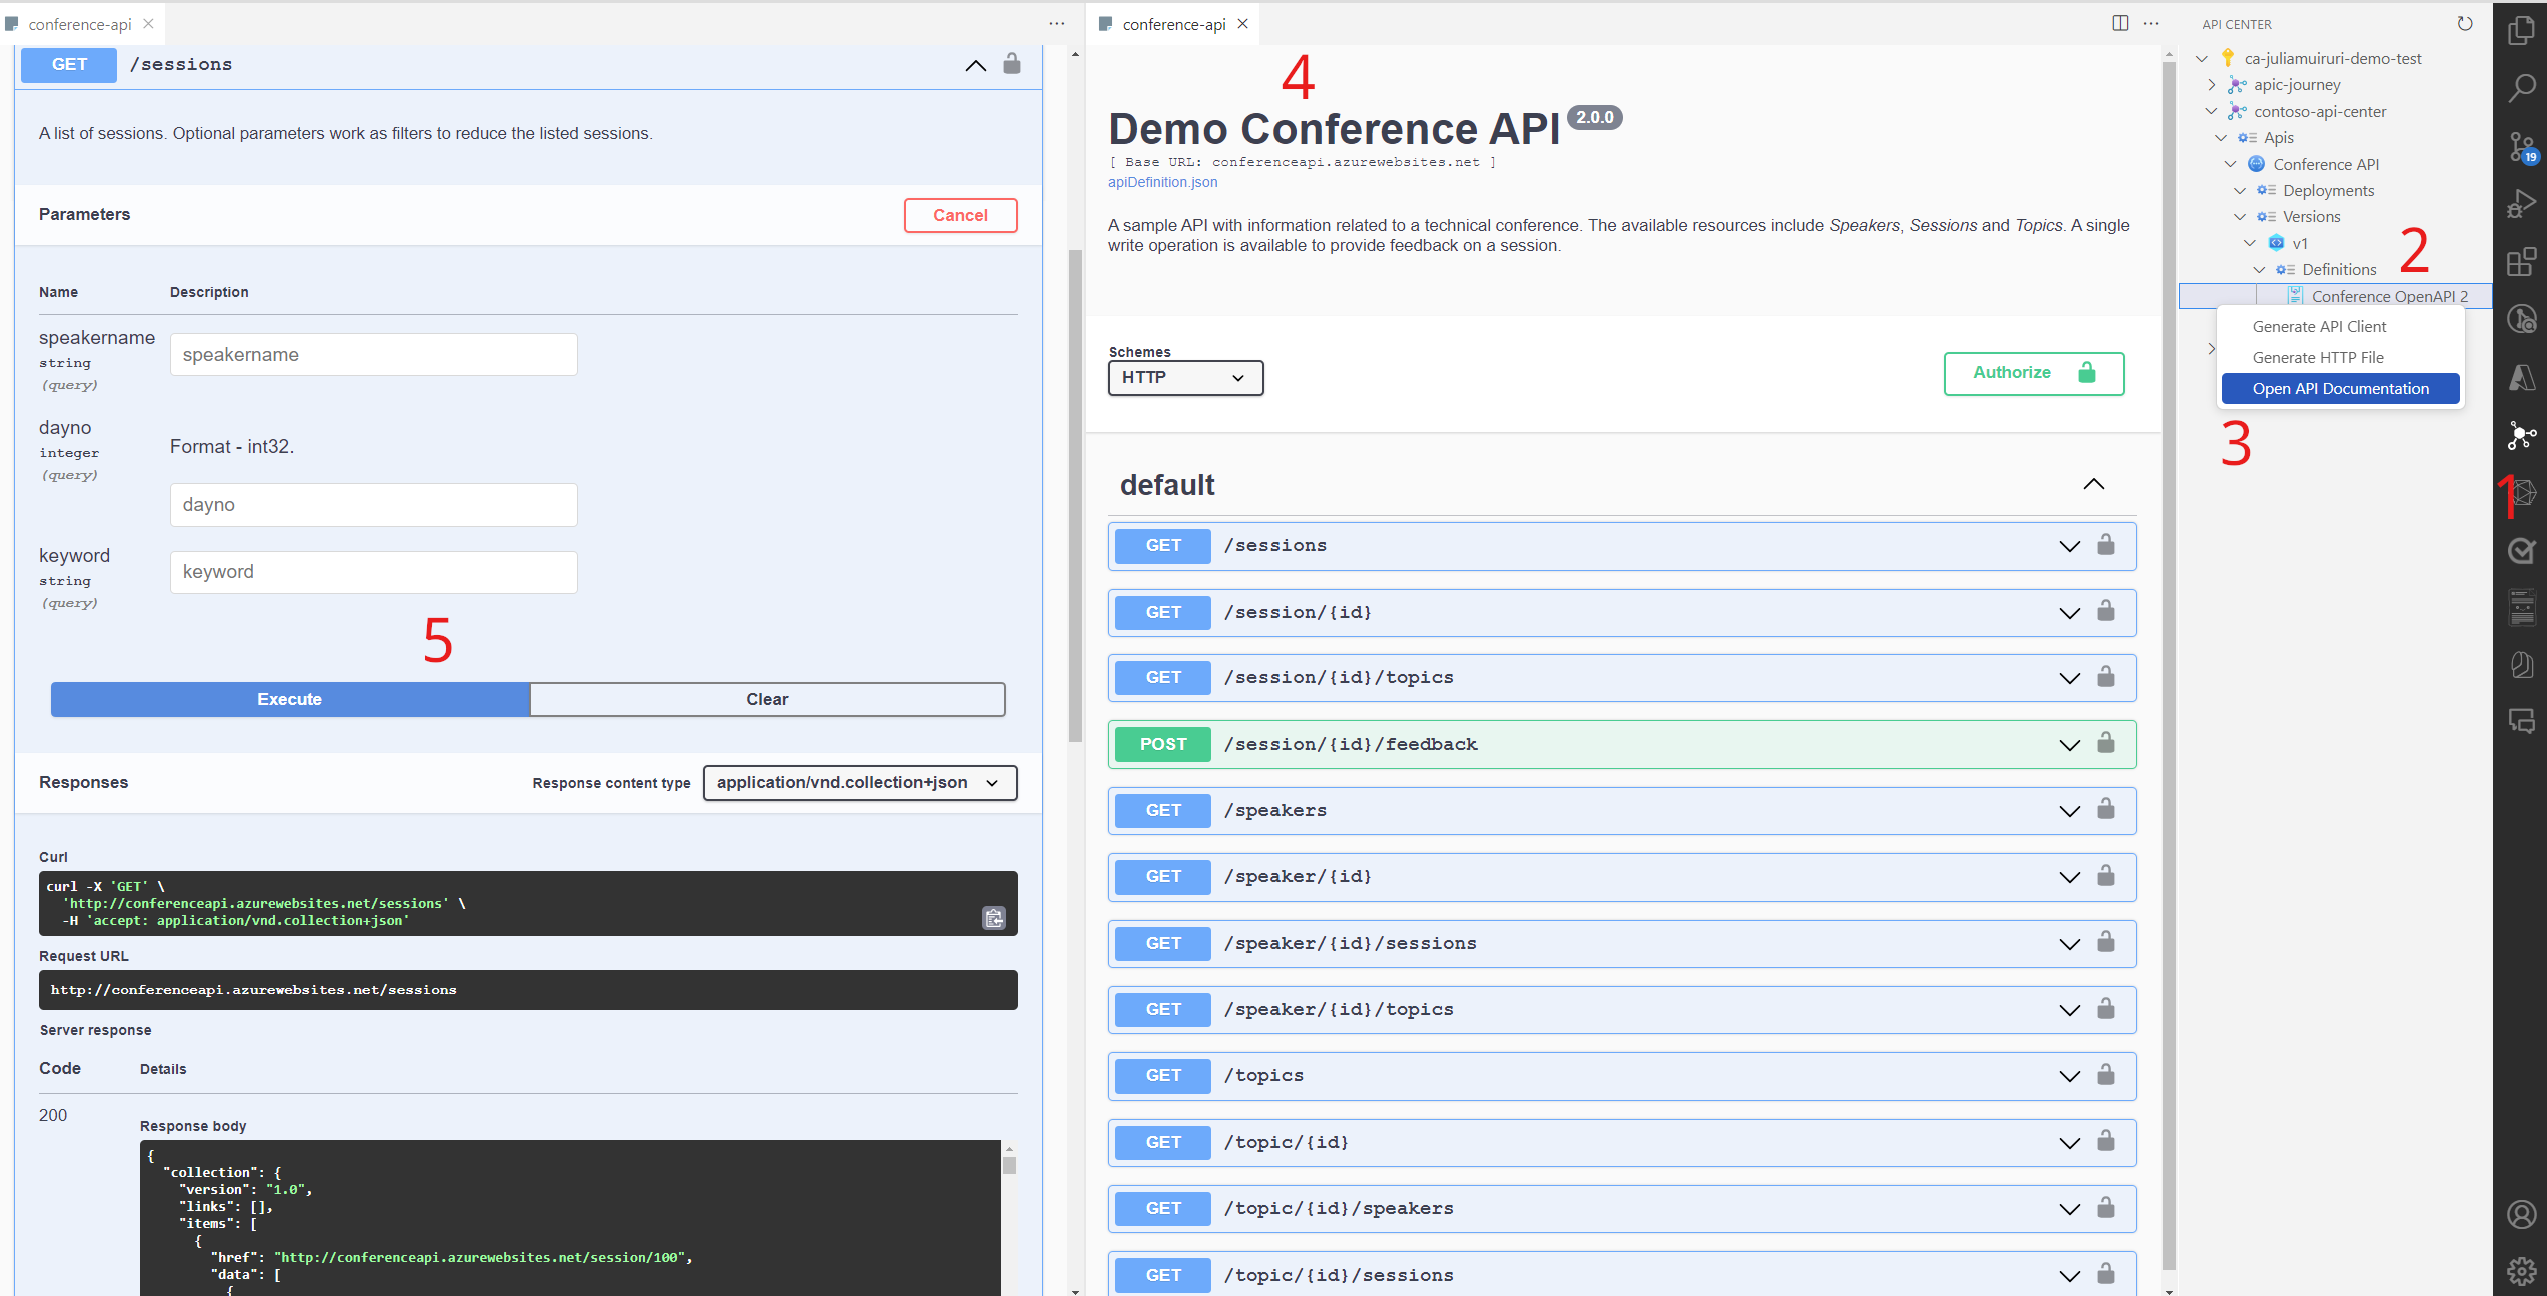
- Open the API Center extension from the tab.
- Expand the API Center tree view to show an API definition.
- Right-click on the definition and select Open API Documentation.
- A new tab appears with the Swagger UI for the API definition.
- Select an endpoint and select Try it out, provide the required parameters and select Execute.
Try APIs
With API Center extension, you can view an .http file based on the API definition provided in the API Center. On this file, you can directly send http requests and view responses right there on your editor.
Note
You need to install the REST Client extension to use this capability.
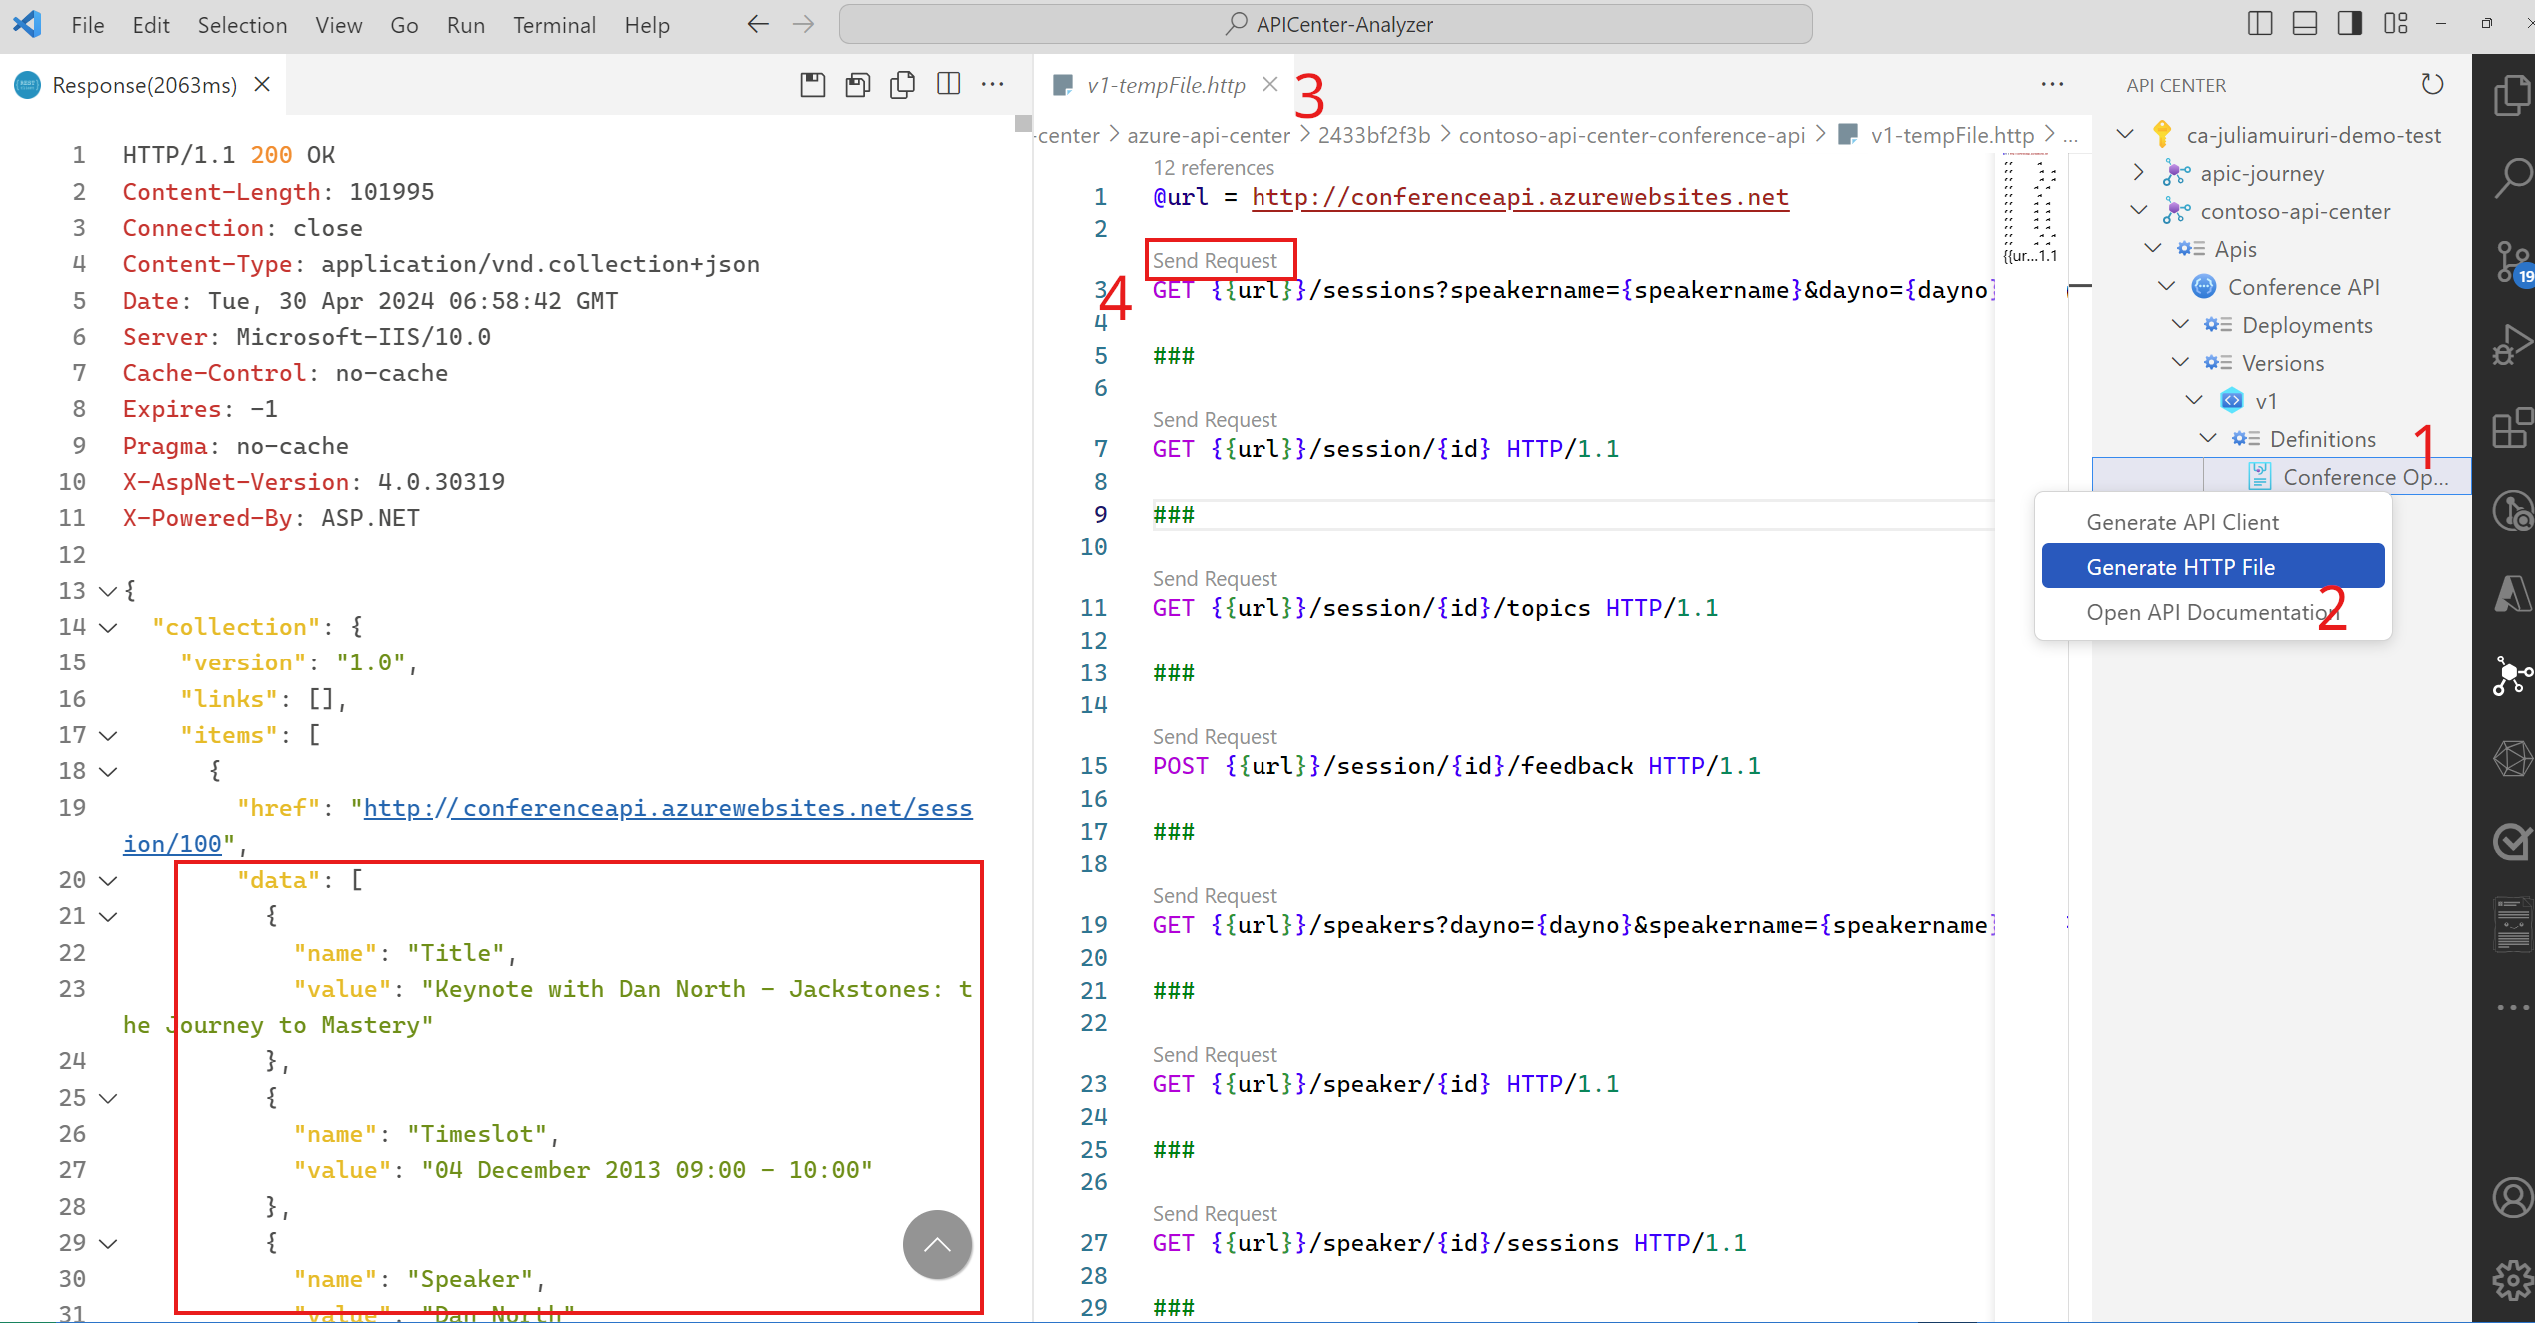
- Expand the API Center tree view to show an API definition.
- Right-click on the definition and select Generate HTTP File.
- A new tab appears that renders a .http document populated by the API specification.
- To make a request, select an endpoint, and select Send Request.
Generate SDKs
The API Center extension also uses Microsoft Kiota to generate a client for your HTTP REST API for your favorite language as defined in your OpenAPI specification. This allows you to instantly generate clients for all or selected endpoints for your API, that satisfy your business needs.
Note
You need to install the Microsoft Kiota extension to use this capability.
Expand the API Center tree view to show an API definition.
Right-click on the definition and select Generate API Client. The Kiota OpenAPI Generator pane appears.
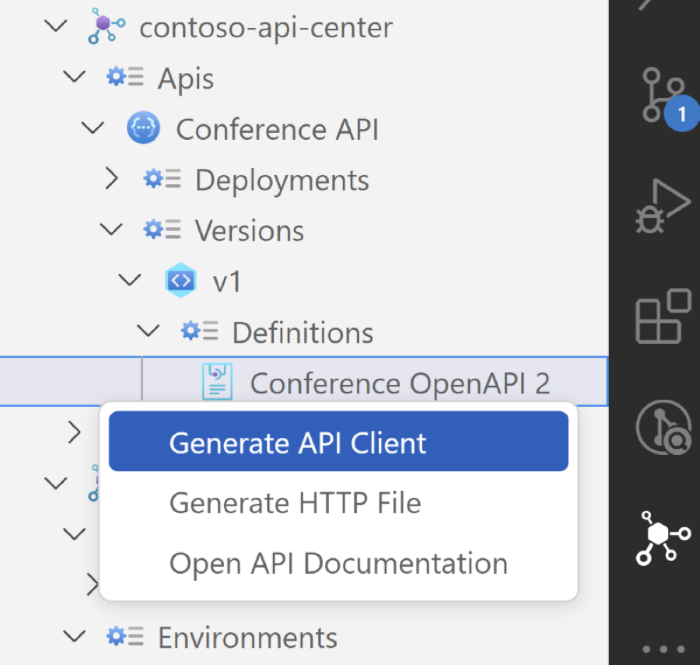
Select the API endpoints and HTTP operations you wish to include in your SDKs. You can hover on an endpoint and select the ‘+’ button to add it or ‘-‘ to remove it.
Once done, select the ‘Play’ button to generate the API client.
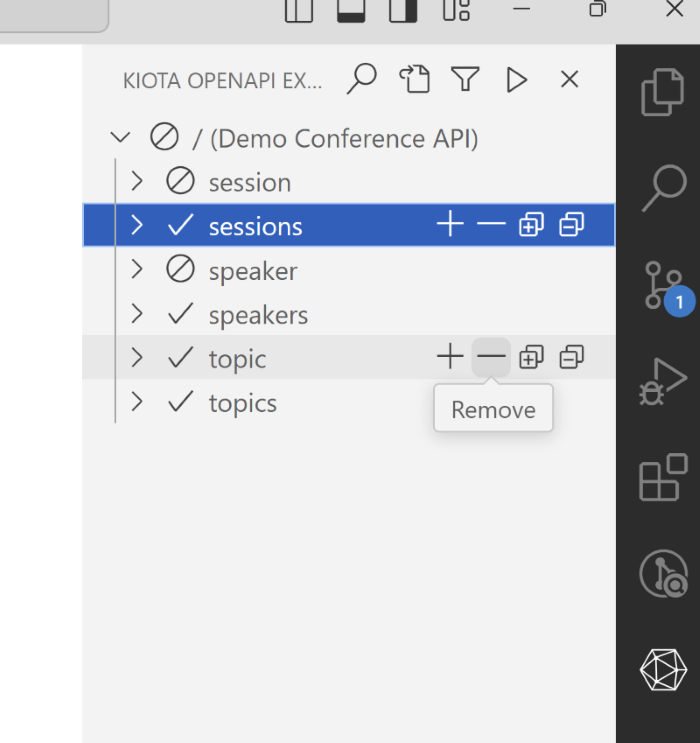
Select Generate API client.
a. Enter configuration details about the SDK name, namespace, and output directory.
b. Select the language for the generated SDK.
Self-hosted API Center portal
API Center portal is a website for developers and stakeholders to seamlessly discover and engage with APIs in your API inventory. With this self-hosted website, organizations provide a web-based API discovery and consumption experience to consumers.
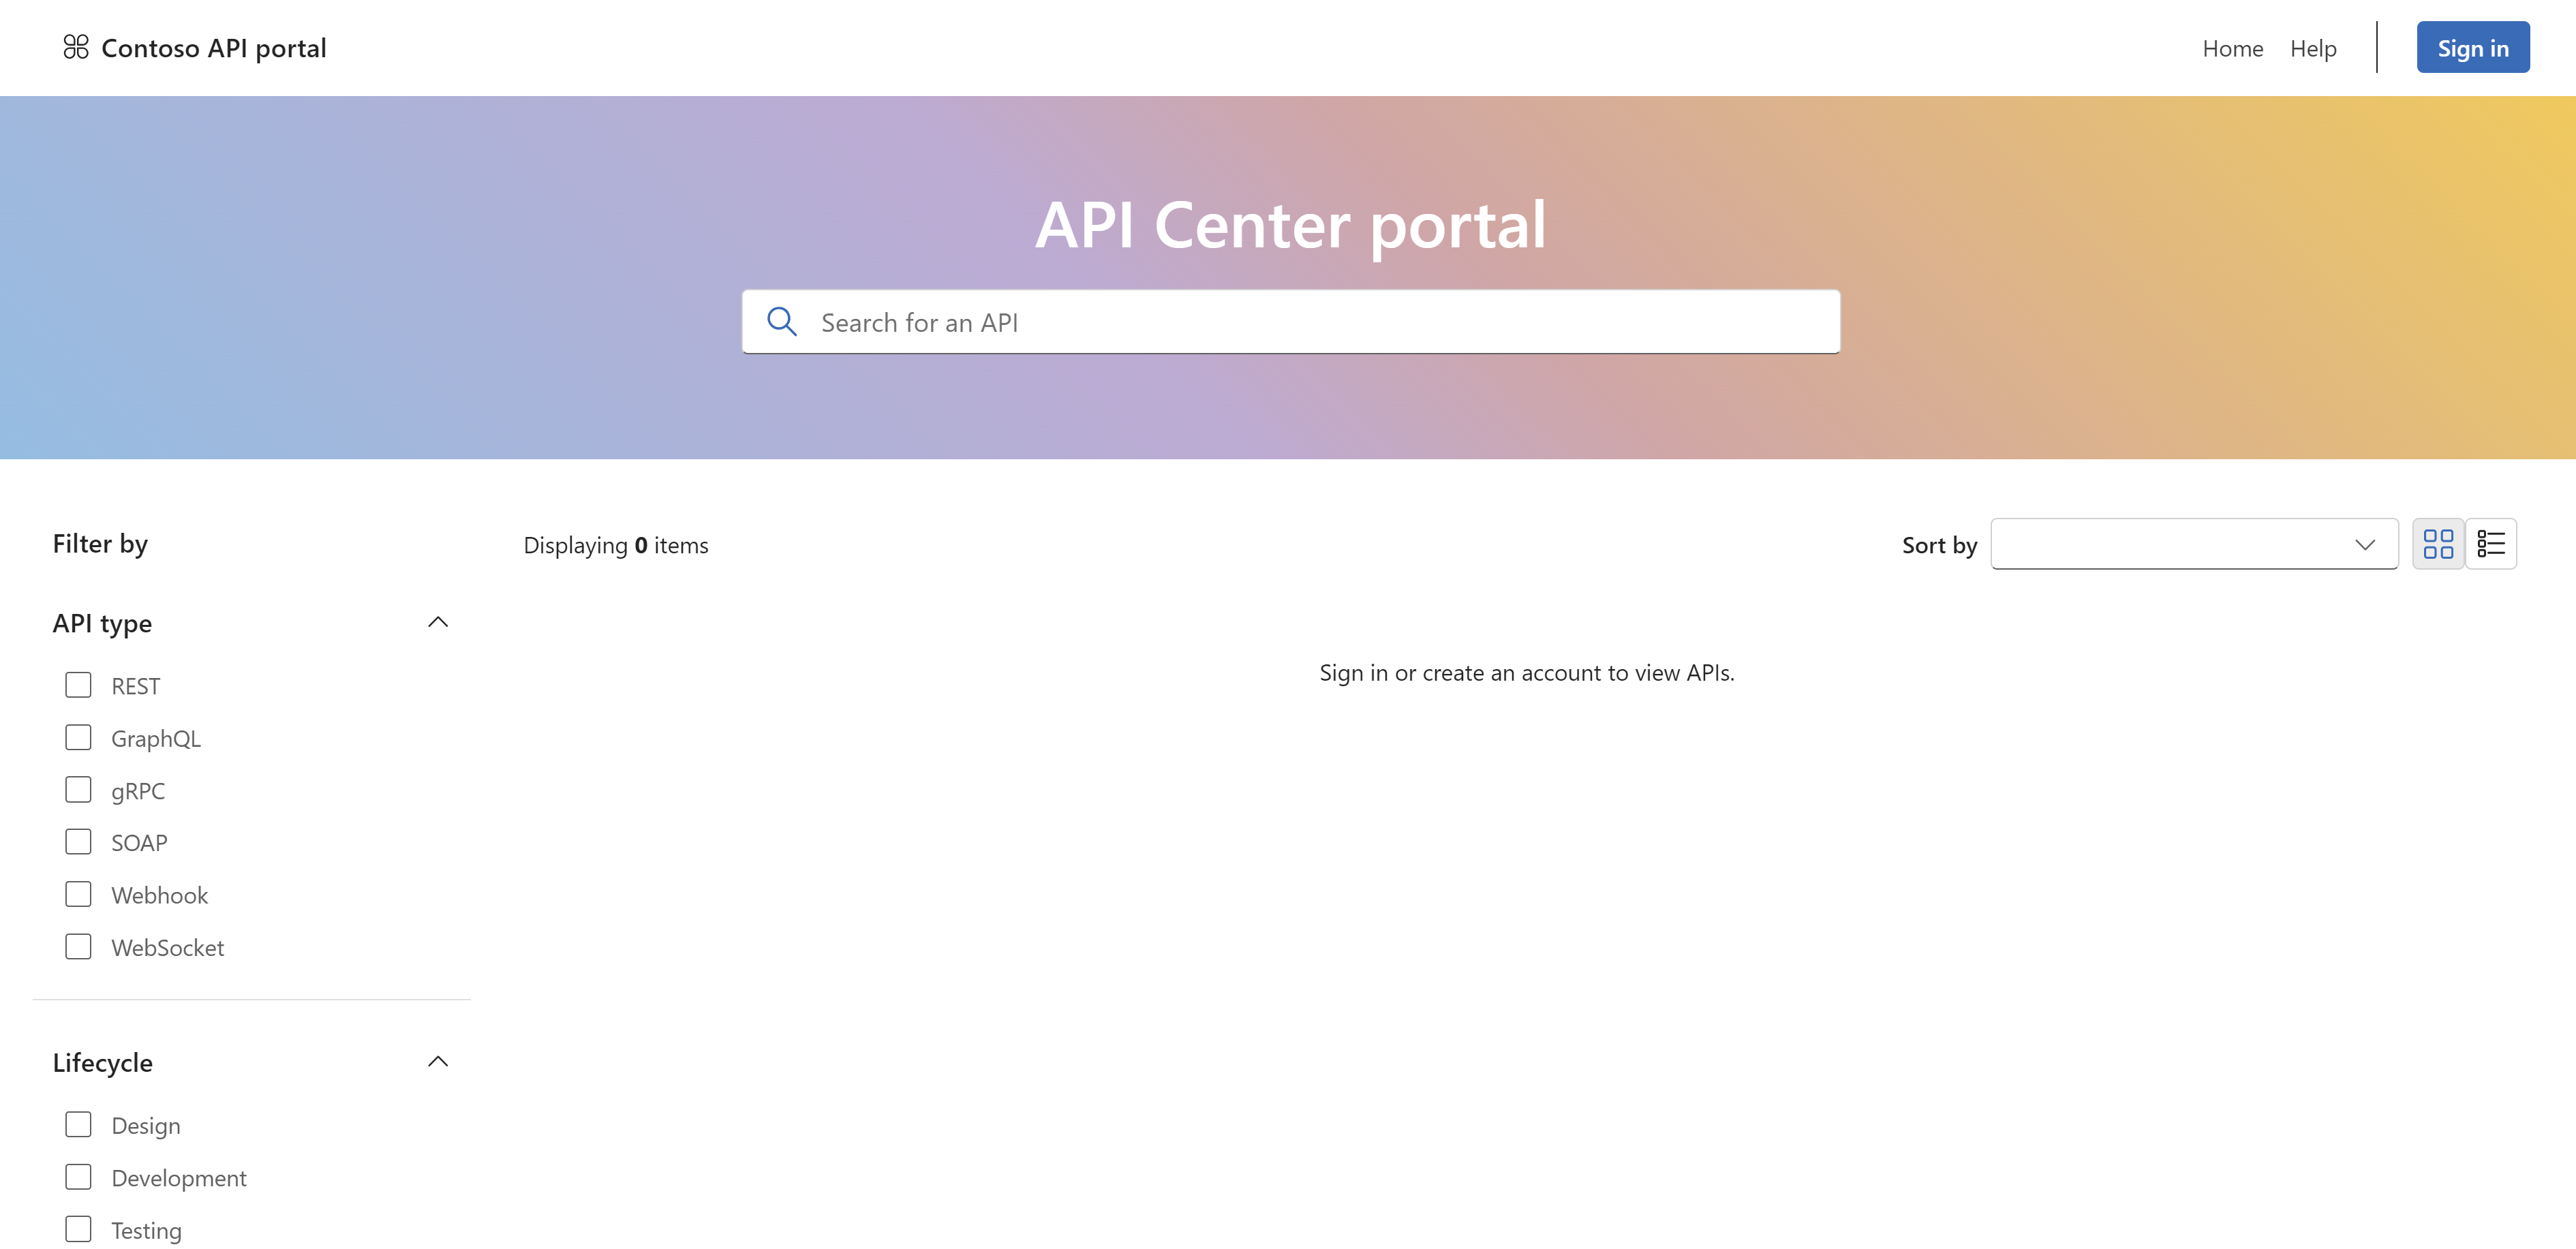
API Platform engineers want a centralized and stand-alone location for all their API Consumers, both internal and external. To get started, you can use the API Center portal starter template using the following steps:
Note
The instructions below are for deploying to Azure Static Web Apps, but you can deploy on your infrastructure of choice.
Fork the API Center reference implementation code.
Create a Static Web App resource on Azure.
Under Deployment details, select GitHub as the source, and direct to the repository containing the API Center starter code.
Static Web Apps will detect the Build Presets, and populate with React.
Enter / as the App location.
Enter dist as the Output location.
Select Create.
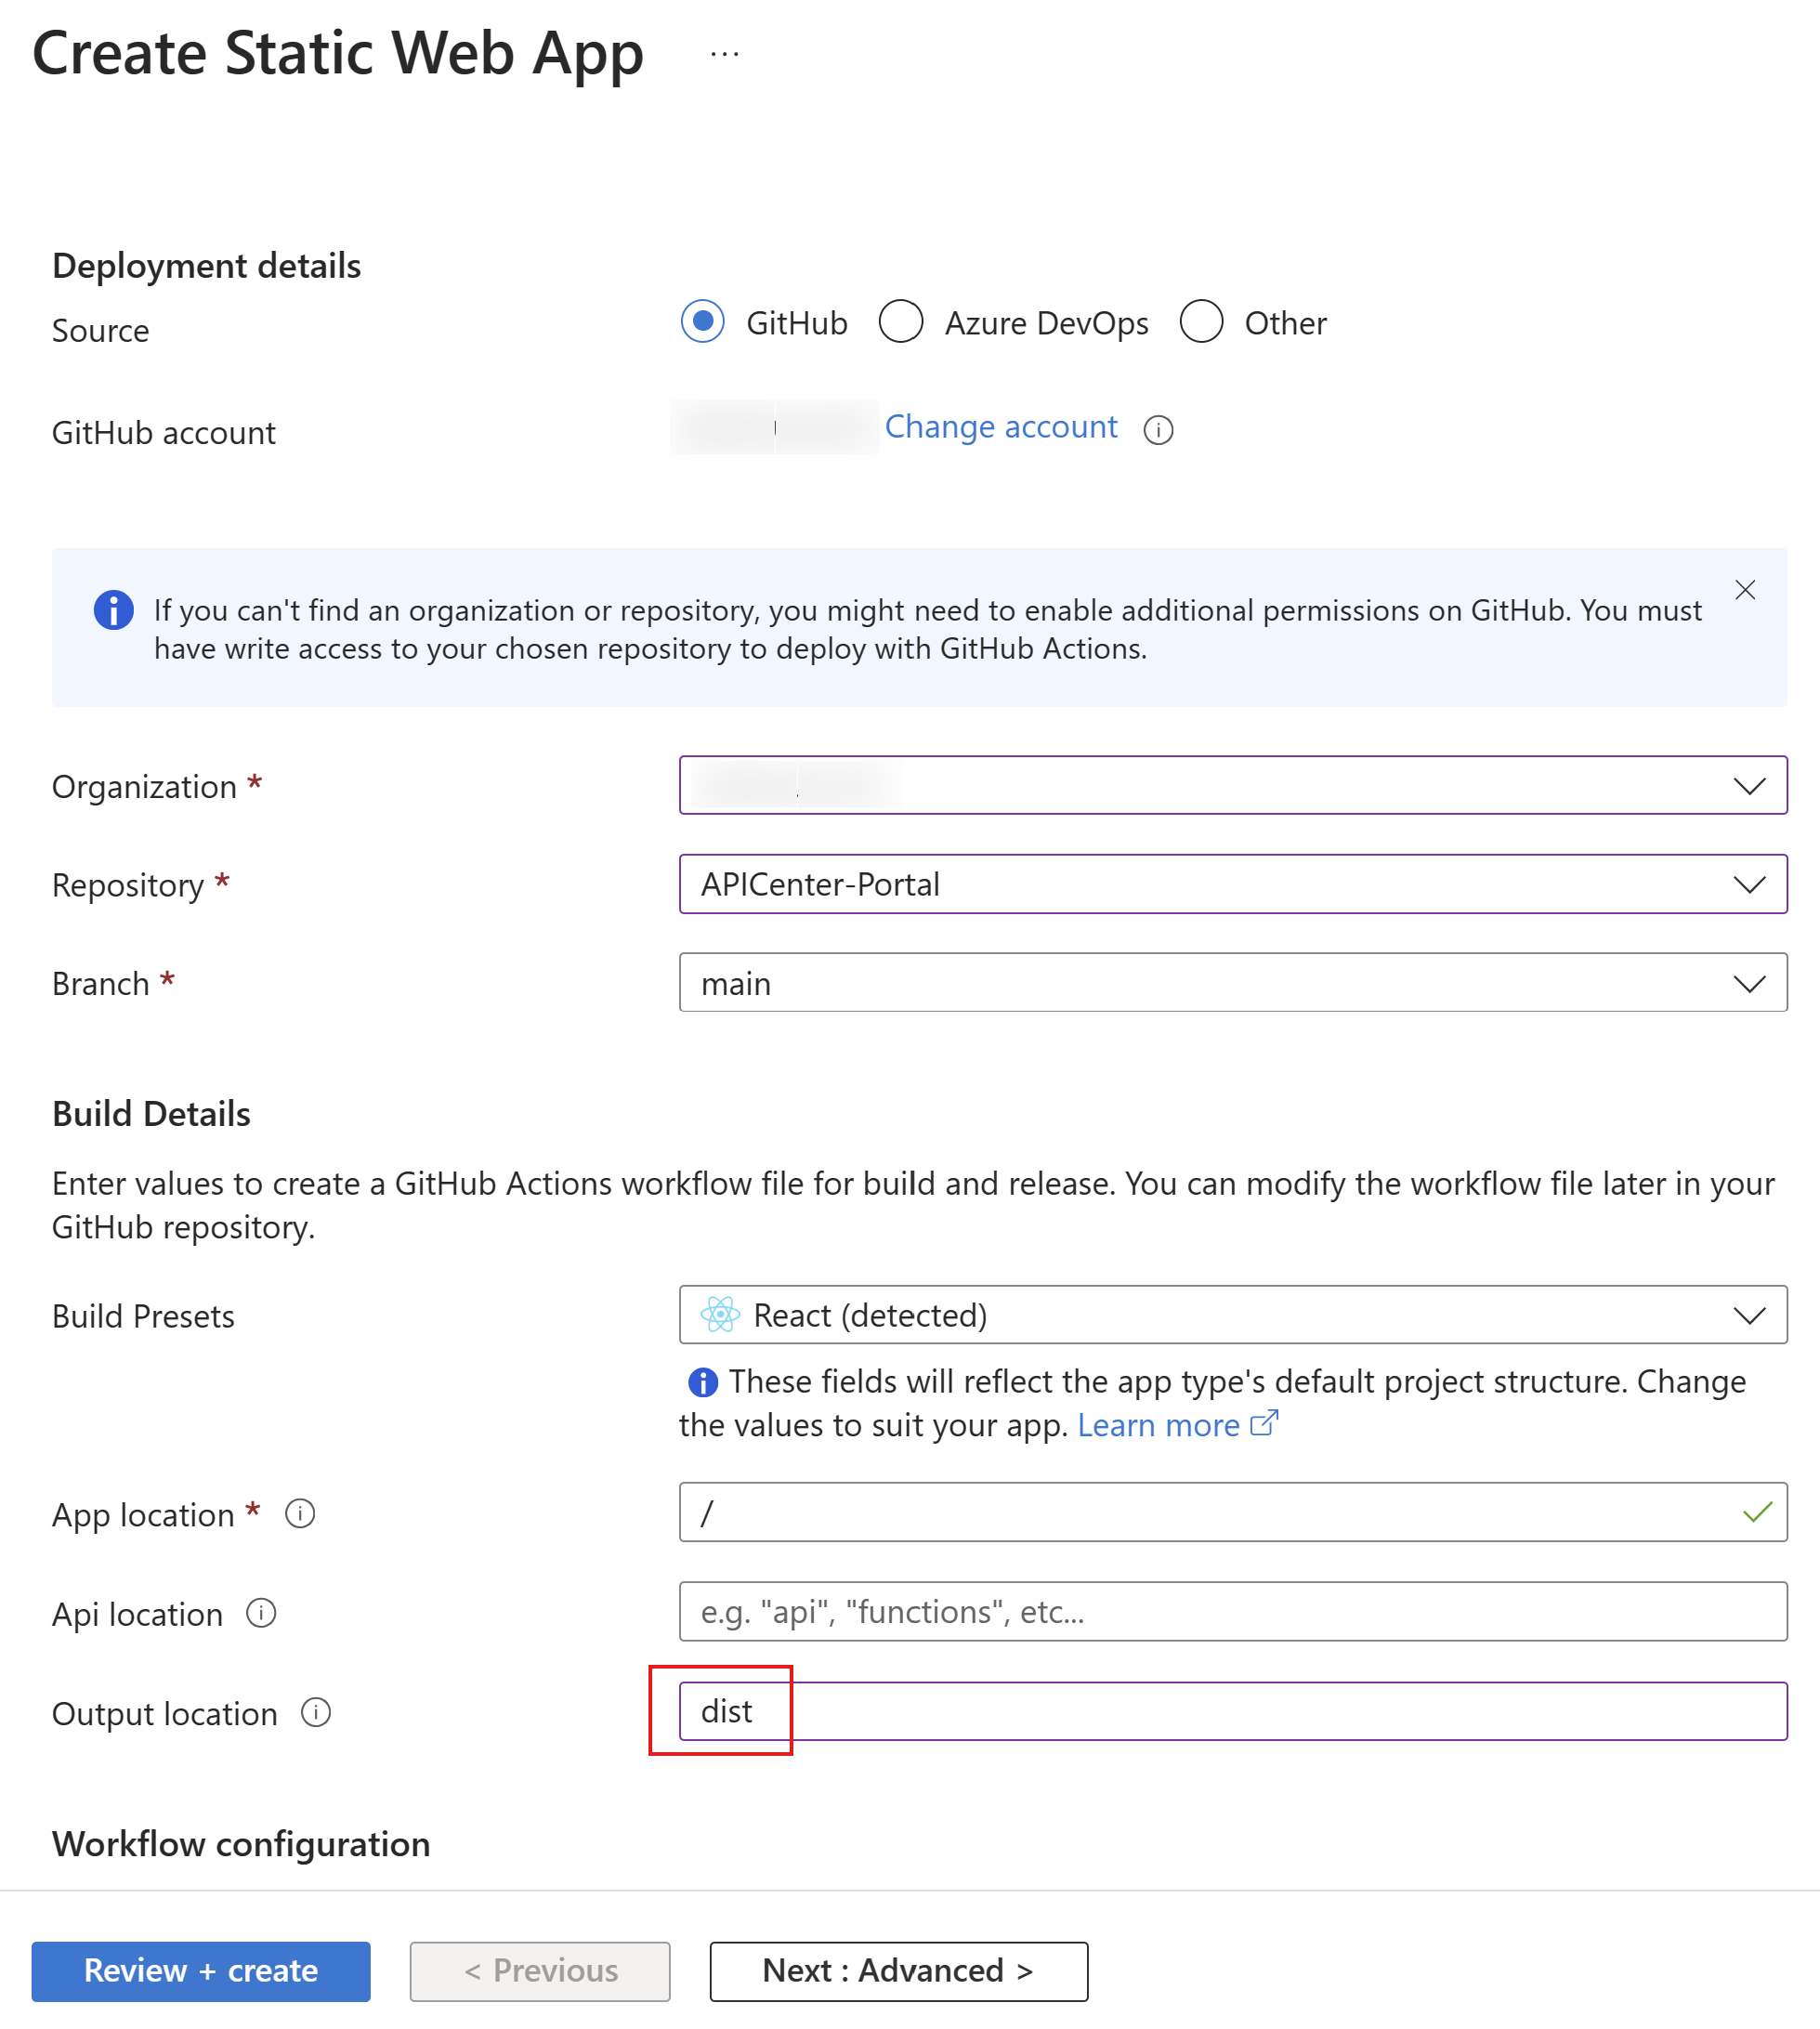
It may take up to 5 minutes to see your code published on the website.
To view your API Center portal running on Static Web Apps, select View app in browser from the Overview tab in the Static Web App resource you created in Azure portal.
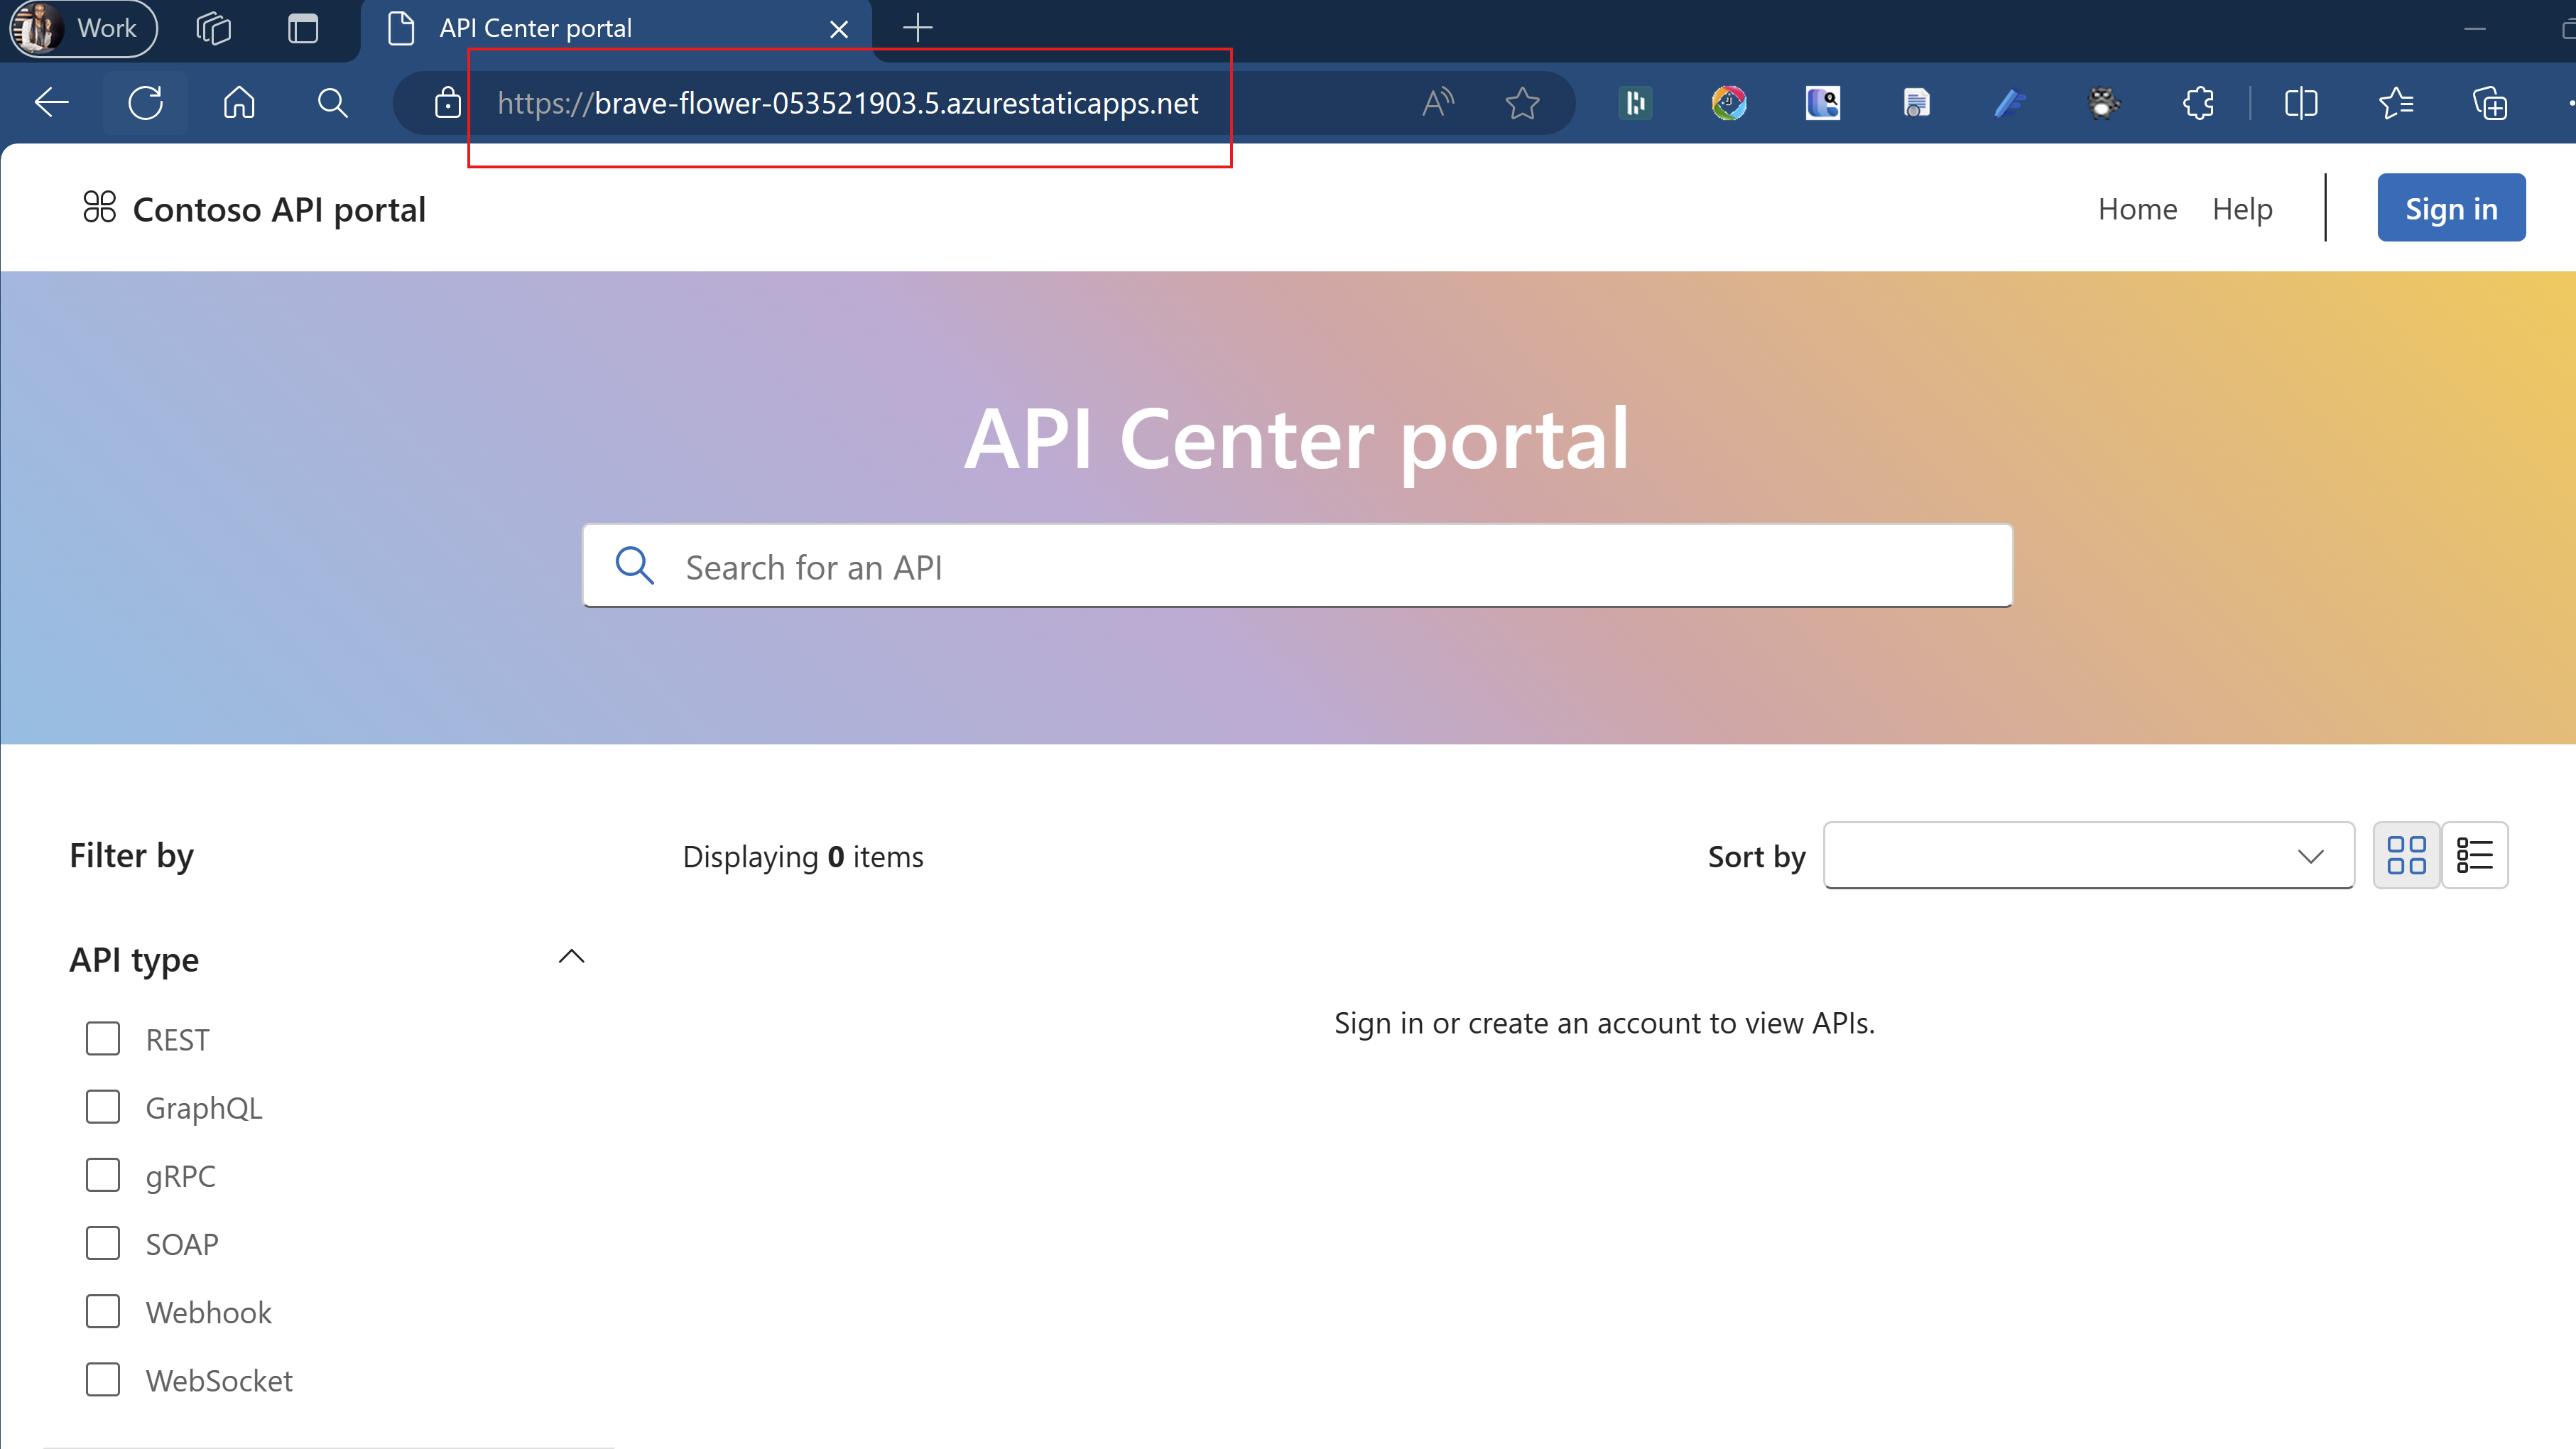
Configuring role-based access control
Administrators have the full control of assigning permissions to access APIs and assets within your organization’s API Center with role-based access control.
Note
By default, administrators of the API center don't have access to APIs in the API Center portal. Be sure to assign the Azure API Center Data Reader role to yourself and other administrators.
To access APIs in your API Center, users must sign in to the portal and must have the necessary permissions, scoped to your API Center. To enable sign-in, assign the Azure API Center Data Reader role to users or groups in your organization, following the steps provided here.