Configure tenant data for Call Quality Dashboard reports
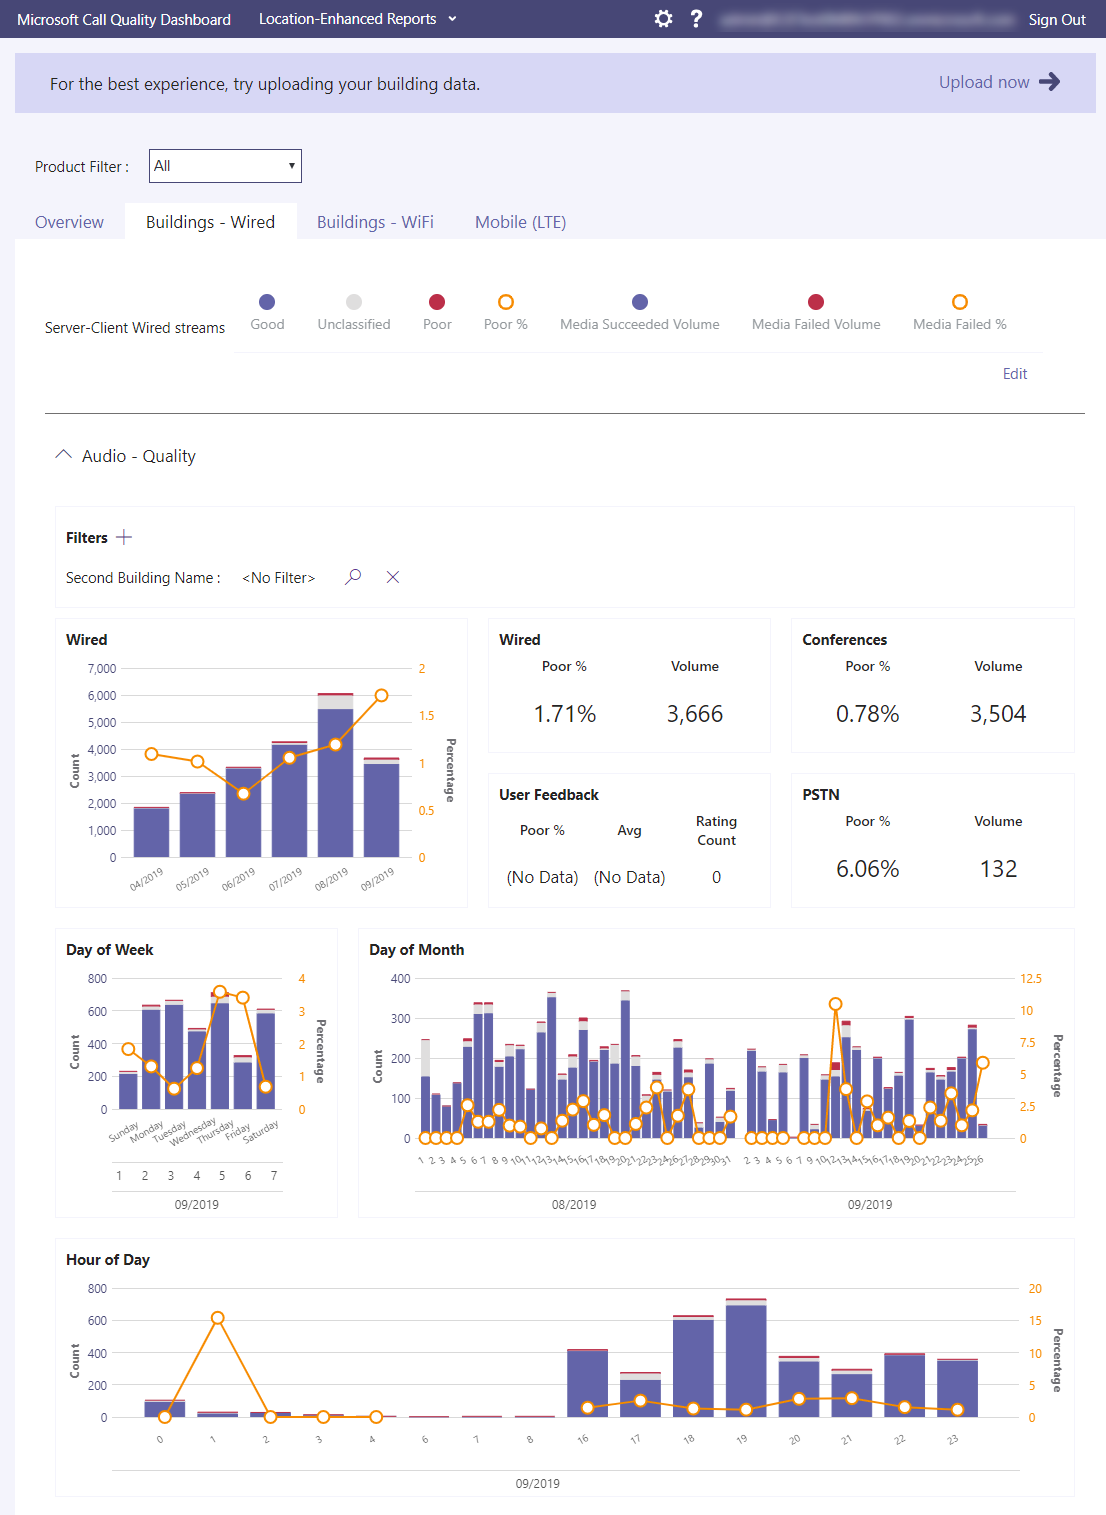
Call Quality Dashboard (CQD) gives you a network-wide view of call quality across your organization. Location-enhanced CQD reports help the network engineer determine if the problem is a site-related issue.
For example, you can include different building locations or endpoint-specific views such as wired or Wi-Fi connected devices. The data can be assessed to determine if the problem is isolated to a single user or affects a larger segment of users.

To turn on building or endpoint-specific views in CQD, an admin must upload building or endpoint information on the CQD Tenant Data Upload page.
Prepare data files
The format of data file must meet the following criteria to pass the validation check before upload:
The file must be either a .tsv file or a .csv file.
The data file doesn't include a table header row. The first line of the data file is expected to be real data.
If a column uses the String data type, a data field can be empty but must still be separated by a tab or comma.
There are two types of data file you can upload.
Building
The Building data file lists the mapping of a network address to geographical information (Building, City, Zip Code, Country/Territory, State, Region, and so on) for a specific tenant. There must be 15 columns for each row, each column must have the appropriate data type and order.
Field order:
NetworkIP, NetworkName, NetworkRange, BuildingName, OwnershipType, BuildingType, BuildingOfficeType, City, ZipCode, Country, State, Region, InsideCorp, ExpressRoute, VPN
Sample row:
192.168.1.0,USA/Seattle/SEATTLE-SEA-1,26,SEATTLE-SEA-1,Contoso,IT Termination,Engineering,Seattle,98001,US,WA,MSUS,1,0,0There's a 1,000,000 expanded row limit per tenant data file.
Data types in the file can only be String, Integer, or Boolean. For the Integer data type, the value must be a numeric value. Boolean values must be either 0 or 1.
Endpoint
The Endpoint data file lists the mapping of an endpoint name to device information along with optional labels for a specific tenant. There must be seven columns for each row with the String only data type. The columns must be in the following order.
Field order:
EndpointName, EndpointMake, EndpointModel, EndpointType, EndpointLabel1, EndpointLabel2, EndpointLabel3
Sample row:
1409W3534, Fabrikam, Model 123, Laptop, IT designated 2018 Laptop, Asset Tag 5678, Purchase 2018The maximum allowed length is 64 characters.
EndpointName must be unique, otherwise the upload fails. If there's a duplicate row or two rows that use the same EndpointName the conflict will cause incorrect joining.
EndpointLabel1, EndpointLabel2, and EndpointLabel3 are customizable labels. They can be empty Strings or values such as “IT Department designated 2018 Laptop” or “Asset Tag 5678”.
Upload building or endpoint information
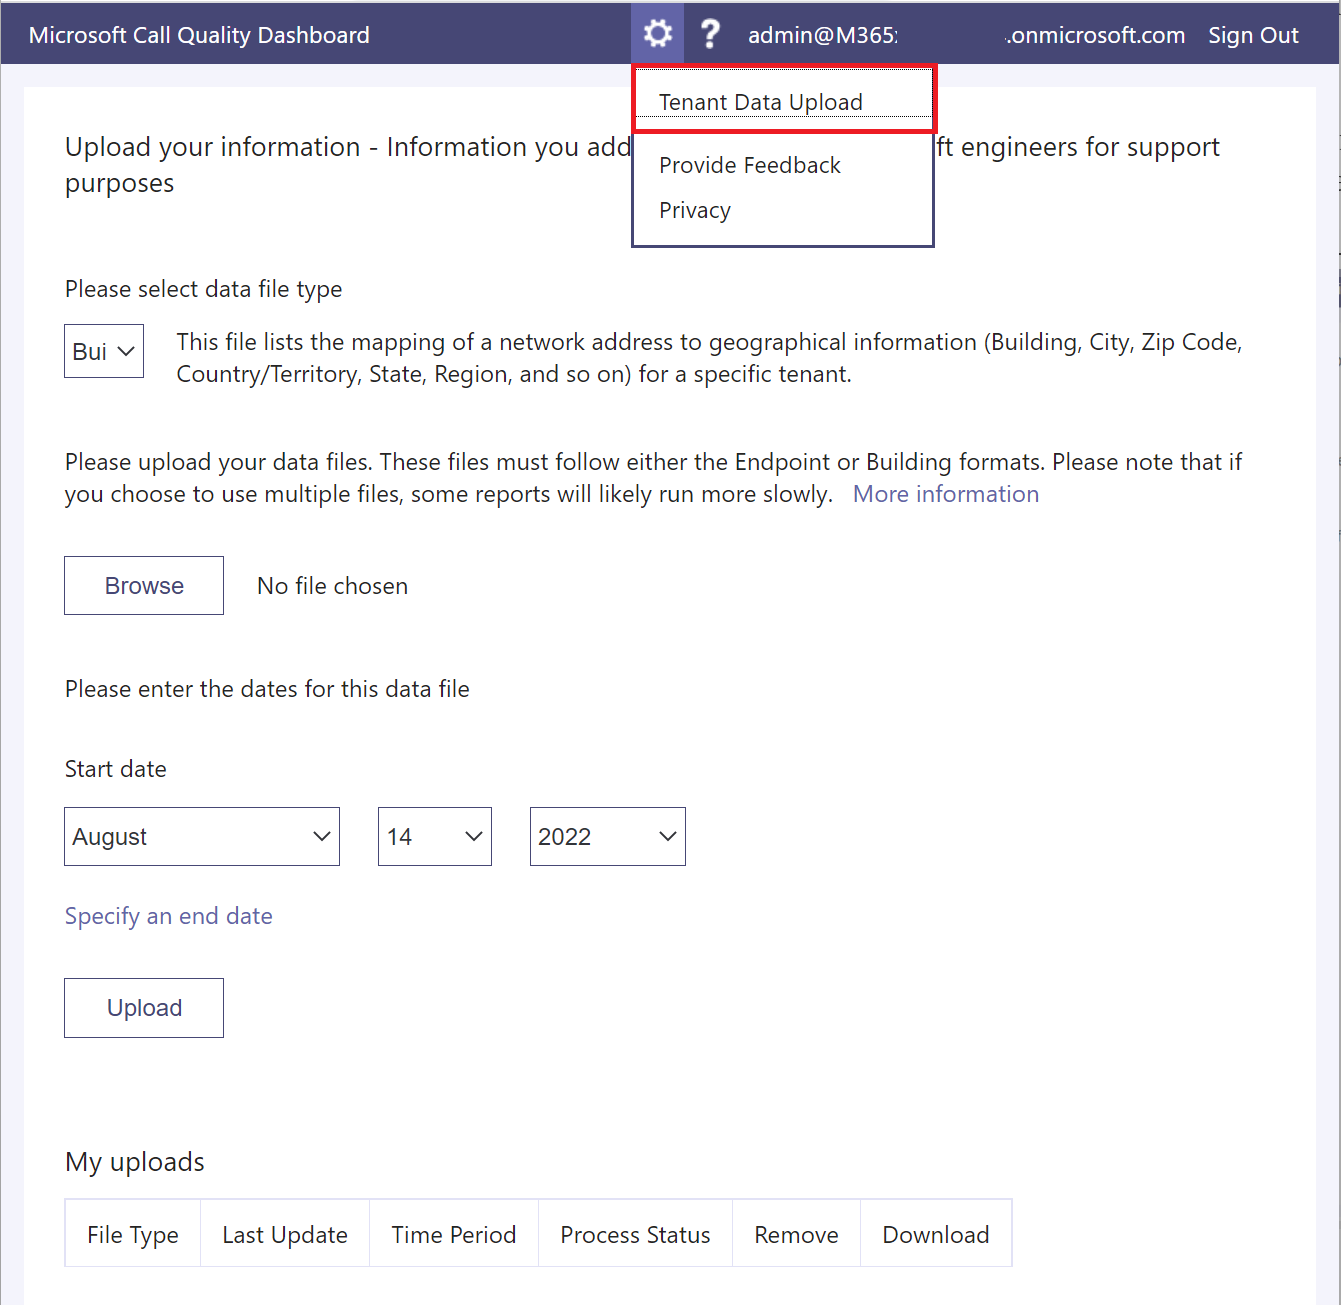
- Open CQD (from the Teams admin center, or at https://cqd.teams.microsoft.com, then select the gear icon in the upper-right corner and choose Tenant Data Upload from the CQD Settings menu.

On the Tenant Data Upload page, select Browse to choose a data file.
Select Browse to choose the data file.
Specify Start date and, optionally, specify an end date.
Select Upload to upload the file to CQD.
If no errors occur during validation, you can see the uploaded data file in the My uploads table at the bottom of that page.
Update a building file
While gathering building and subnet information, administrators will often upload the building file in multiple iterations over time, adding new subnets and their building information as it becomes available. When this occurs, you'll need to re-upload your building file. This process is like the initial upload as described in the previous section, with a few exceptions as noted in the following section.
Important
Only one building file can be active at a time. Multiple building files aren't cumulative.
Add net new subnets
There are times when you'll need to add net new subnets to CQD that weren't originally part of your network topology. To add net new subnets, do the following from the Tenant Data Upload page in CQD:
Download the original file, if you don't already have an up-to-date copy.
Remove the current file in CQD.
Edit the original building file and provide an end date that occurs at least one day before the net new subnets were acquired.
Append the net new subnets to the original building file.
Upload the newly modified building file, and set the start date for one day after the previous building file ends.
Add missing subnets
After you upload building information for managed networks, every managed network should have a building association. However, this won't always be the case; typically, a few subnets are missed. To find these missing networks, review the Missing Subnet Report on the Quality of Experience Reports page in CQD. This presents all the subnets with 10 or more audio streams that aren't defined in the building data file and are being marked as outside. Ensure that there are no managed networks in this list. If subnets are missing, use the following procedure to update the original building data file and re-upload it to CQD.
Go to the Tenant Data Upload page in CQD.
Download the original file, if you don't already have an up-to-date copy.
Remove the current file in CQD.
Append the new subnets to the original file.
Upload the building file. Be sure to set the start date to at least eight months prior so that CQD will process historical data.
Important
You'll need to add your tenant ID as a query filter for Second Tenant ID to this report to filter the report to view only your organization's tenant data. Otherwise, the report will show federated subnets.
Note
Be sure to adjust the Month Year report filter to the current month. Select Edit, and adjust the Month Year report filter to save the new default month.
For more information see Upload tenant and building data in Call Quality Dashboard (CQD).