Exercise - Create a Microsoft Sentinel playbook
The Create a Microsoft Sentinel playbook exercise in this module is an optional unit. However, if you want to perform this exercise, you need access to an Azure subscription where you can create Azure resources. If you don't have an Azure subscription, create a free account before you begin.
To deploy the prerequisites for the exercise, perform the following tasks.
Note
If you choose to perform the exercise in this module, be aware you might incur costs in your Azure Subscription. To estimate the cost, refer to Microsoft Sentinel Pricing.
Task 1: Deploy Microsoft Sentinel
Select the following link:
You're prompted to sign in to Azure.
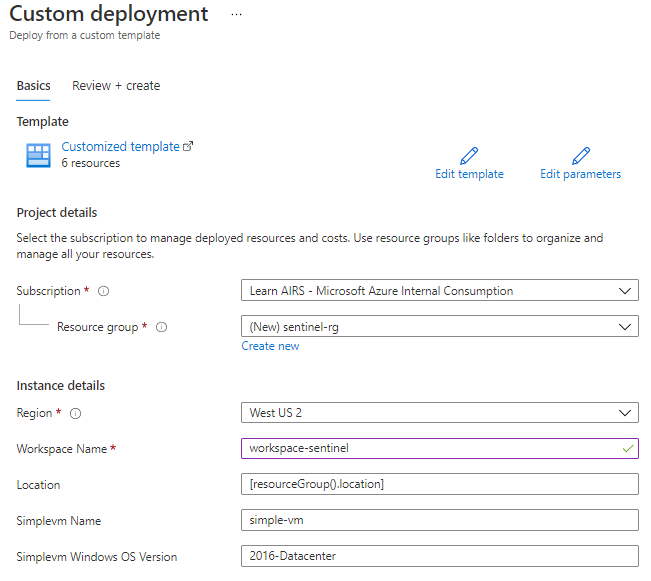
On the Custom deployment page, provide the following information:
Label Description Subscription Select your Azure subscription. Resource Group Select Create new and provide a name for the resource group such as azure-sentinel-rg.Region From the drop-down menu, select the region where you want to deploy the Microsoft Sentinel. Workspace name Provide a unique name for the Microsoft Sentinel workspace such as <yourName>-Sentinel, where <yourName> represents the workspace name that you chose in the previous task.Location Accept the default value of [resourceGroup().location]. Simplevm Name Accept the default value of simple-vm. Simplevm Windows OS Version Accept the default value of 2016-Datacenter. 
Select Review + create, and then, when the data has been validated select Create.
Note
Wait for the deployment to complete. The deployment should take less than five minutes.

Task 2: Check the resources created
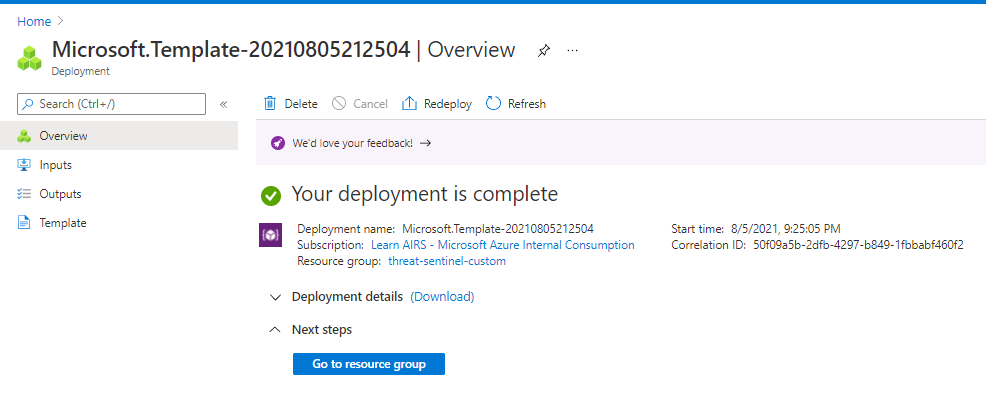
On the Deployment Overview page, select Go to resource group. The resources for your custom deployment appear.
Select Home and in Azure services, search for and select Resource groups.
Select azure-sentinel-rg.
Sort the list of resources by Type.
The resource group should contain the resources displayed in the following table.
Name Type Description <yourName>-SentinelLog Analytics workspace Log Analytics workspace used by Microsoft Sentinel, where <yourName> represents the workspace name that you chose in the previous task. simple-vmNetworkInterfaceNetwork interface Network interface for the VM. SecurityInsights(<yourName>-Sentinel)Solution Security insights for Microsoft Sentinel. st1<xxxxx>Storage account Storage account used by the virtual machine. simple-vmVirtual machine Virtual machine (VM) used in the demonstration. vnet1Virtual network Virtual network for the VM.
Note
The resources deployed and configuration steps completed in this exercise are required in the next exercise. If you intended completing the next exercise do not delete the resources from this exercise.
Task 3: Configure Microsoft Sentinel Connectors
In the Azure portal, search for Microsoft Sentinel, and then select the previously created Microsoft Sentinel workspace.
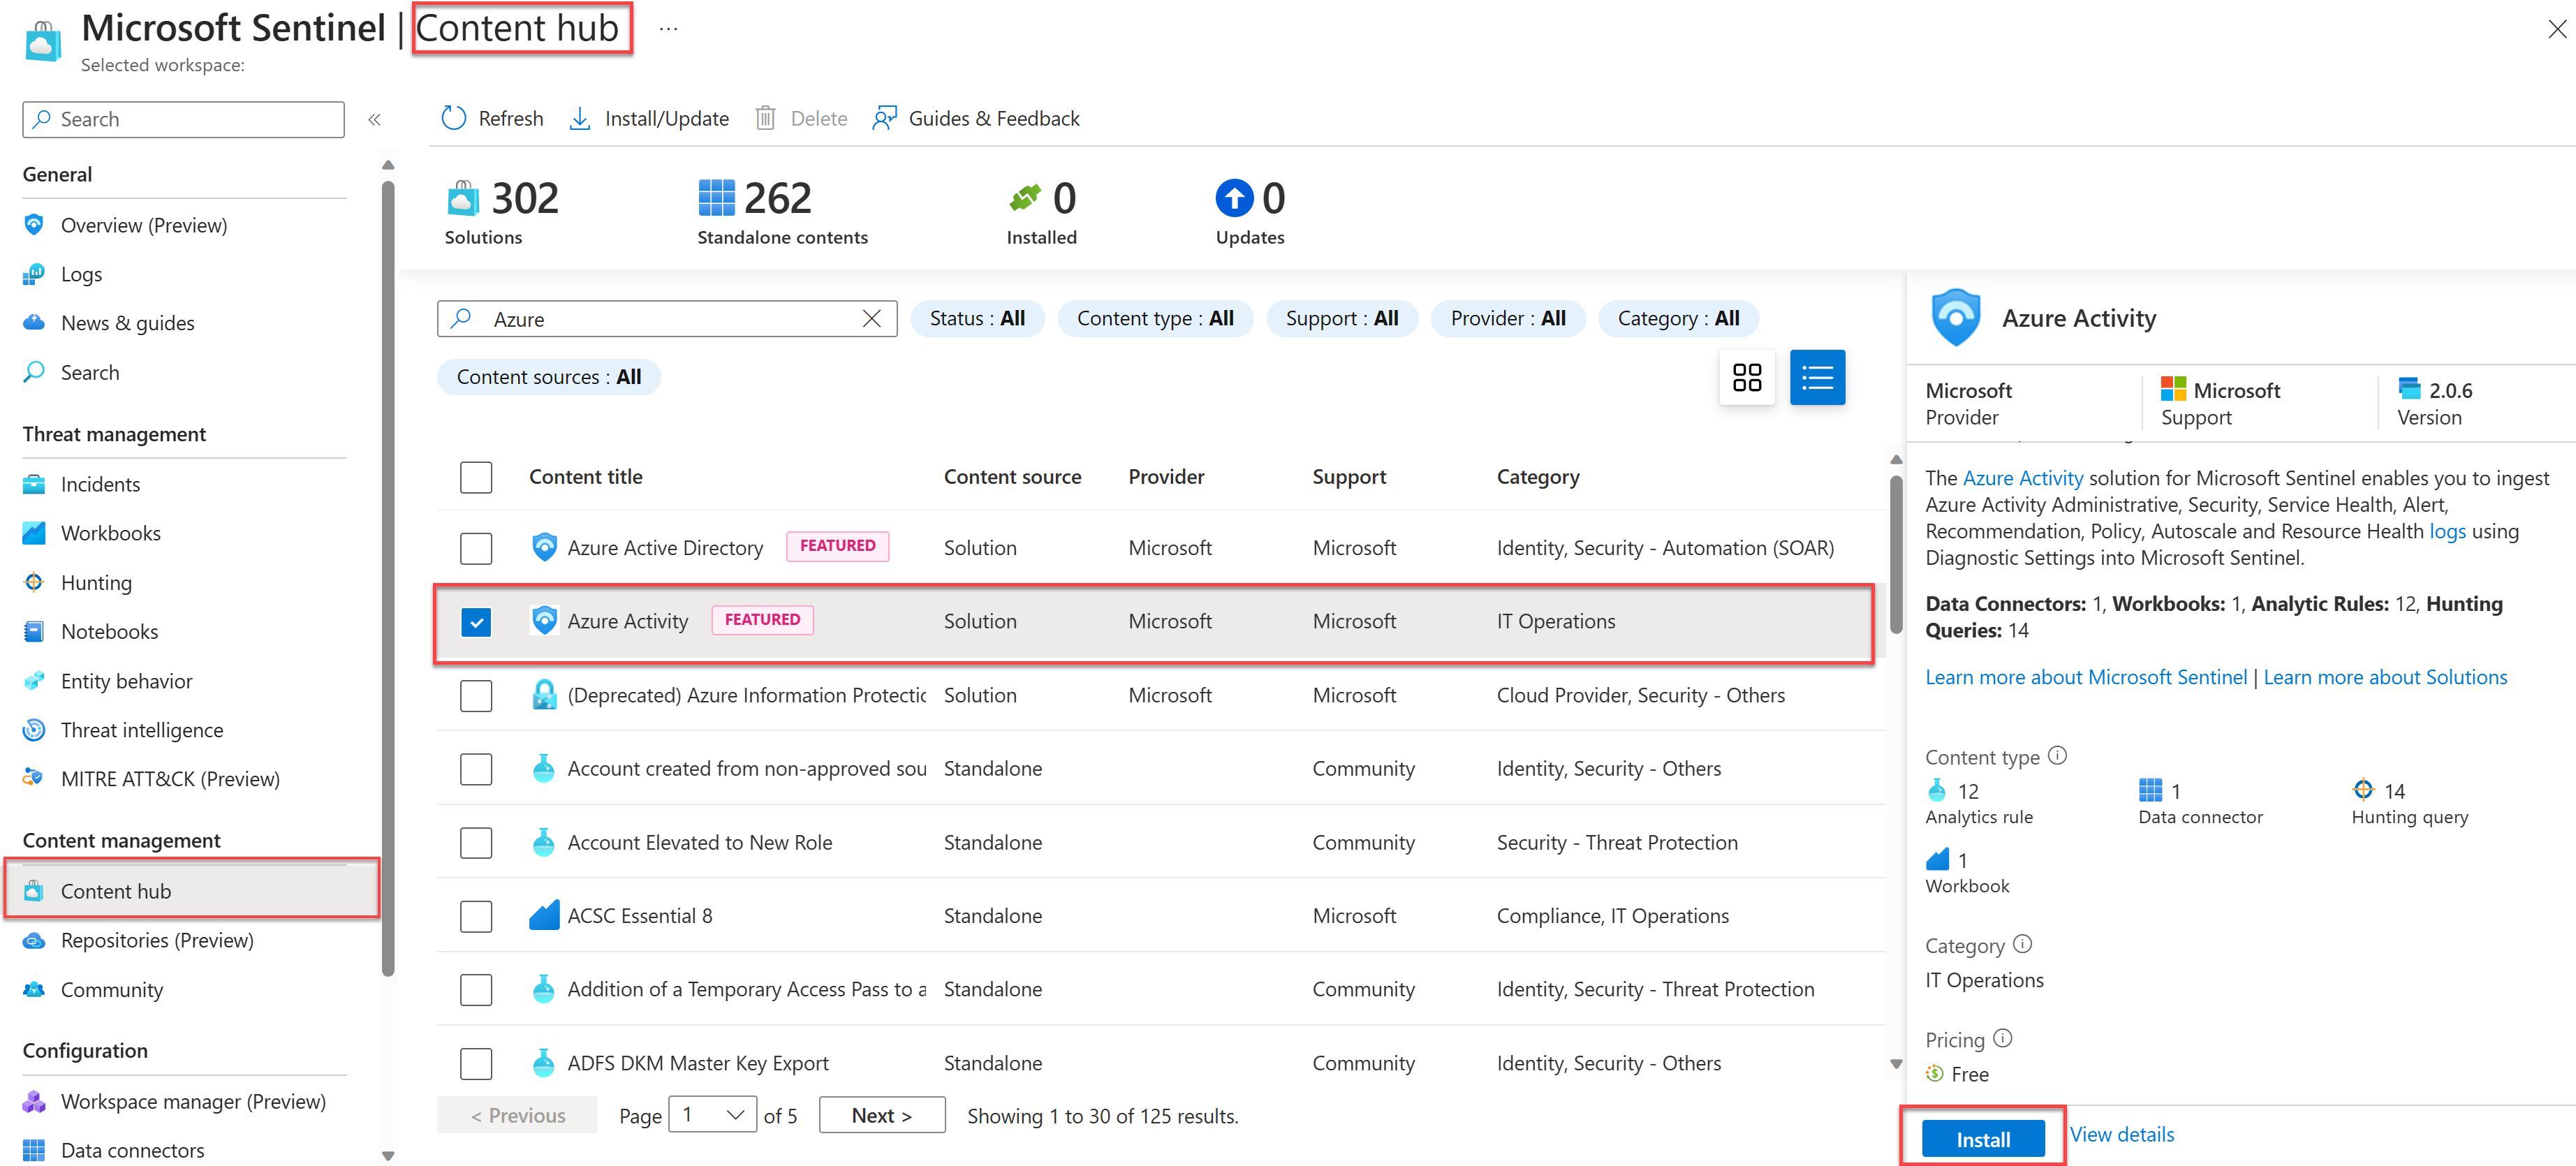
On the Microsoft Sentinel | Overview pane, in the left menu, scroll down to Content Management and select Content Hub.
In the Content Hub page, type Azure Activity into the Search form, and select the Azure Activity solution.
In the Azure Activity solution details pane, select Install.
In the center Content name column, select the Azure Activity Data connector.
Note
This solution installs these Content types: 12 Analytic rules, 14 Hunting queries, 1 Workbook, and the Azure Activity Data connector.
Select Open connector page.
In the Instructions/Configuration area, scroll down and under 2. Connect your subscriptions... select Launch Azure Policy Assignment Wizard.
In the Basics tab of the wizard, select the ellipsis ... under Scope. On the Scopes pane, select your subscription and then select Select.
Select the Parameters tab, and choose your Microsoft Sentinel workspace from the Primary Log Analytics workspace drop-down list.
Select the Remediation tab, and select the Create a remediation task checkbox. This action applies the policy assignment to already existing Azure resources.
Select the Review + Create button to review the configuration, and then select Create.
Note
The connector for Azure Activity uses policy assignments, you need to have role permissions that allow you to create policy assignments. And, it typically take 15 minutes to display a status of Connected. While the connector deploys, you can continue performing the rest of the steps in this unit and subsequent units in this module.

Task 4: Create an analytics rule
In the Azure portal, search for and select Microsoft Sentinel, and then select the previously created Microsoft Sentinel workspace.
On the Microsoft Sentinel page, on the menu bar, in the Configuration section, select Analytics.
On the Microsoft Sentinel | Analytics page, select Create and then select NRT Query Rule (Preview).
On the General page, provide the inputs in the following table, and then select Next: Set rule logic >.
Label Description Name Provide a descriptive name, such as Delete Virtual Machines, to explain what type of suspicious activity the alert detects. Description Enter a detailed description that helps other security analysts understand what the rule does. Tactics and Techniques From the Tactics and Techniques drop-down menu, choose Initial Access category to classify the rule following the MITRE tactics. Severity Select the Severity drop-down menu to categorize the level of importance of the alert as one of four options: High, Medium, Low, or Informational. Status Specify the status of the rule. By default, the status is Enabled. You can select Disabled to disable the rule if it generates a large number of false positives. On the Set rule logic page, in the Rule query section, enter the following query:
  AzureActivity
  | where OperationNameValue == 'MICROSOFT.COMPUTE/VIRTUALMACHINES/DELETE'
  | where ActivityStatusValue == 'Success'
  | extend AccountCustomEntity = Caller
  | extend IPCustomEntity = CallerIpAddress
Accept the default values for all other settings and then select Next: Incident setting.
On the Incident setting tab, ensure that Enabled is selected for creation of incidents from alerts triggered by this analytics rule. And then select Next: Automated response.
On the Automated response tab, you can select a playbook to run automatically when the alert is generated. Only the playbooks that contain a Logic App Microsoft Sentinel connector are displayed.
Select Next: Review.
On the Review and Create page, verify that the validation passed, and then select Create.
Note
You can learn more about Microsoft Sentinel analytics rules in the "Threat detection with Microsoft Sentinel analytics" module.