Create service-level agreements
Before you can create an SLA, you'll need to create the SLA KPIs that will be used in the service-level agreement. You can use SLA KPIs to measure certain facets of the service process, such as how quickly field technicians are completing work orders or how quickly technicians are arriving on site. For example, you can use the Work Order Arrival Time by KPI to measure if field technicians are arriving on site in a timely manner.
By default, no SLA KPIs are defined in the Field Service application. You'll need to specify which ones, such as Work Order Arrival Time or Work Order Resolution, that you want to track. After you've defined your SLA KPIs, they're available for you to select from as you define the SLA line items later.
Though you're defining Field Service KPIs, you'll create all SLA KPIs by using the Customer Service admin center and then going to Service Terms from the Operations group and selecting Manage in the SLA KPIs section.
For more information, see Get started with Customer Service admin center.
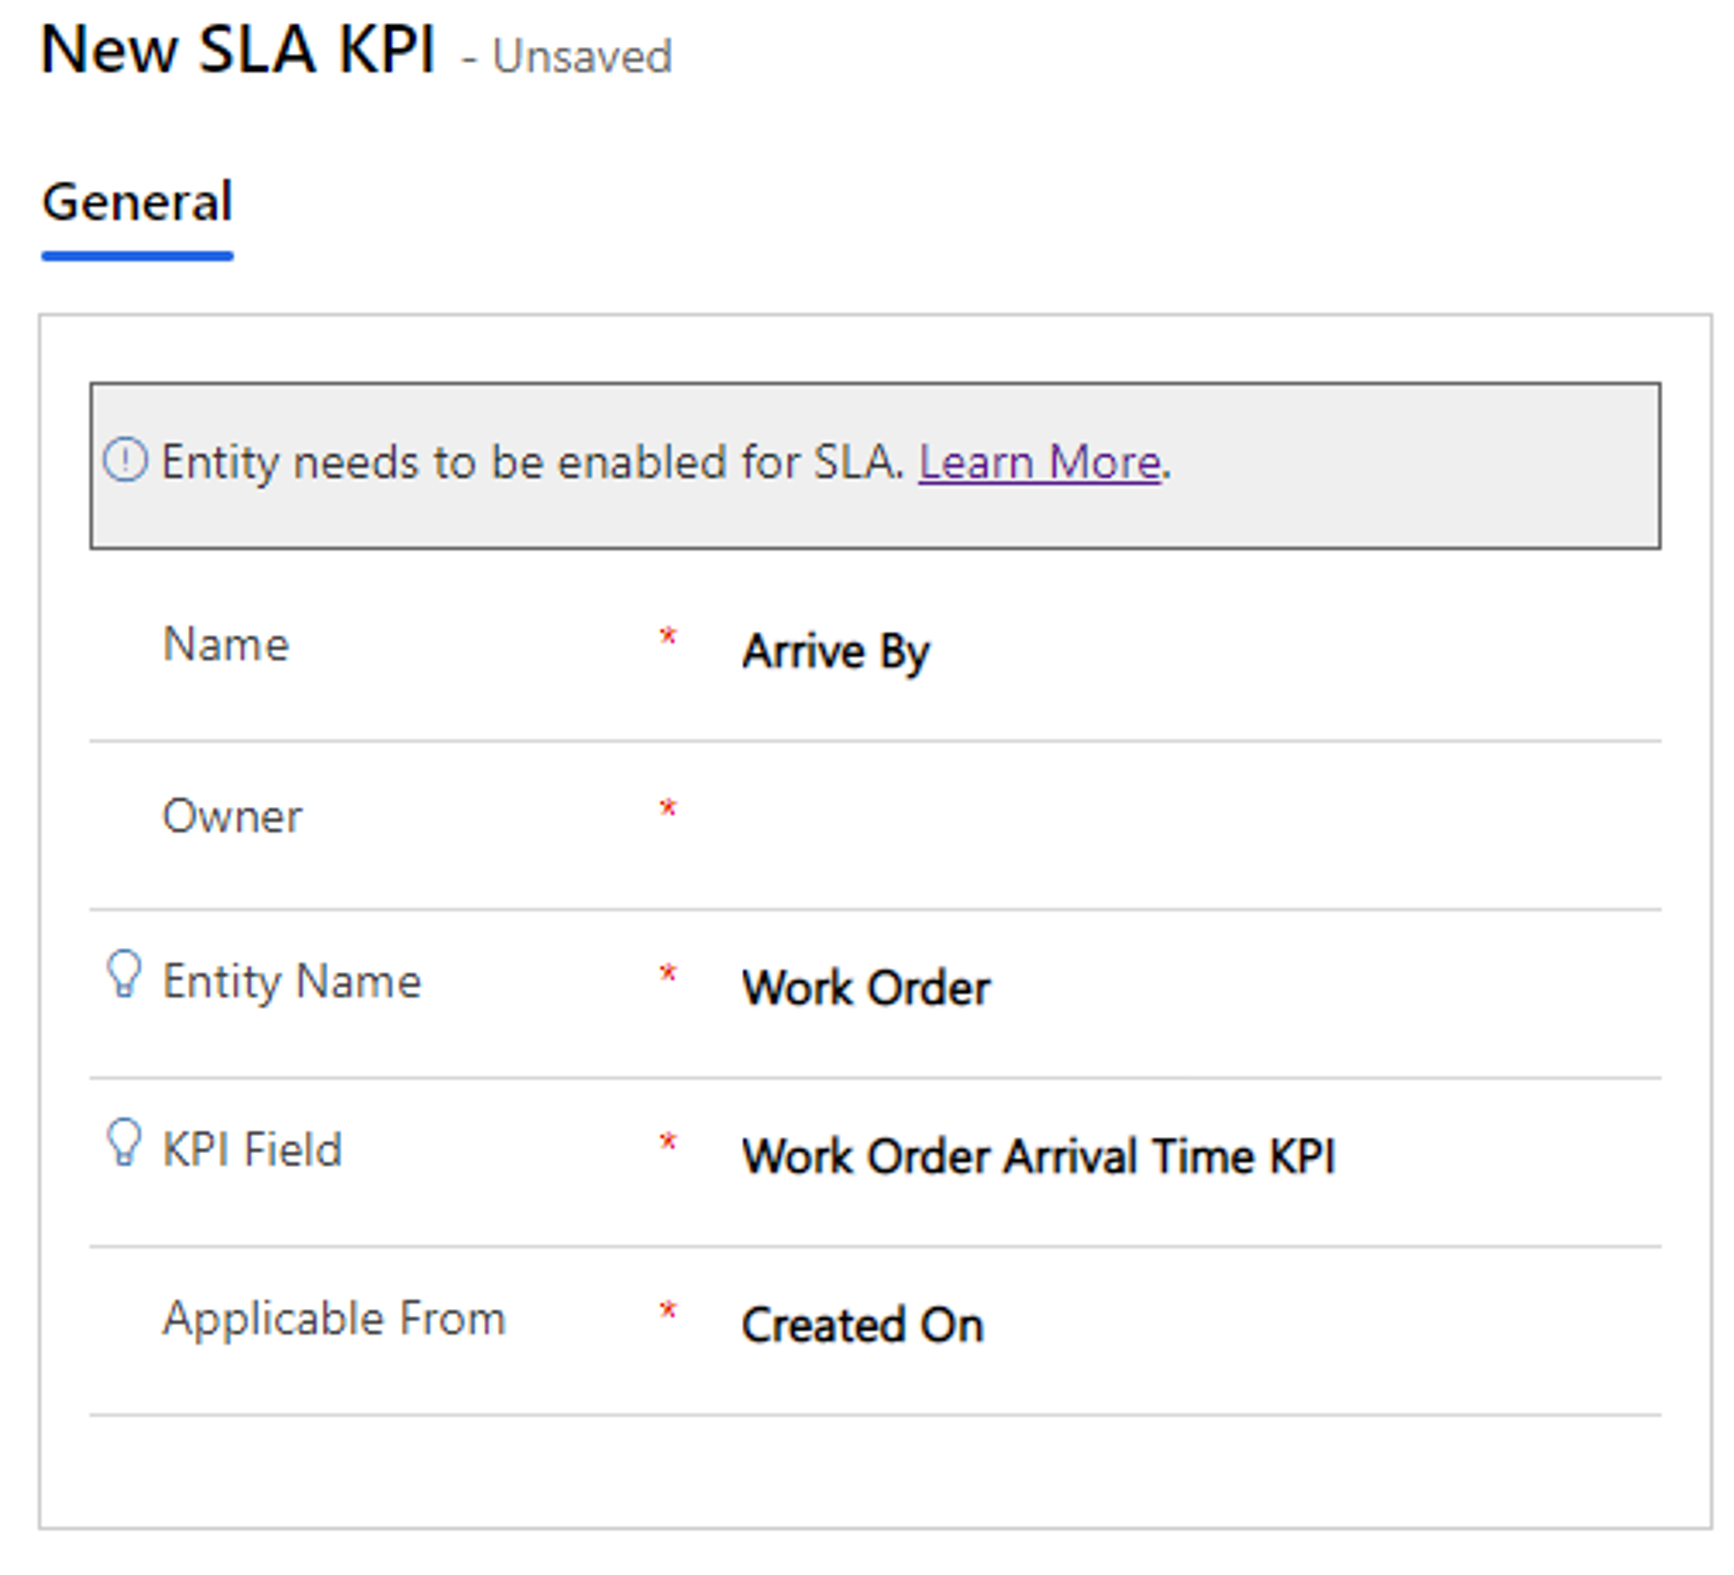
When defining an SLA KPI, you need to specify the following details:
Name - Specifies the name of the SLA KPI that will be used to identify it in the application.
Owner - Defines the owner of the item. By default, it's set to the person who's creating the item, but you can change that aspect.
Entity Name - Specifies the Dataverse table that the KPI will be associated with, such as the Work Order table.
KPI Field - Specifies the KPI field that's used for the item. For example, if you're creating an SLA KPI to define the time within which a technician should arrive on site, select Work Order Arrival Time KPI from the list. Out-of-the-box, the Work Order table includes two options to choose from: Work Order Arrival Time KPI and Work Order Resolution KPI.
Applicable From - Defines the field that's used to measure warning and failure times.
You can set the Applicable From field to any date field that's associated with that entity, such as Created On or Modified On. This field defines when the SLA KPIs should start being calculated.
For example, consider a scenario where you want to create an SLA with a three-hour Arrive By KPI. In that scenario, the result will differ depending on what you set the Applicable From field to:
If you set it to Created On, the technician has three hours from the date and time when the work order was created to arrive on site.
If you set it to Modified On, then whenever the work order record is updated, the Arrive By KPI timer will restart.
While using the Modified On field can be helpful in some instances, it isn't an ideal trigger for tracking an Arrive By KPI. Pay close attention to what you set the Applicable From field to because it can have a significant impact on how KPIs are calculated.
After you defined an SLA KPI, you'll need to activate it so that it can start being used in service-level agreements. When you create a new KPI, it isn't activated by default. When you first save the record, we recommend that you select Activate to activate it.
Create SLAs
After you've created the necessary SLA KPIs and other items, such as your Customer Service calendar and Holiday calendar, you can start creating SLAs in the application by selecting Manage in the Service-level agreements section of Service terms.
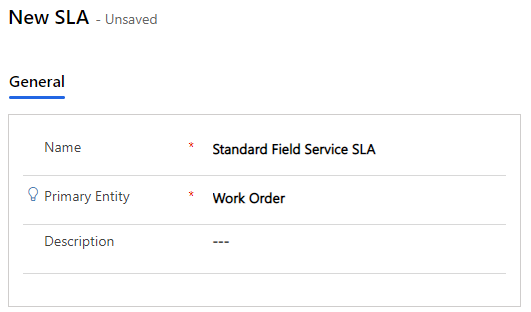
SLAs serve as the container for individual SLA items that specify which SLA KPI is being used, along with success criteria. Initially when you define an SLA, you'll need to provide the following details:
Name - Specifies the name of the SLA.
Primary Entity - Defines the Dataverse table that the SLA applies to.
Define SLA items
You can use SLA items to define the KPIs that you want to measure and when to apply a specific SLA KPI item. A typical SLA might have multiple SLA items defined for it.
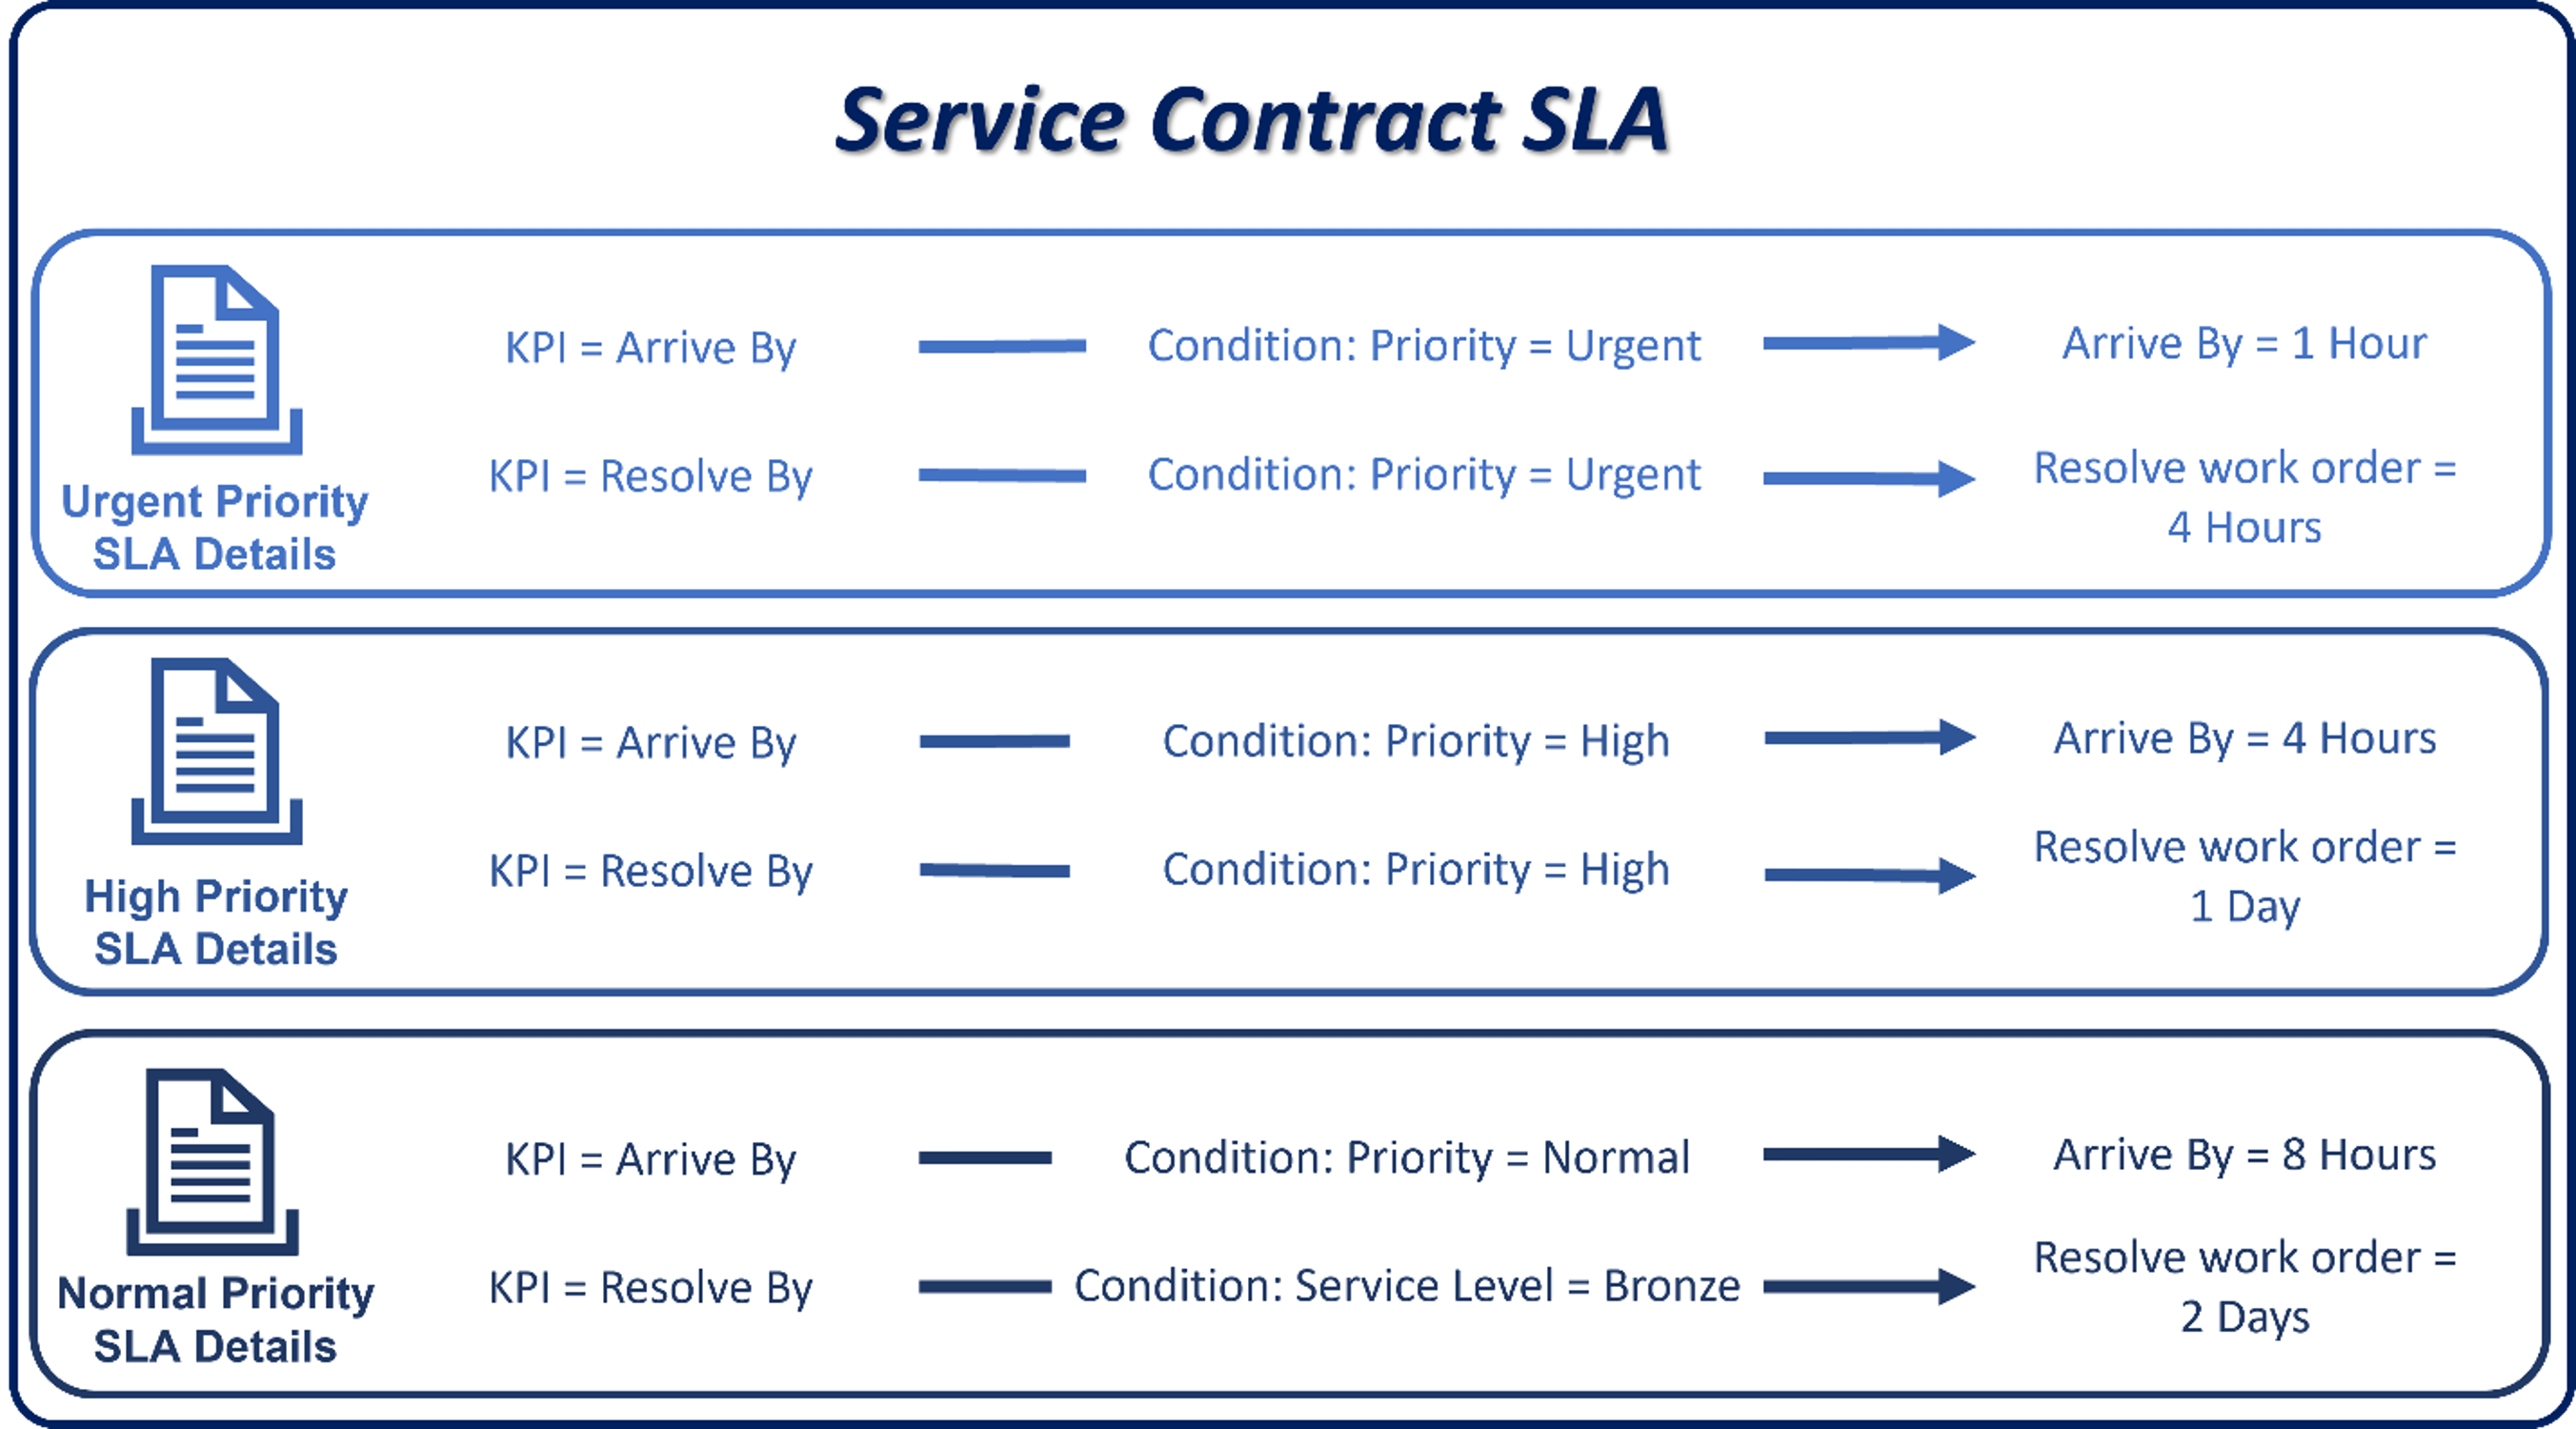
For example, an SLA in Field Service might contain the following SLA items.
Urgent Priority - Arrive By: If Work Order Priority = Urgent, then Arrive within 1 Hour
Urgent Priority - Resolve By: If Work Order Priority = Urgent, then Resolve work order within 4 Hours
High Priority - Arrive By: If Work Order Priority = High, then Arrive within 4 Hours
High Priority - Resolve By: If Work Order Priority = High, then Resolve work order within 1 Day
Normal Priority - Arrive By: If Work Order Priority = Normal, then Arrive within 8 Hours
Normal Priority - Resolve By: If Work Order Priority = Normal, then Resolve work order within 2 Days
In the preceding example, each KPI that you want to track for each service level tier would be added to the SLA as its own SLA item. To track the response and resolve progress for urgent priority work orders, you would define two separate detail items. In this instance, the entire SLA would have six SLA items defined.
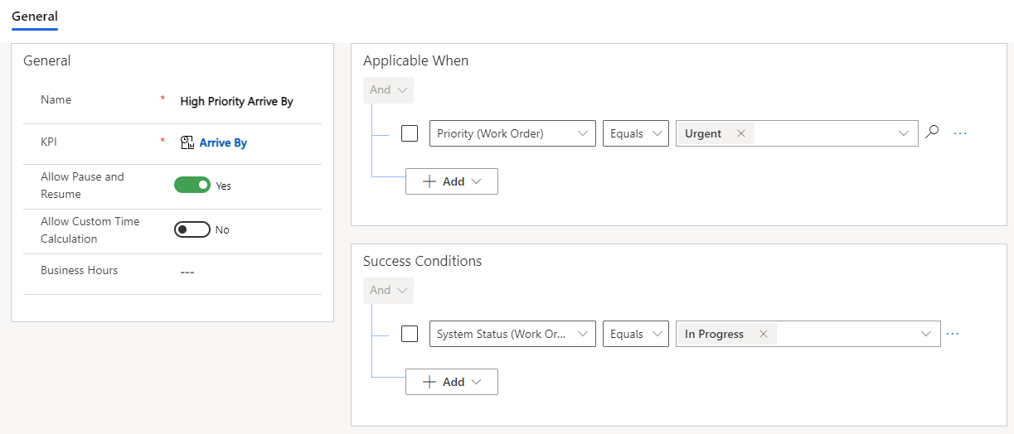
For each SLA item that you add to an SLA, you'll need to supply the following information:
Name - Specifies the name of the SLA item. (This field is required.)
KPI - Specifies the SLA KPI that you're measuring. For example, you can select the Arrive By or Work Order Resolve By SLA KPIs that you previously defined.
Allow Pause and Resume - Specifies if the SLA timer can be paused and resumed. After the timer has been resumed, the amount of time that it was paused for won't impact the SLA timer.
Business Hours - Specifies if a Customer Service calendar is available that you want to apply to the SLA item to impact how the items are calculated.
Applicable When - Defines the conditions that need to exist on the record that the SLA is running against or a related record for the specific SLA item to be applied to the record, such as a work order priority being set to Urgent.
Be aware of using a field that could possibly change frequently when you're defining Applicable When conditions, which can potentially affect system performance.
Only active records are available for you to select from as condition or action arguments.
Success Conditions - Defines what a successful resolution of the defined KPI looks like, such as a specific field on the current or related record that's being updated.
SLA warnings and failures
After you've defined what successful fulfillment of the SLA item looks like, you'll need to define how long the success criteria can go unmet before the warning of possible failure. Additionally, you'll need to determine how long before the item is considered as failed. You can complete these tasks by setting up the SLA item failure and SLA item warnings. Each warning has a time associated with it that acts independently from the other.
Actions
You can use actions to perform a specific task in response to whether success criteria has been met or not. For example, if a technician hasn't updated the status of the work order to Traveling within the 30-minute warning window, a notification might be triggered to alert the dispatcher. The dispatcher can verify what's happening, and if necessary, assign the item to a different technician. Before you can define actions, you'll need to save the detail item. After it's been saved, you can define actions by selecting the Configure Actions button, which opens Microsoft Power Automate. SLA item actions are backed by Power Automate.
Initially, the Power Automate flow includes two steps. Both steps will be labeled as Do not delete or update. Make sure that you don't modify these steps in any way because it would break the functionality that associates the Power Automate flow with the correct SLA item.
The first step is tied to the modification of the SLA KPI instance. This step triggers when the SLA KPI instance that's tied to this SLA item is modified, such as the success criteria being met or the failure or warning criteria being met. As mentioned previously, don't do anything with this step.
The second step is a switch step that includes three actions. While you can't delete or update the switch step directly, you can edit the individual switch steps under the main switch. These steps represent the actions that you can perform.
The three types of actions that you can define include:
Is Near Non-compliance - Defines what action(s) should be implemented if the success criteria are in jeopardy of not being met within the warning time specified.
Success actions are only available for Enhanced SLAs.
Is Succeeded - Defines what action(s) should be started if the success criteria are met.
Is Non-compliant - Defines what action(s) should be started if the success criteria aren't met within the failure time specified.
You can use Power Automate actions to define what should happen for each step. For example, the following image shows the Is Non-compliant step first getting the details of the work order record that the SLA item was triggered on, and then it's updating details on the Work Order record.
Frequently, a specific field on the Work Order record, such as the work order status field, will be used as the success criteria to determine if an SLA item has been successful.
For more information, see Configure service-level agreements.


