Azure Data Explorer integration
Introduction to Azure Data Explorer integration
The Viva Goals integration with Azure Data Explorer (also known as Kusto) allows you to link your OKRs in Viva Goals to a cluster and database in Azure Data Explorer and provides automatic, periodic updates on your OKRs.
For example, if you have a Key Result to increase visits and the time spent in your app by 60%, then you can directly link this Key Result with the relevant data in Azure Data Explorer. This data is automatically synced with Viva Goals every hour. Whenever there's a change in the underlying dataset, the OKR status is updated.
Admins also have permission to manage the integration from the admin dashboard. Once the integration is enabled for the Viva Goals instance, all users have access to this integration.
How to enable Azure Data Explorer
The Azure Data Explorer integration can be enabled by an admin. To do so,
Go to Azure Data Explorer in the integrations section of the admin console.
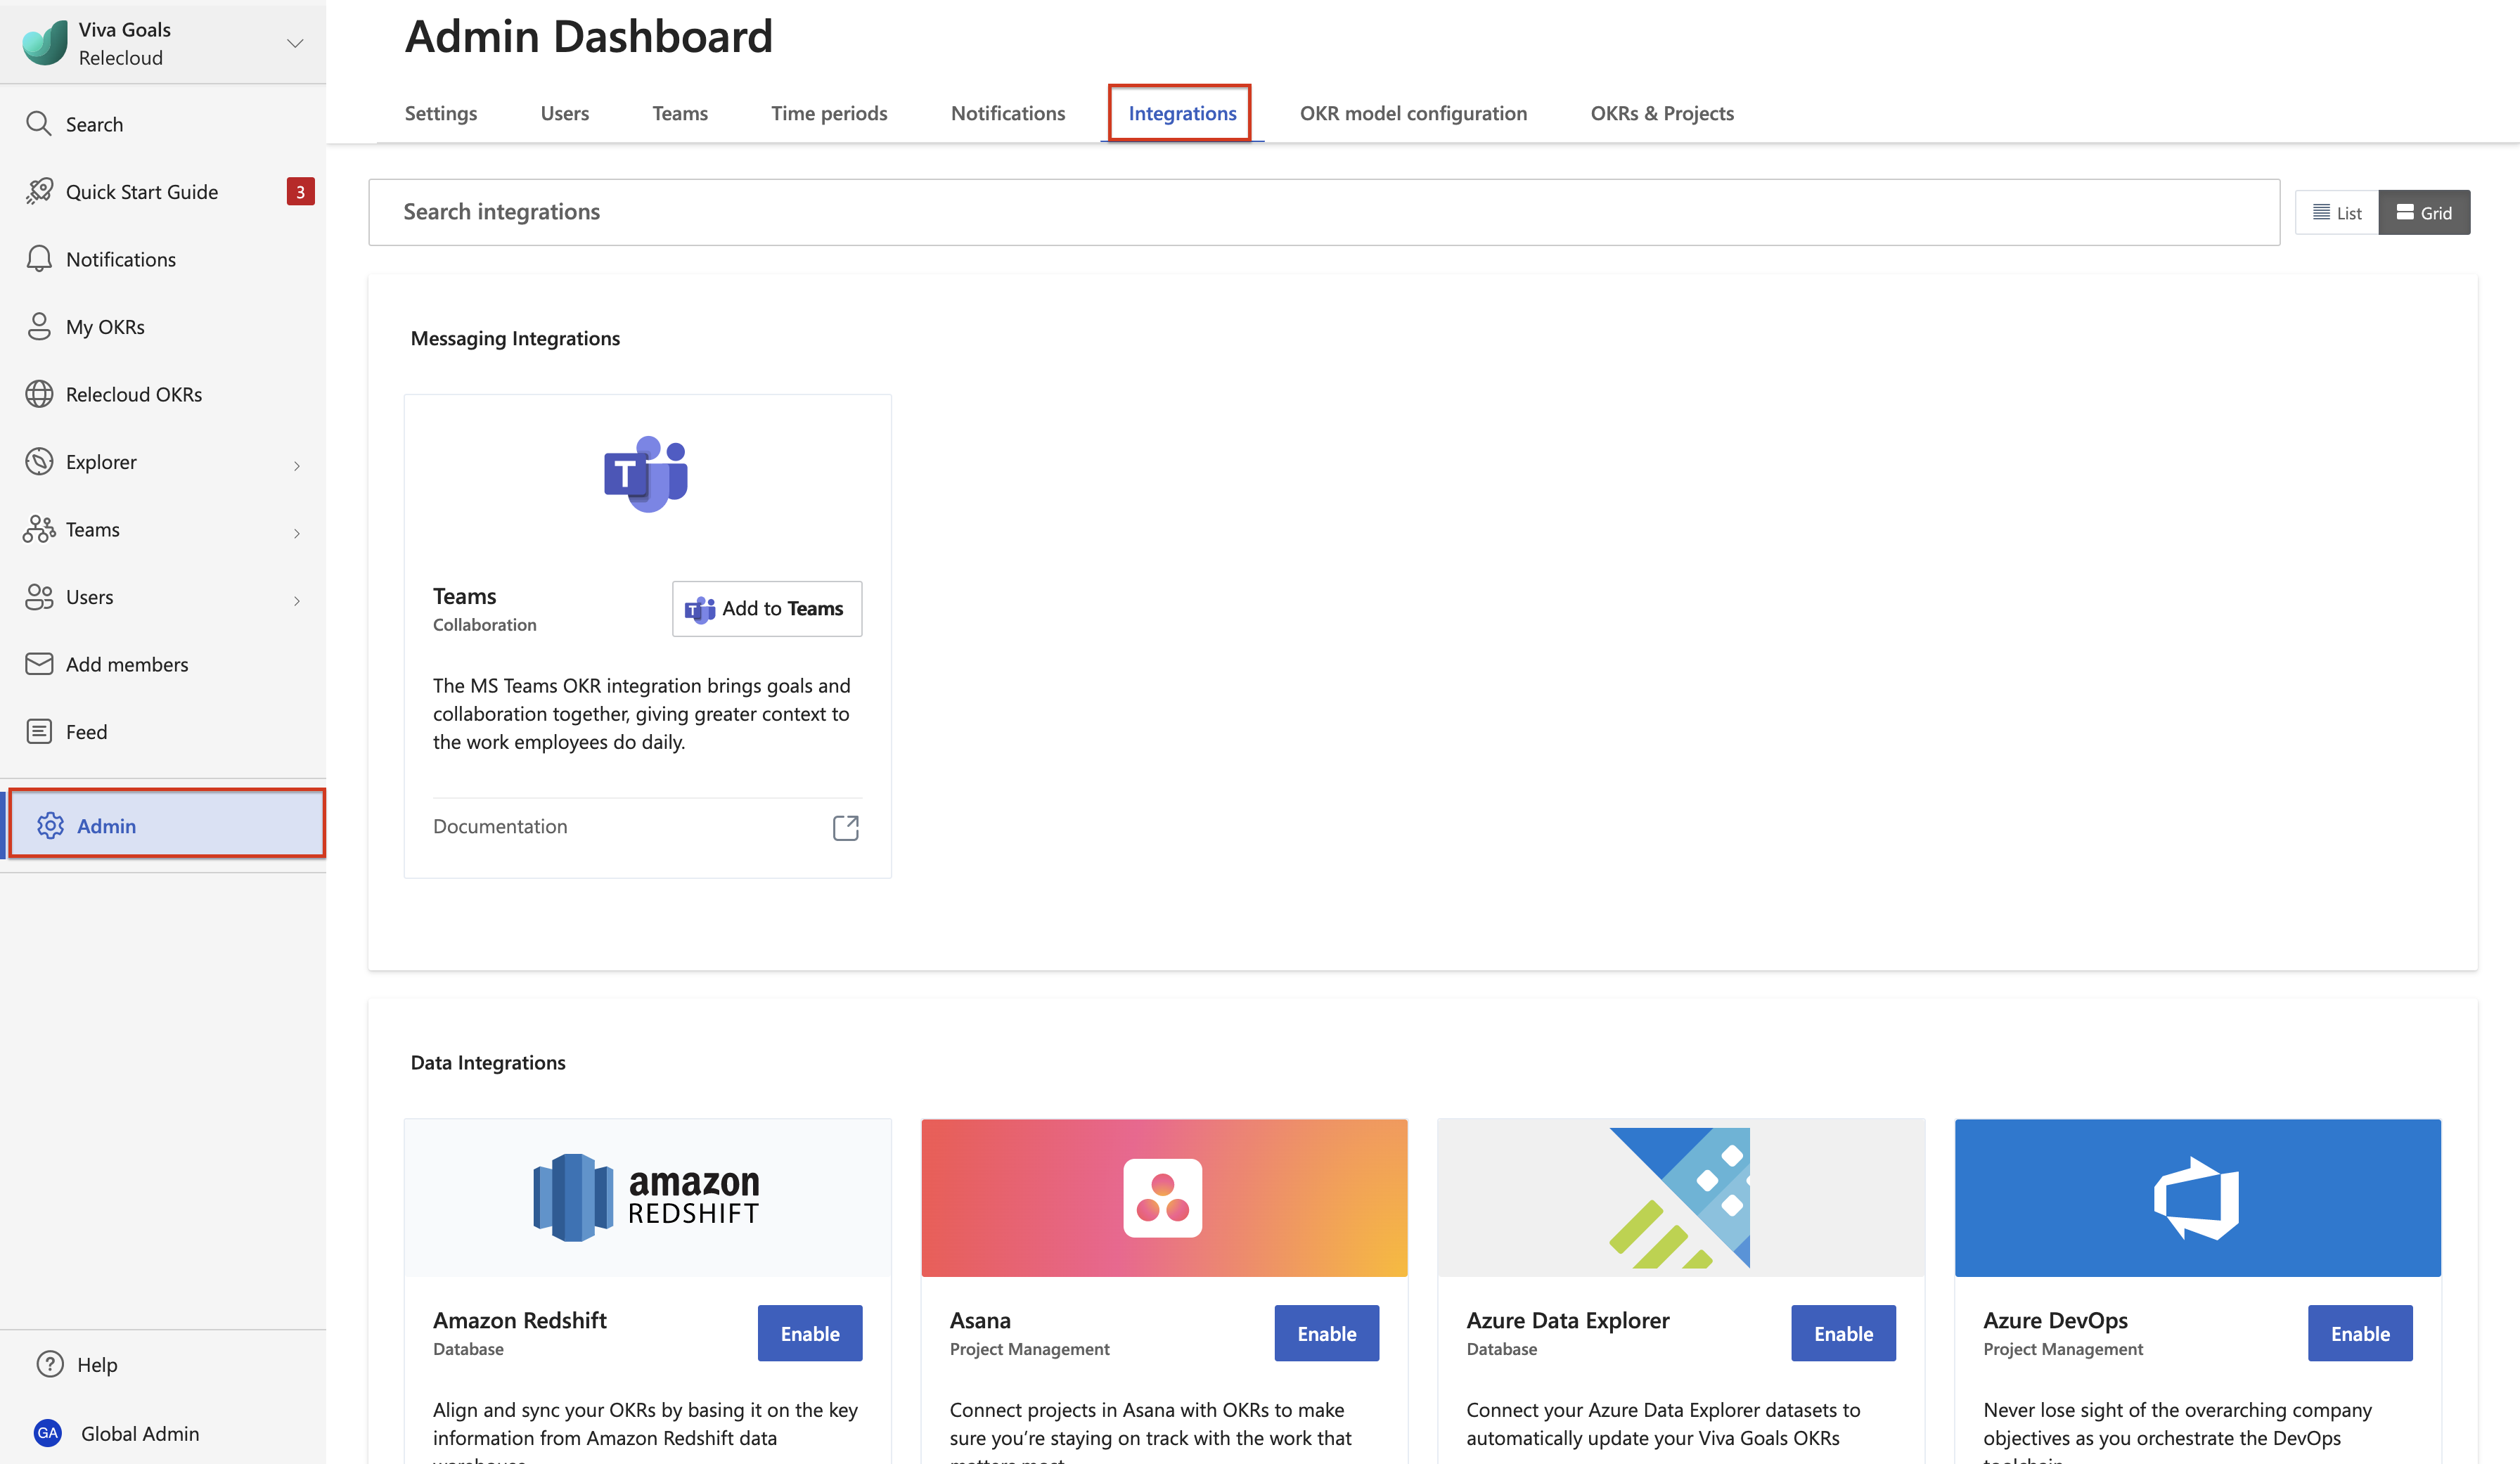
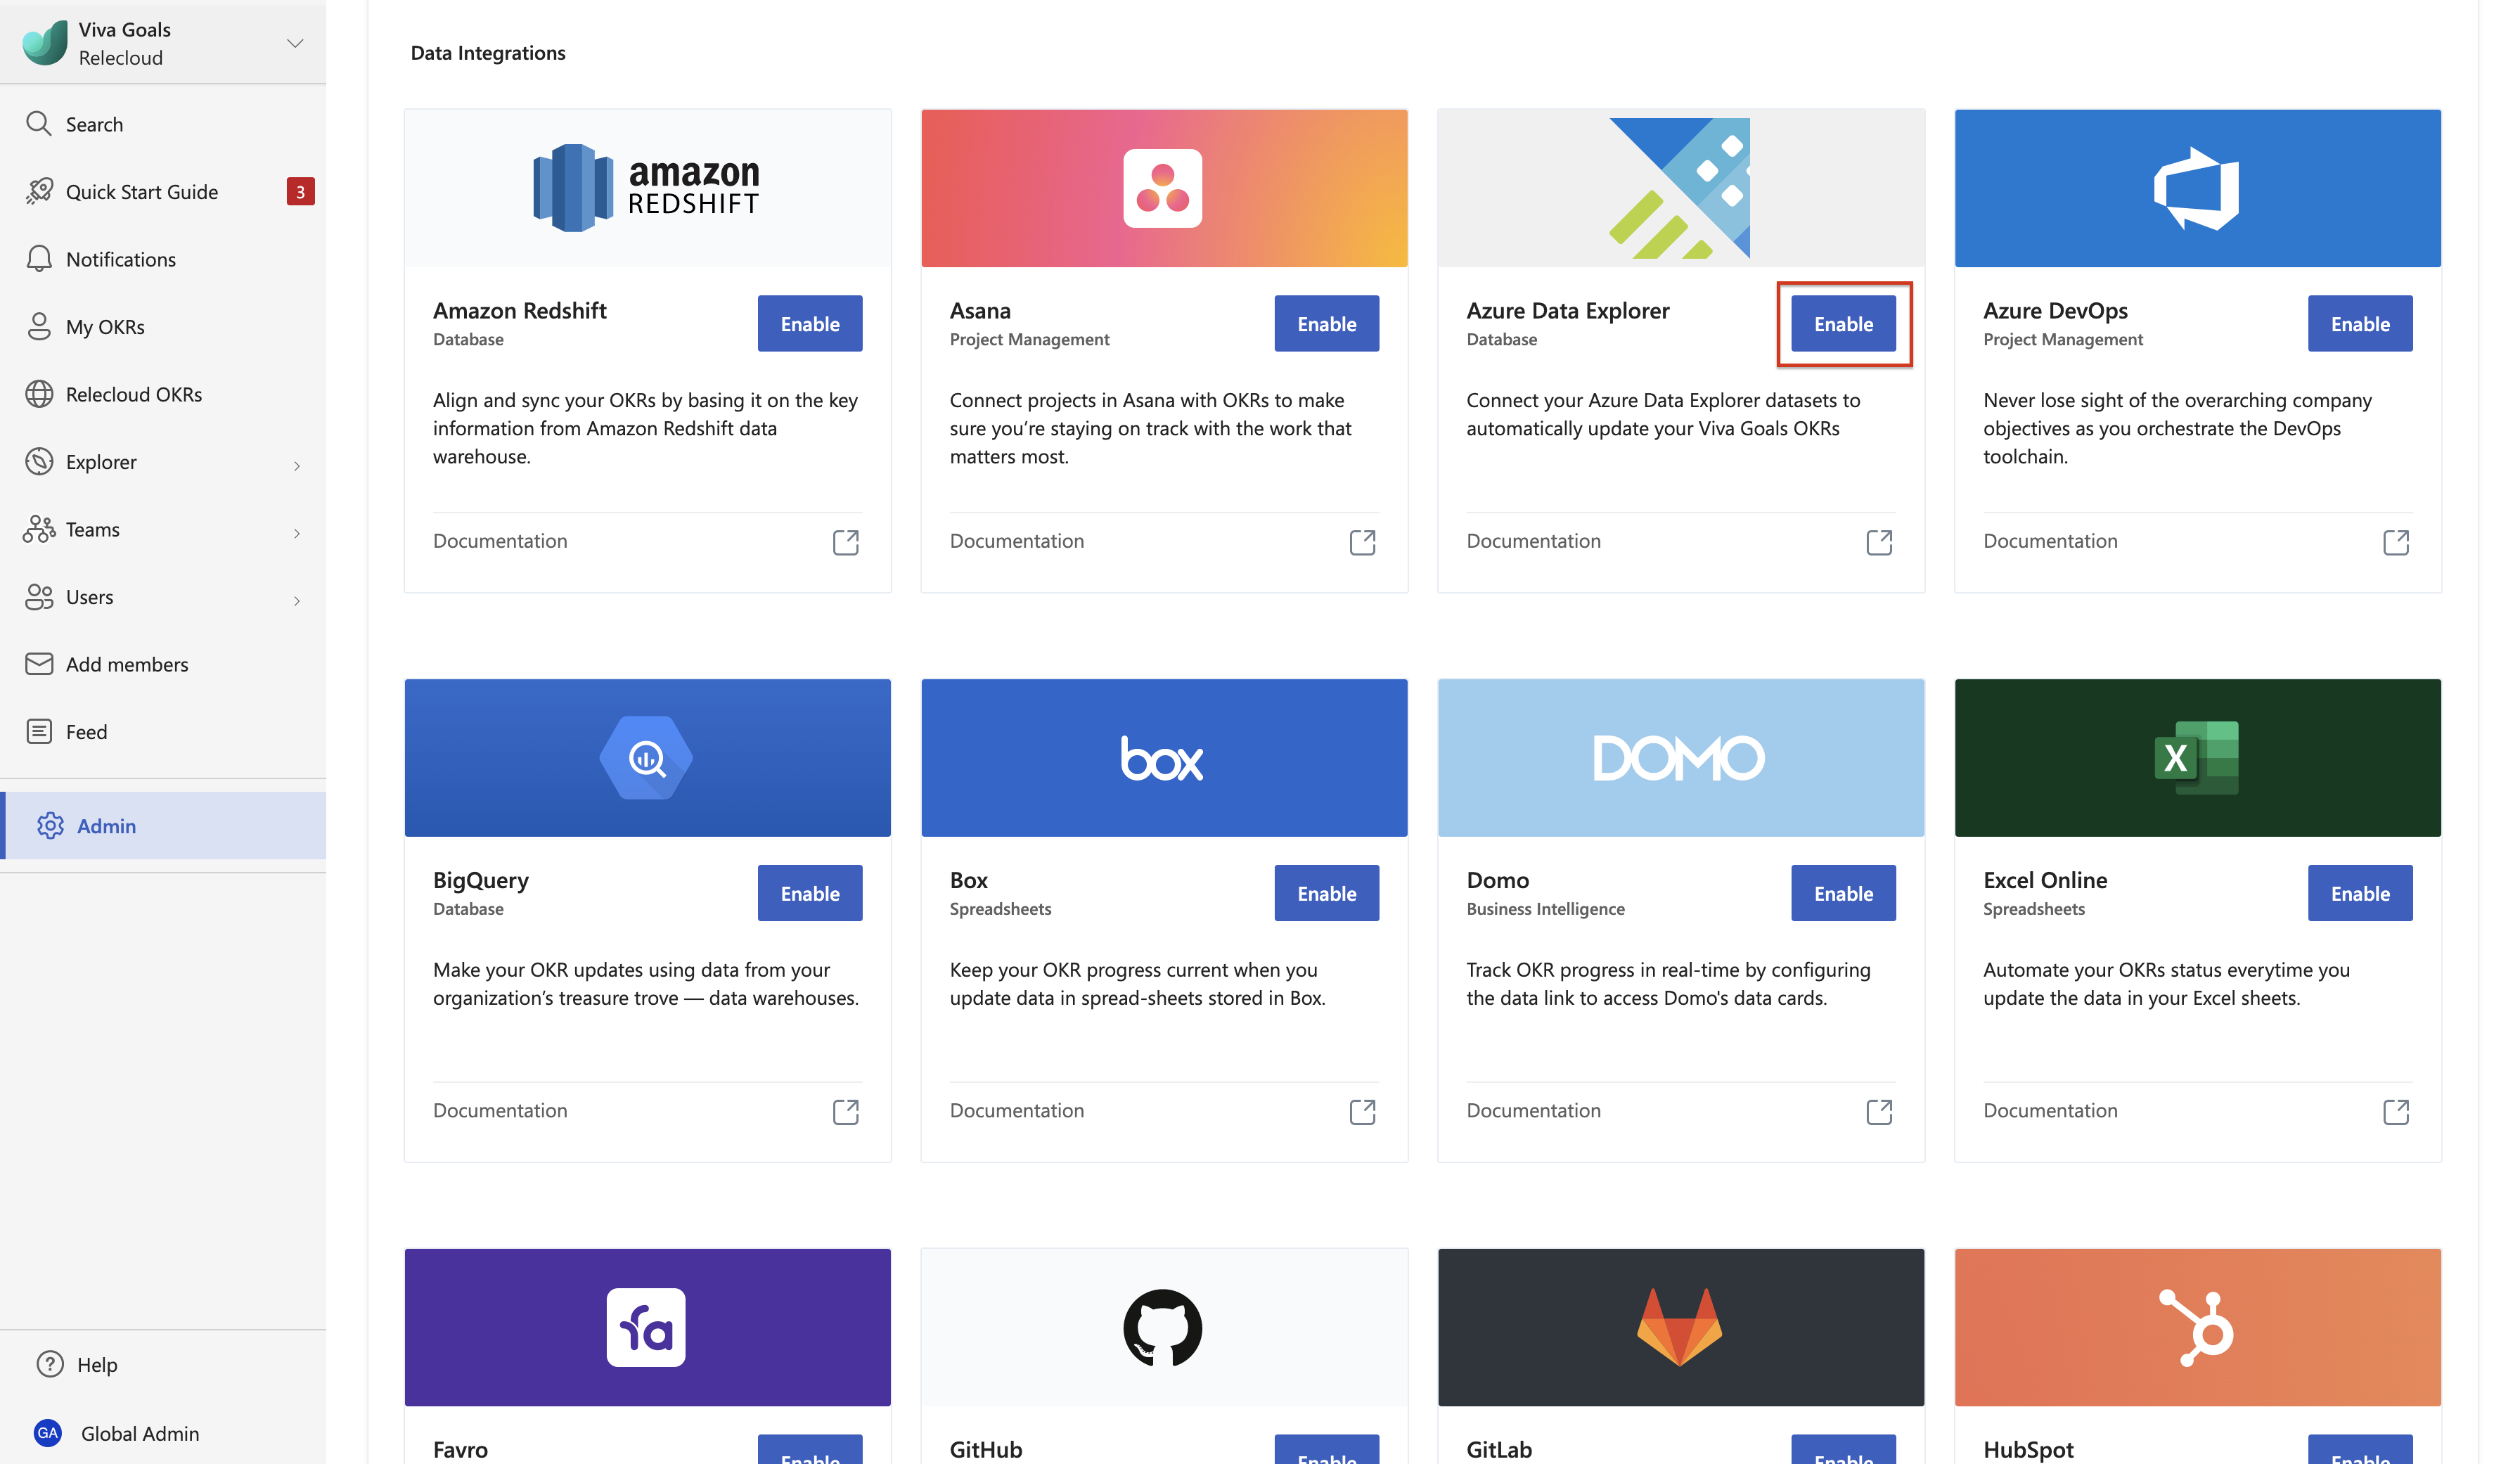
Select Azure Data Explorer and then select Enable.


How to disable the integration
The Azure Data Explorer integration can be disabled by an admin at any time. To disable the integration,
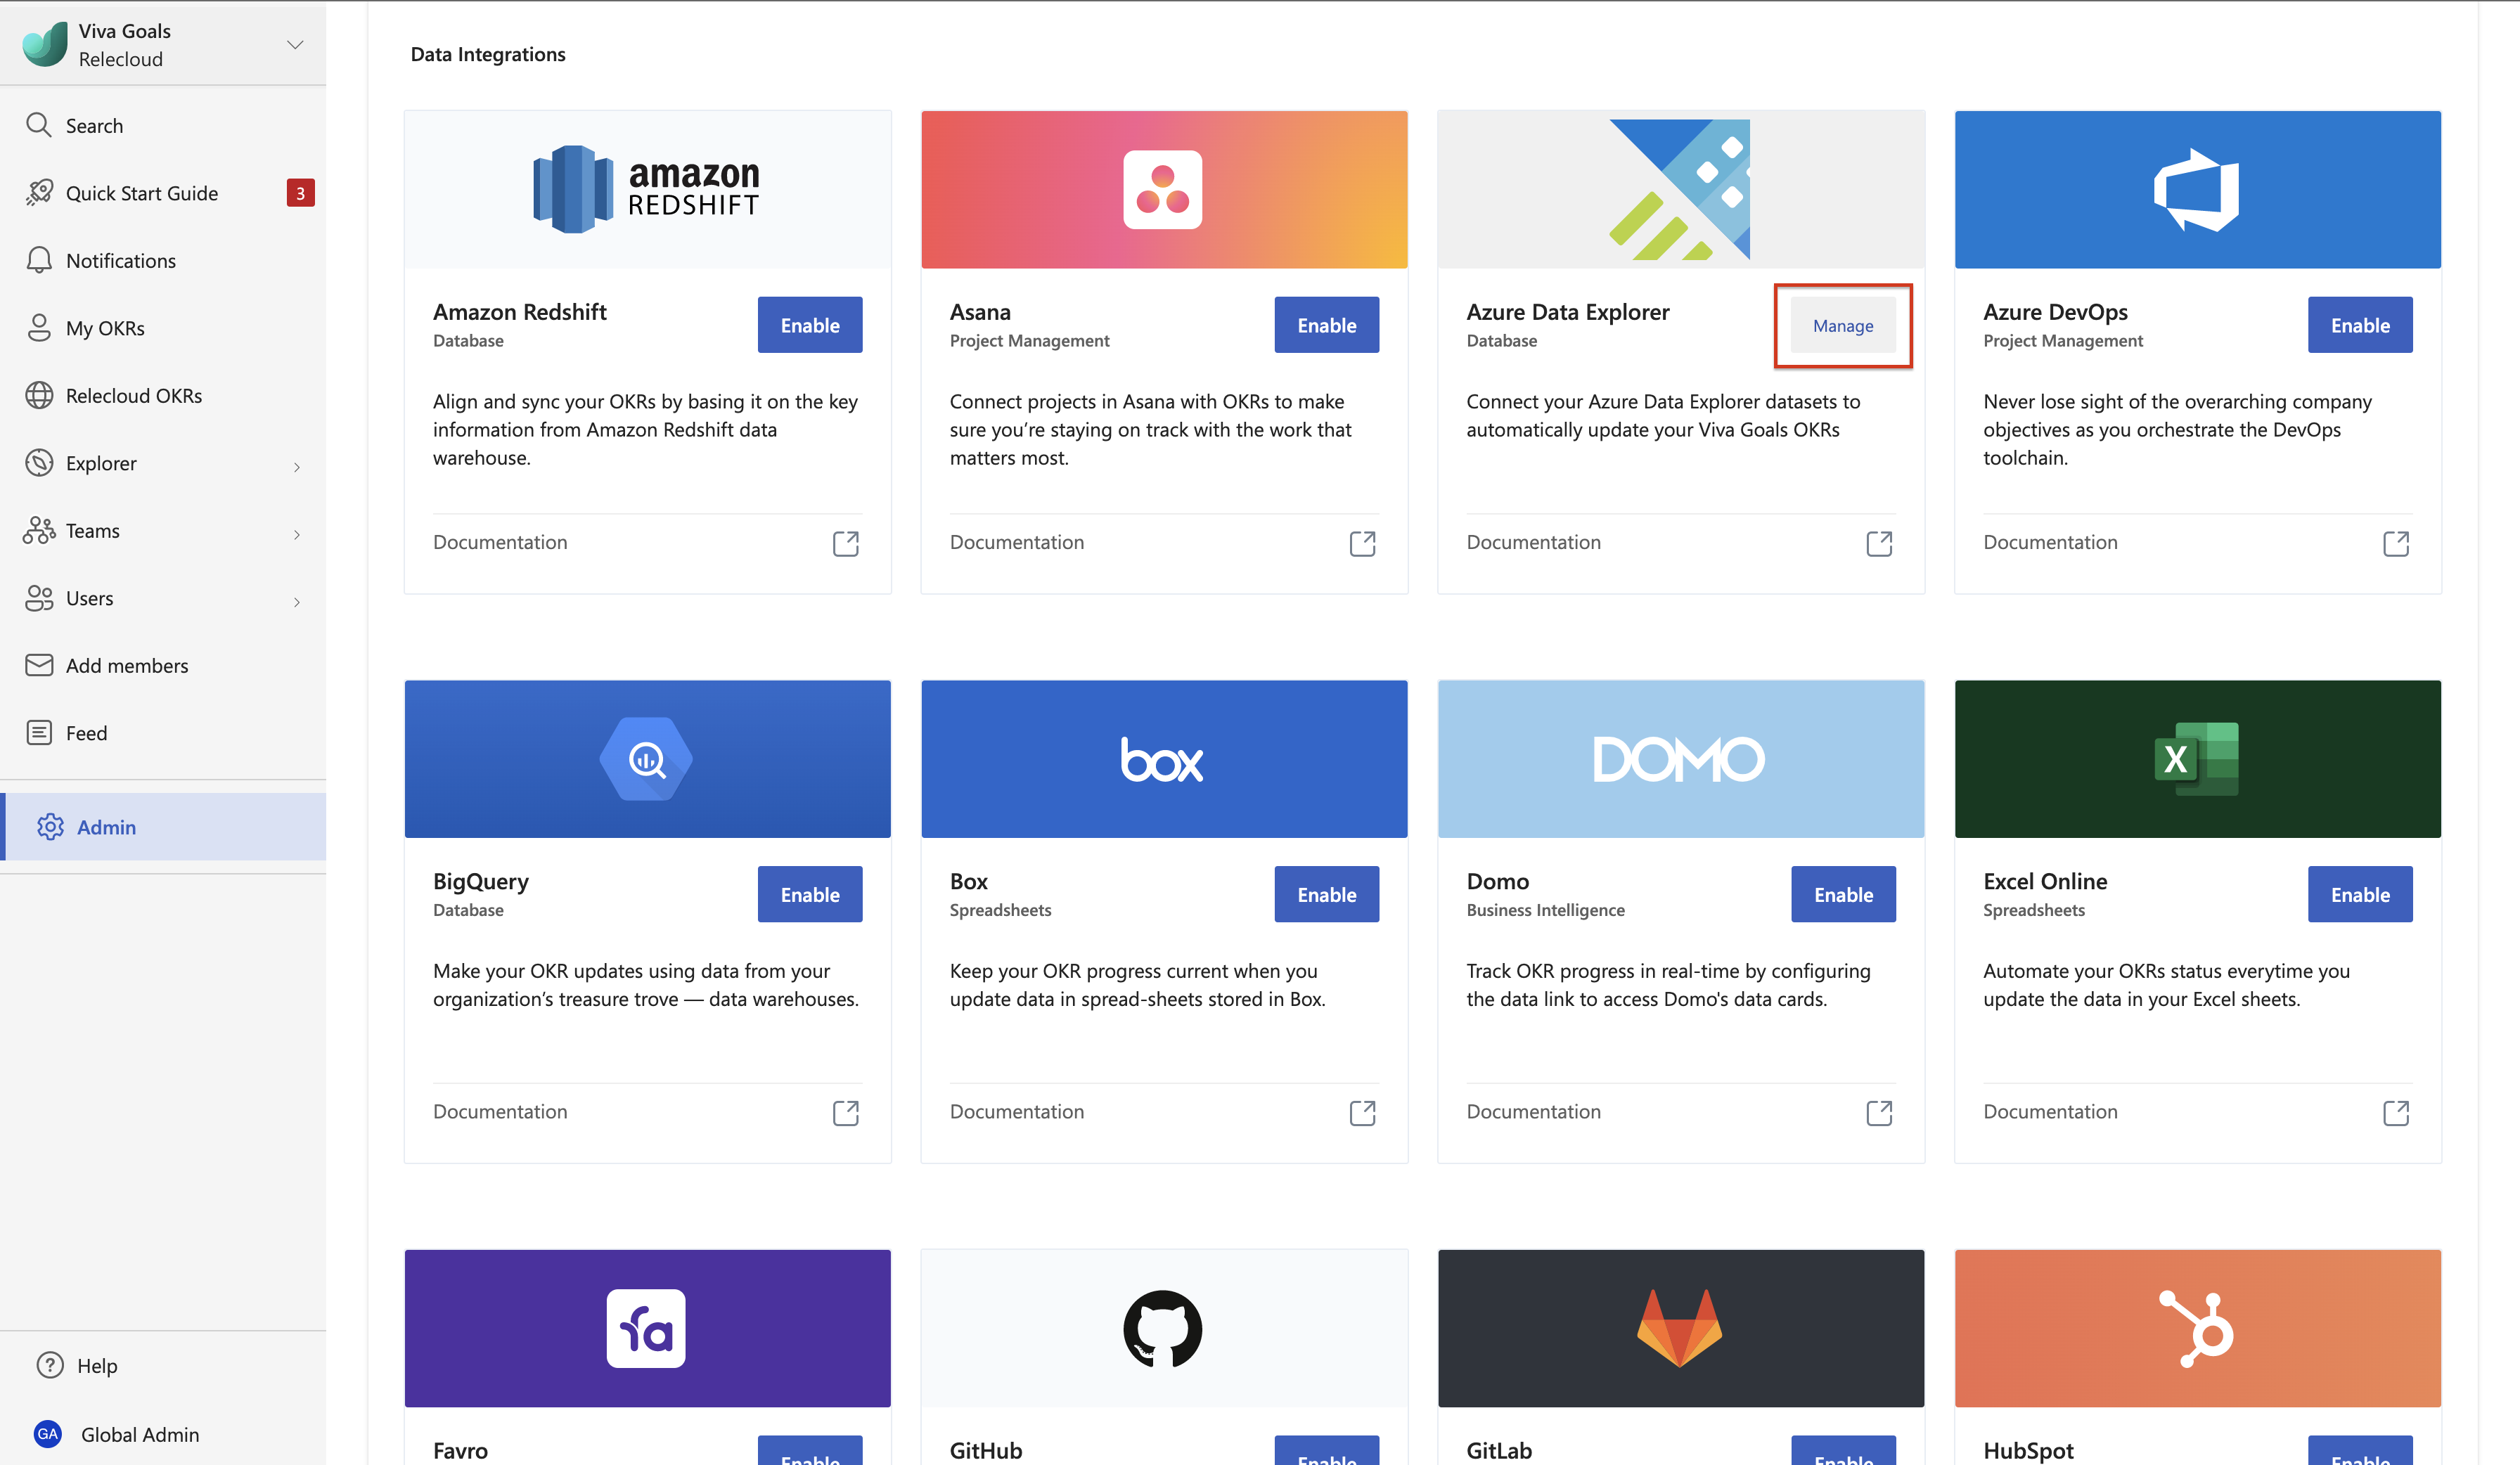
Go to Azure Data Explorer in the integrations section.
Select Azure Data Explorer and then select Manage.
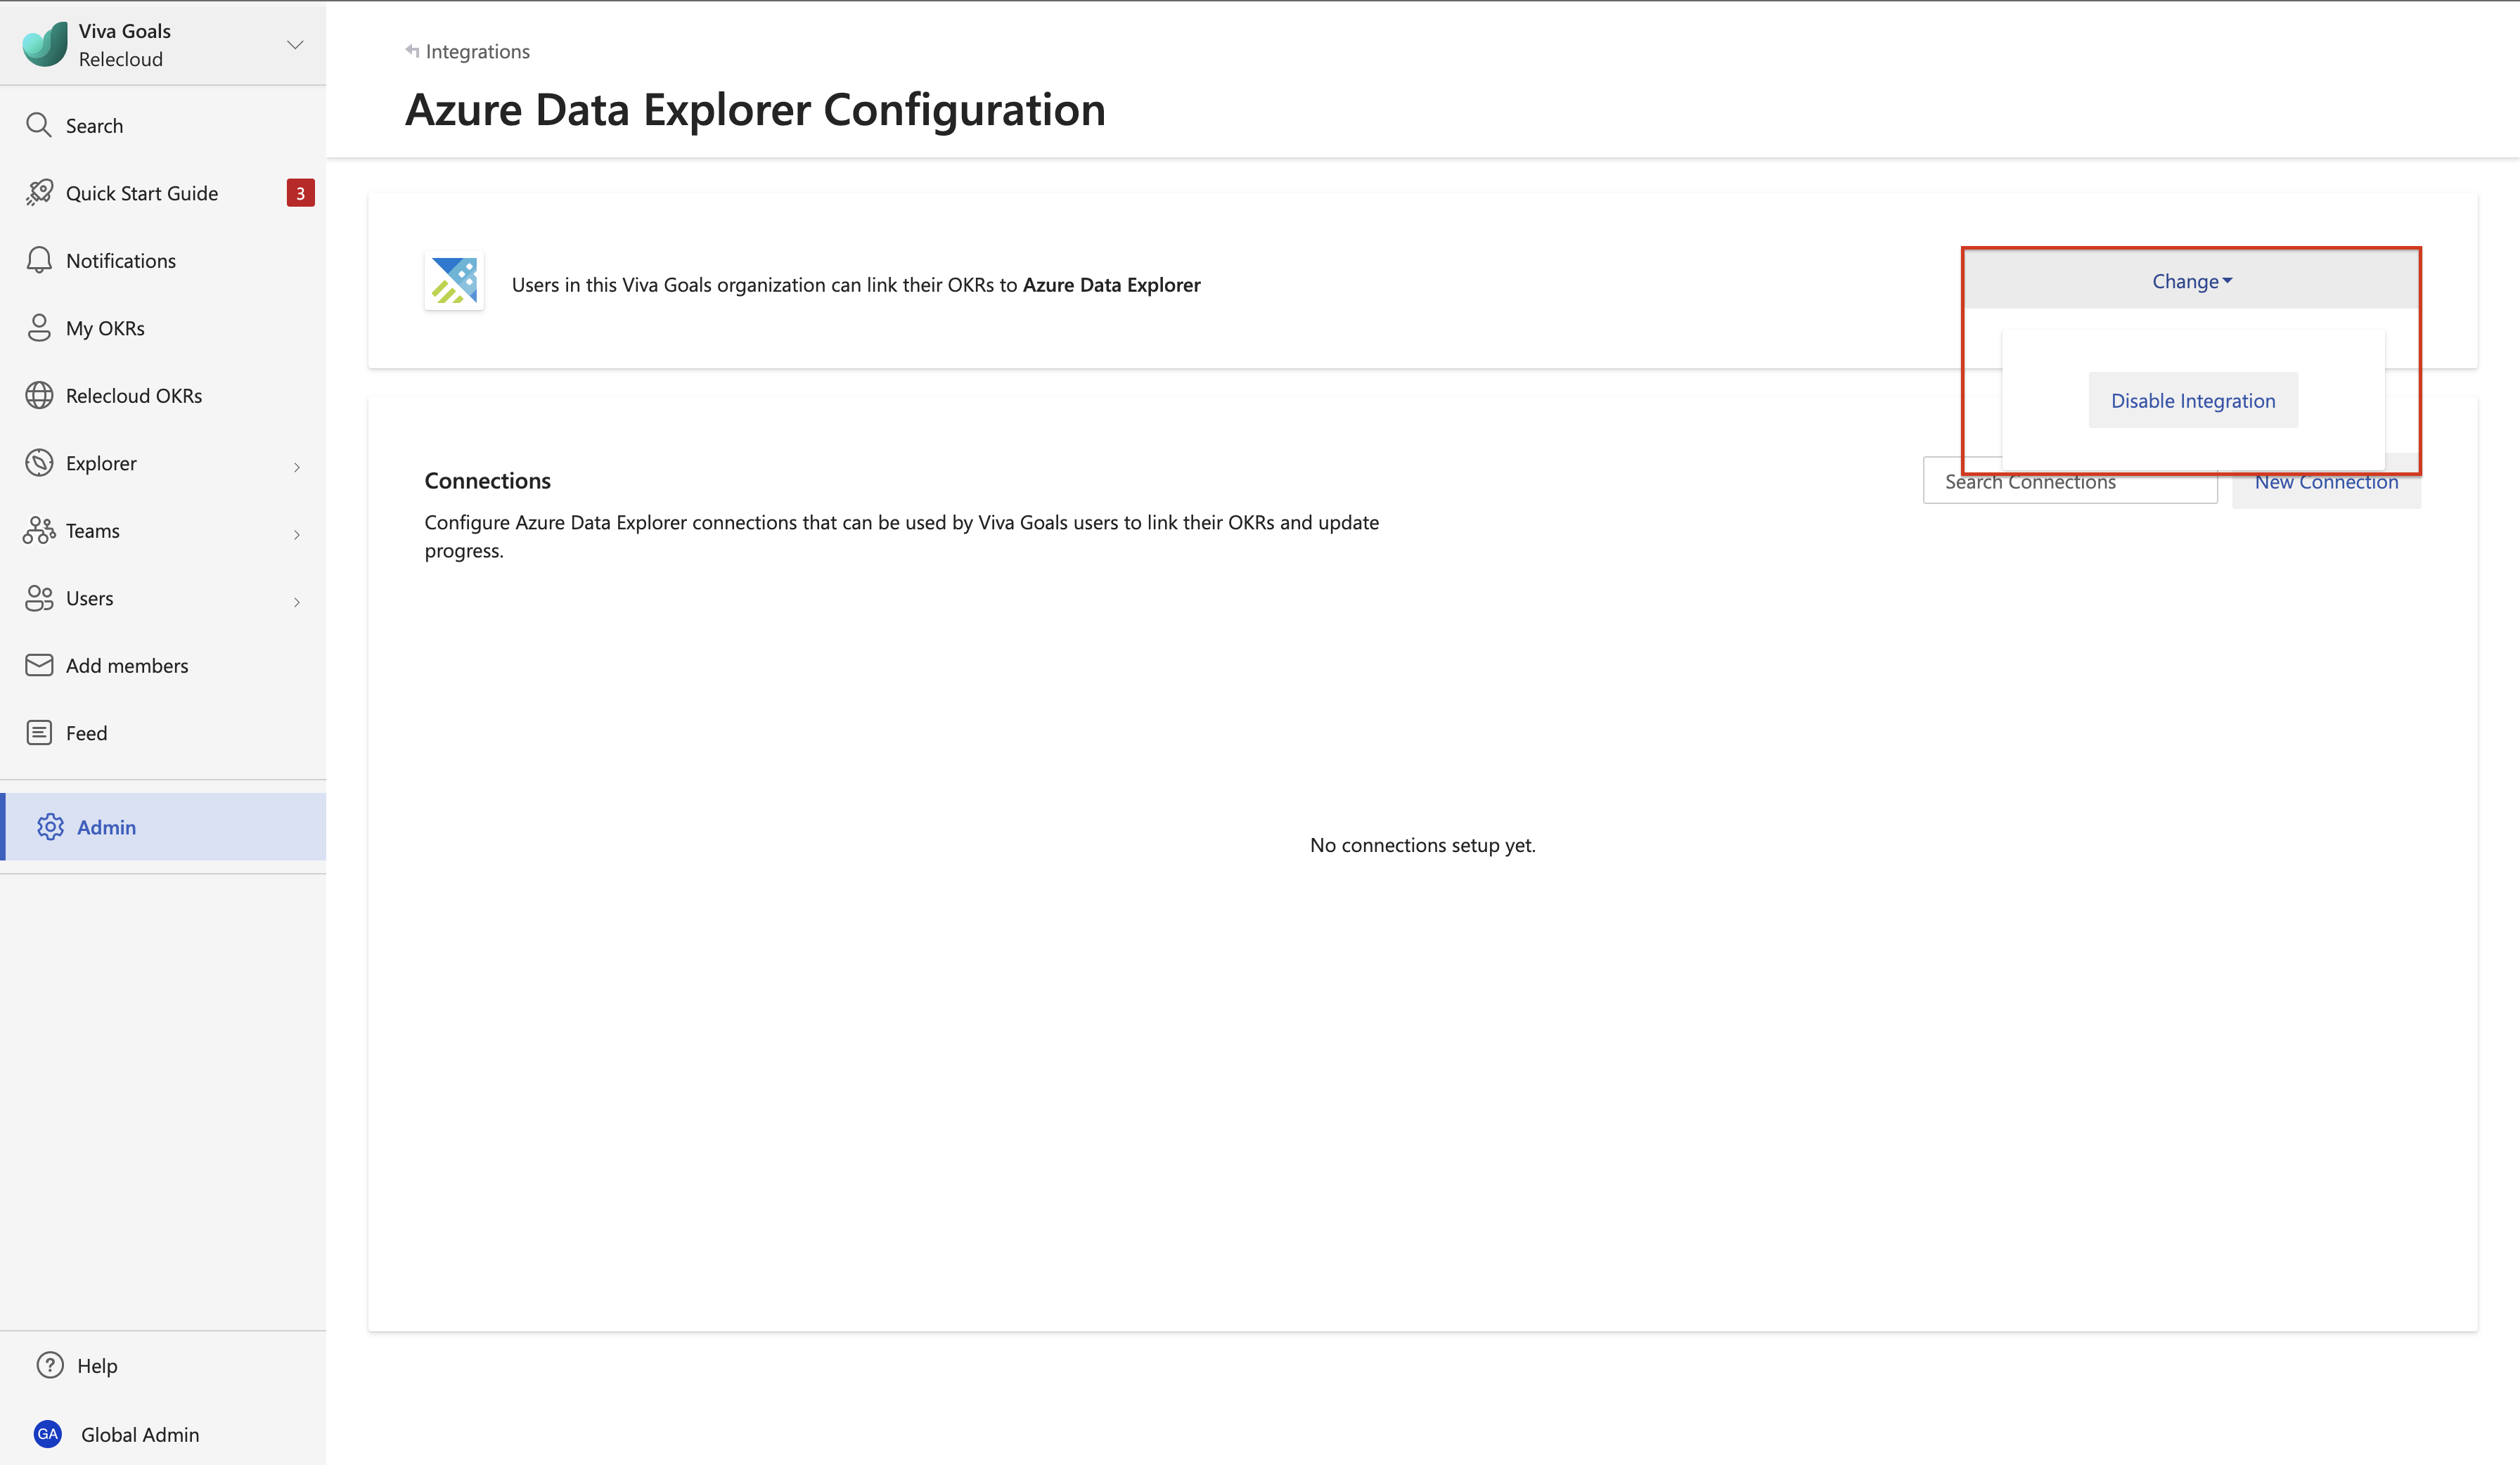
In the configurations page, select the Change dropdown, select Disable and confirm the action.


How to set up an Azure Data Explorer connection
The first step in setting up the Azure Data Explorer integration is to set up a connection. This can be done by an admin or any user during the create/edit OKR process. If you’re a Viva Goals Organization admin:
Navigate to your sidebar, and select Admin and then select Integrations.
In the integrations section, go to Azure Data Explorer and then select Enable. If the integration has already been enabled, you have the option to Manage the integration.
Select New Connection and in the pop-up dialog box provide the full Azure Data Explorer URL (for example, ‘https://CLUSTERNAME.REGION.kusto.windows.net’). This cluster, together with the database provided during the OKR setup, will be the “base” cluster (i.e., your query runs from the context of this cluster).
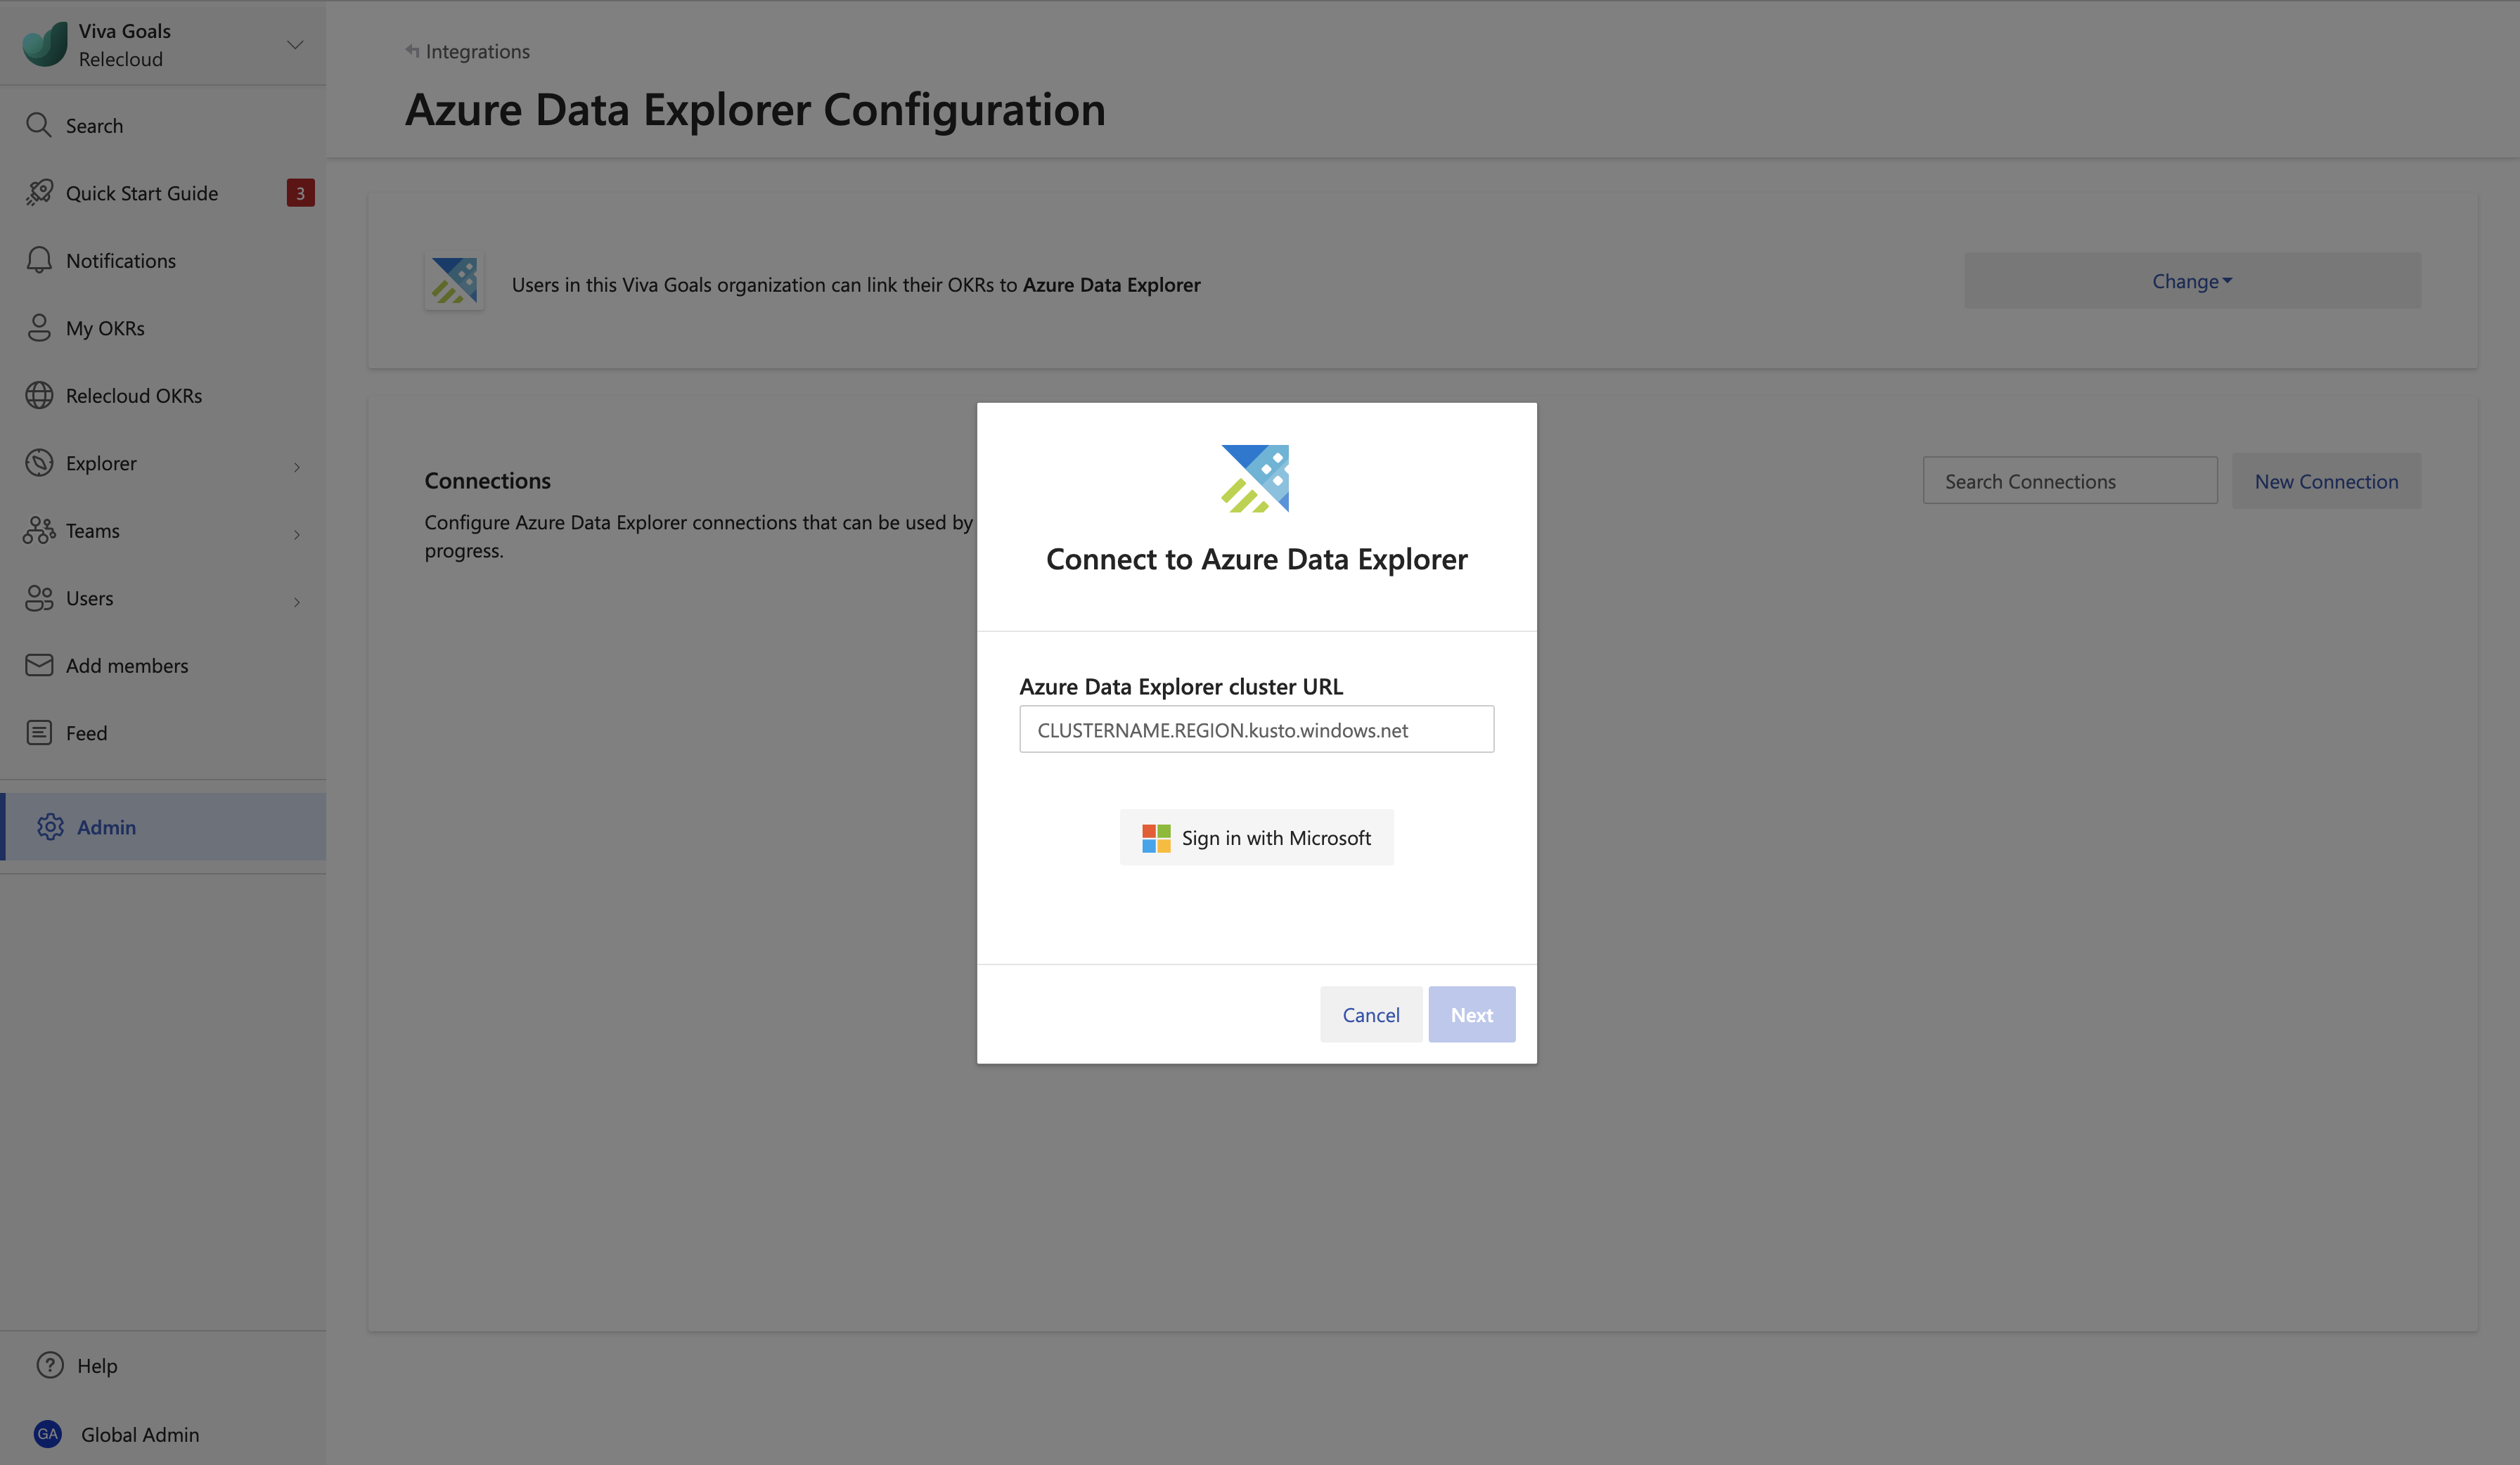
After providing the URL, sign-in with your Microsoft Entra user credentials.

Note
Viva Goals uses Microsoft Entra authentication to create an Azure Data Explorer Integration connection. Whomever is setting up the connection must have access to the Azure Data Explorer cluster.
After successful authentication, name your connection.
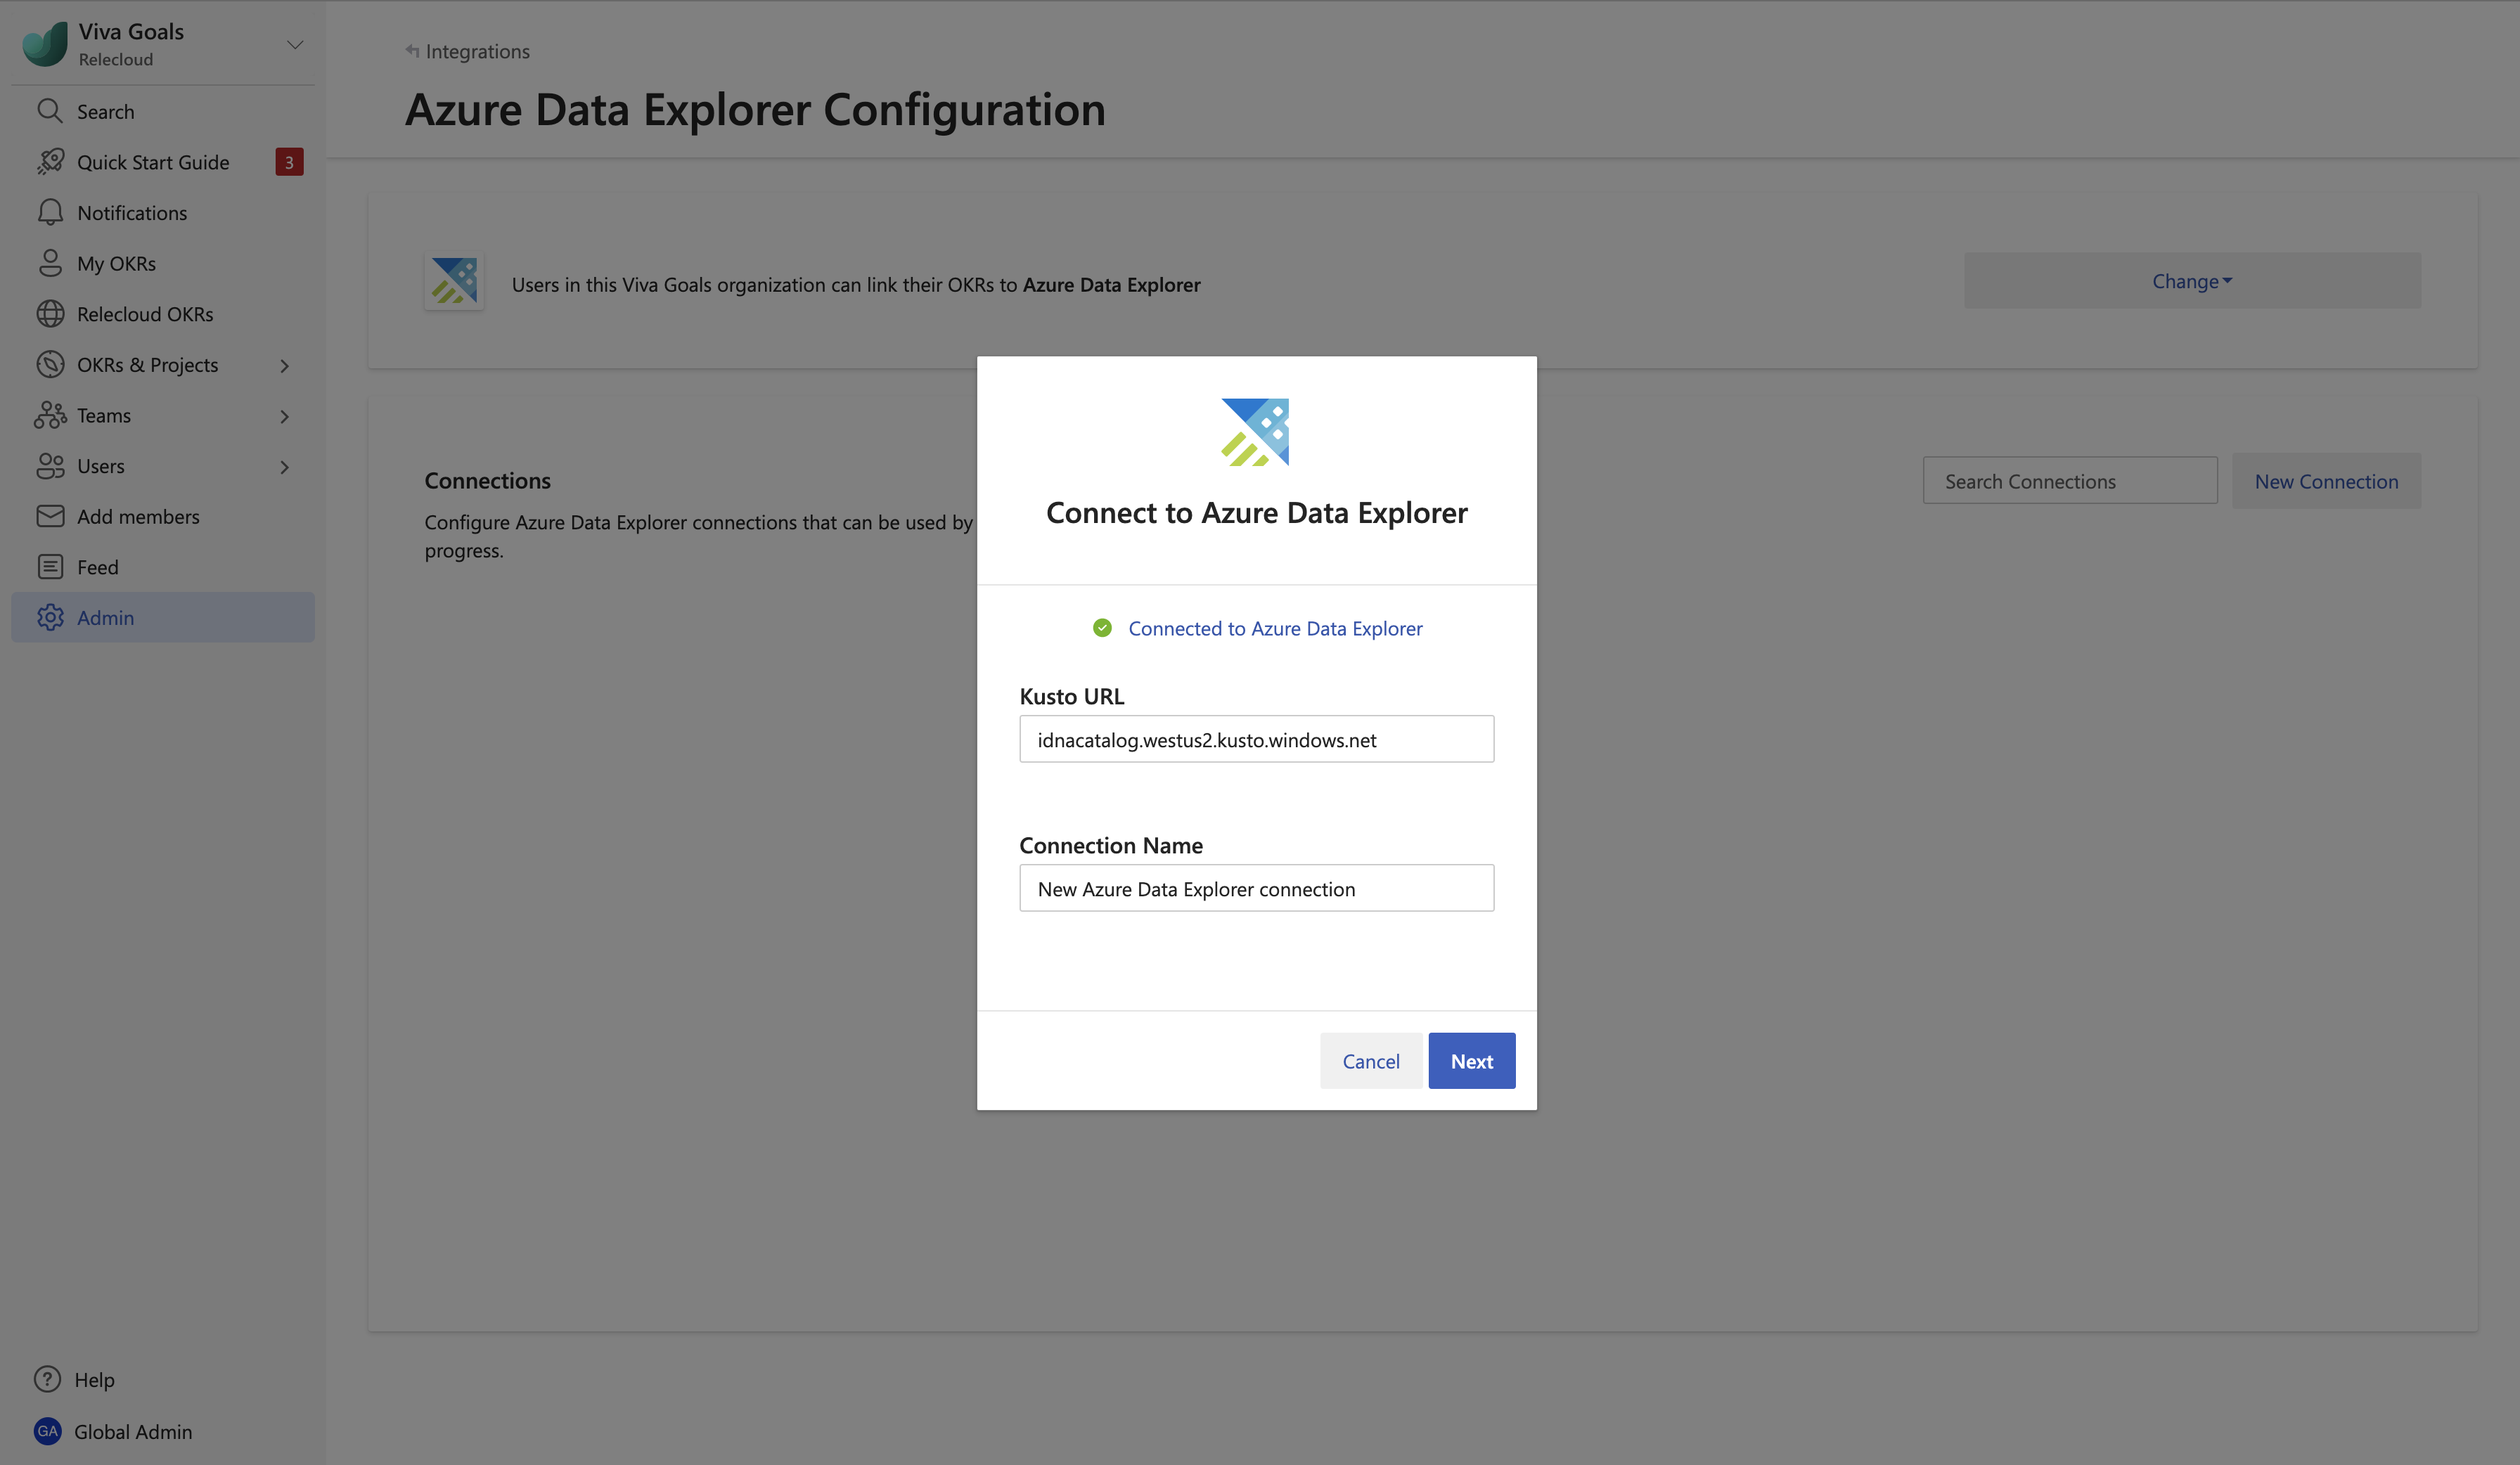
Select Next to complete the new connection setup.

How to edit an existing Azure Data Explorer connection
Admins can delete existing connections. Users can only create new connections.
If you're a Viva Goals Organization Admin, and you also own an existing connection, you can edit it as follows:
Select the Edit icon next to the Azure Data Explorer connection.
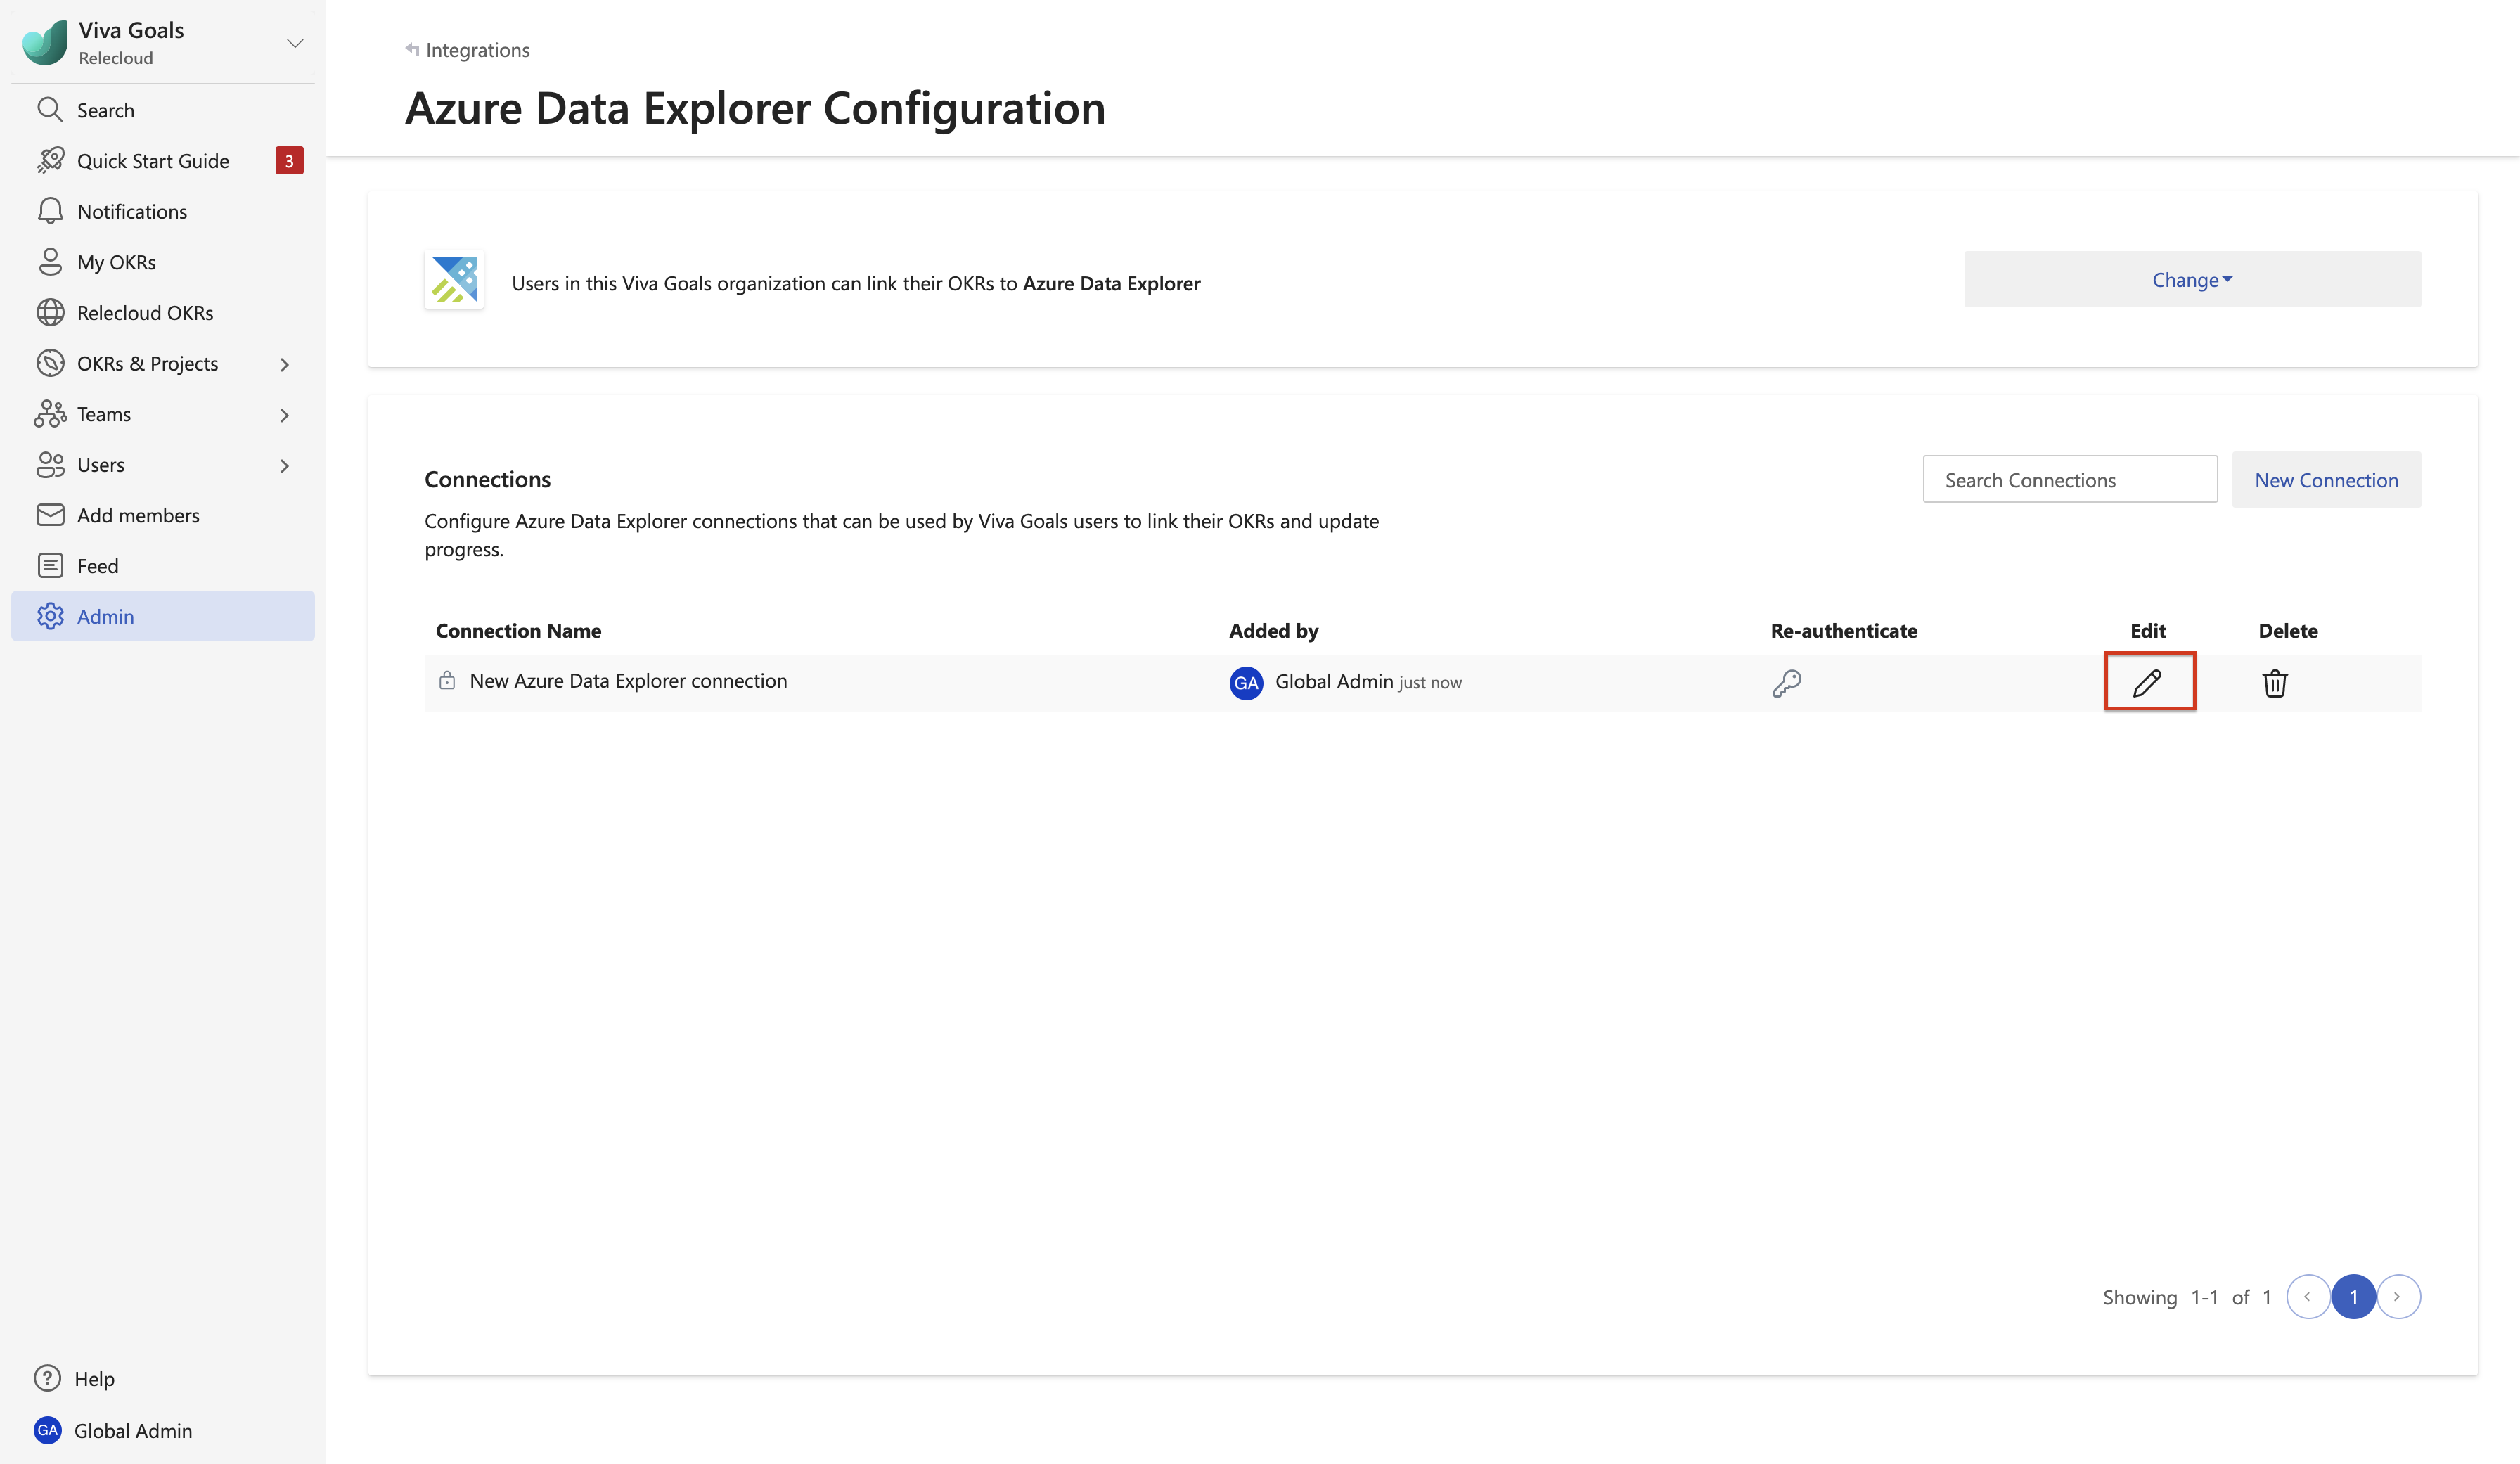
In the pop-up dialog box that follows, update the parameters as needed and select Next.
How to connect an existing Azure Data Explorer connection to an OKR
You can measure your OKRs progress by connecting your new or existing OKRs with an Azure Data Explorer database.
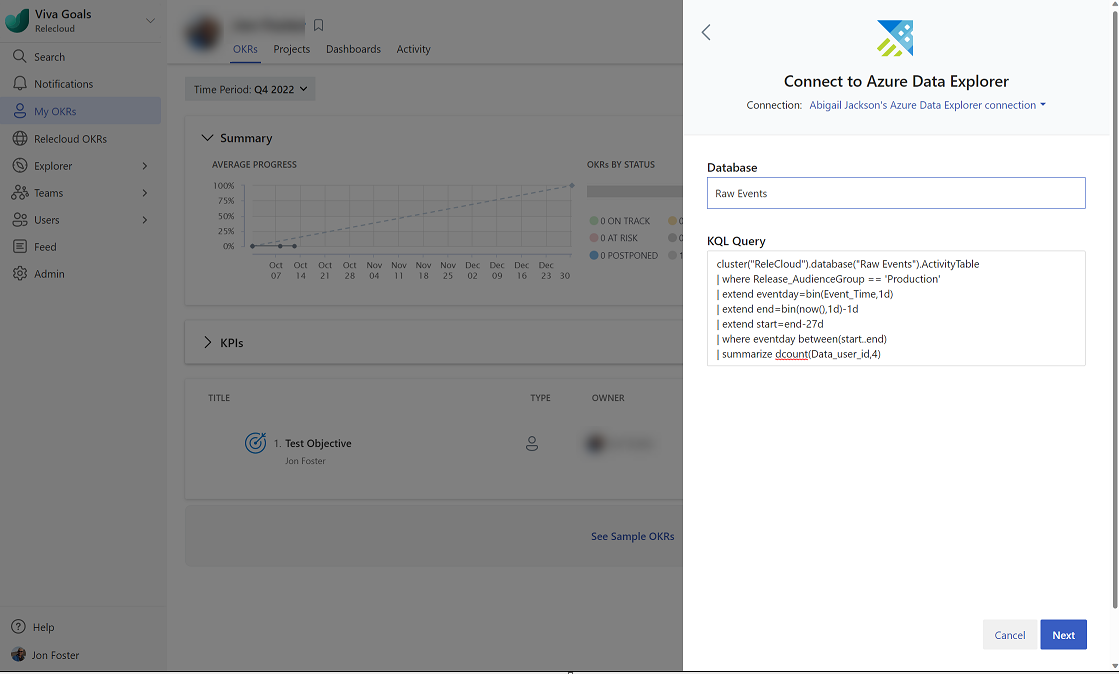
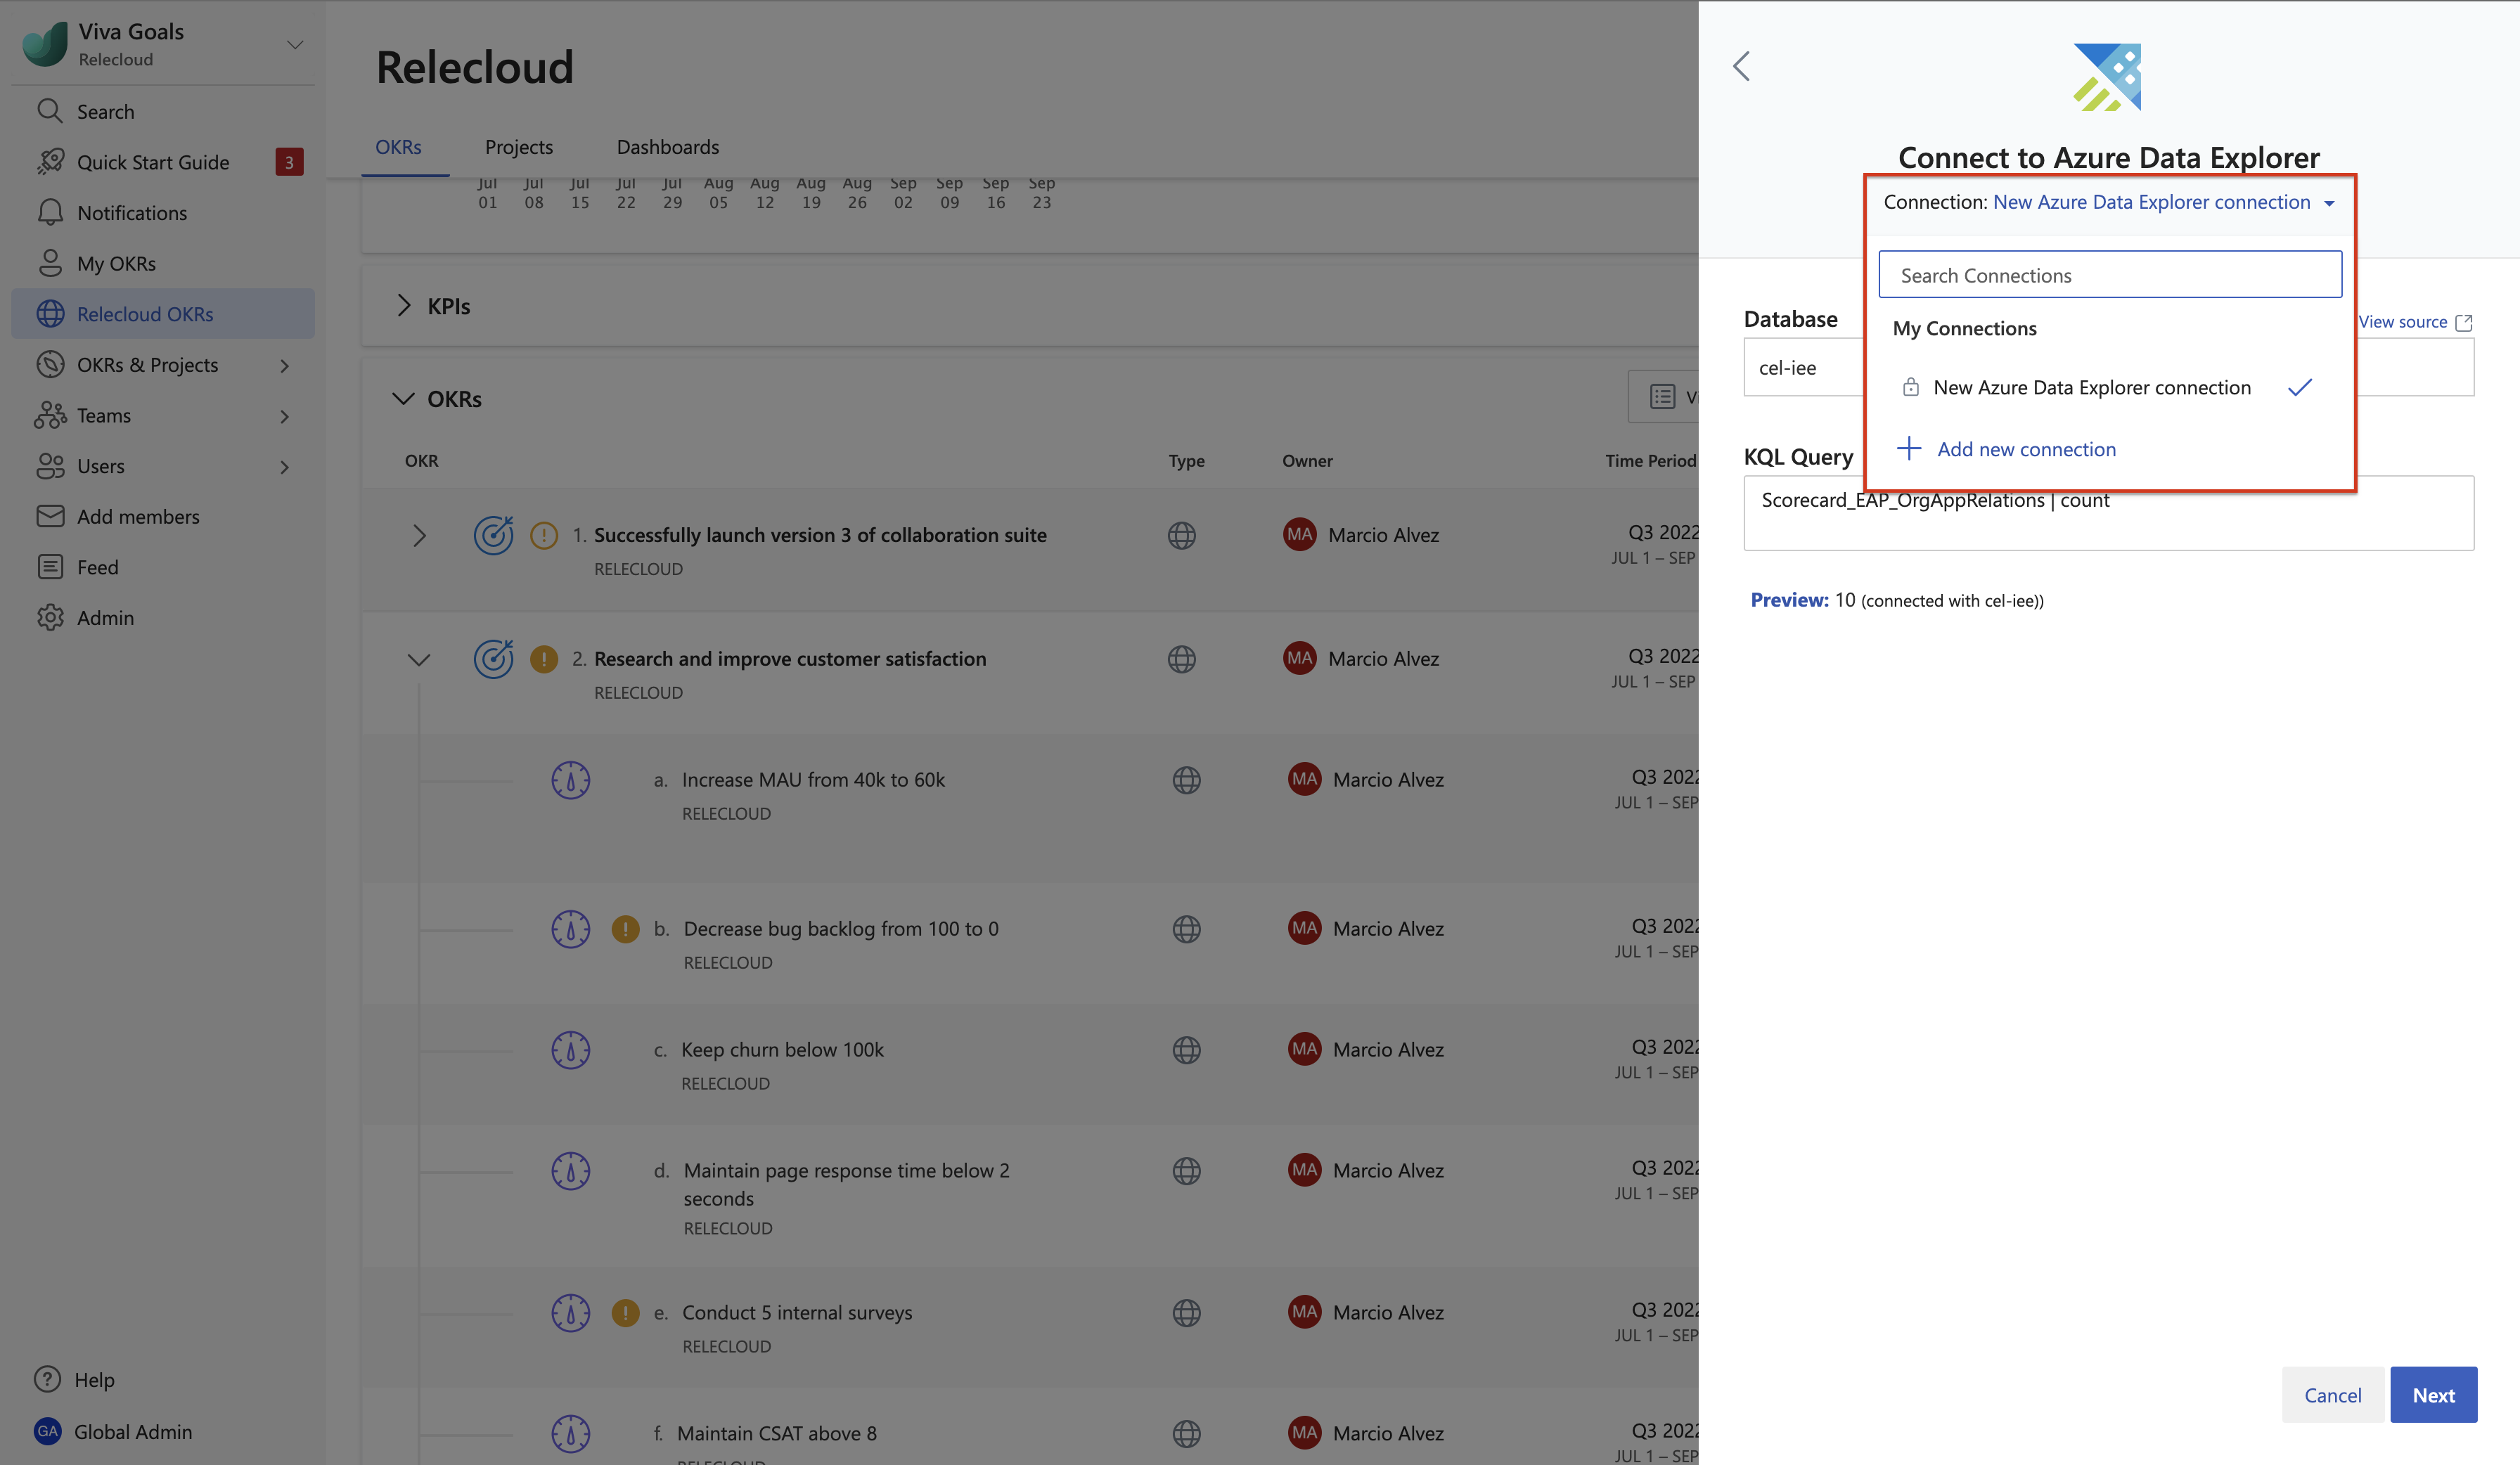
Select Azure Data Explorer from the list of integrations available. Using the dropdown at the top of the dialog, select the appropriate connection. This connection defines the Azure Data Explorer cluster that contains your target database. If the connection you require isn't shown, you can create a new connection (see below).

Once you have selected your Azure Data Explorer connection, provide the database name (for example, ‘DataBaseName’) and the KQL query. Your query must return a single numeric value.


Note
The connection and the database establishes the context from which your query will be executed. The user who sets up the connection must have access to any of the clusters/databases called from within the query.
- Select Next to finish and save your OKR. You’ll now see the Azure Data Explorer icon next to the OKR‘s progress indicator. This means Viva Goals will automatically measure the progress based on the data updates in the report.
How to set up a new Azure Data Explorer connection during the create/edit OKR flow
If the desired Azure Data Explorer Integration connection isn't already established during the OKR setup, you can set up a new connection.
Select Azure Data Explorer from the list of integrations available. Using the dropdown at the top of the dialog, select Add new connection.
In the next screen, provide the full Azure Data Explorer URL (for example, ‘https://CLUSTERNAME.kusto.windows.net’). This cluster, together with the database provided during the OKR setup, will be the “base” cluster (i.e., your query runs from the context of this cluster).
After providing the URL, sign-in with your Microsoft Entra user credentials.
Upon successful authentication, you are returned to the integration setup dialog, where you provide your database and KQL query as outlined above.

FAQ (Frequently asked questions)
- How do I fix sync issues?
- Sync issues could occur due to multiple reasons:
- The device you used to create the connection(s) isn't compliant anymore.
- When you reset your Kusto password, the existing authentications go invalid automatically.
- The user who created the connection(s) isn't part of Microsoft Entra anymore.
- You can quickly fix these by reauthenticating the connection from Account > Preferences > My Integrations > select onManage against Kusto > Reauthenticate.
- Sync issues could occur due to multiple reasons: