[Mini-Tutorial] Working with Images in Expression Design
One of the most common questions I get about Expression Design is how the tool would work with images. It’s true that Design focuses mainly on vector graphics creation, but there are neat bitmap manipulations and effects you can apply on your images as well. Check out the following two examples.
When I was visiting back home earlier this year, I found these cool looking chairs. In this tutorial, I’ll show you how to crop out an object from an image, covert it into its own image object, and then apply an effect onto it. We’ll work on the image below on the right. You can click on the image to download a larger version to work with.
Step 1: use the Pen tool in the tools palette to draw a path tracing the outline of the chair.
 |
Step 2: select both the path from Step 1 and the background image, go to menu and select Object –> Clipping Path –> Make with Top Path. You should get the image below on the right. At this point, you just created a clipping path (like a window to the background image). If you move the clipping path around the image, you’ll see different parts of the image. Follow the next step to make this cropped chair a proper image object.
 |
 |
Step 3: select the clipping path you just made and go to menu and select Object –> Image –> Create Image Project. Drag the curser to draw out a rectangle to represent the area that you’d like to make into an image object. A dialog box will pop out asking you for the dpi for the rasterized area. Put 300 px/inch to create a high quality image object. At the end of this step, you should be able to select the chair object without seeing the path around the object.
Step 4: you can change the color of the chair by going to Effects panel and select “fx” –> Adjust Colors –> Tint. Choose the Tint color you want and adjust the levels to see the results.
 |
 |
Step 5: you can place back the element in the original photo. Look at how different color chairs would look in the image.
 |
 |
 |
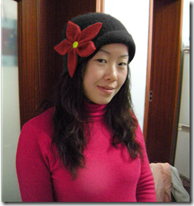
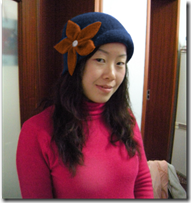
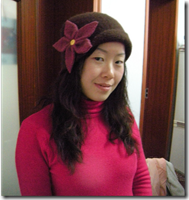
Here’s another example of using the same technique. If you are selling hats on your website, you may want to provide different colors to the same hat style. Can you tell which hat is the original and which ones are created using Expression Design?
You can see a full video tutorial on working with images using Expression Design by Arturo on the Silverlight blog. Start playing with images and have fun with Expression design!
Technorati Tags: Expression Design,Mini-Tutorial,Image Manipulation,Bitmap effect


