REST Calls using PostMan for R server Operationalization
The Microsoft R Server operationalization REST APIs are exposed by R Server's operationalization server, a standards-based server technology capable of scaling to meet the needs of enterprise-grade deployments. With the operationalization feature configured, the full statistics, analytics and visualization capabilities of R can now be directly leveraged inside Web, desktop and mobile applications.
Core Operationalization APIs
These core REST APIs expose the R platform as a service allowing the integration of R statistics, analytics, and visualizations inside Web, desktop and mobile applications. These APIs enable you to publish Microsoft R Server-hosted R analytics web services, making the full capabilities of R available to application developers on a simple yet powerful REST API.
- Click Here to find more information about Core APIs.
- Core API Swagger JSON File
- Core API Reference Documentation
Service Consumption APIs
The service consumption REST APIs expose a wide range of R analytics services to client application developers. Once R code is published and exposed by R Server as a web service, an application can make API calls to pass inputs to the service, execute the service and retrieve R session outputs (R objects, graphics, files, ...) from the service.
We will be using Loan Predict Service example and show how to make REST call using postman. Execute the LoanScoring.R which will publish the Loan predict service into your R o16N server. You can use the swagger.json file which will be generated when you execute the R script or alternatively you use JSON file available on GitHub.
Import Your swagger
Import your swagger JSON file, in postman so that you can view all the API calls that are available to use
- Change the LoanPredict.json to add/modify your server’s `host`
- For example: "host": "10.145.19.6:12800"
- Next change the `schemes` property to use only the one protocol that your server is configured to. This helps the Postman UI.
"schemes": ["http",]
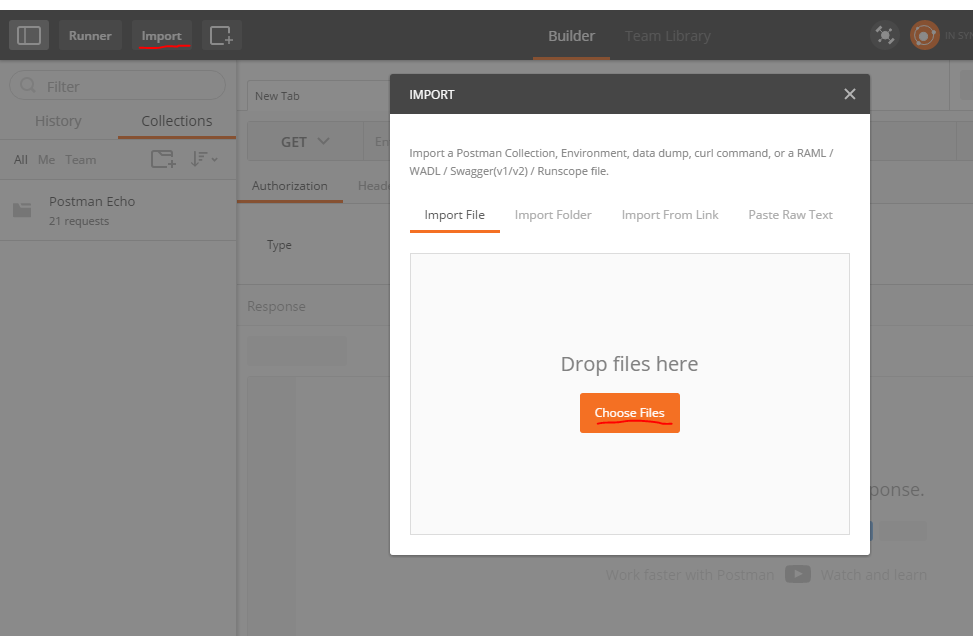
- Now import the swagger using the Postman UI:
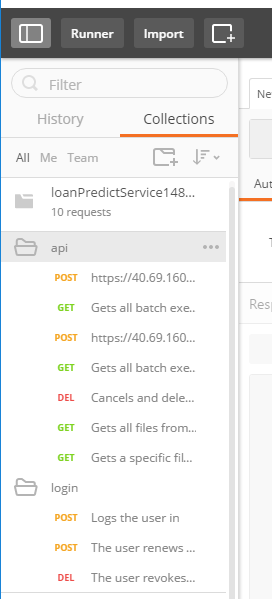
After Importing your swagger JSON file you will see list of all possible API on left side as below
Login API
Once imported, under the `Login` tags to the left, select the `POST User Login`. Double check that your `host and protocol` looks correct
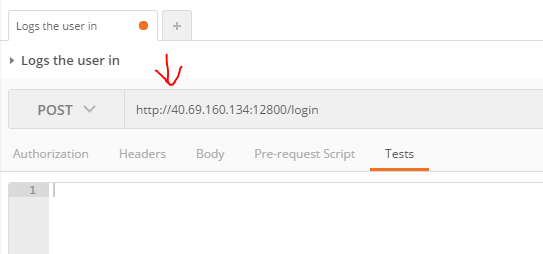
Update your API headers.
- Select the `Headers` tab add the following key value pairs
- Key = Content-Type
- Value = application/json
- These are needed as for all POST calls as the input format we send to O16N server is in JSON format.

One Time Setup of Bearer Token
Bearer Token is needed to send as part of header for all authenticated calls, This can be copied from login response call and added as part of header in subsequent calls or can be setup as global variable and can be used in subsequent calls.
Every call must have below header else will get 401 Not Authorized error.
key = Authorization
value = Bearer {{Access_token}}
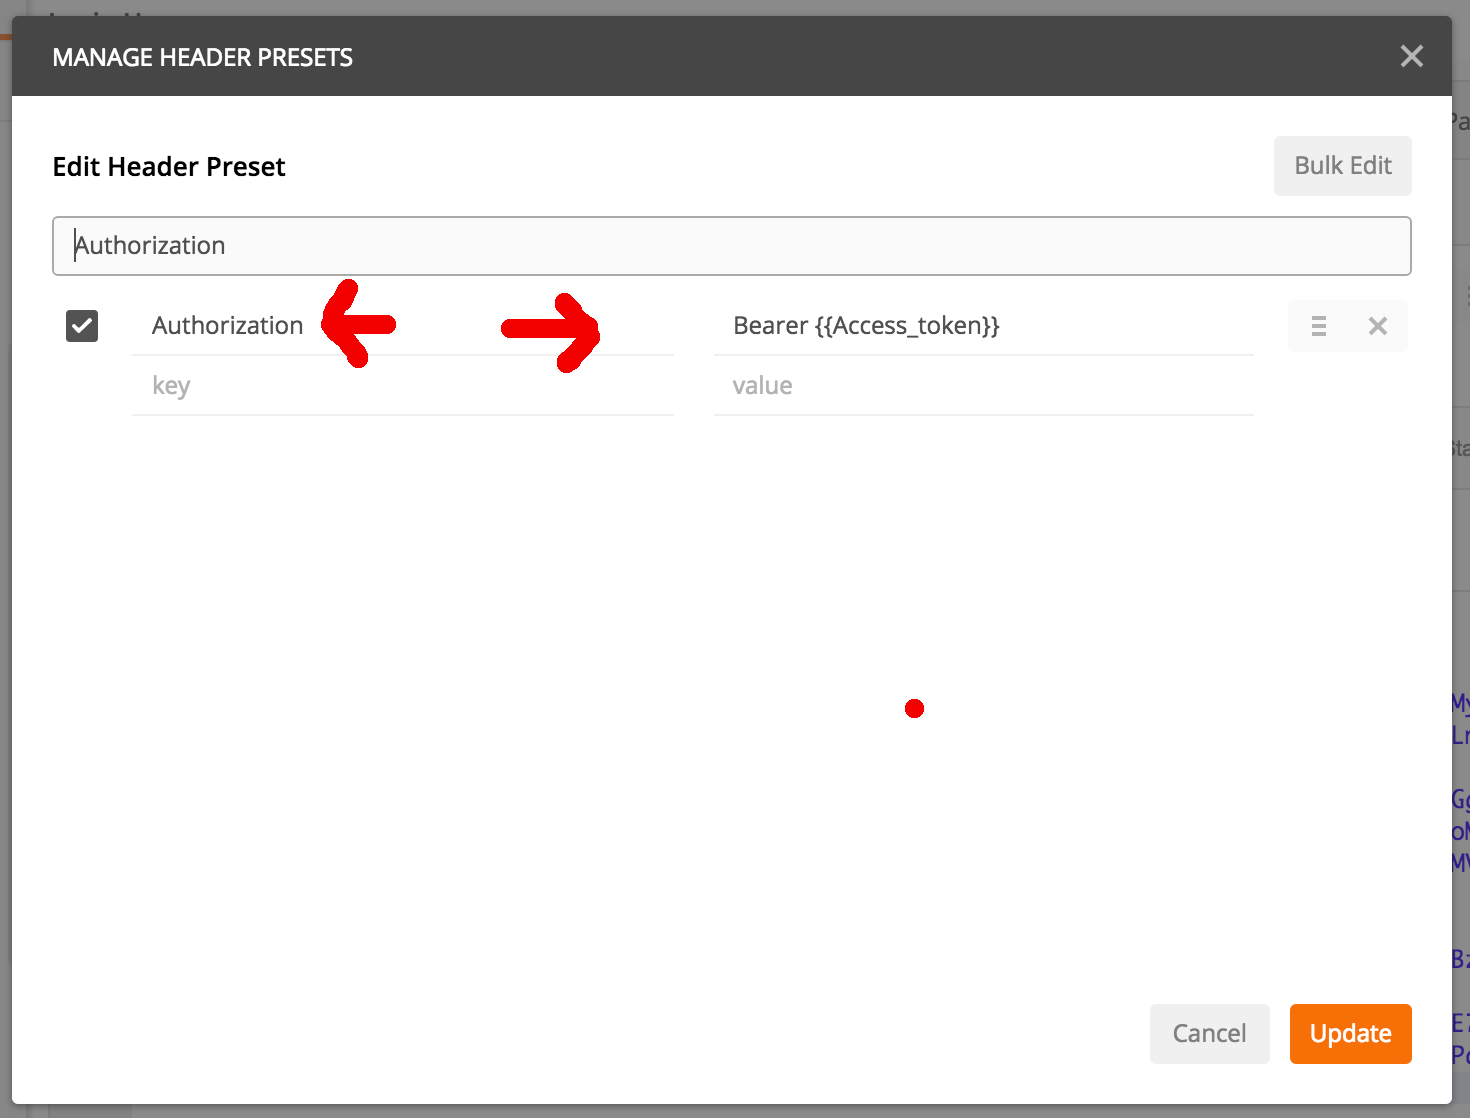
Preset for Authorization
Create Preset to manage Authorization header for login and future calls
- Click on Presets and then Manage Presets

- Add new Presets
- Name Authorization
- Key : Authorization
- Value : Bearer {{Access_token}}
Setup Global Variable
Global variables provide a set of variables that are always in scope. You can have multiple environments, and only one can be active at a time. But you’ll have only one set of global variables, and they’ll always be available. Other than that, you can use them in the same way - {{variableName}}.
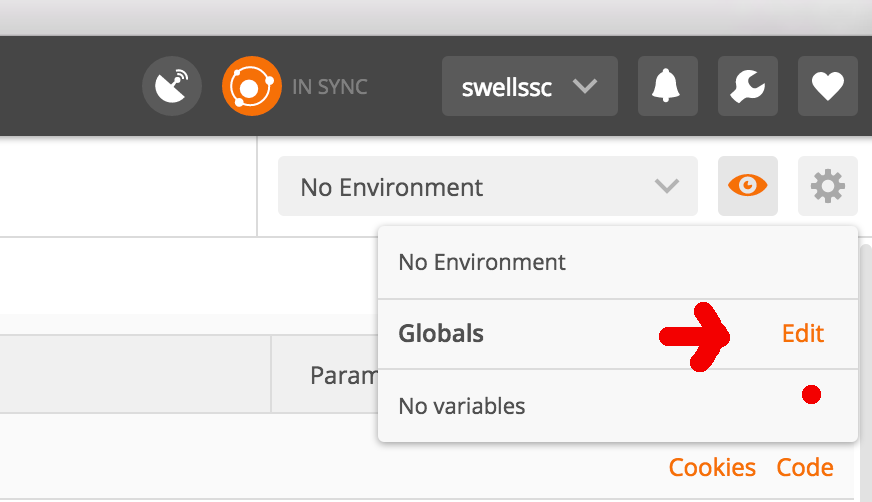
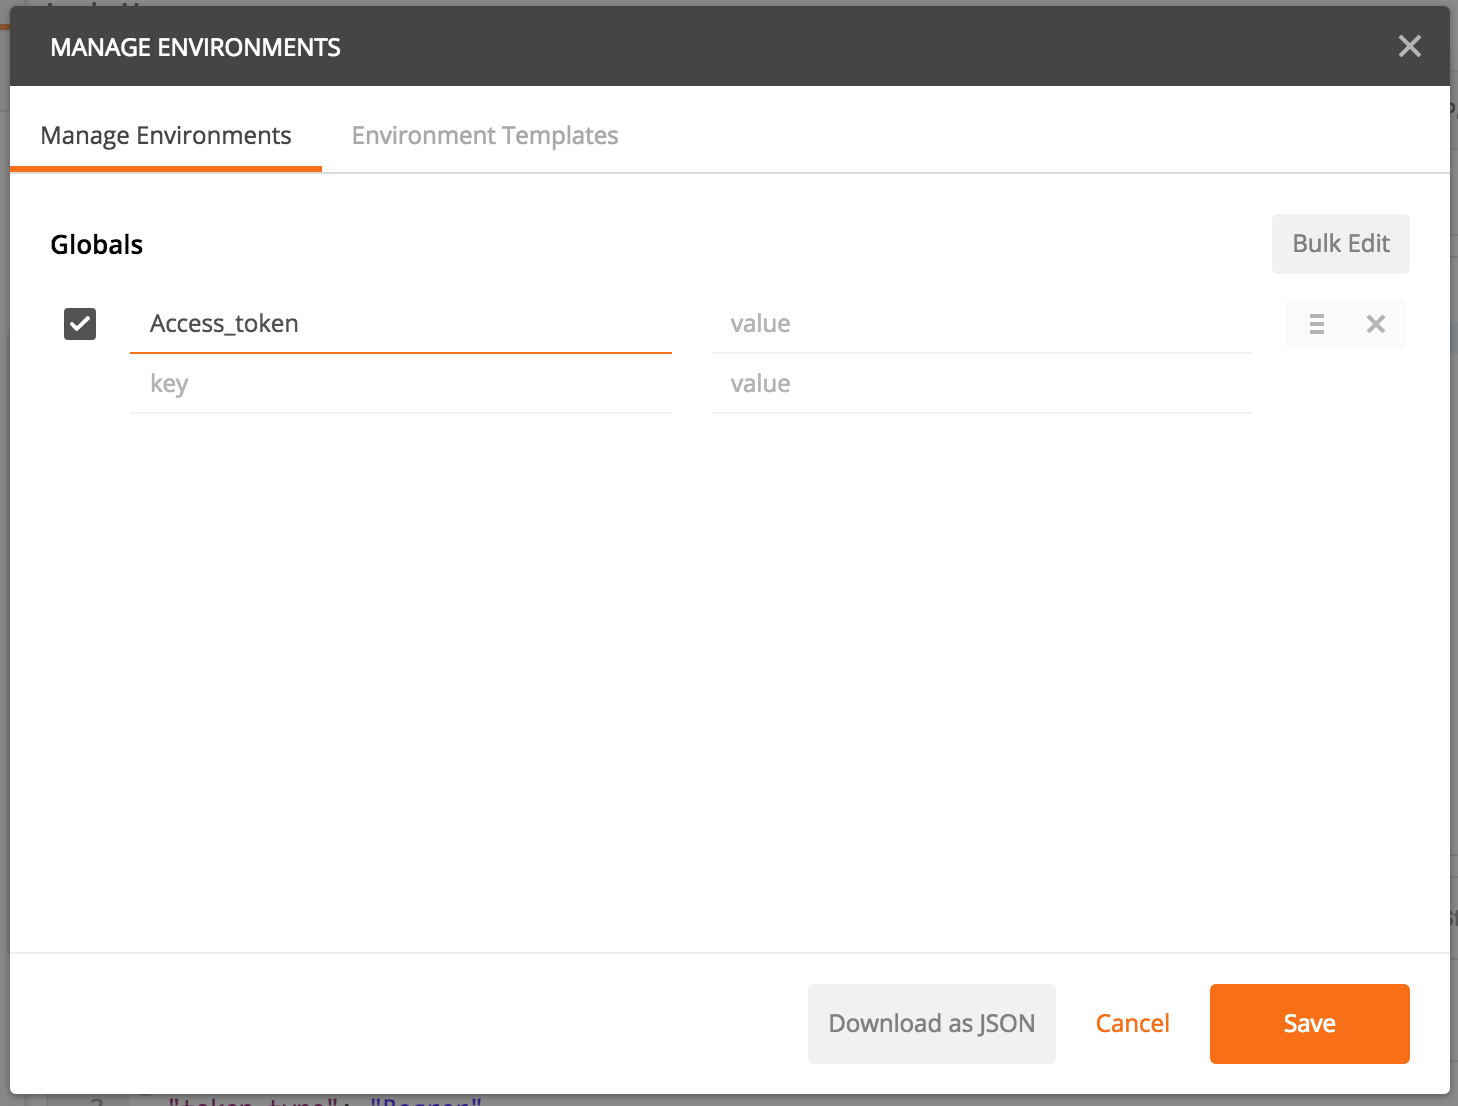
- Add the variable `Access_token`
- key = Access_token
- value =
Note the value of `Access_token` is empty. This will be populated with the actual token value from login API response.
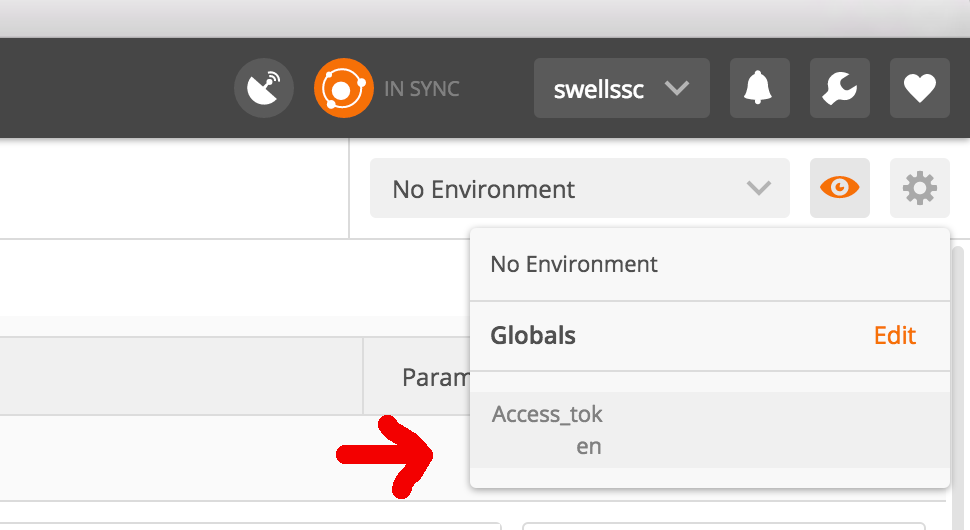
Verify Global Variable Access_token is created
Populate Access_token from login API call
Using script we can extract the access_token from login API response and set it to a previously created global variable called Access_token
var data = JSON.parse(responseBody); postman.setGlobalVariable("Access_token", data.access_token); 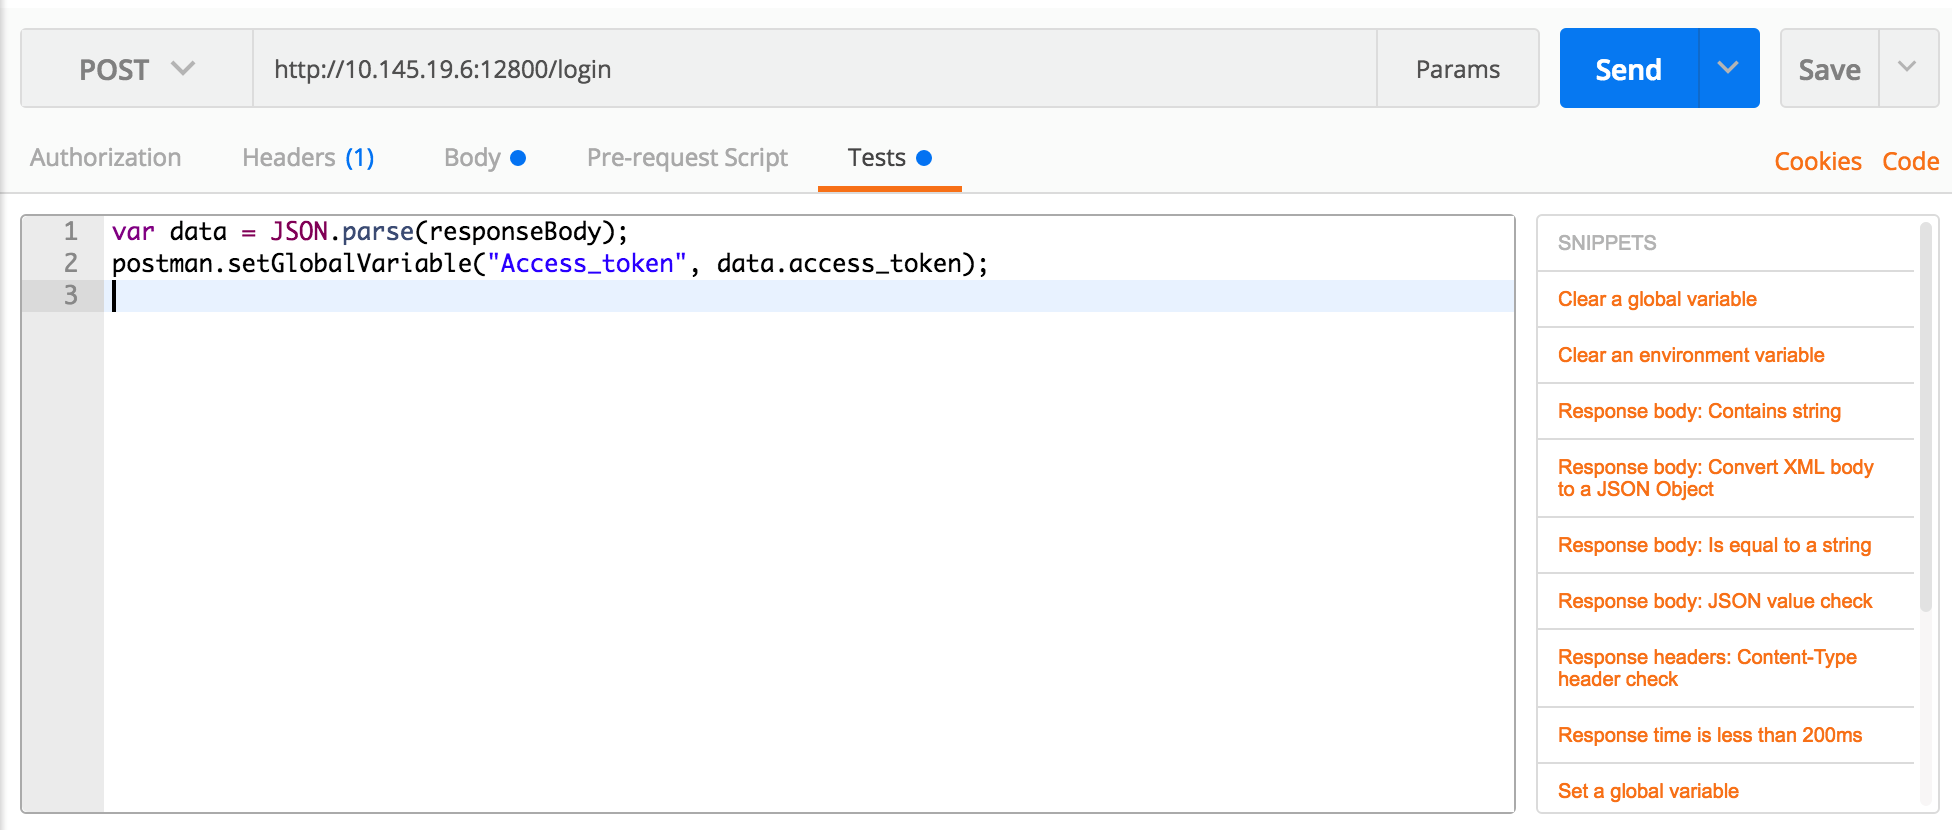
Invoke Login API Call
We have created global variable and are ready to make login API call to server
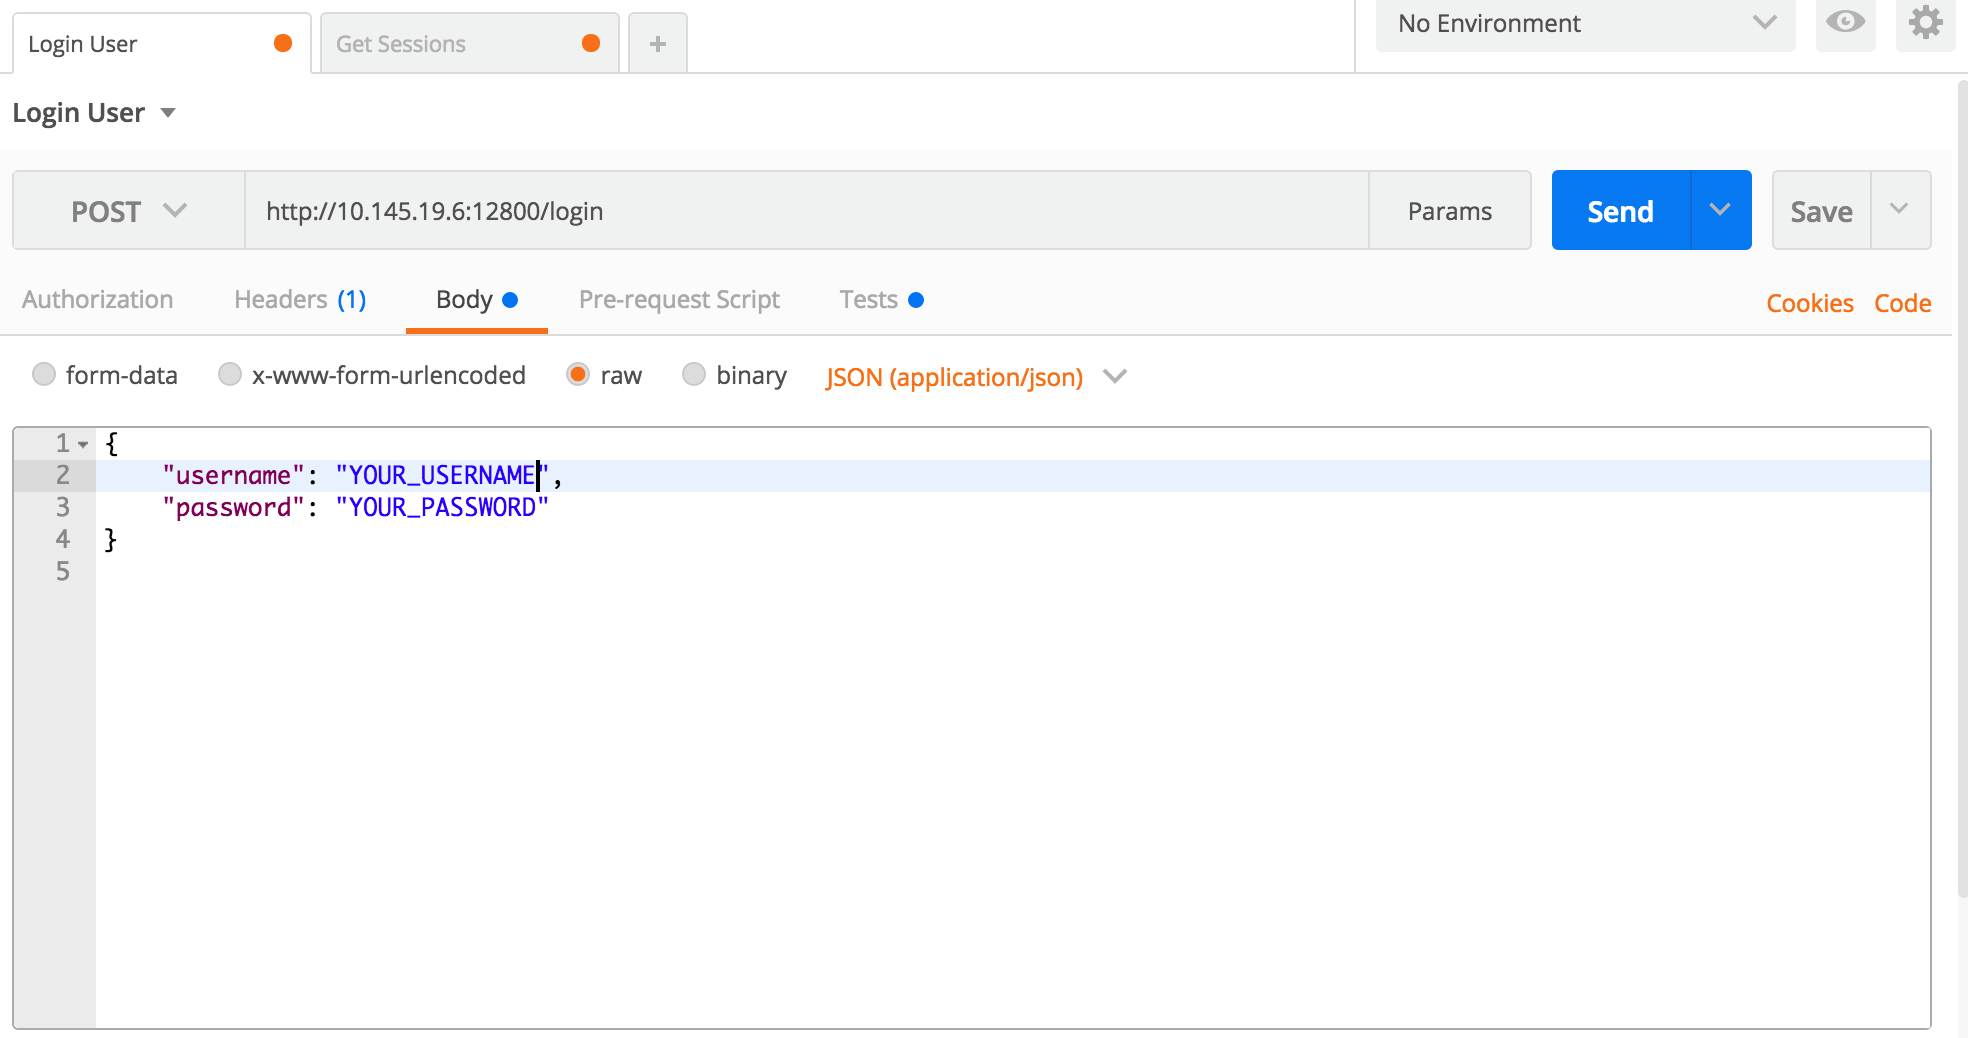
Request
- In body of the request enter your username and password as below
- Click send
Response
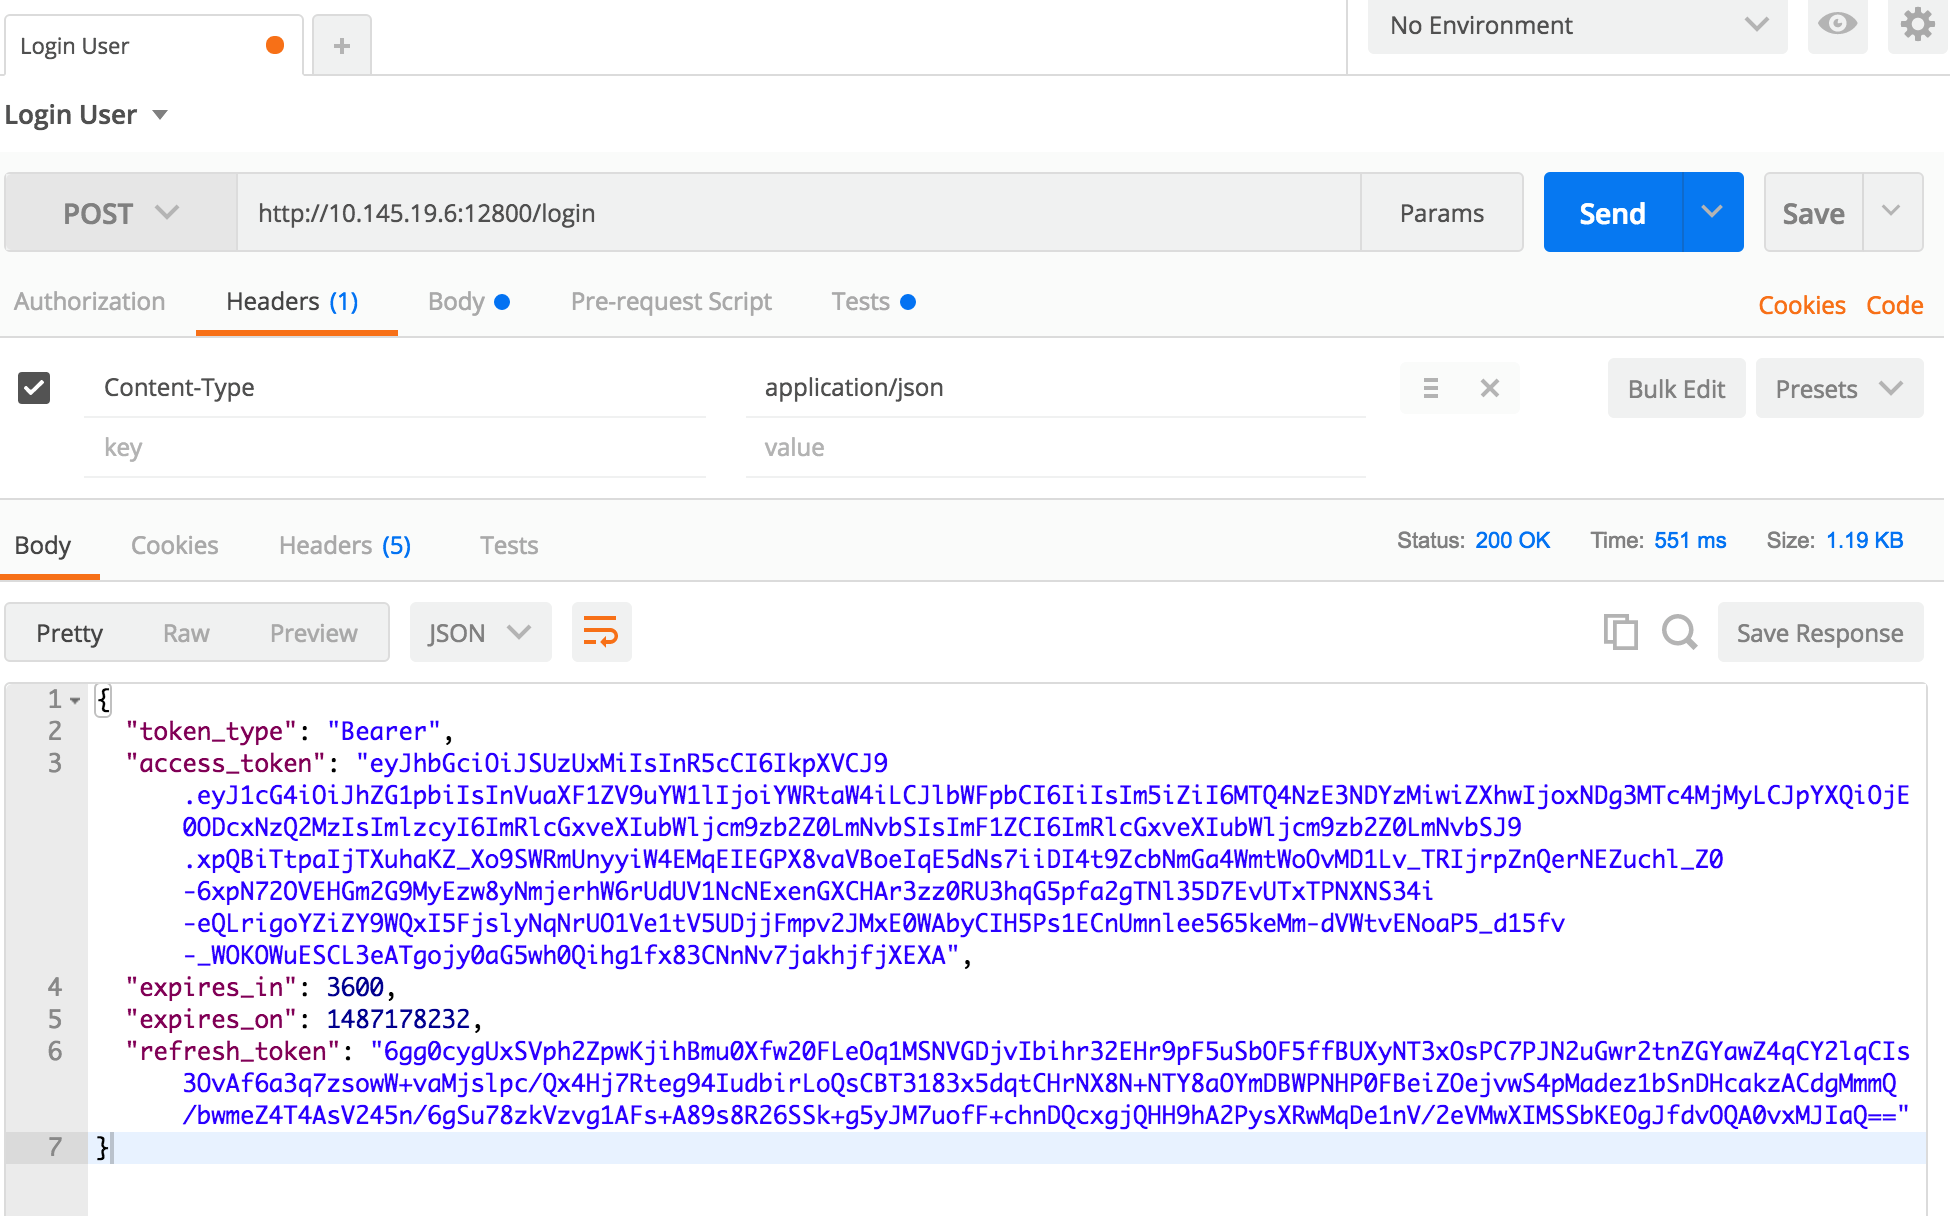
Login API Response is shown below which shows access token and this access token will be copied to global variable
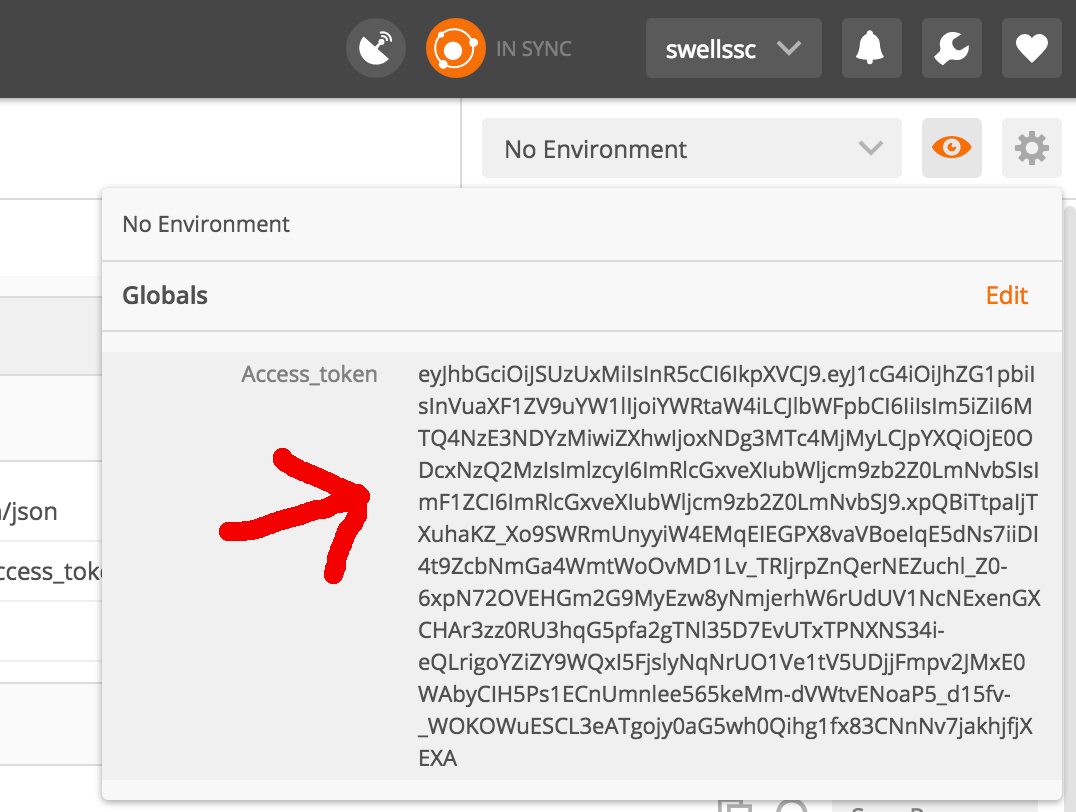
Verify global variable Access Token has the value retrieved from Login API call
Now we are authenticated, try out other API calls using this access token in the header
After Login API call is successful, you will notice that access_token is available in global variable. we can then use this access_token to make other API calls.
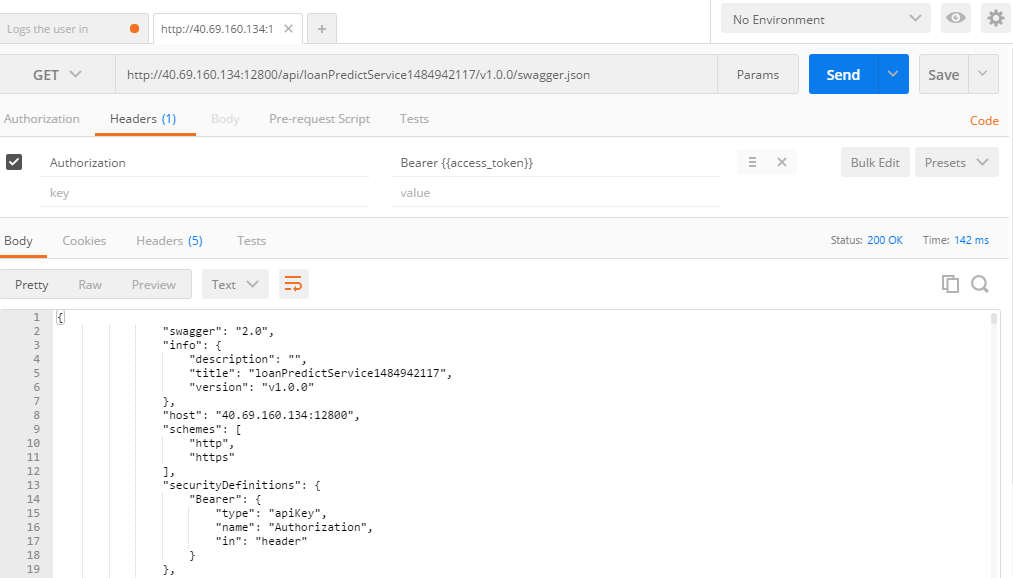
Get Swagger JSON
We can make REST call to GET swagger json.
- To GET swagger json file api call is GET /api/YOURSERVICE/VERSION/swagger.json
- Add Authorization Preset which we have created earlier
- When we click send, Access_token from global variable will added automatically in this GET API cal
Request

Response
Consume Loan Predict Service
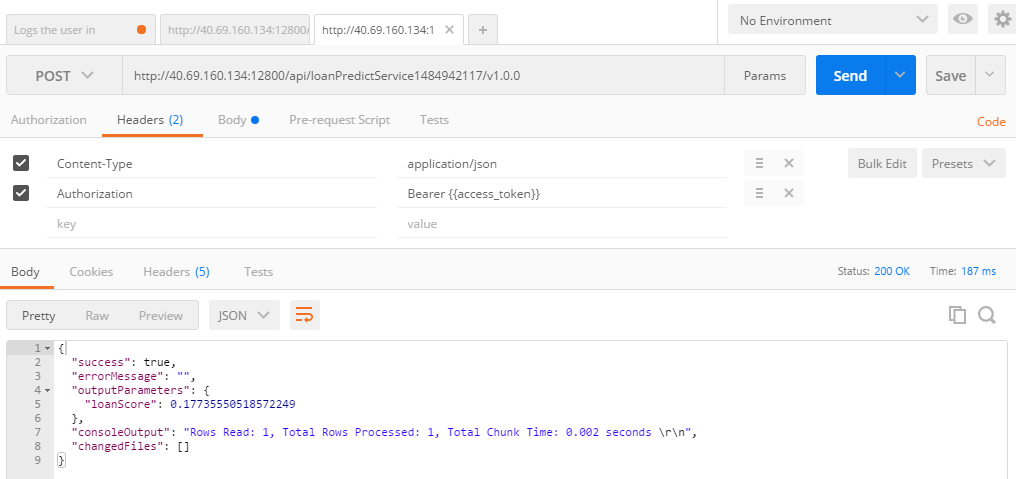
We can use REST API to consume loanPredict service, this is a POST API call so we will need to send Request Input parameters in JSON format.
Request
- We set one header as Key : Content-Type , Value : application/json
- We will use Preset -> Authorization for sending in Access_token


Response
