View and add work items
Azure DevOps Services | Azure DevOps Server 2022 - Azure DevOps Server 2019
Visual Studio 2019 | Visual Studio 2022
View work items that you created or are assigned to you. The Work items page offers several personalized pivots and interactive filter functions to streamline listing work items. Use this page to quickly find work items defined across teams within a project.
This article shows how to add any type of work item. However, use the backlog or board to add backlog or portfolio items—such as user stories, product backlog items, features, or epics. For more information, see Create your backlog, Define features and epics, and Start using your board.
To create test cases and link them to user stories, see Add, run, and update inline tests and Create test plans and test suites.
You can add work items in the following ways:
- Add work items from the Work items page
- Add work items from a Boards, Backlogs, or Sprints page
- Add work items using the Azure DevOps CLI
These methods provide flexibility in how you manage and track your work items within Azure DevOps.
Note
The Work Items page is available from Azure DevOps Services, Azure DevOps Server 2019 and later versions, and Visual Studio 2019 RC1.
Prerequisites
Permissions:
- To view, follow, and edit work items: View work items in this node and Edit work items in this node permissions set to Allow. By default, the Contributors group has these permissions. For more information, see Set work tracking permissions.
- To add tags to work items: Project-level Create new tag definition permission set to Allow. By default, the Contributors group has this permission.
Access levels:
- Project member.
- To add new tags to work items or to view or follow pull requests: At least Basic access.
- To view or follow work items: At least Stakeholder access. For more information, see About access levels.
- All project members, including those in the Readers group, can send emails containing work items.
Note
- Provide Stakeholder access to members who want to contribute to the discussion and review progress. These are typically members who don't contribute to code, but want to view work items, backlogs, boards, and dashboards.
- By default, all Contributors and Stakeholders in public projects can add new and existing tags. In private projects, Stakeholders can only add existing tags. To control the ability to create new tags, set the Create tag definition permission at the project level. For more information, see Change project-level permissions.
Note
- Provide Stakeholder access to members who want to contribute to the discussion and review progress. These are typically members who don't contribute to code, but want to view work items, backlogs, boards, and dashboards.
Open the Work items page
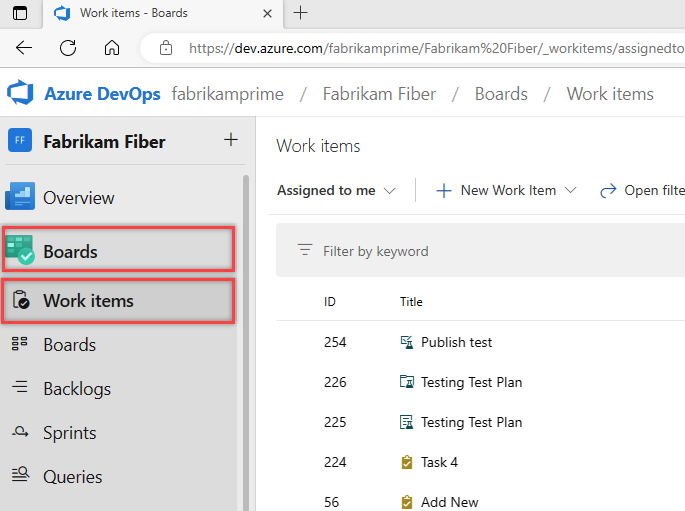
From your project, select Boards > Work items.
Note
The types of work items you can create depend on the process chosen when the project was created—Agile, Basic, Scrum, or CMMI. For example, backlog items may be called user stories (Agile), issues (Basic), product backlog items (Scrum), or requirements (CMMI). All these types describe the customer value to deliver and the work to be performed.
For more information, see About processes and process templates.
View work items
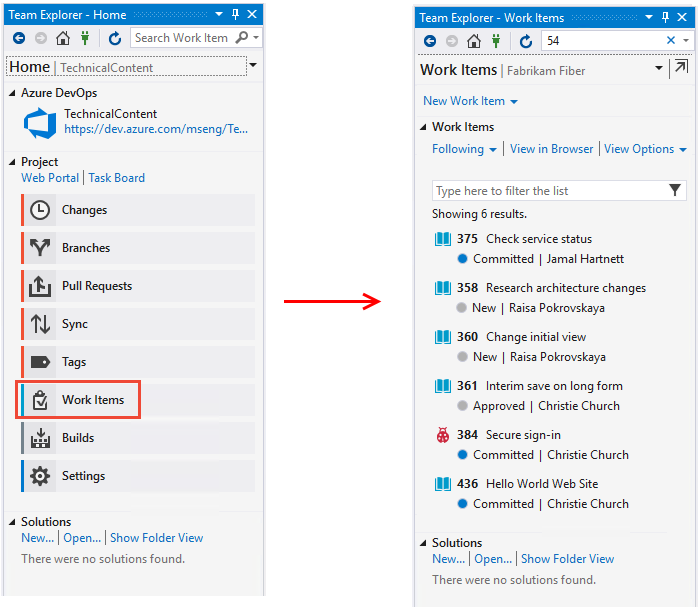
You can view work items assigned to you, work items you're following, work items in which you're mentioned, and work items that you recently viewed or updated via the web portal and Visual studio.
You can also view work items usings the Azure DevOps CLI.
Use the drop-down menu to focus on relevant items within a project using one of seven pivots. Additionally, filter each pivot view.
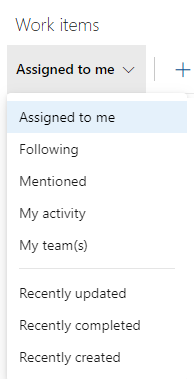
- Assigned to me: Lists all work items assigned to you in the project in the order they were last updated. Doesn't include items moved to the Removed category state. To open or update a work item, select its title.
- Following: Lists work items that you're following.
- Mentioned: Lists work items in which you're mentioned in the last 30 days.
- My activity: Lists work items that you recently viewed or updated.
- My team(s): Lists work items that your team members recently viewed or updated.
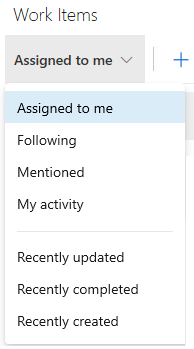
- Assigned to me: Lists all work items assigned to you in the project in the order they were last updated. To open or update a work item, select its title.
- Following: Lists work items that you're following.
- Mentioned: Lists work items in which you're mentioned in the last 30 days.
- My activity: Lists work items that you recently viewed or updated.
- Recently updated: Lists work items recently updated in the project.
- Recently completed: Lists work items completed or closed in the project.
- Recently created: Lists work items created within the last 30 days in the project.
You can sort your view by any column field selected from the Column Options dialog in the web portal. For more information, see Change column options.
Filter to create personal views
Filter each work item pivot view by entering a keyword or using fields like work item type (Types), State, Area Path, and Tags. The page remembers your filters for each pivot, providing personalized views across all pivots. For more information, see Filter backlogs, boards, queries, and plans.
Add work items
You can add work items from the Work Items page or from a Boards, Backlogs, or Sprints page in the web portal, from Visual Studio, or by using the Azure DevOps CLI.
Add a work item from the Work items page
Note
New work items are assigned the last Area Path and Iteration Path selected by the user.
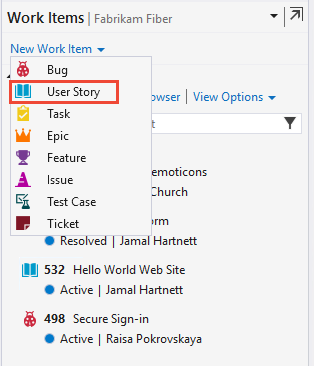
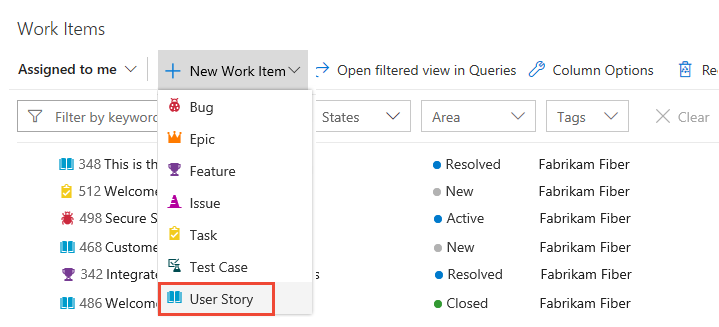
Select New Work Item and choose the work item type from the drop-down menu. For example, here we choose User Story.
Tip
Work items you add are automatically assigned to the current team's area and iteration paths. To change the team context, see Switch project or team focus. Enter a title and save the work item. You must save it before changing its initial default state.
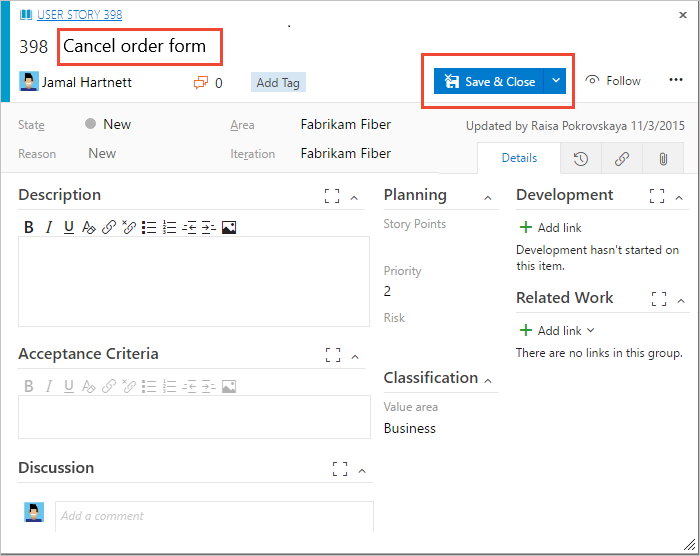
Add tags to any work item to filter backlogs, queries, and work item lists. Users with Basic access can create new tags, while users with Stakeholder access can only add existing tags.
Add a work item from a Boards, Backlogs, or Sprints page
Do the following steps to add a work item from your Boards, Backlogs, or Sprints page.
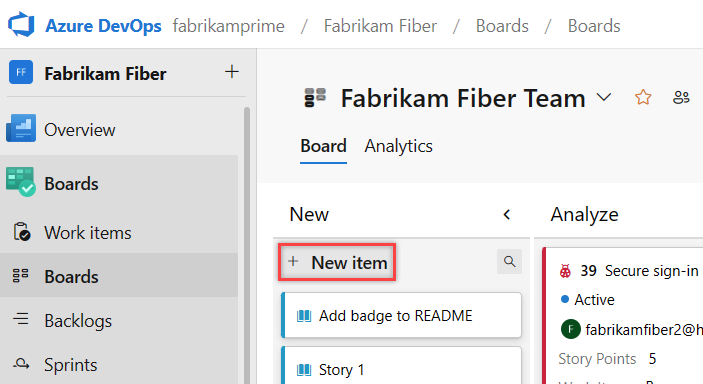
From your Boards, Backlogs, or Sprints page, choose the
 plus icon or + New Work Item. The following example shows creating a work item from a board.
Note
Depending on the process chosen when the project was created—Agile, Basic, Scrum, or CMMI—the types of work items you can create are different. For example, backlog items may be called user stories (Agile), issues (Basic) product backlog items (Scrum), or requirements (CMMI). All four are similar: they describe the customer value to deliver and the work to be performed.
For more information, see About processes and process templates. The Basic process requires Azure DevOps Server 2019.1 or later version.
Select a work item type from the dropdown menu, enter a title, and then select Enter. From a board, for example, you can also select Add to top. Before you can change the state from its initial default, save it.

You can add tags to any work item to filter backlogs and queries.
Added work items are automatically scoped to your team's default area path and iteration path. To change the team context, see Switch project or team focus.
Create as many work items as you need of the type you need to track the work you want to manage.
Open a view as a query
From the web portal, you can open any view, filtered view, or selected set of work items as a query. Choose Open in Queries or the Open selected items in Queries option from the context menu.
Queries provide the following features and more:
- Edit one or more fields of several work items
- Add or remove tags from several work items
- Change the work item type
- Delete work items
- Apply work item templates
For more information, see Bulk modify work items. For more information about queries, see Use the query editor to list and manage queries and Query fields, operators, and macros.
Use work items page controls
Use the following three controls to manage your views in the web portal.
| Control | Function |
|---|---|
| View/hide completed items | |
| Turn filtering On/Off | |
| Enter or exit full screen mode |
