Using Azure Automation to automatically shutdown your dev VMs
Azure Automation is a great way to perform routine maintenance on resources that are provisioned in Azure. As more and more dev teams move to Azure for their dev and test environments, I’m often being asked how I can shut down a set of VMs automatically (for instance, after-hours when no one will be working). This is easy to accomplish using Azure Automation, which is a service provided by Azure that allows you to schedule and run Powershell Workflow.
Quick Gotcha #1: There is a difference between what regular Powershell and what Powershell workflow supports. For instance, I wanted to write a script to Get the VMs that start with a prefix “dev”, I might write script it like this:
$VMs = Get-AzureVM | Where-Object { $_.Name -like “dev” }
If you try to run the above script within the context of a Powershell Workflow (which, again, is what Azure Automation uses), you will get an error stating:
Parameter set cannot be resolved using the specified named parameters.
So, to get it working in a Powershell Workflow, you need to change it to this:
$VMs = Get-AzureVM | Where-Object -FilterScript { $_.Name -like $prefix }
Notice the –FilterScript parameter. This is necessary because Powershell workflow does not support positional parameters. I spent a good 30 minutes tracking this down, and stumbled upon this thread that was provided a more detailed explanation.
With that out of the way, lets get to work.
Step #1: Create an Azure AD Account that will be used to authenticate and run the automation job. It takes just a couple of minutes. Follow this post here: https://azure.microsoft.com/blog/2014/08/27/azure-automation-authenticating-to-azure-using-azure-active-directory/. You can also use certificates, but my example uses Azure AD for credentials.
Do that and come back, just remember the account name that you created.
Step #2: From the Azure Portal (https://manage.azure.com) click on “Automation > Runbook > Quick Create”. And then enter the runbook name, automation account, subscription and region (note: you may have to create an automation account if one doesn’t already exist)
Step #3: Select your runbook, and click the Author tab to edit the script. In the script I am iterating through all of my subscriptions, getting the VMs that have a name that begins with “dev” (this is the naming convention that I use, you’re free to use whatever convention you like. Or, a better way would be to use a Resource Group or a dedicated subscription to target).
Note: Edit the subscription names and the credential to use your own, of course.
You can run the script by clicking the “Test” button at the bottom of the portal. If it succeeds, move on to the next step.
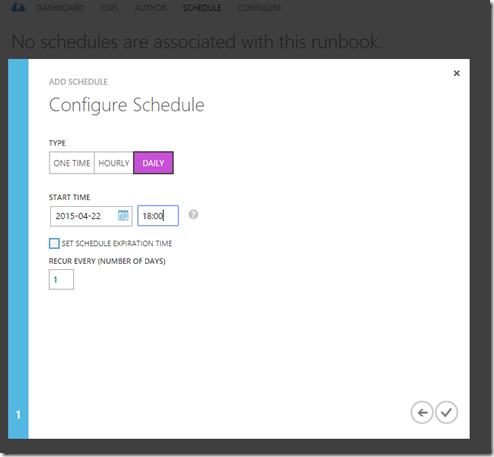
Step #4: Publish and Schedule the runbook. You can publish the runbook by clicking the “Publish” button at the bottom of the portal. Then, click on the Schedule tab to associate this runbook with a schedule.
In the below screenshot, I execute the runbook every evening at 6:00 PM.
That's it! There is so much else you can do with Azure Automation. Be sure to take a look at the other sample scripts in the gallery.
Comments
- Anonymous
April 27, 2015
I think a step is missing after the creation of the Runbook in #2. If you get "Get-AutomationPSCredential returns NULL" error, then do the following: After the newly created automation account, go to Assets, "Add Setting", "Add Credential", "Windows PowerShell Credential", type in a name (yourazureautomationaccount), specify user name (yourazureautomationaccount@YourADDirectory.onmicrosoft.com) and password. Ensure the Azure AD account has co-admin rights to the subscription.

