A Minimal MVVM UWP App
With the introduction of Win 10 and Universal Windows apps I wanted to try out some of the new XAML features like compile-time binding with x:Bind.
I started by looking for a very simple Universal Windows Platform (UWP) sample that showed how to build an MVVM app with create, read, update, and delete (CRUD) operations over some data source. Surprisingly, I really didn’t find anything specific for UWPs. Of course there are many samples for WPF but they required a rewrite for UWP and they don’t leverage the new XAML capabilities making them more complicated than necessary. Similarly the core UWP XAML samples don’t show how to do CRUD and while they covered new capabilities they include a lot of unrelated stuff that makes them less useful as a starting point for your own apps.
So I thought it would be interesting to see how simple we could make an MVVM UWP example and still support full CRUD. As you can see below the ViewModel for the resulting app is less than 100 lines of code – which is pretty reasonable since we need to cover all the corner cases associated with adds, updates, and deletes – and get those connected to the data layer. The XAML View is also simple – only 25 lines of XAML and no code behind other than initialization.
If you work through this example, you can see how it uses the new x:Bind capability. Creating and debugging bindings in XAML has previously been a little touchy but now with x:Bind you get typesafe code at compile-time which makes it easier to get the bindings right and they run faster. In addition the new x:Bind event capability reduces the complexity of implementing operations on the ViewModel.
Why MVVM?
Before we look at the code, I wanted to touch on whether it is worth the effort to use an approach like MVVM (Model, View, ViewModel). The basics of MVVM are pretty simple…
Model. Think of the models as the business objects. A Model should know about nothing about the user experience - specifically the View or how it is implemented using a ViewModel. The Model only interact with system and data services.
ViewModel. The ViewModel is where you encapsulate any code or data that your UX or View will need. It is important that ViewModel only knows about and encapsulates the Model – but it shouldn’t be responsible for any Business Logic or Business Constraints – that should all be in the model. And on the other side, the ViewModel should know nothing about the specifics of the Views and UX that use it.
View. This is where you create the user experience – in Windows apps you do this declaratively with XAML markup language and design tools. The View uses properties and actions on the ViewModel to get the job done.
Since the MVVM approach is so conceptually simple, why do a lot of people get frustrated with it? One challenge was that historically the approach was fairly opinionated requiring base classes like DependencyObject and implementations often required a lot of coding to do simple things like connecting up a command to XAML. Another challenge was that a lot of developers felt that execution overhead of runtime bindings – and challenges debugging runtime bindings – ultimately led them to abandon binding and simply do imperative code to implement the UX.
With Windows 10 and Visual Studio 2015 many of the challenges have been addressed. As you can see we can now easily build an MVVM app using compile-time bindings that eliminates runtime overhead and reduces the likelihood you will need to debug bindings at runtime. We also show how x:Bind to methods means we don’t need to implement Commands and we show how two new C# language features [CallerMemberName] and nameof can help make it easier to implement INotificationPropertyChanged.
MVVM was already a well-proven approach that has been used to build many sophisticated and great performing apps and now with these new capabilities MVVM is more approachable than ever.
An Overview of the App
One of the key goals was to keep this example as simple as possible. But we also want the example to represent what a developer would actually need to do to build an app using MVVM. And getting all the CRUD operations in place over a real world database or other system isn’t trivial. So here is how we approach this.
At the core of the app is a Business Object – our Model. It is called Organization. It is just an in-memory “database” of People objects and an organization Name. The People collection is just a list where each Person has a Name and Age.
In terms of implementing the model we leverage some scaffolding code that implements a fake data service that pretends to communicate with a cloud service to manage the data – but here our stubbed out service runs locally and just prints messages for debugging / logging purposes. Again, the only reason to do this is so we have a realistic sense of what would be involved with building this over real world data and business objects.
In terms of the user experience all we need is a View that shows the list of people in the Organization and enables the user to Add or Delete People, or Update their Name and Age properties – nothing complicated. Our View is written entirely in XAML with no code behind other than initializing the ViewModel.
Most of code in the sample is focused on building the ViewModel for the Organization business object. The OrganizationViewModel keeps track of a collection of People that is kept in sync with the model. It also keeps track of a SelectedPersonIndex from the collection of people so the View can perform edit and delete operations on the current selection.
All the code can be found here on GitHub.
Building the App – A Walkthrough using Visual Studio 15
Building this app will consist of the following steps:
Create the project
Set up the Data layer. Here will use an existing FakeService that simulates HTTP operations on a cloud service.
Build the Models. This is the Organization class. It will use the FakeService.
Build the ViewModels. This is the OrganizationViewModel that will point to an Organization and provide both state and actions to the Views.
Build the View. We simply modify the MainPage.xaml file to add a list, a couple of edits fields, and a couple of buttons. Then we will use x:Bind to attach these controls to ViewModel.
Step 1: Create the Project
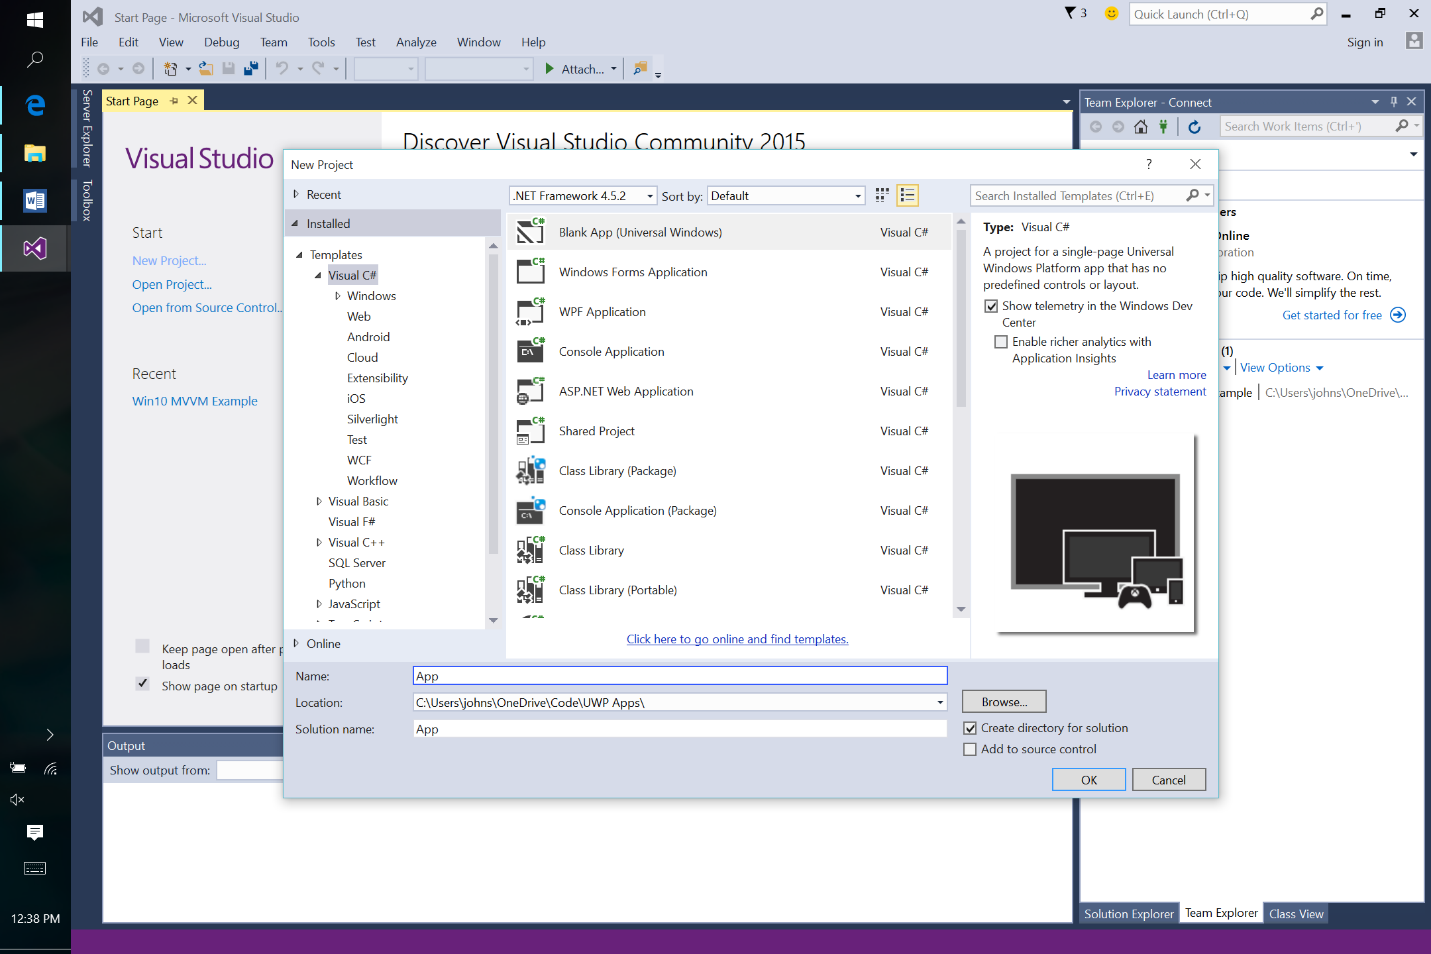
In Visual Studio 15 close any open solutions and then create a new project. Select Blank App (Universal Windows) and name your project. FWIW, I recommend checking source code management and using GIT as it comes in handy as you make changes to your project and later want to publish it.
Step 2: Create the Data Layer
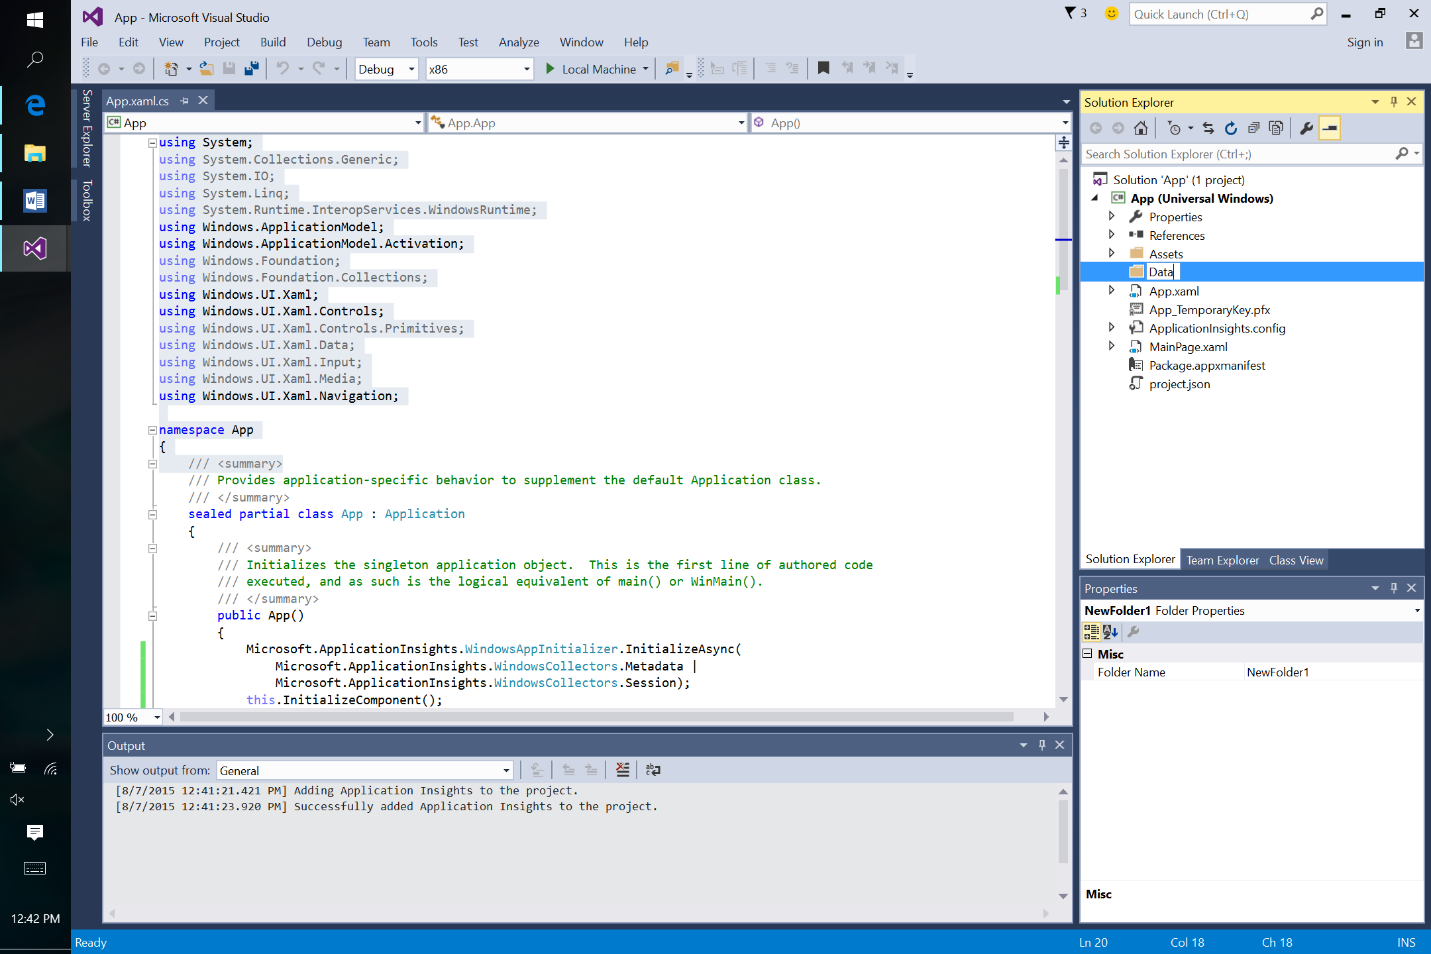
Next right mouse click on the solution and Add a New Folder called Data.
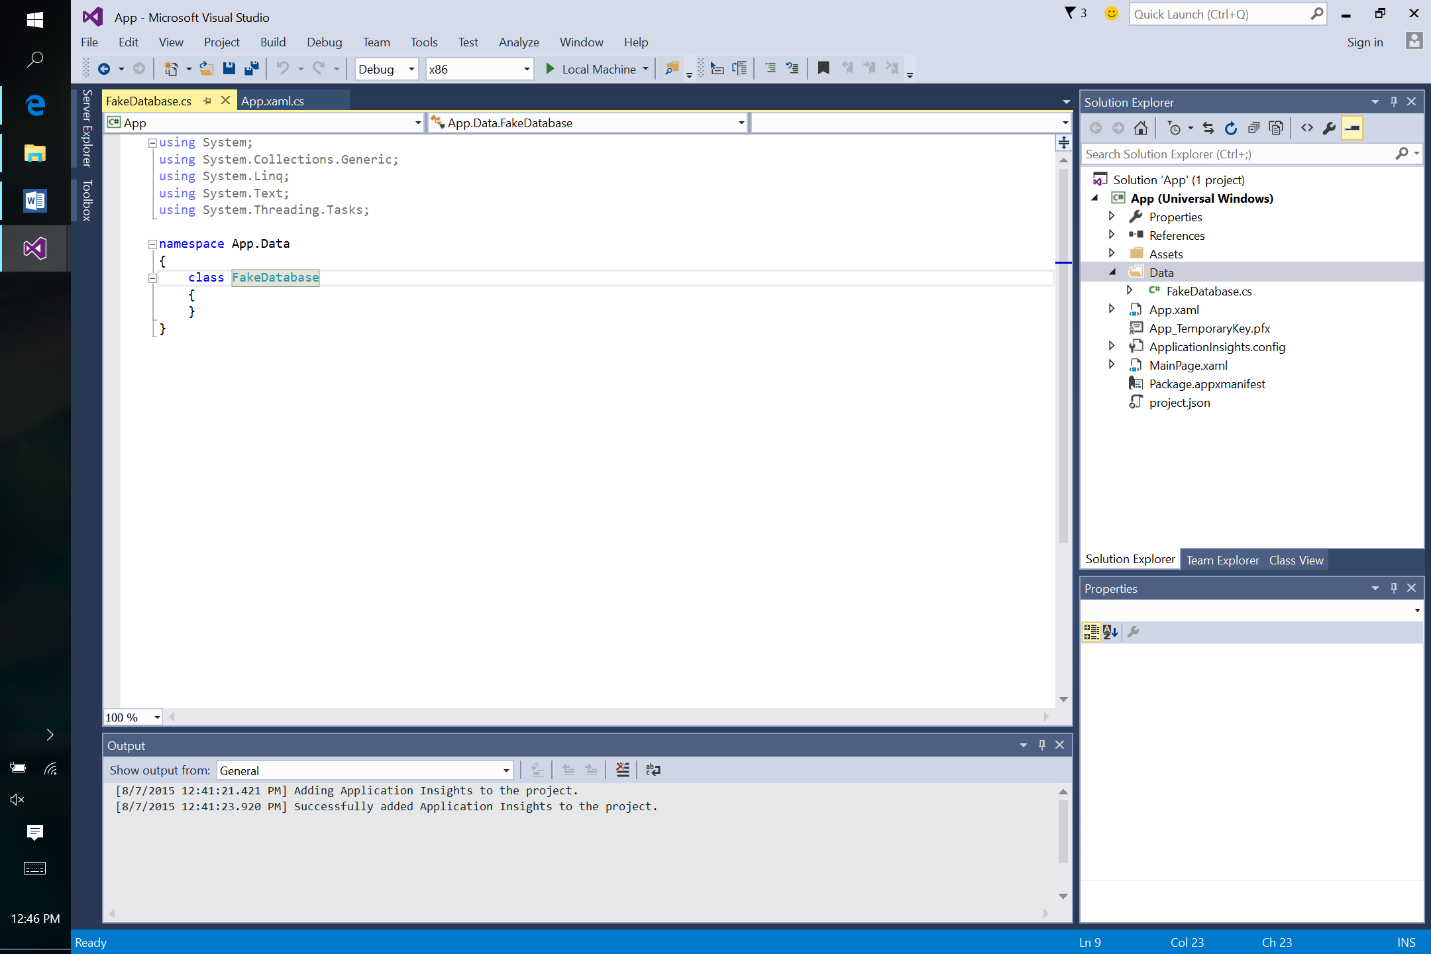
Now right mouse click on the Data directory and add a new C# Class called FakeService.cs.
Replace the namespace and included class with the following code:
As you can see all our FakeService does is simulate GET, INSERT, and DELETE operations against a cloud service. When you run the program you can watch the output window to see the simulated operations on the database.
Step 3: Create the Models
Create another New Folder for Models.
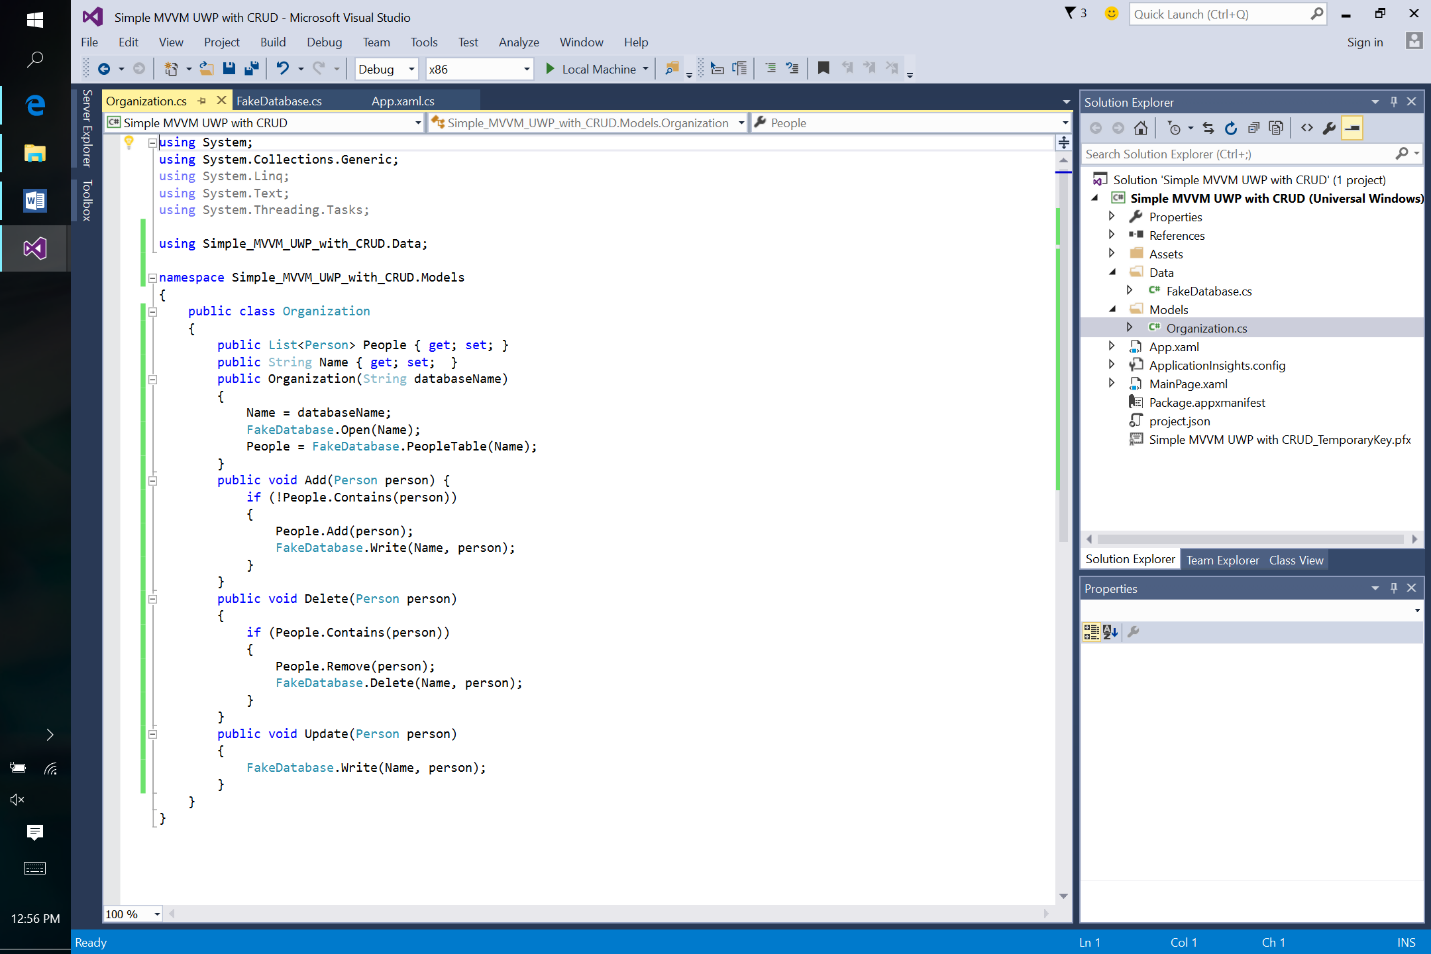
Then go to the Models folder in the Solution explorer and right mouse click to add a class called Organization.cs to this folder. Replace the namespace and class with the following code:
As you can see the Model only depends on the Data layer. And it simply calls the simulated cloud service to load and update people in the organization.
Your project should look like this now.
Step 4: Build the ViewModels
So far we’ve taken care the models - the business logic including connection to the data layer. Now we get to the interesting part of the MVVM work – building the ViewModel.
For those of you less familiar with the MVVM approach, here is a quick summary a two important constructs:
INotificationPropertyChanged. INotificationPropertyChanged (or INPC) is an interface that describes how an object can participate in XAML bindings. The Binding system knows this interface and it uses it observe when properties on your objects have changed. We will wrap the Person object and implement the INPC interface to create the PersonViewModel. And we will do the same for the OrganizationViewModel.
ObservableCollection. Normal Lists and other IEnumerables don’t support notifications of changes that the View will need. The ObservableCollection class does this so we create one of these within our OrganizationViewModel to keep track of the people in the organization. In order to do this we will need to keep the Organization’s collection of people in sync with the ViewModel.
Let’s go. Create a new directory for ViewModels.
And add a Class called PersonViewModel.cs.
Now we could implement our ViewModel and write the straight-forward code for supporting the INotificationPropertyChanged interface. But to save some typing we are going leverage a helper class that make it easy to add INotificationPropertyChange to existing classes.
To do this let’s add another file to our ViewModels directory called ViewModelHelpers.cs and paste in following code replacing the existing namespace and class.
Go back to PersonViewModel.cs and add the following code.
As you can see we’ve created a ViewModel for a Person that is called PersonViewModel. This ViewModel maintains a reference to an underlying Person and we create getters and setters for each of the properties that rely on the underlying Person for the storage and it sends INotifyPropertyChanged events when the property is set. Notice how we use the NotificationBase<Person> class to do the default implementation of INotificationPropertyChanged. We also use the SetProperty helper functions to implement our getters and setters. The NotificationBase uses a nice new feature of System.Runtime.CompilerServices called CallerMemberName at compile time so we don’t need to manage the String for property names. Using the NotificationBase<T> is a convenient way to wrap existing business objects that don’t already support INPC. It is good approach especially when the business objects are large – as the pass through capability doesn’t require duplicating fields. Now add a new Class for OrganizationViewModel.cs and add the following code replacing the generated namespace and class.
This is really the core of the application. Let’s look at it in some detail. We create the ViewModel for the Organization class and call it OrganizationViewModel. Like the PersonViewModel it also inherits from NotificationBase to provide a default implementation of INotifyPropertyChanged. Next we add an ObservableCollection<PersonViewModel> property called People to provide a XAML bindable implementation of our List<Person>. This ObservableCollection really doesn’t do much other than get loaded through to the underlying model. We initialize the collection in the constructor and when we make changes to the ObservableCollection we update the model. Next we add two fields that are interconnected – a SelectedIndex that we can get and set from XAML and the SelectedPerson that corresponds to the SelectedIndex. Our user interface View will move the SelectedIndex as the user clicks on the list. Once a user has selected a Person the View enables the user to update the properties of the SelectedPerson. Notice that when we update the SelectedIndex we also fire a property changed notification on the SelectedPerson.
We add actions for Add and Delete that are just normal methods on the OrganizationViewModel – no fancy Commands or anything else required. The View will be able to bind to these actions in response to user input. As you can see they send the changes to the collection and the underlying model. One last important part of the model to note: when a property is changed on one of the PersonViewModel objects, they fire an event. We catch event this in the OrganizationViewModel and use to send an update to the underlying model and ultimately to the data service. To enable this we add person.PropertyChanged += Person_OnNotifyPropertyChanged in the Add operation.
Step 5: Create the View
Okay, we are mostly done with the coding part of our application. Now we just need to create the View and we will do that using XAML. Open the default MainPage.xaml file. Paste in the following in place of the existing Grid.
In addition, add the following namespaces to the <Page> tag:
xmlns:viewModels="using:ViewModels"
Our view is very simple – it consists of a Grid with two columns. On the left is our list of People. And on the right is our edit fields.
Inside of each Grid columns we have a vertically oriented StackPanel. On the right this StackPanel contains the ListView and the Add button and on the left it consists of the edits fields and the Delete button.
Now let’s review the bindings.
In all cases we are using the high performance x:Bind compile time bindings. This not only Binding runtime overhead but it generates typesafe code ensure everything is hooked up properly before we even run the app.
Most of the bindings should be fairly obvious. On the list view note on the DataTemplate we specific the x:DataType to our ViewModelPerson so that the list can bind to fields in a typesafe manner.
The new x:Bind syntax makes it very easy to simple call the Add and Delete operations on our ViewModel – we simply x:Bind to these methods.
It is important to note that while x:Bind offers a lot of great benefits from performance to IDE support, it is worth mentioning that it is not suitable everywhere. For instance x:Bind it does not support ElementName binding or UpdateTriggerSource.
Now if you tried to compile this right now it would fail. This is great. Because it is based on compile time bindings, Visual Studio catches the fact that we don’t anything called Organization available to bind against.
So go to the code behind page for the View by opening MainPage.xaml.cs. Then add a property called Organization and initialize it. Here is the code.
You will also need add a “using ViewModels” line above. Now the app should compile. Try it out.
One of the most important things to note is that each of x:Binds to properties explicitly set the Mode. It is very easy to forget to set the Mode on an x:Bind in which case it defaults to OneTime. So if you see your user interface start to work but not update – check the Mode.
If you run the code now you’ll note that the edit fields are visible even when there is no SelectedPerson. To address we’re going to use a little trick. We going to add a Converter to the Page.Resources that will let us give us back Visible if there is the SelectedPerson is not null and Collapsed otherwise.
To do this Add a New Folder to the Solution call it Converters. Then Add a new Class to the Converters folder called ObjectExistsToVisible.cs. Here is the code that you should add replacing the generated namespace and class.
Now go back to the MainPage.xaml file.
Add the following to the Page attributes.
xmlns:converters="using:Converters"
And then, in order to use the Converter in our XAML we need to load it so add the following right before the Grid.
Now let’s use the converter. To do this use a x:Bind on Visibility attribute of the right-hand StackPanel – the one with Grid.Column=”2”. The StackPanel should now look like this:
We are done. Try it out.
Next Steps
Hopefully this shows that implementing CRUD on data in an MVVM UWP App can be accomplished fairly easily. We used the new x:Bind approach works over our View and OrganizationViewModel and demonstrated how it helps you find Binding errors at compile-time. We also show using x:Bind to bind events directly to ViewModel methods making it easy to code up actions.
If we wanted to turn this sample into a production application there are a few things you will need to think about:
In terms of improving the solution it is clear we can make the View look a lot better – here we were trying for the simplest implementation.
You would probably want to find and use a MaskedTextBox (or intercept the TextChanged operation and apply Int32.TryParse) on the Age text – otherwise you will run into cases with an exception being thrown when the user enters something that is not an Int32. Related to this, the current default for TextBox is to update the binding when the focus leaves the TextBox. This can cause problems if you navigate away by selecting the list. As mentioned earlier you can use a regular Binding and set UpdateTriggerSource to fire when the text is changed.
When implementing INotifyPropertyChanged we show how to do it manually, but you might want to look into implementing it more automatically through code weaving; e.g. something like Fody Property Changed found at https://github.com/Fody/PropertyChanged. While the Fody approach is great we didn’t use it in this example to keep the number of moving parts to a minimum and also because Fody Property Changed requires some manual steps to get it working with UWP apps.
As you start to deal with larger amounts of data you will want to look into UX virtualization and implementing ISupportIncrementalLoading.
If you want to add sorting and filtering to the list you probably want to leverage a CollectionViewSource – a good simple description of how to do that is here Filtering Data Using CollectionViewSource.
In a subsequent blog post I’ll also show you can use a typesafe implementation of the data set approach to eliminate some manual work – we didn’t include it here since we wanted to keep everything stock. Some of the key benefits of typed data set approach is that you get a data source independent Model and you can use this as a foundation to easily implement sophisticated ViewModels over the data with very little code.
Finally, once you’ve got all the basics running, there are many interesting improvements you can make to MVVM apps. For example, some organization use dynamic lookup and assembly loading to connect together their MVVM components – this can be really handy if you want to be able to be able to update a running version of your application.


