Deploying Java WAR File to Azure Service Fabric using VSTS
It is very easy to deploy any guest executable to Azure Service Fabric. The process is well documented here. However, process described there is using PowerShell Commandlets which is great if you are working on your machine.
However, in production scenario, you would want to automate deploying applications to Service Fabric using CI/CD pipeline.
Among many services offered by Visual Studio Team Services (VSTS), Service Fabric Deployment Task under Build options can be leveraged to automate this process.
While guidance to deploy .NET application exists here, I didn't find much guidance available for cross platform teams such as Java development team using Eclipse. This post tries to address some common issues faced by such teams to deploy their applications to Service Fabric.
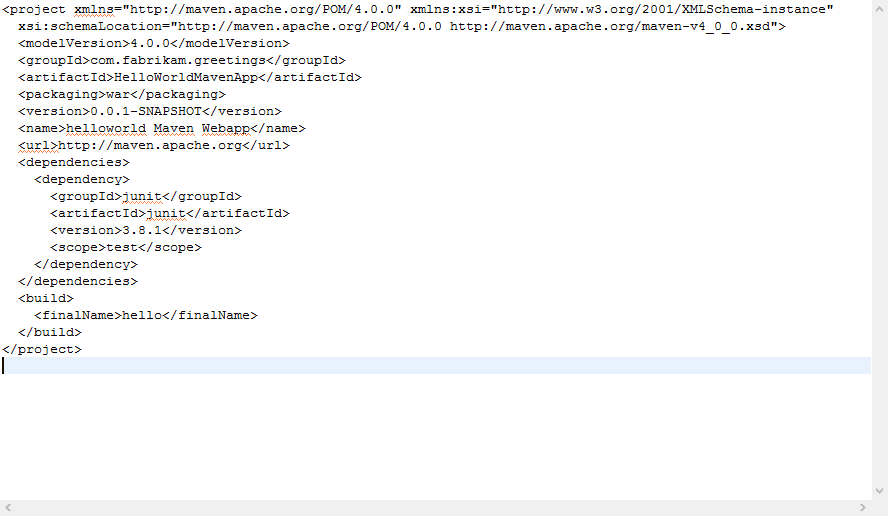
I've downloaded a sample Maven webapp from here. It is of type Maven web app archetype. I add a POM.xml which has structure as below to web app.
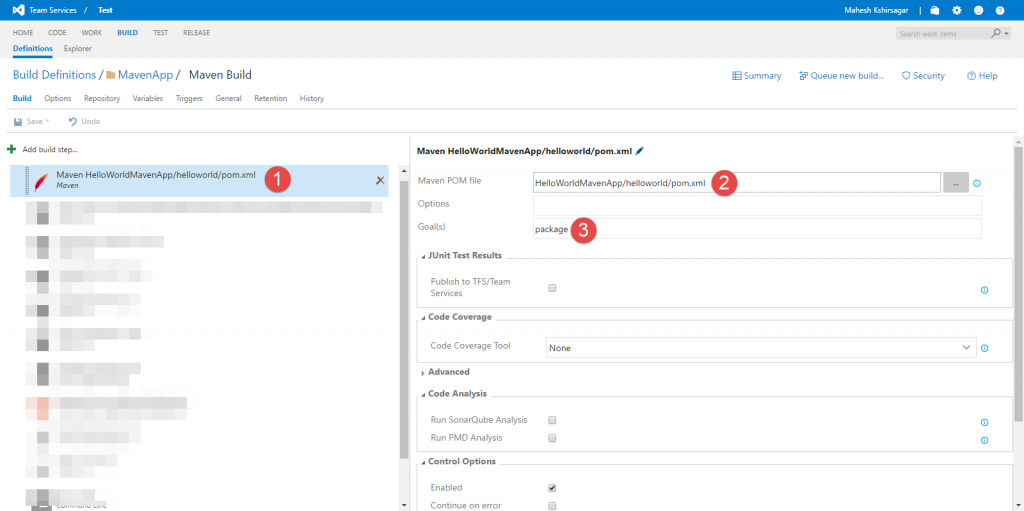
Next, I set up a Maven build task in VSTS.
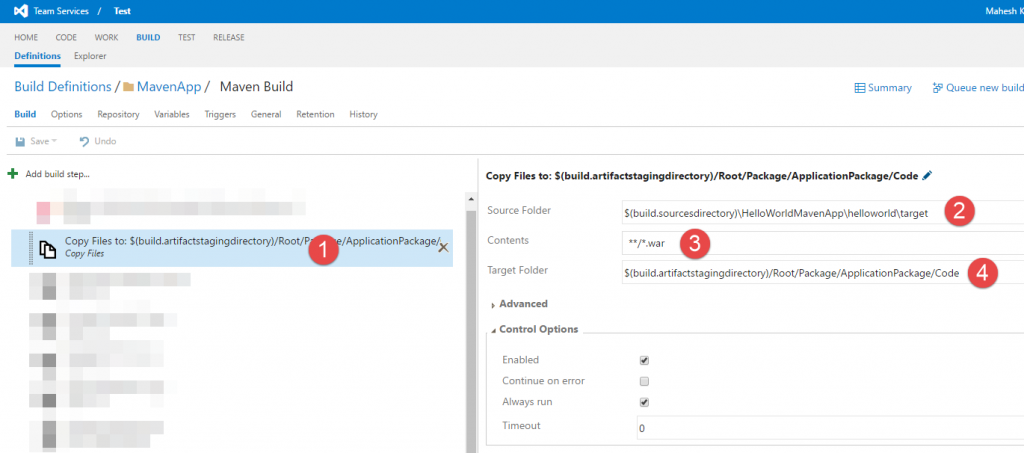
I then add a "Copy Files" task to build. This task will move WAR file to a specific location. The requirement to move to a specific location comes from the guidance available here. For service fabric deployment, package needs to have folder structure as below.
 |-- ApplicationPackage
    |-- Code
        |-- hello.war
    |-- config
        |-- Settings.xml
    |-- data
    |-- ServiceManifest.xml
|-- ApplicationManifest.xml
I've made some changes to the original folder structure. Notice that Code is in proper case (C is CAPS) and existingapp.exe is replaced by hello.war file.
My Copy Files Task looks like below.
Next we need to have 4 more File Copy tasks. But before tasks, lets talk about these files first.
ServiceManifest.xml: This file describes the service including its code, configuration, etc. I want to highlight the ServiceTypeName and CodePackage Name settings.
In the original guidance , value for ServiceTypeName setting is NodeApp. Value for this setting should be name of the directory in the package where this file will be copied to. As shown in the folder structure above folder containing ServiceManifest,xml is ApplicaitonPackage. That's the value I have set in my ServiceManifest.xml.
Similarly for CodePackage Name, value should name of the folder that contains WAR file. In my case, it is Code.
My ServiceManifest.xml looks like below. 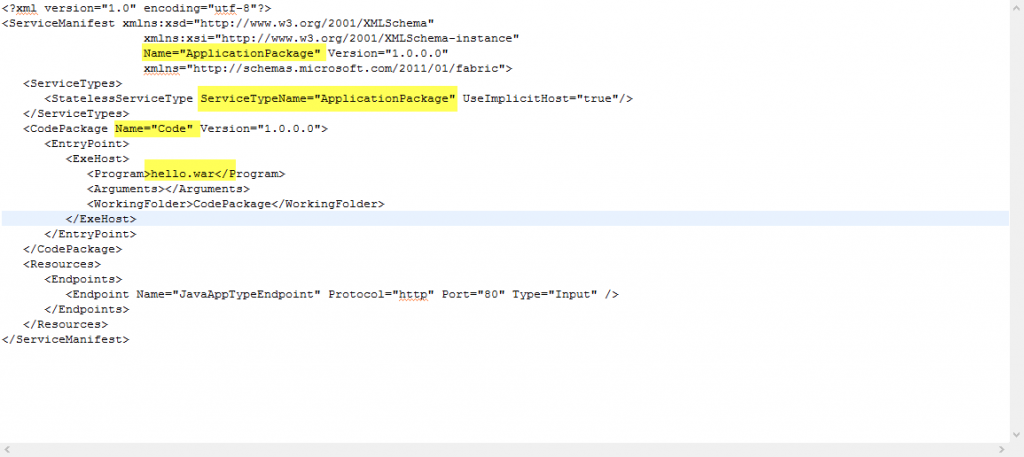
ApplicaitonManifest.xml: This file describes the service fabric applicaiton. It can contain more than 1 service definitions. In a way, it a deployable wrapper around service. Noteworthy parameters here are ServiceManifestName , ServiceManifestVersion and ServiceTypeName. Values for these parameters should match the values as defined in ServiceManifest.xml. My ApplicationManifest.xml file looks like below. 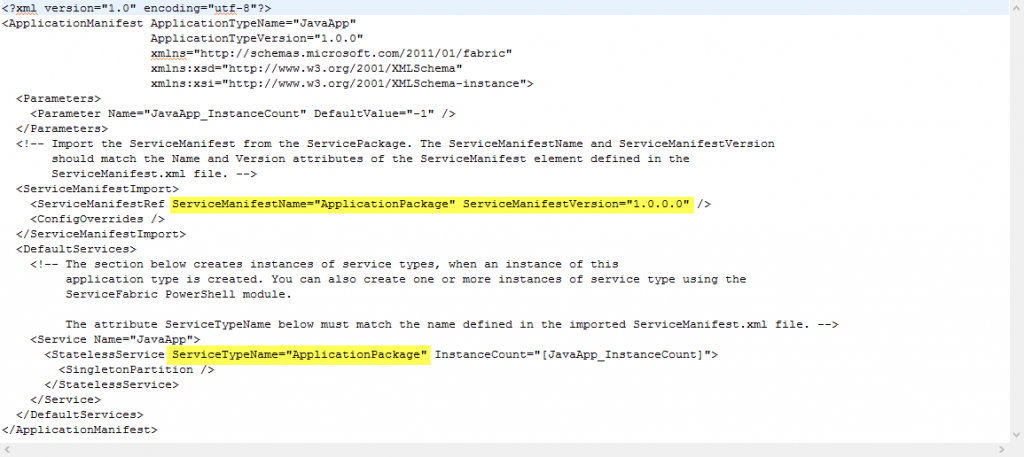
PublishProfile.xml: This is not a Java file. It is required by the Service Fabric Deployment Task so we need to include it as part of Java project. It contains the service fabric cluster for the deployment and an additional ApplicaitonParameters.xml file. My PublishProfile.xml file below.

ApplicationParameters.xml: This is also not a Java file :-) but is required (again!) by Service Fabric Deployment Task. 
After adding all these files in Java project, it looks like this.

Now back in VSTS, I define the 4 file copy tasks as below. Please note the target paths for each File Copy operation.
Application Manifest File Copy 
Service Manifest File Copy 
Publish Profile File Copy 
Application Parameters File Copy 
After File Copy operations, I add a "Publish Artifact" task. This will let me know if the package generated has structure necessary for the Service Fabric deployment.
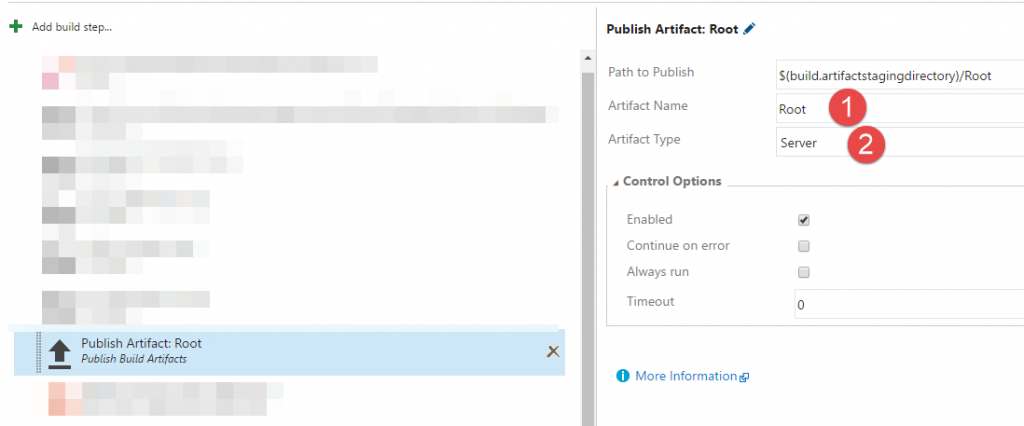
At this stage, you can save your Build definition and run it to verify the package structure being created after the "Publish Artifact" task. You should see result like below.
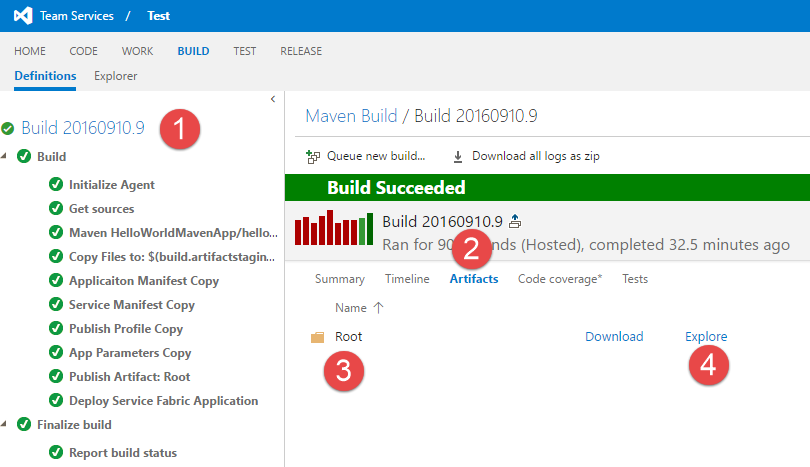
Click "Explore" link and observe the content inside "Root" folder. It should look like below.
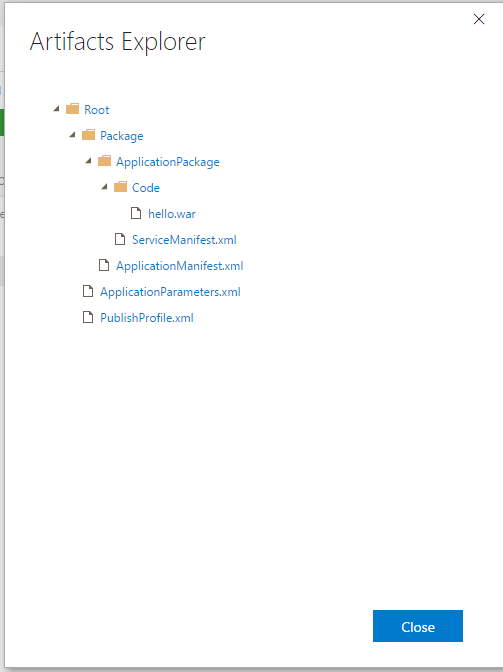
This folder structure matches with the structure as mentioned in the guidance. ApplicaitonParameters.xml and PublishProfile.xml files do not interfere with rest of the content.
Now it's time to deployment to Service Fabric!
I created the Service Fabric Deployment Task with the definition as below.
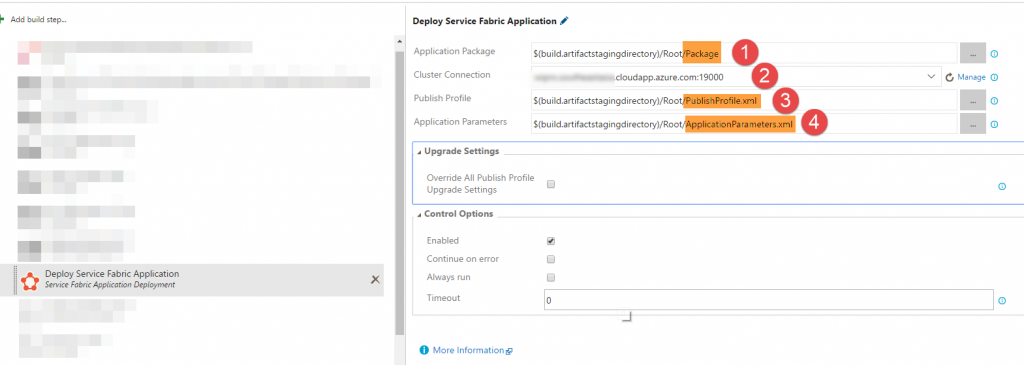
I specify the "Application Package" as the folder that contains the ApplicaitonPackage folder. Then, I specify my Azure based cluster endpoint. Finally, I provide the PublishProfile and ApplicaitonParamters xml file paths, which are inside my Root folder.
After you run the Build again, you should be able to see the successful deployment.
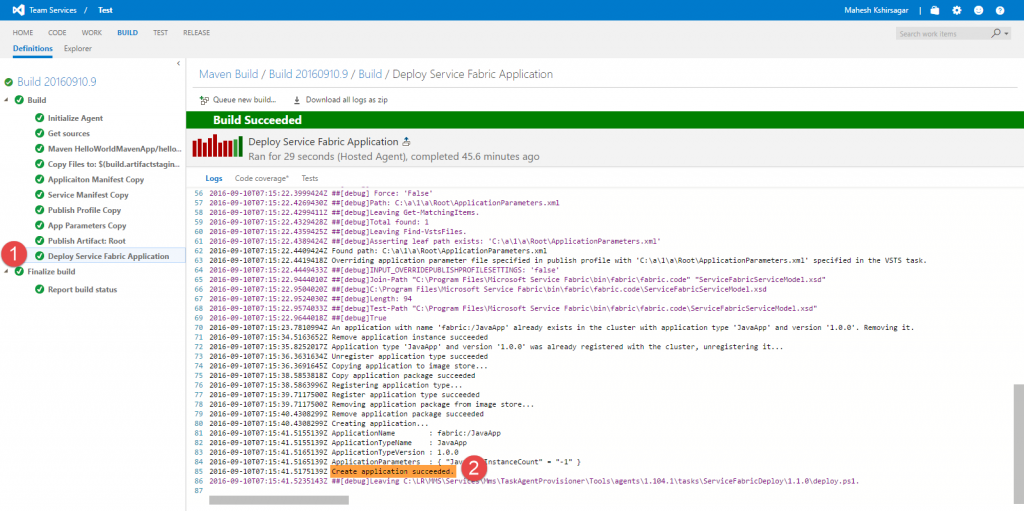
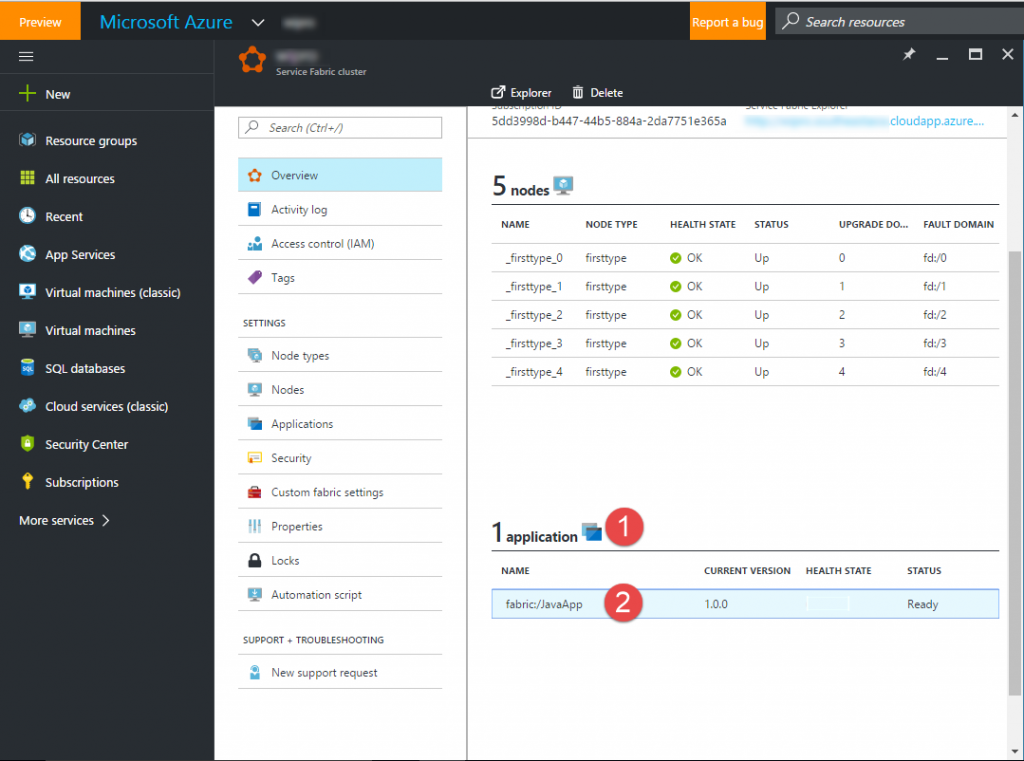
You can then navigate to Azure Portal and see the Application being listed there.
Complete Java application code attached below.
Comments
- Anonymous
September 22, 2016
I followed Similar setup, but my war file doesn't have tomcat bundled in it, it is just application archive alone. I faced the deployment errors in Service Fabric explorer "Error event: SourceId='System.Hosting', Property='CodePackageActivation:Code:EntryPoint'.There was an error during CodePackage activation." But i got stackoverflow suggestions to include it as embedded Server (http://stackoverflow.com/questions/39622029/java-webapp-deployment-in-azure-service-fabric-explorer). Was that true in your case?