Running Spring Boot Java application as a Microservice in Service Fabric - Part 2
Previous post covered creating a fat JAR application and running it locally.
In this post we'll look at how we can run this JAR application as a microservice in Service Fabric. Service Fabric Plugin for Eclipse makes it very easy to deploy from Eclipse on Linux/Mac platforms as described here. If you are using Windows as a development/deployment platform you can use Visual Studio 2017 with Service Fabric SDK. In this post, I'll use Visual Studio 2017.
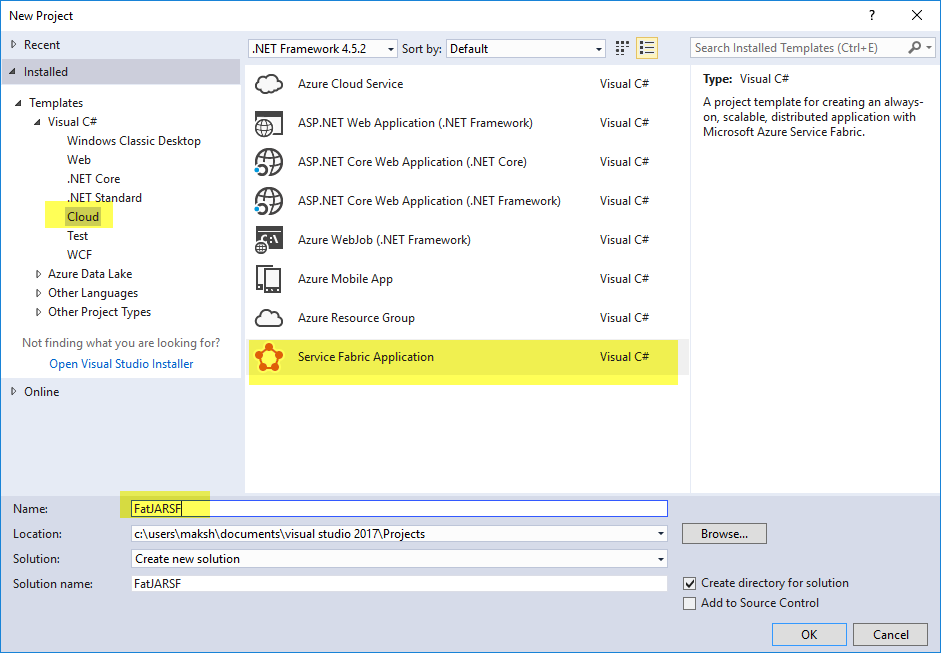
Start Visual Studio and click File-->New. Select "Cloud" under Templates and "Service Fabric Application" on the right-hand side pane.
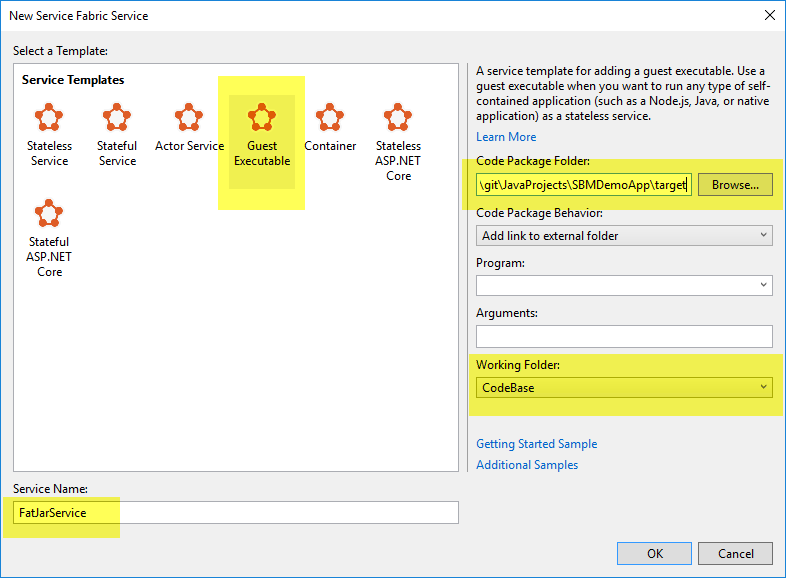
In next dialogue, select "Guest Executable" as a service template. Folder location containing JAR file as "Code Package Folder" and name of service in "Service Name".
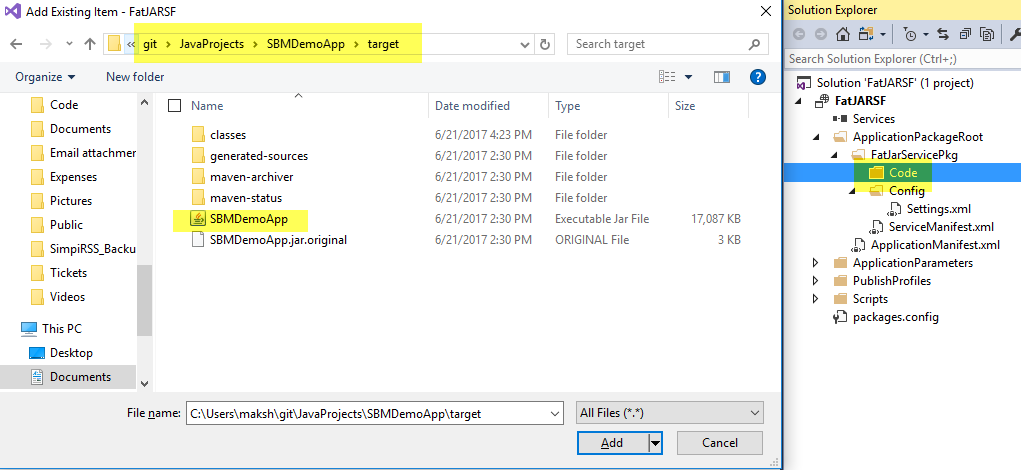
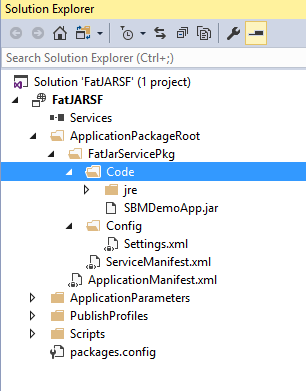
Visual Studio creates a solution structure as shown below.

Now, lets add the JAR file to "Code" folder shown above. To do so, right click it, select "Add an existing Item", navigate to folder containing JAR file and select it.
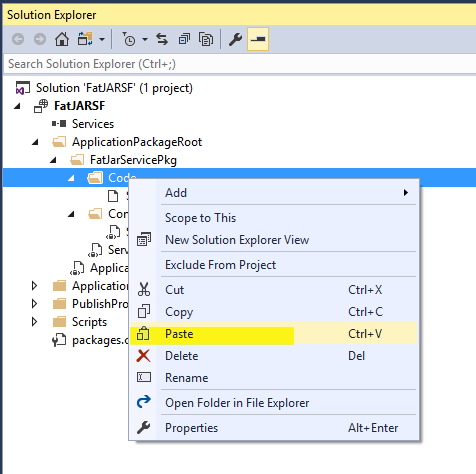
Along with JAR, we also need to upload runtime to run this JAR file. Typically, this is JRE. It generally resides in the JDK installation folder (C:\Program Files\Java\jdk1.8.0_131).

Simply copy this folder and paste it on "Code" folder in VS.
After copy, solution structure in VS should look like below.
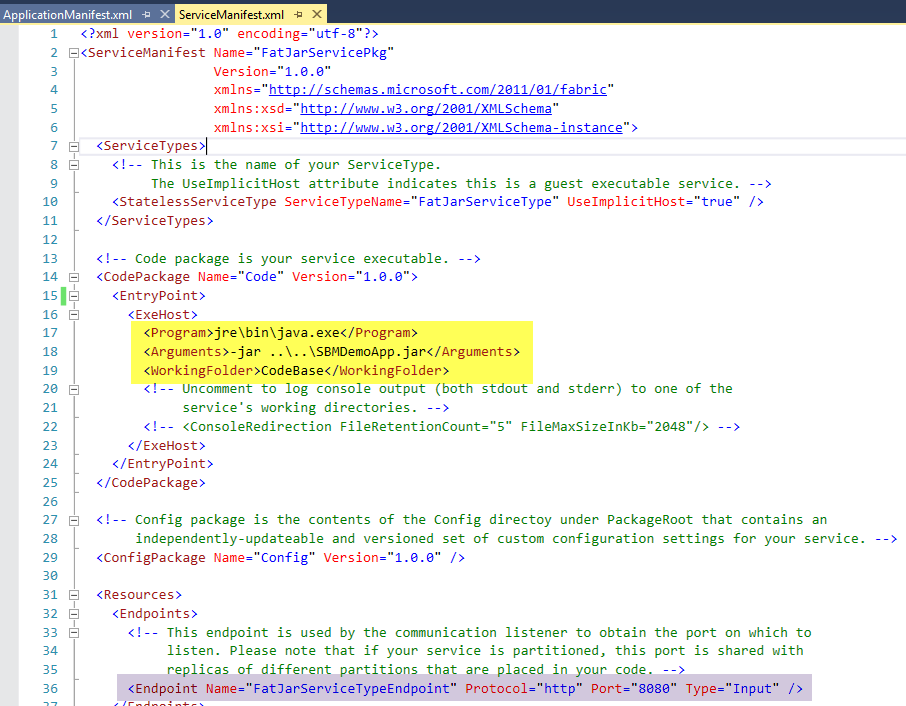
Now, navigate to "ServiceManifest.xml" file in Service Fabric solution. Change following parameters as shown below.
- Program: This should point to java.exe file in JRE folder that was copied.
- Arguments: This should contain the -jar and path of the JAR filename relative to java.exe. They are arguments passed to java.exe when it starts.
- WorkingFolder: This should be CodeBase.
- Endpoint: Name a endpoint and provide protocol as HTTP and port no (8080) along with type(input).
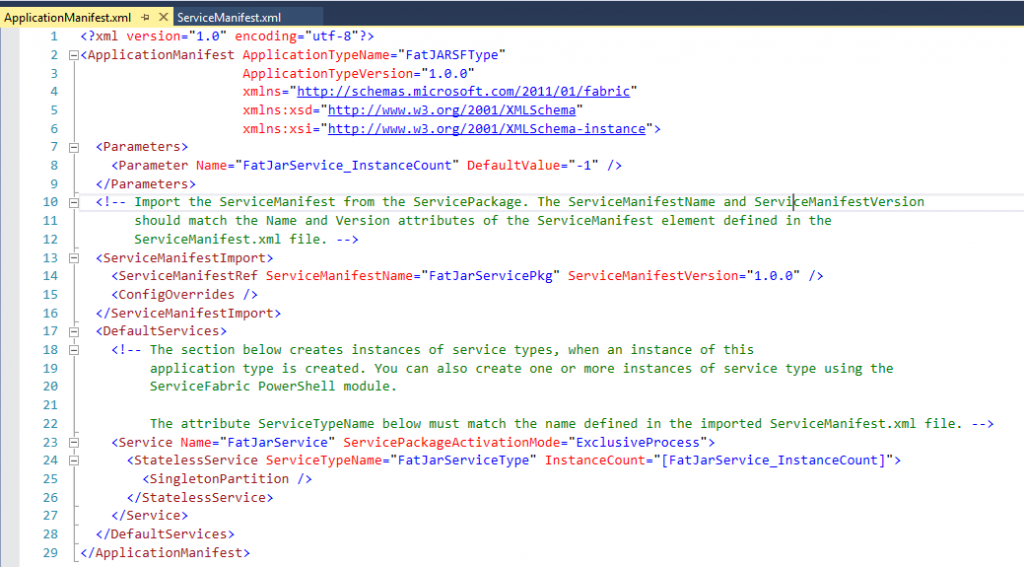
Next open the "ApplicationManifest.xml" file and verify its settings as shown below. Pay attention to name, type of the Service. They should match in ServiceManifest and ApllicaitonManifest files.
Click "Start" button in Visual Studio and wait for a successful deployment to local SF cluster.

Navigate the local service fabric cluster endpoint at https://localhost:19080/Explorer/index.html#/ and validate application is deployed and running successfully.
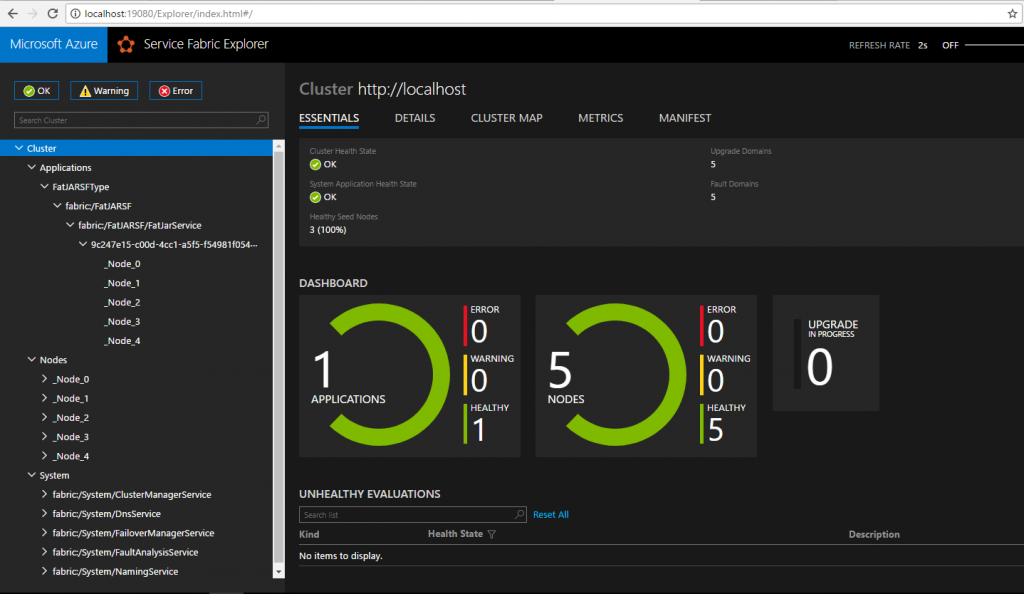
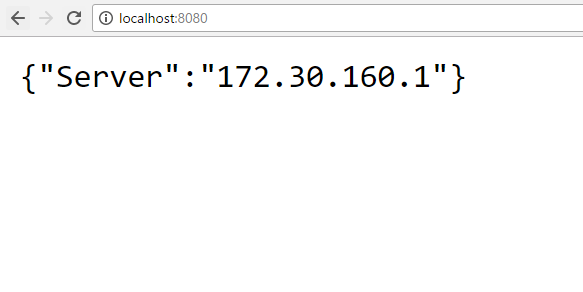
Application is now running on service fabric cluster. Verify by navigating to localhost:8080 and it should return the IP address.
At this point, we can potentially deploy this application to Azure. However, let's see how we can implement a CI/CD pipeline to deploy to Azure in next post.