Metatags module
This article covers metatags modules and describes how to add them to templates in Microsoft Dynamics 365 Commerce.
The metatags module supports the entry of custom HTML meta tags that can help improve search engine optimization (SEO) rankings for site pages.
The metatags module is added to a template's HTML Head slot. It's then available for configuration both in the template and on the site pages that are derived from the template.
One or more general meta tags can be added to a template. However, page-specific meta tags should be added to the relevant site pages. Page-level meta tags overwrite template-level meta tags.
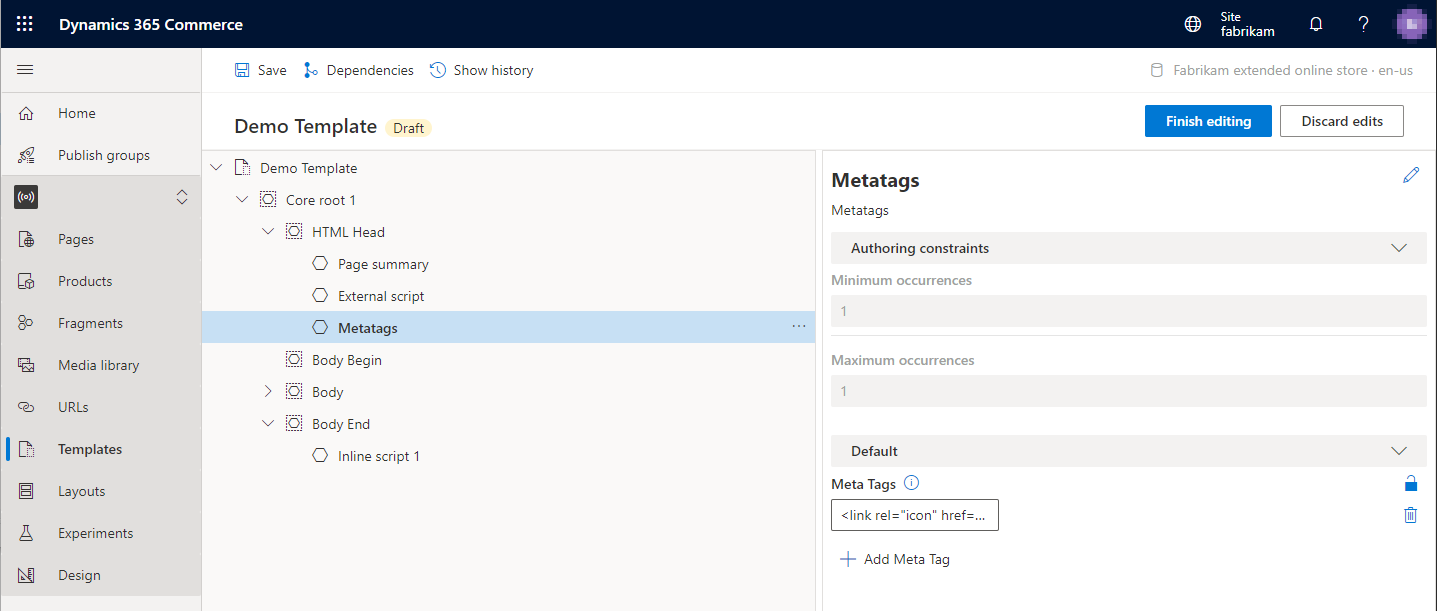
The following illustration shows an example where a metatags module has been added to the HTML Head slot of a template.

Metatags module properties
| Property name | Values | Description |
|---|---|---|
| Meta Tags | Text | One or more meta tags can be added to the module. |
Add a metatags module to a template
To add a metatags module to a template, follow these steps.
In Commerce site builder for your site, select Templates.
Select a template, and then select Edit.
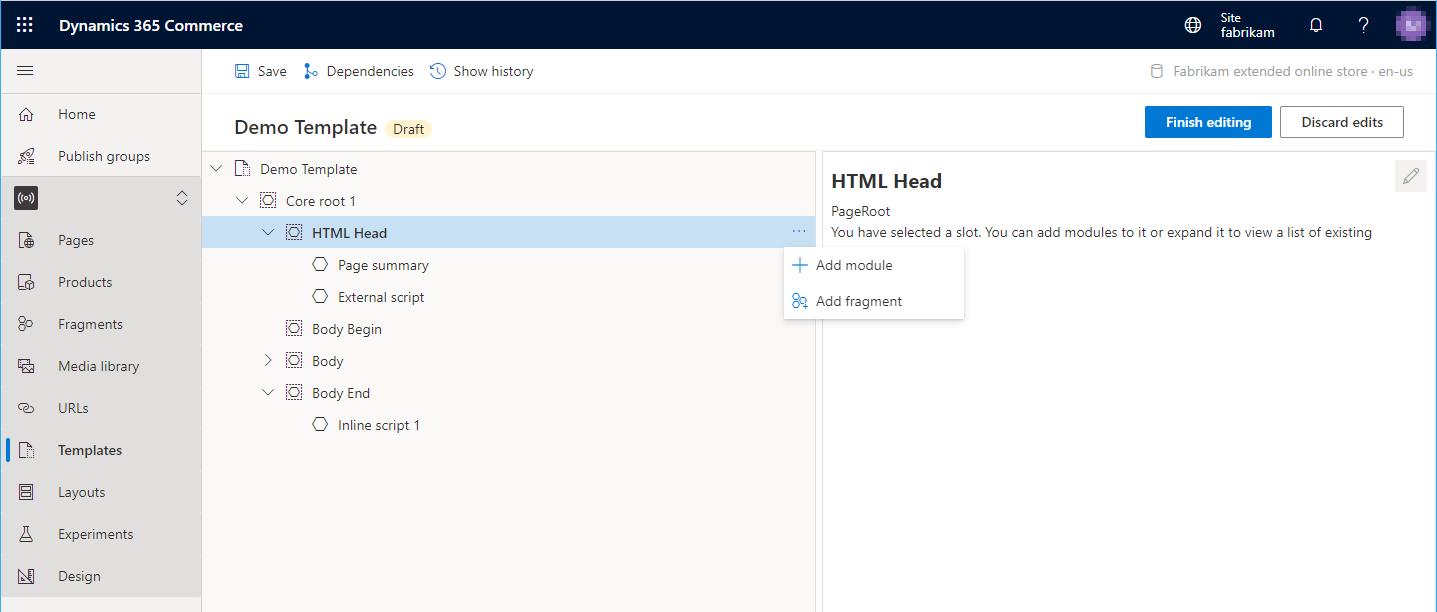
In the HTML Head slot, select the ellipsis (...), and then select Add module.

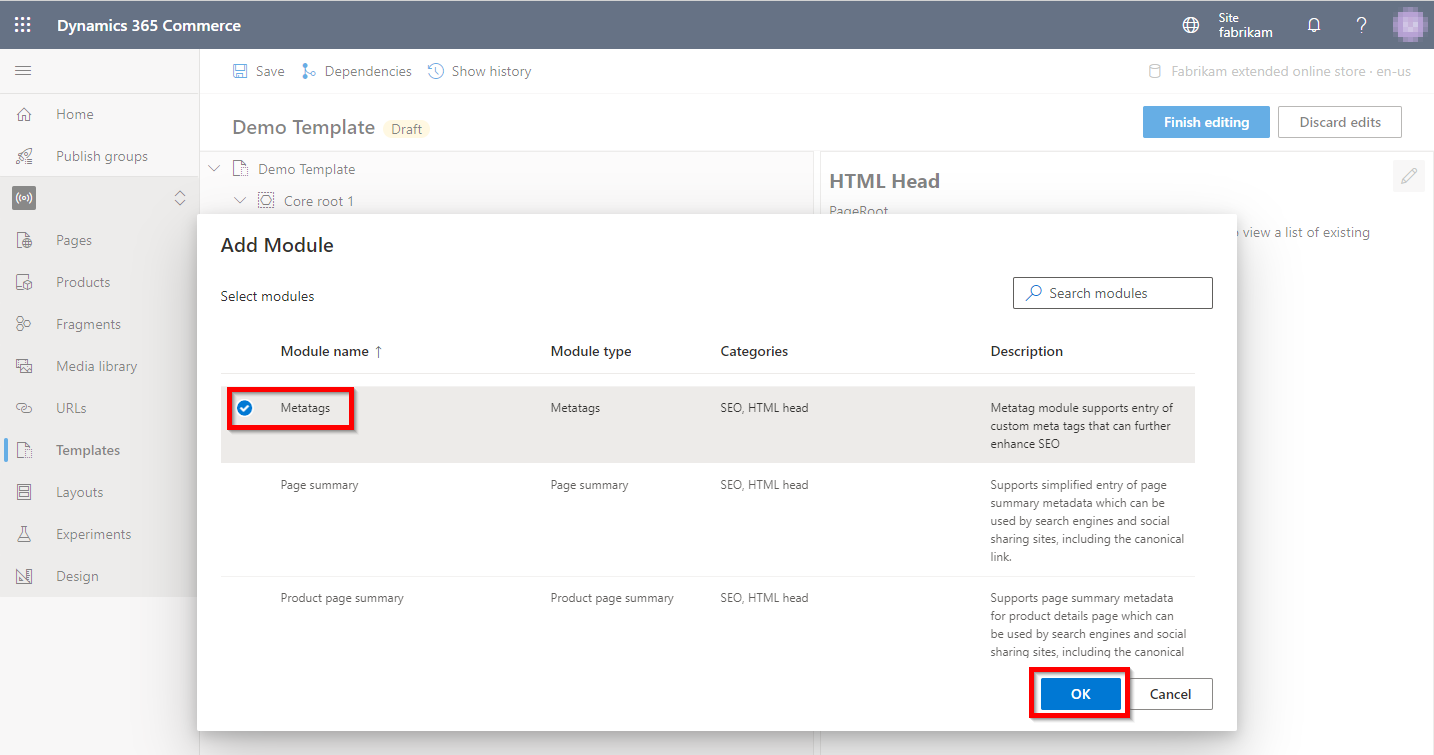
In the Select modules dialog box, select the Metatags module, and then select OK.

To add meta tags, select the Metatags slot. Then, in the module properties pane, select Add Meta Tag to add each meta tag. You can reorder the meta tags by using the up arrow and down arrow buttons.
When you've finished editing the template, select Save, select Finish editing, and then select Publish to publish it.
After the meta tags module is added to a template, page-specific meta tags can be added to the site pages that use the template.