Change access levels
TFS 2018
Note
This article applies to Azure DevOps Server (on-premises). To manage access levels for Azure DevOps Services (cloud), see Add users to your organization or project.
Access levels grant or restrict access to use the functions and features that Azure DevOps Server provides. Access levels are in addition to permissions granted through security groups, which provide or restrict specific tasks. In this article, learn how to change access levels for users and groups. For more information, see About access levels.
For a simplified overview of the permissions that are assigned to the most common groups—Readers, Contributors, and Project Administrators—and the Stakeholder access group, see Permissions and access.
Important
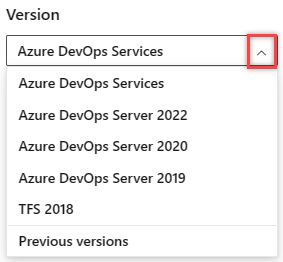
Select the version of this article that corresponds to your platform and version. The version selector is above the table of contents. Look up your Azure DevOps platform and version.
Prerequisites
- You must be a member of the Administrators group. If you aren't a member, get added now.
- To manage access for a large group of users, create either a Windows group, a group in Active Directory, or Azure DevOps security group, and then add users to those groups.
- Users must be added to a project.
Open access levels
You can manage access levels for the collections defined on the application tier. The default access level affects all the projects in all the collections. When you add users or groups to teams, projects, or collections, they get the default access level. To give a different access level to a certain user or group, you need to add them to a non-default access level.
From a user context, open Server Settings by choosing the ![]() gear icon. The tabs and pages available differ depending on which settings level you access.
gear icon. The tabs and pages available differ depending on which settings level you access.
From the web portal home page for a project (for example,
http://MyServer:8080/tfs/DefaultCollection/MyProject/), open Server settings.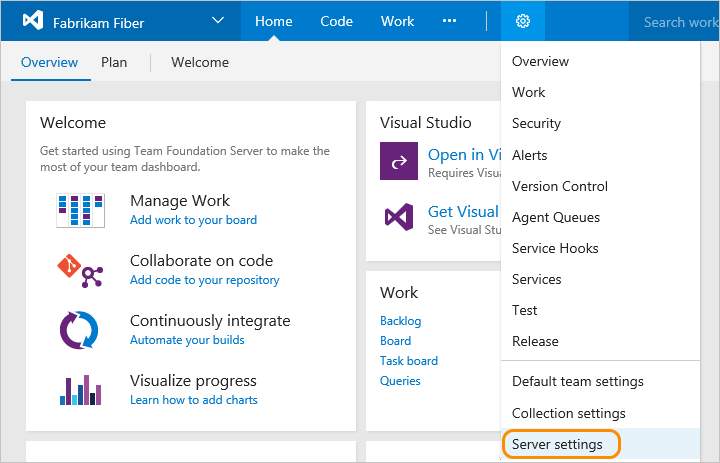
Add a user or group to an access level
Changes you make to the access level settings take effect immediately.
From Access levels, select the access level you want to manage. For example, here we choose Stakeholder, and then Add to add a group to Stakeholder access.
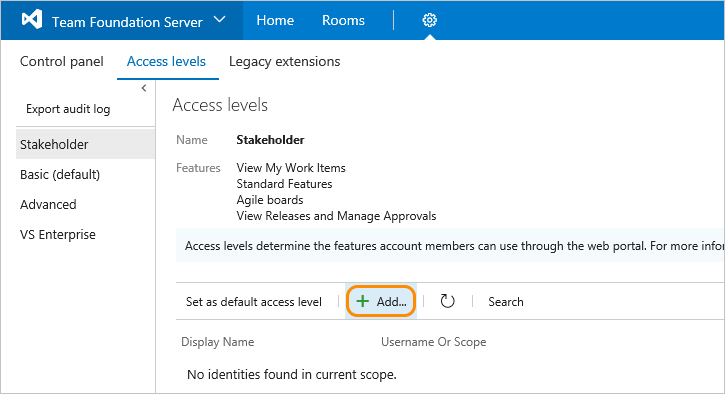
If you don't see Access levels, you aren't an administrator and need to get permission.
Enter the name of the user or group into the text box. You can enter several identities into the text box, separated by commas. The system automatically searches for matches. Choose the matches that meet your choice.
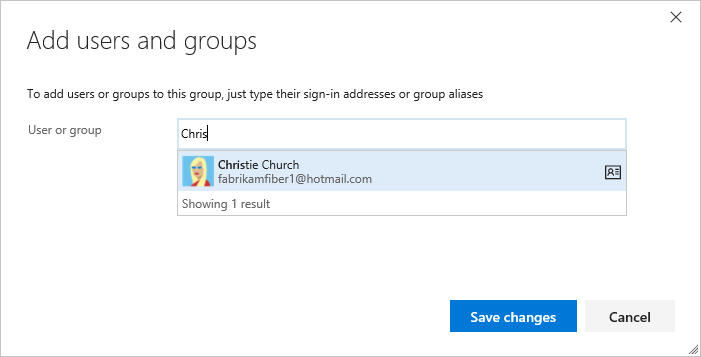
Choose Save changes.
Change the access level for a user or group
To assign a different access level to a user or group, you need to first delete their current access level and then grant them the new one.
Make sure to set each user's access level based on what you've purchased for that user. Basic access includes all Stakeholder features - Basic + Test Plans. Advanced and Visual Studio Enterprise subscriber access levels include all Basic features.
Choose the user or group and then select Remove.

Add the user or group to the other access level following the steps provided in the previous section.
Change the default access level
Make sure the default access level is the same as the access you're licensed for. When you set the default access level to Stakeholder, only the users who are given the Basic or a higher level can access more features than the Stakeholder level.
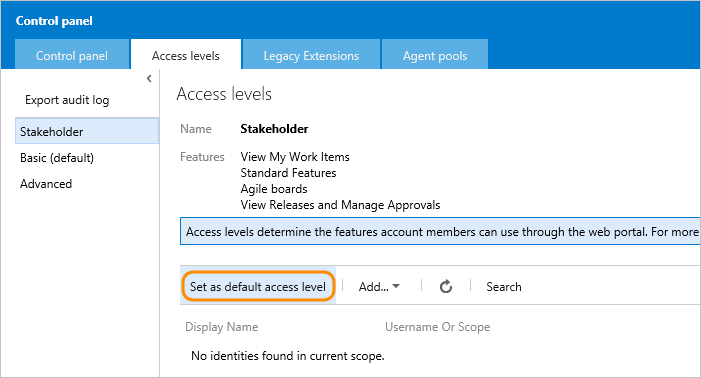
You can set an access level from its page. Choose Set as default access level as shown.
Important
Service accounts get added to the default access level. If you set Stakeholder as the default access level, you must add the Azure DevOps service accounts to the Basic or an advanced access level group.