Set up a dual server configuration, Azure DevOps on-premises
TFS 2017 | TFS 2015
You can enable your Azure DevOps Server deployment to handle more load than a single server configuration by deploying the application and data tiers on separate servers. Make sure to review our hardware recommendations to confirm that this configuration seems appropriate for your team. If not, consider a single server or multiple server configuration instead.
If you're upgrading from an earlier version, learn more about compatibility and getting started with your upgrade.
Preparation
Prepare an application tier server that satisfies the system requirements for Azure DevOps Server.
Prepare a data tier server that meets the hardware recommendations for your team.
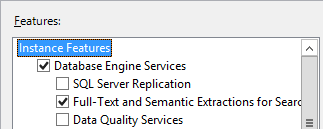
Set up a supported version of SQL Server on the data tier. When you set SQL Server up for Azure DevOps Server, install at least the database engine and the full text search services.

Paid copies of Azure DevOps Server come with a license to SQL Server Standard for use with Azure DevOps Server. The Team Foundation Server pricing page explains the details. If you use the license that's included with Azure DevOps Server, you can only use it for the Azure DevOps Server databases.
Configure the firewall on your data tier to allow access to the SQL Server database engine so that Azure DevOps Server can get through the firewall to connect to the SQL Server database engine from the application tier.
Ensure that the account you plan to use to configure Azure DevOps Server is a member of the SysAdmin server role in SQL Server.
Installing Azure DevOps Server involves a complex set of operations that require a high degree of privilege - these include creating databases, provisioning logins for service accounts, and more. Technically, all that is required is membership in the ServerAdmin role; ALTER ANY LOGIN, CREATE ANY DATABASE, and VIEW ANY DEFINITION server scoped permissions; and CONTROL permission on the master database. Membership in the SysAdmin server role will confer all of these memberships and permissions, and is therefore the easiest way to ensure that Azure DevOps Server configuration will succeed. If necessary, these memberships and permissions can be revoked after Azure DevOps Server is installed.
If you're going to enable reporting, prepare the application and data tiers for that.
Install SQL Server Analysis Services and install and configure SQL Server Reporting Services. Configure your firewall to allow access to Reporting Services and to allow access to Analysis Services.
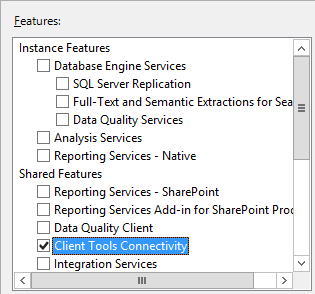
If you're installing TFS 2015 or earlier version, install SQL Server Client Tools Connectivity on the application-tier server.

Installation
-
Download Azure DevOps Server through one of the following channels:
- Visual Studio Downloads, which is the simplest method (scroll down to All downloads, Azure DevOps Server 2019)
- Visual Studio Dev Essentials
- Volume Licensing Service Center
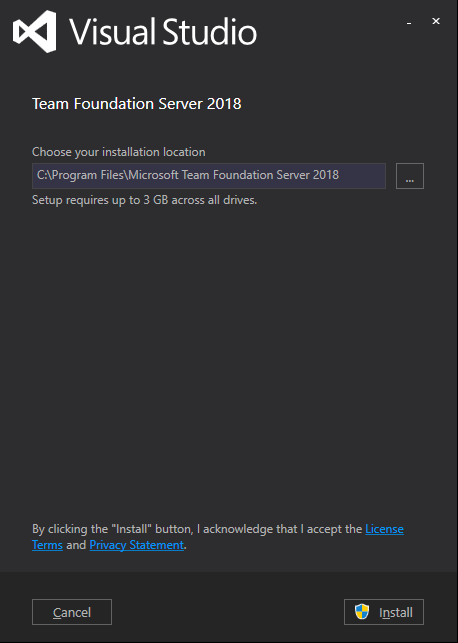
Kick off the installation.

The installer copies files onto your machine, and then starts the Azure DevOps Server Configuration Center.
Configure your installation
Configure Azure DevOps Server using from your supported configuration options as described in the get started guide.
New Deployment - Basic option
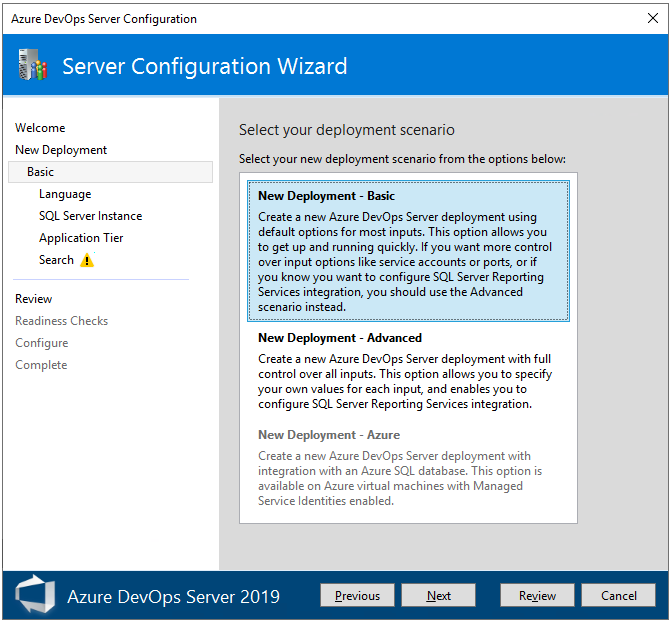
Even in a dual-server configuration, the easiest way to set up Azure DevOps Server is to use the Server Configuration Wizard with the New Deployment - Basic scenario. For details, see Configure using the Basic option.

This option is optimized for simplicity, using default settings for most inputs.
When selecting a SQL Server instance in the wizard, be sure to point to the data tier you have already configured. With the New Deployment - Basic option, you will also need to choose:
- Application Tier: Which website settings to use, including whether to use HTTP or HTTPS bindings. See website settings for more information.
- Search: Whether to install and configure Code Search features. See configuring Search for more information.
New Deployment - Advanced option
If you want full control over all inputs, use the New Deployment - Advanced option instead.
If you select the New Deployment - Advanced option, you will additionally need to choose:
- The service account your various Azure DevOps Server deployment processes will run as. The default value used in the Basic scenario is
NT AUTHORITY\NETWORK SERVICEin domain joined scenarios, andLOCAL SERVICEin workgroup scenarios. - Whether to enable SSH, along with the port it should listen on. The default value used in the Basic scenario is to configure SSH on port 22.
- The location of the file cache used for frequently accessed Azure DevOps Server resources. The default value used in the Basic scenario is the path
AzureDevOpsServerData\ApplicationTier\_fileCacheon the local drive, which has the most free space.. - Whether to configure Reporting features. The default behavior used in the Basic scenario doesn't support configureation of these features. Note that these options are not available on client operating systems.
- Whether to create a project collection in which to store your projects, along with the name of that collection. The default behavior in the Basic scenario is to create a project collection named
DefaultCollection.
In both cases, the wizard runs readiness checks to validate your environment and your setting selections. If all goes well, the wizard lets you configure your deployment. If there are errors, you need to fix each of them and re-run the readiness checks before you can continue.