Manually Install SharePoint products for Team Foundation Server
TFS 2017 | TFS 2015 | TFS 2013
Note
TFS 2018 and later versions no longer support native integration with SharePoint products. If you're planning to upgrade to TFS 2018, read About SharePoint integration to learn about the options available to you.
This procedure is for installing and configuring SharePoint Server 2013 on the same server as TFS and SQL Server.
We’re going to install SharePoint after we install SQL Server, so that we can use the same Database Engine instance we installed for TFS for our SharePoint deployment, although using the same SQL Server instance for both SharePoint and TFS is not a requirement.
Tip
Installing SharePoint on the same server as TFS isn’t a requirement either. TFS is very flexible with regard to the topology of your SharePoint installation. See “What If I Already Have SharePoint?” later.
Do I even need SharePoint?
Maybe. SharePoint is a collaboration website product that offers deep integration with Office products like Word, Outlook, and Excel. Although it’s not a TFS requirement, some teams do find its features useful. SharePoint is different from the Team Web Access site that comes with TFS. Team Web Access is a website that mirrors Visual Studio features and offers functionality for certain specialized team collaborations that relate to creating software projects. You get Team Web Access by default when you install TFS.
You don’t need to add SharePoint to your initial TFS installation. You can always install TFS first, add SharePoint later, and then manually hook up each of your TFS projects to SharePoint.
What will I need?
Assuming you still want SharePoint in your TFS deployment, you’ll need a single domain account to act as the TFS Report Reader account. TFS uses this account to generate reports. (Even if you don’t set up SharePoint, you’ll need a report reader account to generate reports). We’re going to use the report reader account for reports, but we’ll also use it as the Farm Administrator account for our SharePoint installation, just as TFS would during a standard install.
Tip
Don’t put the report reader account in the Windows Administrators security group. It just needs the Allow log on locally permission, which all domain accounts have by default.
Free SharePoint vs. paid-for SharePoint
For each version of SharePoint, Microsoft delivers a free version and a paid-for version with additional functionality. TFS always comes with one of the free versions. However, TFS supports both versions and the instructions for installing either are very similar.
If you use the enterprise edition of SharePoint Server, as we are going to in this topic, you must make a few additional SharePoint configurations after you install SharePoint (and before you install TFS) to enable TFS dashboard functionality on the SharePoint site. If you install any other version of SharePoint, you can skip the extra dashboard configurations in this topic. You’ll still get some dashboard functionality, but not as much as if you had the enterprise edition of SharePoint Server.
Dashboard differences between SharePoint products
Team Foundation Server contains dashboards that use SharePoint Products features to display team data. The dashboards that are available to you depend on the version of SharePoint that you use.
If you use any supported enterprise edition of SharePoint Server, you get five dashboards that are based on Microsoft Excel.
If you use any other SharePoint Product (including the standard editions of SharePoint Server), you get two dashboards that are based on SQL Server Reporting Services.
What if I already have SharePoint?
If your existing SharePoint installation meets the TFS requirements for SharePoint, you can verify your existing SharePoint deployment and then integrate it with TFS. Before you verify, review the SharePoint requirements for TFS.
Tip
You can use a remote SharePoint installation—an instance of SharePoint that is not installed on the TFS server—but to do this you’ll need to install the TFS extensions for SharePoint on the SharePoint server. See How to: Install Remote SharePoint Products for Team Foundation Server.
To install SharePoint 2013 products for TFS
Prerequisites
You must be a member of the Windows Administrators security group on the computer where you install SharePoint Products and where you host its databases.
Before you install any SharePoint 2013 product, run the SharePoint 2013 Products preparation tool. After preparing the server, you’ll install SharePoint, and then do whatever post installation configuration tasks are appropriate for the product you just installed.
Remember that you’ll need a single domain account to act as the TFS Report Reader account to install SharePoint Server 2013. See, What will I need??
Run the preparation tool
Insert the SharePoint Server 2013 DVD and launch default.hta, or download SharePoint Foundation 2013 and run sharepoint.exe.
You can find detailed information about SharePoint Products requirements for Team Foundation Server on MSDN, but this instruction will guide you through typical installations.
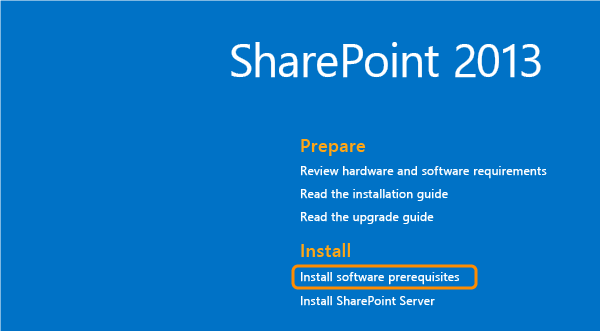
Choose Install software prerequisites.
On the Welcome page, choose Next.
On the license agreement page, accept the terms of the license and choose Next.
Depending on the state of your computer, the installer might prompt you to restart the machine. Follow any instructions.

After a restart, you might have to run the SharePoint Products prep tool again, if it doesn’t start automatically. Repeat the previous four steps for manual restarts until you get a success message.
At completion, choose Finish.

Run the SharePoint installation
Once the SharePoint Products Preparation tool finishes, you might have to launch the SharePoint installer again, especially if you had to restart your computer.
Remember that you’ll need a single domain account to act as the TFS Report Reader account to complete this section. See “What will I need?” earlier in this topic.
Insert the SharePoint Server 2013 DVD and launch default.hta, or run sharepoint.exe (for SharePoint Foundation installations).
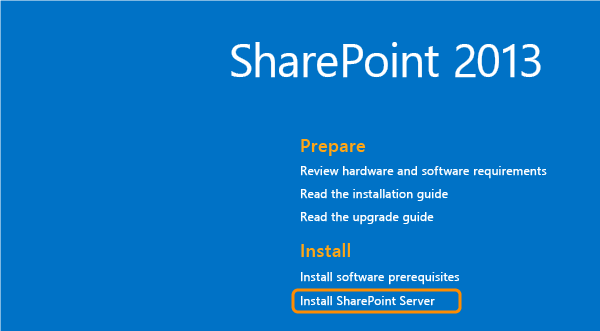
Choose Install SharePoint Server this time (or Install SharePoint Foundation).
If you are installing SharePoint Server, type your product key, and choose Continue.
Read and accept the agreement. Choose Continue.
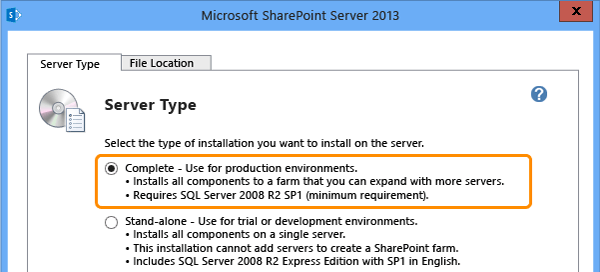
On the Server Type tab, choose Complete.
Choose Install Now.
When the installation wizard finishes, a dialog box appears that prompts you to complete the configuration of your server.
In that dialog box, verify that the Run the SharePoint Products and Technologies Configuration Wizard now check box is selected.
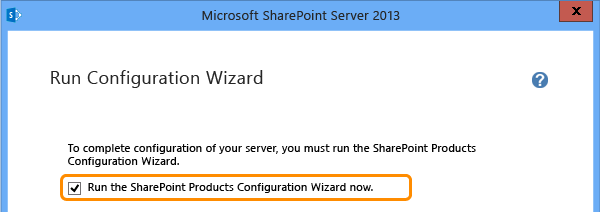
Choose Close to start the configuration wizard.
On the Welcome page, choose Next.
Note
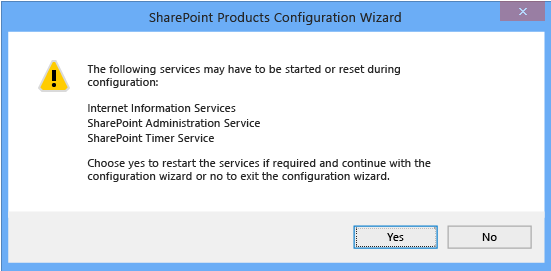
A warning about restarting certain services will appear. Choose Yes. Some services might need to be restarted during the configuration phase.
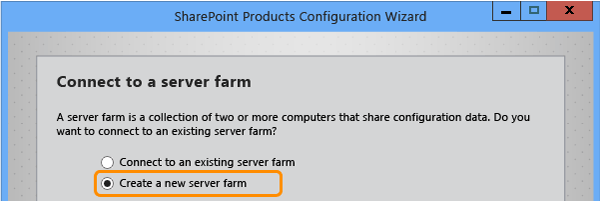
On the Connect to a server farm page, choose Create a new server farm.
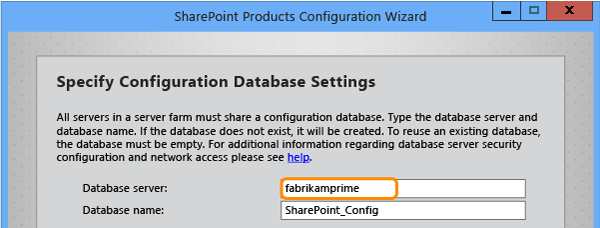
On the Specify Configuration Database Settings page, perform the following steps and then choose Next:
In Database server, type the name of the server that is running SQL Server. Accept the default value for database name.
Tip
If you used a named instance in step 10 of your SQL Server install, type the named instance here. For example, servername\InstanceName.
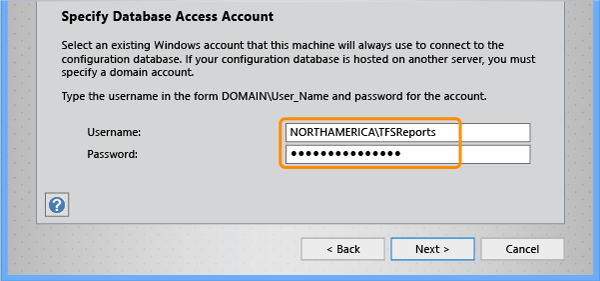
Type the name of the report reader account and its password.
Tip
You can use the same account here that you will use for the report reader account. Even if you use the report reader account here, the account you use to run the wizard will also be added to the SharePoint Farm administrators group.
Type a password in Passphrase and confirm it.
On the Configure SharePoint Central Administration Web Application page, select the Specify port number check box, and type 17012.
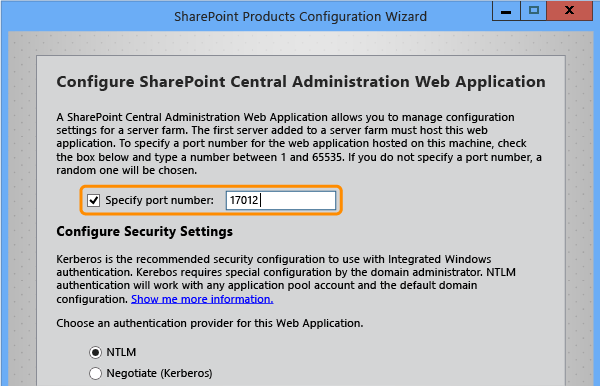
You can use the randomly generated port number, but Team Foundation Server has always used 17012 as the port for the SharePoint Products administration site.
Choose NTLM, and then choose Next.
Review the information, and then choose Next.
Configuration begins.
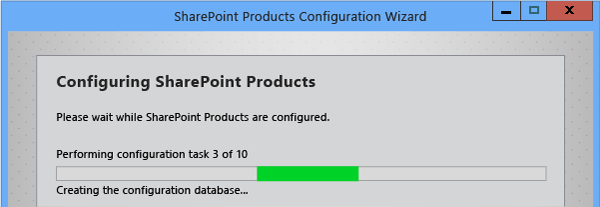
Choose Finish.
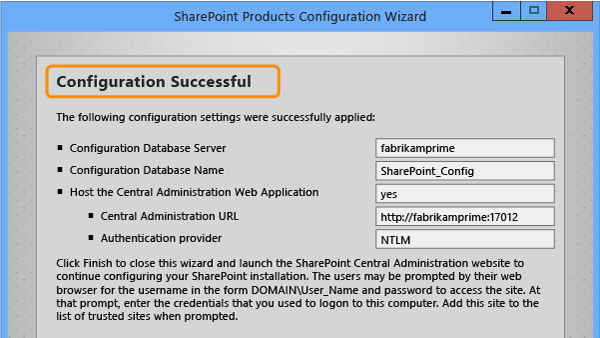
Once the installation routine finishes, it launches the SharePoint administration site, open to the initial configuration wizard.
Run the SharePoint Configuration wizards
No matter which version of SharePoint you install, you must run the SharePoint Configuration wizard. Special instructions appear in step 3 if you’re installing the enterprise edition of SharePoint Server 2013.
Choose Start the Wizard.
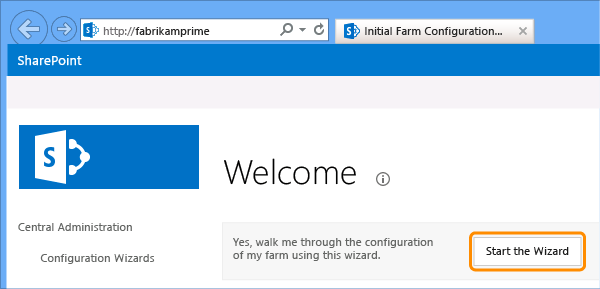
Select Use existing managed account and choose the report reader account.
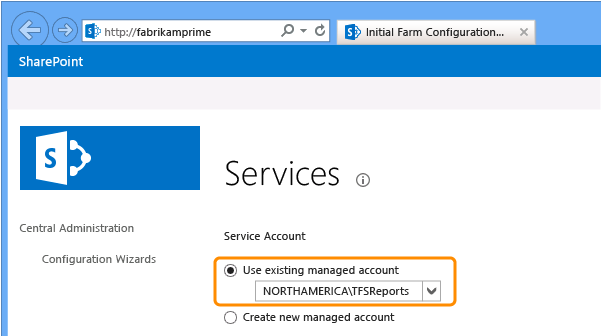
If you’re installing SharePoint Server Enterprise edition, as we are, then you’ll need to select Excel Services and Secure Store Service.
If you’re installing the Standard edition of SharePoint Server 2013 or SharePoint Foundation, none of the listed services are required, but you must run the wizard to succeed with your TFS installation. Even if you select no services, SharePoint will configure a site collection and some other services.
Select any services you want to set up. Clear any you don’t want set up.
SharePoint selects all of them by default.
Tip
Remember that you can always come back later to run the configuration wizards, but to succeed with your TFS installation, you have to run it one time after the SharePoint installation.
Choose Next.
The SharePoint configuration begins and takes a few minutes, depending on the number of services you’re configuring. At some point during the configuration, SharePoint will prompt you to create a site collection.
Type a Title and choose Next.
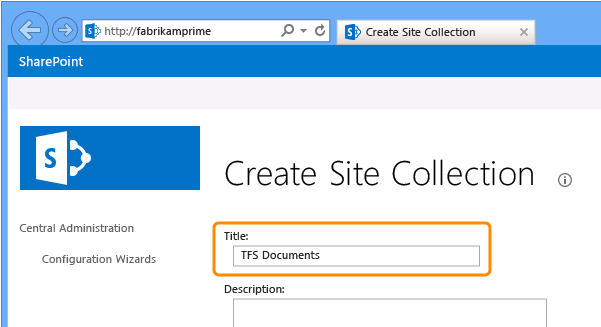
Choose Finish.
If you’re installing SharePoint Foundation or the standard edition of SharePoint Server, you can skip forward to TFS installation. If you’re installing SharePoint Server 2013, as we are, then configure Excel Services and Secure Store Service in the following sections.
Configure Excel Services (SharePoint Server only)
For TFS reports to operate correctly on a supported enterprise edition of SharePoint Server, you must also configure a trusted file location for Excel Services.
In SharePoint Central Administration, under Application Management, choose Manage service applications.
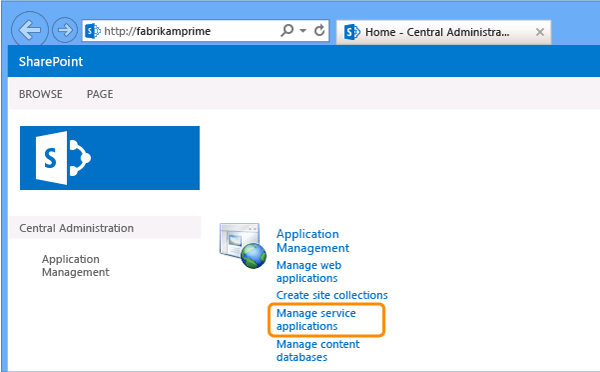
On the Manage Service Applications page, choose Excel Services Application.
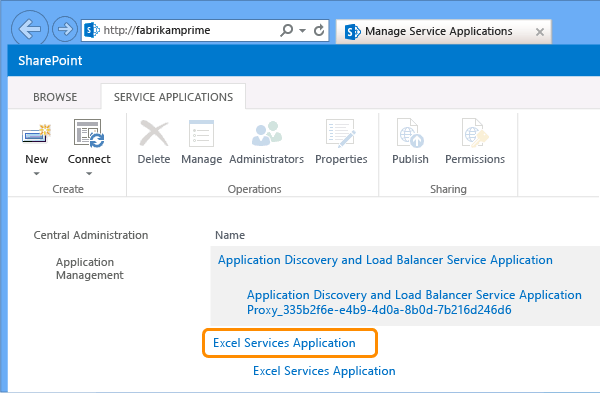
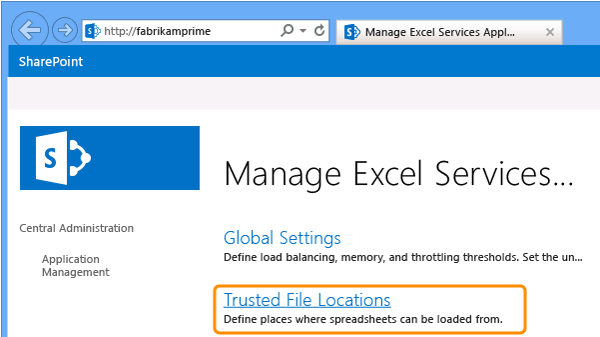
On the Manage Excel Services Application page, choose Trusted File Locations.
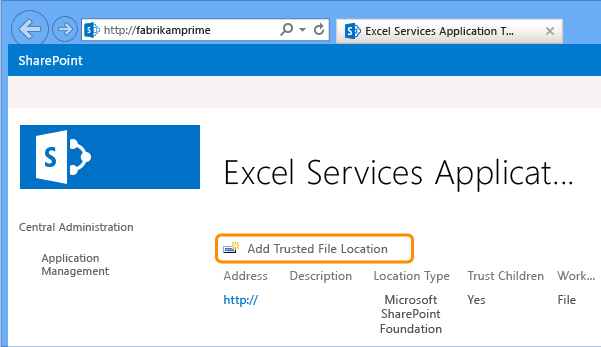
Choose Add Trusted File Location.
In Address, enter the URL of the root of the SharePoint site. This is the web application that the SharePoint configuration wizards created on port 80.
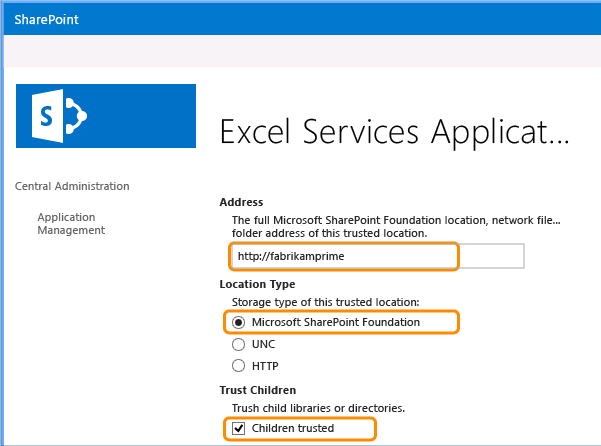
In Location Type, choose Microsoft SharePoint Foundation.
In Trust Children, select the Children trusted check box.
In the External Data section, under Allow External Data, choose Trusted data connection libraries and embedded.
(Optional) Clear the Refresh warning enabled check box.
In Maximum Concurrent Queries Per Session, change the number to 20 and choose OK.
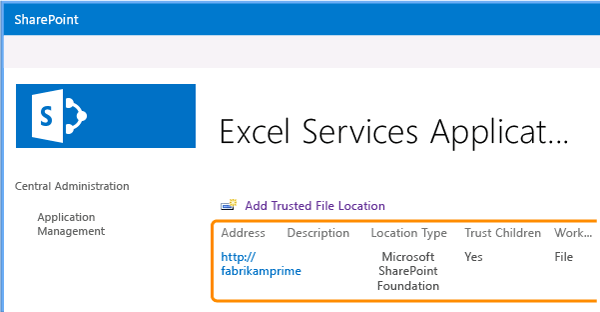
The trusted file location you just created appears in the Excel Services trusted file location list.
Configure Secure Store Service (SharePoint Server only)
To configure the secure store service, you must create a target application for the secure store.
In SharePoint Central Administration, under Application Management, choose Manage service applications.
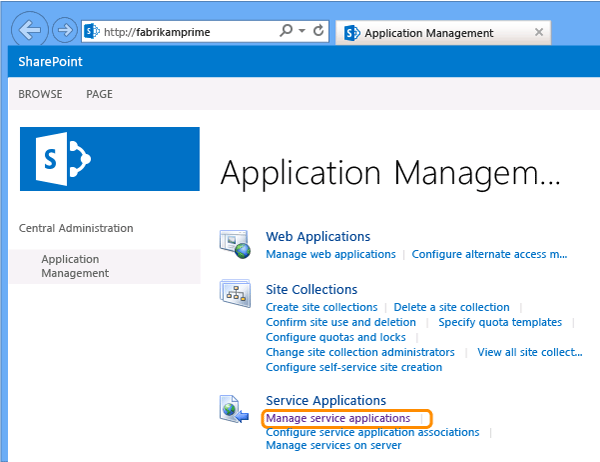
On the Manage Service Applications page, choose Secure Store Service.
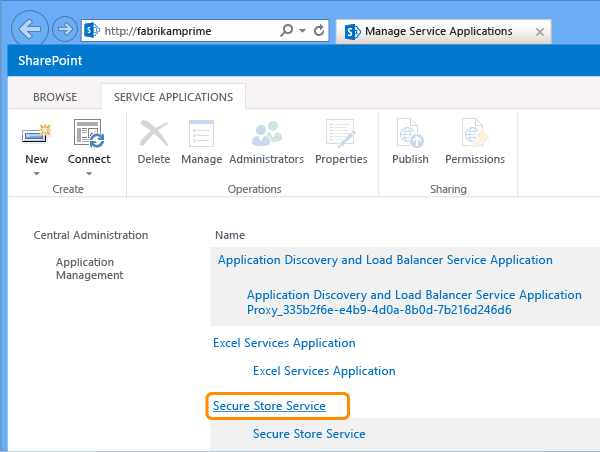
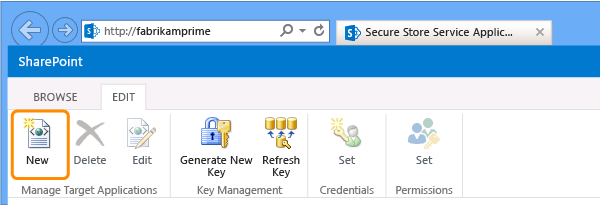
Choose New to create a secure store target application for Team Foundation Server.
Tip
If you have not created a key, SharePoint Products prompts you to create one by choosing Generate New Key. Without a key, you cannot create a target application for the secure store.
The fields configured in the next four steps are pictured in the next screenshot.
In Target Application ID and Display Name, enter TFS
Tip
You do not have to use TFS for Target Application ID or Display Name, but take note of whatever you use here, because you will need it to configure Team Foundation Server later.
In Contact E-mail, type the e-mail address of the person or group you want email messages about this application to be sent to
In the Target Application Type list, choose Group
In Target Application Page URL, choose None.
In Specify the credential fields for your Secure Store Target Application, accept the default settings for the credential fields.
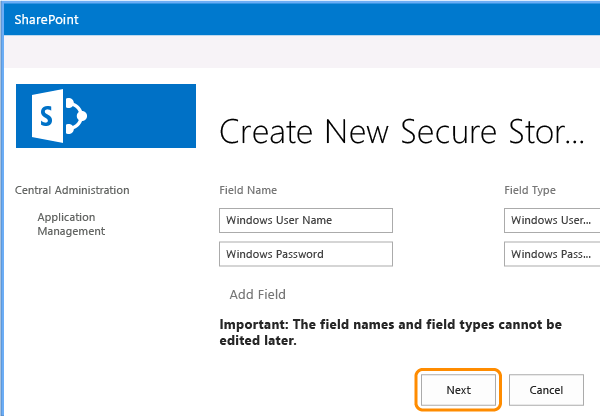
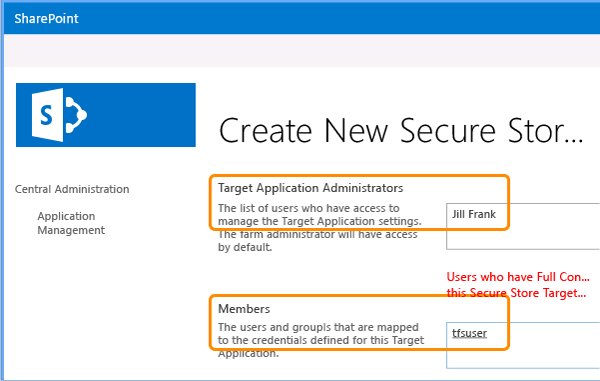
In Target Application Administrators, type the administrative account for the application.
In Members, enter the global security group from the domain that contains all the users to whom you want to grant access to dashboards and reports in Team Foundation Server.
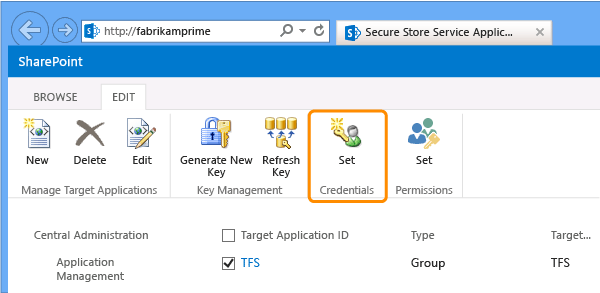
On the Secure Store Service Application page, select the check box for the target application that you just created (named TFS if you used the naming guidance that was provided earlier in this topic), and then choose Set Credentials in the ribbon.
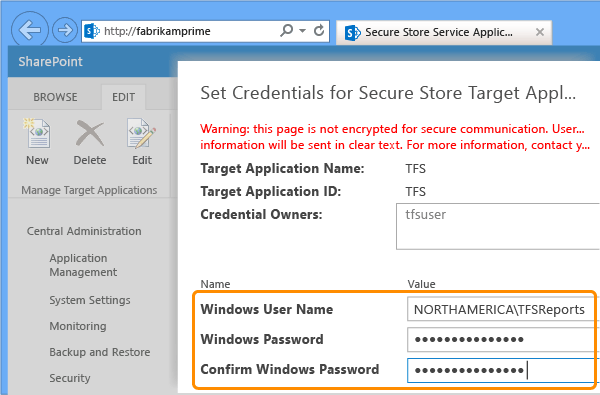
In the Set Credentials for Secure Store Target Application (Group) dialog box, enter the name and password of the report reader account for Team Foundation Server and confirm the password.
Next steps
With SharePoint Server 2013 installed, you’re ready to move to the topic on TFS installation.